FREE DINNER EBOOK! Get your copy!
  • Cookie Policy
  • GDPR Policy
  • Disclaimer
  • Terms Of Use
  • Visit my other site: Fun Cookie Recipes
sweet savory saga
  • Home
  • Dinner
  • Desserts
  • Drinks
  • Appetizers
  • Contact
  • About
  • Privacy Policy
  • Home
  • Dinner
  • Desserts
  • Drinks
  • Appetizers
  • Contact
  • About
  • Privacy Policy
  • Cookie Policy
  • GDPR Policy
  • Disclaimer
  • Terms Of Use
Visit my other site: Fun Cookie Recipes

HOME / CATEGORIES /

Latest

- 1 tablespoon coconut oil - 1 onion, finely chopped - 2 garlic cloves, minced - 1-inch piece of fresh ginger, grated - 2 tablespoons red curry paste - 1 can (400ml) coconut milk These main ingredients set the stage for a rich and creamy soup. The coconut oil adds a lovely flavor. Onion, garlic, and ginger give a strong, aromatic base. Red curry paste brings heat and depth. Finally, coconut milk adds creaminess and sweetness. - 4 cups vegetable broth - 2 tablespoons soy sauce - 1 tablespoon freshly squeezed lime juice - 1 tablespoon brown sugar The broth and flavorings make the soup come alive. Vegetable broth provides a light base. Soy sauce adds umami and saltiness, while lime juice brightens the flavors. Brown sugar balances the heat from the curry paste. - 200g rice noodles - 1 cup snap peas, trimmed - 1 red bell pepper, thinly sliced - 1 cup baby spinach - Fresh cilantro leaves, for garnish - Lime wedges, for serving Rice noodles add a chewy texture to the soup. Snap peas and bell pepper offer crunch and color. Baby spinach wilts nicely and adds nutrients. Garnishing with cilantro and lime wedges enhances the flavor and looks. {{ingredient_image_2}} Start by heating 1 tablespoon of coconut oil in a large pot over medium heat. When the oil shimmers, add 1 finely chopped onion. Sauté it for about 5 minutes until it becomes soft and translucent. Next, stir in 2 minced garlic cloves and 1-inch piece of grated ginger. Cook this mixture for 1 more minute, stirring often to keep it from burning. This step builds a fragrant base for your soup. Now, add 2 tablespoons of red curry paste to the pot. Stir it for about 2 minutes. This helps release the rich flavors and aromas of the curry paste. After that, pour in 1 can (400ml) of coconut milk and 4 cups of vegetable broth. Also, add 2 tablespoons of soy sauce, 1 tablespoon of freshly squeezed lime juice, and 1 tablespoon of brown sugar. Stir well until everything blends into a vibrant soup base. Bring this mixture to a gentle simmer and let it cook for about 5 minutes. This allows the flavors to meld together beautifully. While the broth simmers, add 200g of rice noodles to the pot. Cook them according to the package instructions, usually about 4-6 minutes. Stir them occasionally to prevent sticking. In the last 2 minutes of cooking, add 1 cup of trimmed snap peas, 1 thinly sliced red bell pepper, and 1 cup of baby spinach. Mix gently until the vegetables are tender but still bright. To make your Coconut Curry Noodle Soup shine, adjust the seasoning. A splash of lime juice adds brightness. It balances the rich coconut milk. Soy sauce brings in salt and depth. Always taste your soup before serving. This lets you find the right flavors. You might need more lime or soy sauce. A little tweak can make a big difference. Cooking rice noodles without sticking can be tricky. First, boil water and add the noodles. Stir them gently to keep them apart. Cook according to the package, usually 4-6 minutes. When they are almost done, it’s time to add your veggies. Add snap peas, red bell pepper, and baby spinach in the last 2 minutes. This keeps the veggies crunchy and bright. Serving your soup well makes it more appealing. Use wide, shallow bowls to show off the colors. Ladle the soup carefully to keep it neat. Scatter fresh cilantro on top for a pop of green. Arrange lime wedges around the bowl for extra flair. This not only looks great but makes it easy for guests to add more flavor. Pro Tips Fresh Ingredients Matter: Using fresh vegetables and herbs will enhance the flavor of your soup, giving it a vibrant taste and aroma that dried or older ingredients simply can't match. Adjust Spice Level: If you prefer a spicier soup, consider adding fresh chili or extra red curry paste. Start with a small amount and increase gradually to achieve your desired heat. Perfect Noodle Texture: For the best texture, cook the rice noodles separately according to package instructions, then add them to the soup just before serving to prevent them from becoming mushy. Garnish for Flavor: Don't skip the fresh cilantro and lime wedges! They not only add a burst of flavor but also elevate the presentation of your dish significantly. {{image_4}} You can easily boost your soup with protein. Chicken, shrimp, or tofu work great. For chicken, add bite-sized pieces after sautéing the onion. Cook until they turn white. For shrimp, toss them in during the last few minutes of cooking. They only need a few minutes to turn pink and tender. Tofu is a great choice for a vegetarian option. Use firm tofu, cut into cubes, and add it with the vegetables. This way, it absorbs all those tasty flavors. To make this dish vegan, you can swap a few ingredients. Use vegetable broth instead of chicken broth. For noodles, choose rice noodles, which are gluten-free. You can also use zucchini noodles for a low-carb option. Check the labels to ensure they are gluten-free. This way, everyone can enjoy this creamy, rich soup without worry. The beauty of coconut curry noodle soup is its versatility. You can change the taste easily. Try different curry pastes like yellow or green curry for a unique spin. Each type brings its own flair. You can also add spices like cumin or coriander to deepen the flavor. For a little heat, toss in some chili flakes or fresh chilies. Experiment with these options to find your favorite combination. To keep your coconut curry noodle soup fresh, follow these simple steps. First, let the soup cool to room temperature. Then, transfer it to an airtight container. Make sure to store it in the fridge. It will stay good for up to 3 days. If you want to keep it longer, freezing is a great option. If you plan to freeze the soup, use freezer-safe containers. Leave some space at the top, as the soup will expand when frozen. Label the container with the date. To reheat, take it out of the freezer and let it thaw in the fridge overnight. When ready to eat, heat it gently on the stove. Stir it well to ensure even heating. In the fridge, your coconut curry noodle soup lasts about 3 days. If you freeze it, it can stay good for up to 3 months. Just remember that the texture of the noodles may change after freezing. To keep the best taste and texture, enjoy your soup sooner rather than later. If you don’t have coconut milk, you can use almond milk or cashew cream. Both options give a creamy texture. You can also mix regular milk with a bit of coconut extract. This still adds a hint of coconut flavor. Keep in mind, the taste may change slightly. This soup has a mild to medium spice level. The red curry paste adds warmth, but you can adjust it. If you like it hot, add more curry paste or some chili flakes. For a milder version, use less curry paste and taste as you go. Yes, you can prepare this soup in advance. Cook the noodles and veggies separately. Store them with the broth in the fridge. When ready to serve, heat the broth and add the noodles and veggies. This keeps everything fresh and tasty. Fresh cilantro is a must for garnish. It adds great flavor and color. Lime wedges also work well, giving a zesty kick. You can add sliced green onions or crushed peanuts for extra crunch. These garnishes make your soup look and taste amazing! This Coconut Curry Noodle Soup is both simple and delicious. We explored key ingredients like coconut milk and fresh veggies. I shared step-by-step instructions for making the soup. Tips on flavor and presentation will help you impress anyone. You can easily adjust this recipe for different diets or try new flavors. Finally, proper storage techniques ensure your leftovers last. Enjoy your cooking journey with this tasty dish!

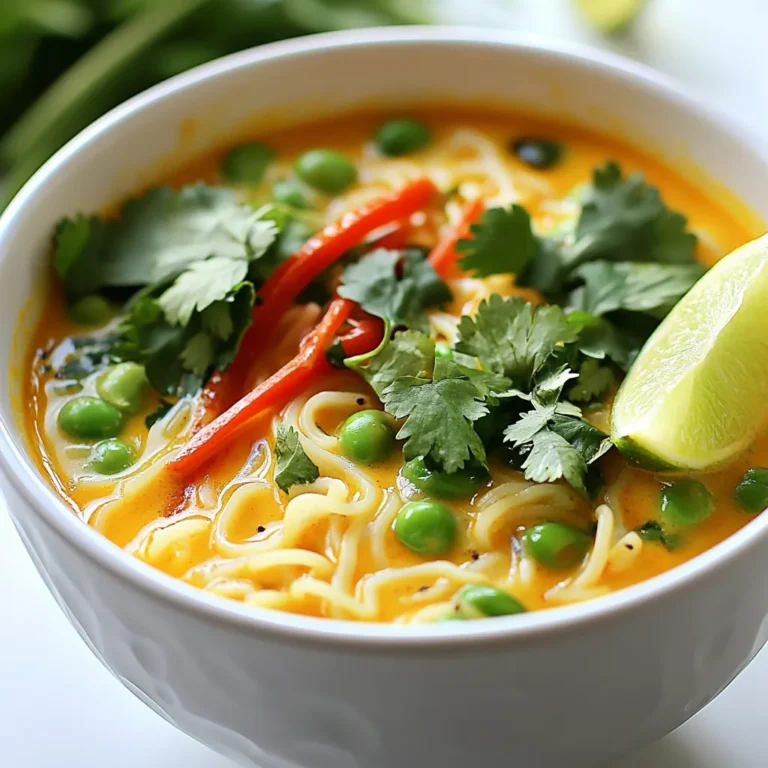
Coconut Curry Noodle Soup Simple and Flavorful Dish

- 1 cup fresh spinach leaves - 1 ripe banana - 1/2 cup diced mango (fresh or frozen) - 1/2 cup coconut water - 1/2 cup Greek yogurt (optional) - 1 tablespoon chia seeds - 1 tablespoon honey or maple syrup (optional) - Ice cubes (optional) - Spinach: This leafy green packs iron and vitamins A, C, and K. It supports healthy skin and boosts your immune system. - Banana: Bananas give you potassium and fiber, which help with digestion and energy. They add natural sweetness. - Mango: Mangoes are rich in vitamins A and C. They promote good eyesight and healthy skin. Plus, they taste amazing! - Coconut Water: This drink hydrates you with electrolytes. It is low in calories and helps you stay refreshed. - Greek Yogurt: If you add Greek yogurt, it boosts protein. This helps keep you full longer and adds creaminess. - Chia Seeds: These tiny seeds offer fiber, omega-3s, and antioxidants. They help your heart and support digestion. - Honey or Maple Syrup: Use these for sweetness if you like. They add flavor and can provide energy. - Ice Cubes: Ice makes your smoothie cold and refreshing. It’s great for hot days! - Spinach: Look for bright, vibrant leaves. Avoid yellow or wilting leaves. Fresh spinach has a crisp feel. - Banana: Choose bananas with a few brown spots. They will be sweet and perfect for your smoothie. - Mango: A ripe mango should give slightly when pressed. It should smell sweet near the stem. - Coconut Water: Select pure coconut water without added sugars or flavors. This keeps it healthy. - Greek Yogurt: Look for plain yogurt with live cultures. This adds good bacteria to your smoothie. - Chia Seeds: Check for whole seeds that are clean and dry. They should be fresh and not clumpy. - Sweeteners: Choose organic honey or pure maple syrup for the best taste. Avoid processed options. - Ice: Use clean, fresh ice to keep your smoothie cold and tasty. To start, rinse 1 cup of fresh spinach leaves under cold water. This step is key to remove dirt. After rinsing, drain the spinach well. Next, take 1 ripe banana and peel it. Chop the banana into smaller pieces for easy blending. Now, prepare 1/2 cup of diced mango. You can use fresh or frozen mango. The mango adds a sweet, tropical flavor. In a high-powered blender, combine the washed spinach, banana pieces, and mango. Pour in 1/2 cup of coconut water. If you like creamy smoothies, add 1/2 cup of Greek yogurt too. Sprinkle in 1 tablespoon of chia seeds for extra nutrition. If you enjoy sweetness, add 1 tablespoon of honey or maple syrup. For a chilled drink, toss in some ice cubes. Blend everything on high speed for 30 to 60 seconds. Stop when you get a velvety smooth texture. If your smoothie is too thick, pour in a little more coconut water. Blend again to mix well. Taste your smoothie. If it needs more sweetness, add more honey or maple syrup. Blend briefly once more to combine. Finally, pour your bright smoothie into a glass. Enjoy it right away to savor all the flavors! To make your Tropical Green Smoothie creamier, add Greek yogurt. It gives a nice, thick texture. A ripe banana also helps. Frozen mango adds creaminess, too. If you want an extra boost, try a splash of coconut milk. Blend until smooth for the best result. If you like it sweeter, use honey or maple syrup. Start with a tablespoon, then taste. You can always add more if needed. For a natural option, try dates or agave syrup. If you want less sugar, skip the sweeteners altogether. The ripe banana and mango bring natural sweetness. Store leftover smoothie in the fridge for up to 24 hours. Use an airtight container to keep it fresh. You can also freeze extra portions in ice cube trays. This way, you can pop them into future smoothies. For fresh spinach, keep it in a sealed bag in the fridge. Use it within a week for the best flavor and nutrients. {{image_4}} To boost your Tropical Green Smoothie with protein, add a scoop of protein powder. You can use whey, plant-based, or collagen powder. Another great option is to include nut butter like almond or peanut butter. These additions make your drink more filling and give you extra energy. If you want a vegan version, skip the Greek yogurt. You can use silken tofu instead for creaminess. Another choice is to add a plant-based yogurt. Make sure to check the label for dairy-free options. Sweeten with maple syrup instead of honey to keep it vegan-friendly. Feel free to experiment with flavors! Here are some fun ideas: - Pineapple and Kiwi: Swap mango for pineapple and add kiwi for a tangy kick. - Berry Blast: Mix in strawberries or blueberries for a fruity twist. - Citrus Zing: Add a splash of orange juice or lime juice for a refreshing burst. These variations can help keep your smoothie exciting and tasty! To keep your Tropical Green Smoothie fresh, store it in an airtight container. Glass jars work best. Make sure to fill the jar to the top to minimize air exposure. This helps prevent oxidation, which can change the taste and color. When you’re ready to drink, give it a good shake. This mixes the ingredients and restores its smooth texture. You can keep your smoothie in the fridge for up to 24 hours. After that, it may lose flavor and nutrients. If you see any separation, just shake it well before drinking. If you're unsure, trust your senses. If it smells or looks off, it’s best to toss it out. Freezing your smoothie is a great option if you want to prep ahead. Pour your smoothie into ice cube trays or freezer-safe jars. This makes it easy to blend a quick drink later. When you're ready, just blend the frozen cubes with a little extra coconut water. This gives you a refreshing, cold smoothie in no time! A Tropical Green Smoothie is packed with nutrients. It gives you vitamins and minerals. Spinach is rich in iron and vitamins A and C. Bananas provide potassium, which helps with heart health. Mango adds vitamin C and antioxidants, boosting your immune system. Chia seeds offer fiber and healthy fats, keeping you full. Greek yogurt adds protein for muscle building. Overall, this smoothie helps with digestion, energy, and skin health. Yes, you can. If you don’t have coconut water, use regular water. You may also try almond milk for a nutty flavor. Juice can work too, but it may add more sugar. Choose a substitute that fits your taste. Just remember, the goal is to keep it refreshing and hydrating. You can prepare this smoothie ahead of time. Blend all your ingredients as usual. Then, pour the smoothie into an airtight container. Store it in the fridge for up to 24 hours. If it separates, just shake or stir it before drinking. For longer storage, freeze it in ice cube trays. Just blend again when you want to enjoy it! A Tropical Green Smoothie is packed with vibrant ingredients and rich benefits. We covered the best produce, tips for making it creamy, and variations to suit your taste. Remember to select fresh ingredients and adjust the blend for a perfect texture. Storing your smoothie properly extends its shelf life. Enjoy the health perks and explore your own flavor twists. This smoothie can be a fun and tasty way to boost your day!

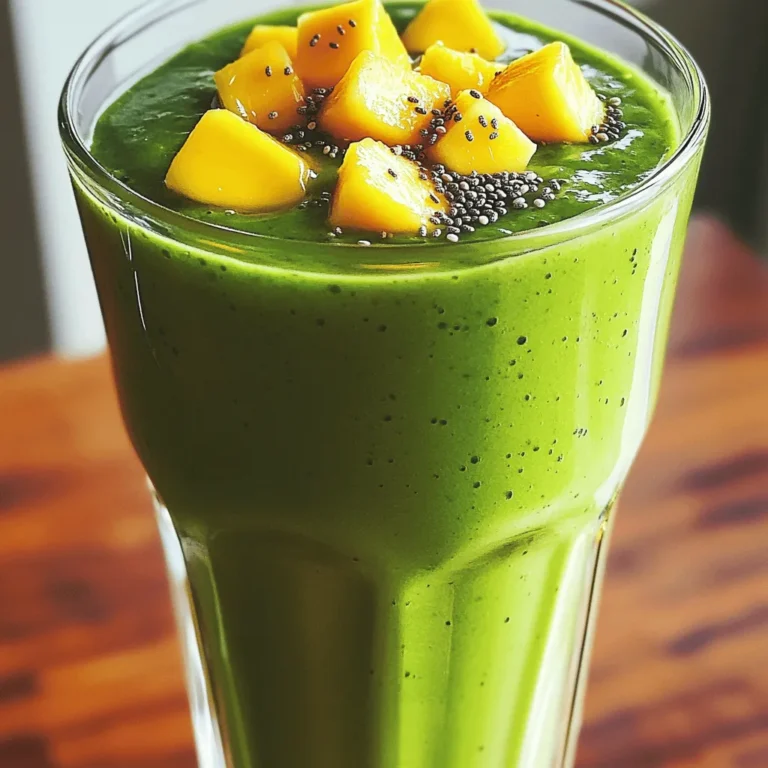
Tropical Green Smoothie Refreshing Nutrient Boost

- 2 cups canned chickpeas - 2 tablespoons olive oil - 3 tablespoons honey - 3 cloves garlic, minced - 1 teaspoon smoked paprika - 1/2 teaspoon ground cumin - 1/4 teaspoon kosher salt - 1/4 teaspoon freshly ground black pepper - Fresh parsley, chopped (for garnish) - Alternative sweeteners like maple syrup or agave - Different spices for a unique twist Gathering the right ingredients is key to making Honey Garlic Roasted Chickpeas. First, you need canned chickpeas. They are easy to use and save time. If you prefer, you can cook dried chickpeas, but this takes longer. Next, you need a good oil. I like olive oil for its flavor. It helps the chickpeas get crispy. Honey adds sweetness and a sticky glaze that makes these chickpeas shine. For flavor, minced garlic is a must. It brings a savory note that pairs well with the sweet honey. Smoked paprika adds a hint of smokiness, while ground cumin gives warmth and depth. A touch of kosher salt and black pepper rounds out the flavors. Don’t forget fresh parsley! It brightens up the dish and adds a pop of color. Feel free to switch things up based on what you like. Use maple syrup instead of honey for a vegan option. You can also try different spices like cayenne for heat or herbs like rosemary for a fresh twist. This recipe is flexible and fun! - Preheat the oven to 400°F (200°C). - Line a baking sheet with parchment paper. - Rinse and dry canned or cooked chickpeas. - Drying chickpeas is key for crispiness. To start, I rinse my chickpeas under cold water. This helps remove extra sodium and any canning liquid. After rinsing, I place them on a clean kitchen towel. I gently pat them dry, which is important. The drier they are, the crunchier they will get when roasted. - Whisk together olive oil, honey, garlic, and spices. - Ensure even coating for the chickpeas. Next, I grab a large mixing bowl. I add 2 tablespoons of olive oil, 3 tablespoons of honey, and 3 minced cloves of garlic. Then, I sprinkle in 1 teaspoon of smoked paprika, 1/2 teaspoon of ground cumin, 1/4 teaspoon of kosher salt, and 1/4 teaspoon of black pepper. I whisk it all together until smooth. This mixture gives the chickpeas a sweet and savory punch. - Spread chickpeas on the baking sheet. - Roast for 25-30 minutes and stir halfway. After mixing, I toss the dried chickpeas into the bowl. I make sure every chickpea is well-coated in the honey garlic mix. Then, I spread them out on the prepared baking sheet in a single layer. I place the sheet in the preheated oven and roast for 25-30 minutes. About halfway through, I stir the chickpeas to help them cook evenly. - Cool the roasted chickpeas. - Garnish with chopped parsley. Once the chickpeas are golden and crispy, I take them out of the oven. I let them cool for a few minutes to enhance their crunch. Right before serving, I sprinkle some freshly chopped parsley on top. This adds a nice touch of color and flavor. To get that perfect crunch, drying the chickpeas is key. If you skip this step, your chickpeas may turn out soft. After rinsing, lay them out on a towel and pat them dry thoroughly. This helps remove moisture. Stirring during roasting is also vital. Halfway through the cooking time, give them a good stir. This helps them brown evenly and ensures every bite is crunchy. You can boost the flavor of your chickpeas with spices. Consider adding a pinch of cayenne for heat or some dried oregano for a herby touch. Mixing in more garlic can also enhance the taste. Don't forget to experiment with honey. Different types, like wildflower or clover, can change the flavor profile. Try them to see which you like best! For serving, present these roasted chickpeas in a charming bowl. This makes them look great as a snack or appetizer. To make them pop, drizzle a bit of extra honey on top. It adds shine and sweetness. Pair them with drinks like lemonade or iced tea. You can also serve them with dips like hummus or yogurt sauce for added fun! {{image_4}} You can swap honey for maple syrup. This adds a nice, rich flavor. Maple syrup works well in this recipe. You can also use agave nectar for a milder taste. It keeps your dish sweet and tasty without being too strong. Want some heat? Add cayenne pepper for a spicy kick. This gives your chickpeas a bold flavor. You can also try infusing herbs like rosemary or thyme. These herbs add a fresh twist and make the dish more aromatic. You can use these roasted chickpeas as a salad topping. They add crunch and protein to your greens. You can also toss them into grain bowls for extra texture. They make your meal filling and fun to eat. To keep your honey garlic roasted chickpeas fresh, use an airtight container. Make sure to cool them completely before sealing. Proper storage helps maintain their crunch. When stored this way, they last up to five days in the pantry. For the best crunch, reheat in the oven. Preheat it to 350°F (175°C). Spread the chickpeas on a baking sheet and heat for about 10 minutes. This method keeps them crispy. If you're in a rush, you can use the microwave. Heat them in short bursts of 20 seconds, but they may lose some crunch. If you want to freeze your chickpeas, use a freezer-safe bag. Make sure they are fully cooled. Lay them flat in the bag to save space. They can last up to three months in the freezer. When you're ready to eat, thaw them overnight in the fridge. Reheat them in the oven for best results. To make these chickpeas vegan, use maple syrup instead of honey. Maple syrup gives a nice sweetness. You can also try agave nectar if you prefer. Both options work well with garlic and spices. Yes, you can use dried chickpeas. Start by soaking them overnight in water. This helps soften them. After soaking, cook the chickpeas in boiling water for about 1-1.5 hours. Make sure they are tender before roasting. Look for a golden brown color and a crispy texture. You can test one by tasting it. If it has a nice crunch, it’s ready. Stir the chickpeas halfway through cooking to ensure even roasting. Absolutely! You can try different spices like cayenne for heat or Italian herbs for a twist. Experiment with smoked paprika or garlic powder too. The choices are endless, so have fun with it! If they aren’t crispy, check if they are dry enough. Pat them dry before roasting. Also, make sure you stir them halfway through to help them crisp up. If they still lack crunch, roast them a bit longer. This blog post shows you how to make tasty Honey Garlic Roasted Chickpeas. You learned about key ingredients like chickpeas, olive oil, and honey. We covered the steps to prep, mix, and roast them for maximum crispiness. You also discovered tips for variations, storage, and serving. In conclusion, these chickpeas are easy to make and fun to eat. Explore different spices for even more flavor. Whether as a snack or meal topping, enjoy your creation! Keep experimenting, and you’ll find your favorite recipe.

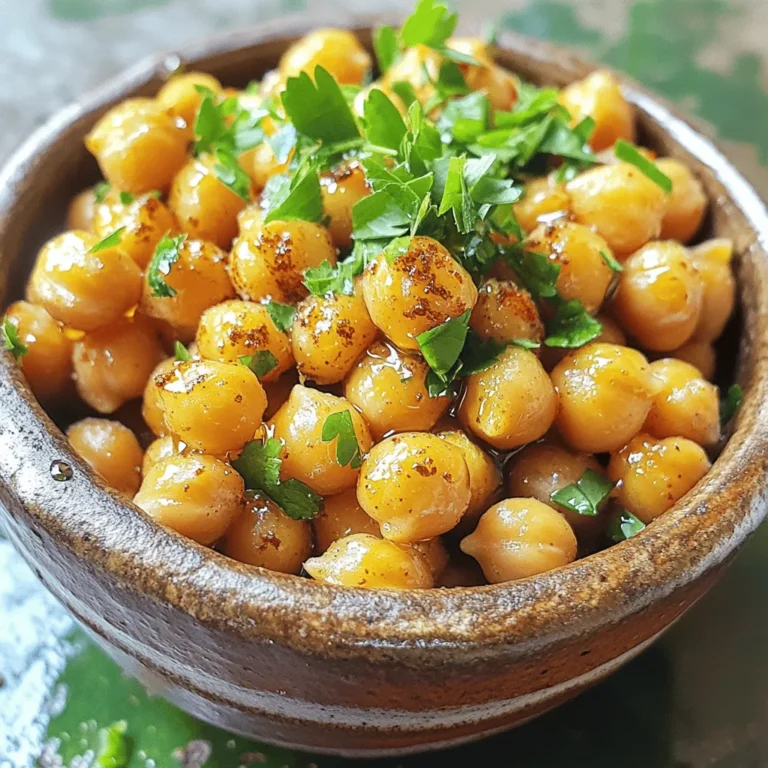
Honey Garlic Roasted Chickpeas Crunchy and Flavorful

- 1 store-bought or homemade flatbread (or naan) - 2 large onions, thinly sliced - 2 tablespoons extra-virgin olive oil - 1 teaspoon sea salt - 1 teaspoon granulated sugar - 4 ounces creamy goat cheese, crumbled I choose either store-bought or homemade flatbread for this recipe. Homemade flatbread gives a personal touch, while store-bought saves time. Next, I use two large onions, sliced thin. The onions need to be sweet and soft after cooking. The olive oil helps to cook the onions evenly. I add sea salt and sugar to enhance their natural sweetness. Finally, I crumble the creamy goat cheese over the onions. - 1 cup fresh arugula, washed and dried - 1 tablespoon balsamic glaze - Freshly cracked black pepper, to taste For a fresh kick, I add arugula on top after baking. The balsamic glaze gives a nice tangy flavor. I finish with freshly cracked black pepper to add depth. - Skillet for caramelizing onions - Baking sheet or pizza stone for baking I use a skillet to caramelize the onions, ensuring they cook well. A baking sheet or pizza stone bakes the flatbread perfectly. Having the right tools makes the process easier and more fun. 1. Heat 2 tablespoons of olive oil in a large skillet over medium heat. 2. Add 2 large, thinly sliced onions to the hot oil. 3. Sprinkle in 1 teaspoon of sea salt and 1 teaspoon of granulated sugar. 4. Stir the onions well to coat them in the oil, salt, and sugar. 5. Cook the onions for about 20-25 minutes. Stir occasionally. 6. Look for a deep, golden brown color. They should be soft and sweet. 1. While the onions cook, preheat your oven to 400°F (200°C). 2. Get your flatbread ready by laying it out on a baking sheet or pizza stone. 1. Once the onions are caramelized, spread them evenly over the flatbread. 2. Crumble 4 ounces of creamy goat cheese on top of the onions. 3. Place the flatbread in the preheated oven and bake for 10-12 minutes. 4. Watch for golden edges and melted cheese. This shows it's ready. 5. After baking, let it cool for a few minutes before slicing. 6. Top with fresh arugula and drizzle some balsamic glaze over it. 7. Add freshly cracked black pepper for extra flavor. Enjoy! To get perfect caramelized onions, keep the heat at medium. This helps the onions cook evenly without burning. Stir them every few minutes. This careful stirring helps them cook well and not stick. Look for signs that tell you the onions are ready. They should be soft, golden brown, and sweet. If they are still hard or pale, give them more time. Patience is key! To make your flatbread even better, add some seasonings. A pinch of thyme or rosemary works great. These herbs add depth to the dish. Also, a little salt and pepper can balance the sweet taste of the onions. Remember to balance flavors. The creamy goat cheese adds richness, while the balsamic glaze brings a nice tang. This mix makes each bite exciting! When serving your flatbread, cut it into wedges. This makes it easy for everyone to grab a piece. You can also serve it with extra arugula on the side. The fresh greens add a nice crunch. For drinks, a light white wine pairs well. If you prefer something non-alcoholic, a sparkling water with lemon works too. Both options enhance the flavors without overpowering them. {{image_4}} You can swap goat cheese for other types. Try feta for a salty kick. Cream cheese gives a creamy texture. If you want a stronger flavor, use blue cheese. For vegan options, look for plant-based cheeses. Many brands make almond or cashew cheese. These mimic the taste of goat cheese well. Add more veggies to the flatbread. Spinach adds color and nutrition. Roasted bell peppers bring sweetness. Mushrooms can add a nice umami flavor. For protein, consider grilled chicken or bacon. Both pair well with the rich cheese. Drizzle your flatbread with sauces for extra flavor. Pesto or herb oil can elevate each bite. Flatbreads come in many types. You can use pita or focaccia instead of traditional flatbread. Both add different textures. If you need gluten-free options, check for gluten-free flatbreads. Many stores offer tasty choices. You can even make your own with almond flour for a unique twist. To keep your flatbread fresh, store it in the fridge. Use an airtight container or wrap it tightly in plastic wrap. This helps prevent it from drying out. Make sure it cools down before you store it. If you have extra toppings, store them separately. This way, the flatbread stays crispy, and toppings remain fresh. Reheating flatbread can be tricky. I recommend using an oven or toaster oven for the best results. Set the oven to 350°F (177°C). Place the flatbread on a baking sheet and heat for about 8-10 minutes. This keeps the edges crispy and the cheese melty. Avoid using a microwave, as it can make the flatbread chewy. If you want to freeze your flatbread, wrap it tightly in foil or freezer bags. This helps prevent freezer burn. You can freeze it for up to three months. When you’re ready to eat, let it thaw in the fridge overnight. Reheat it in the oven for the best texture. To make homemade flatbread, you need simple ingredients. Start with: - 2 cups all-purpose flour - 1 teaspoon salt - 3/4 cup warm water - 1 tablespoon olive oil Mix the flour and salt in a bowl. Add the warm water and olive oil. Knead the dough on a floured surface until smooth. Let it rest for 30 minutes. Roll the dough into thin rounds. Cook each round in a hot skillet for 1-2 minutes on each side. You want them to puff up slightly. This easy flatbread pairs perfectly with many toppings. Yes, you can make caramelized onions ahead of time. Cook them as usual, then cool them down. Store them in a sealed container in the fridge for up to a week. You can also freeze them for up to three months. To use frozen onions, thaw them in the fridge overnight. Reheat in a pan over low heat until warm. This saves time when you’re ready to make your flatbread. You can serve many sides with this flatbread. Here are some ideas: - Fresh arugula salad with a light vinaigrette - Tomato soup for a warm pairing - Roasted vegetables for added flavor - A cheese platter with assorted cheeses and fruits These sides enhance the meal and balance the rich flavors of the flatbread. Enjoy experimenting with different pairings! This blog covered how to make delicious caramelized onion goat cheese flatbread. We explored key ingredients like flatbreads, onions, and goat cheese. You learned how to caramelize onions, prepare your flatbread, and assemble the dish. I shared tips to perfect your flavors and ideas for variations. With proper storage and reheating methods, you can enjoy leftovers too. Remember, cooking is all about creativity. Don’t hesitate to experiment with your ingredients and flavors. Enjoy your tasty creation!

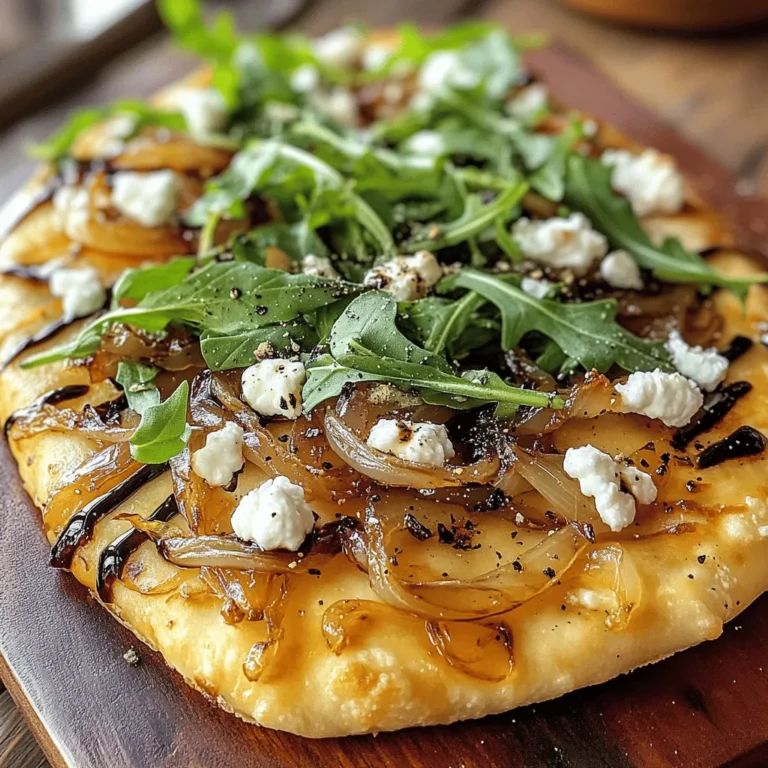
Caramelized Onion Goat Cheese Flatbread Delight

- 2 pounds chicken wings - 1/4 cup extra virgin olive oil - 1 tablespoon garlic powder - 1 teaspoon onion powder - 1 teaspoon smoked paprika - 1 teaspoon freshly ground black pepper - 1 teaspoon sea salt - 1 cup freshly grated Parmesan cheese - 1/4 cup fresh parsley, finely chopped - 2 tablespoons freshly squeezed lemon juice - 1/2 teaspoon red pepper flakes (optional, for added heat) To make baked garlic Parmesan wings, start with the chicken wings. You need 2 pounds. This amount serves 4 to 6 people. Next, grab the olive oil. Use 1/4 cup of extra virgin olive oil for great flavor. Now, let's talk about spices. You will need 1 tablespoon of garlic powder for a nice kick. Add 1 teaspoon of onion powder for depth. For a smoky touch, include 1 teaspoon of smoked paprika. Add 1 teaspoon of freshly ground black pepper and 1 teaspoon of sea salt to boost the flavor. For the cheesy goodness, use 1 cup of freshly grated Parmesan cheese. This makes the wings rich and tasty. Don’t forget fresh parsley! You need 1/4 cup, finely chopped, for garnish and freshness. Lastly, you can add heat with red pepper flakes. Just use 1/2 teaspoon if you want a spicy twist. To tie it all together, use 2 tablespoons of freshly squeezed lemon juice. This adds a bright flavor that balances the richness. With these ingredients, you are set to create delicious baked garlic Parmesan wings. Enjoy the process and the tasty results! First, preheat your oven to 400°F (200°C). This step makes sure the wings cook evenly. While the oven heats, prepare a baking sheet. Line it with parchment paper or aluminum foil. This makes cleanup quick and easy. In a large bowl, mix together the olive oil, garlic powder, onion powder, smoked paprika, black pepper, and sea salt. Stir well until the blend is smooth and combined. Next, add the chicken wings to the bowl. Toss them well in the oil and spice mix. You want every wing to be covered nicely. This ensures great flavor in every bite. Now, arrange the wings in a single layer on the baking sheet. Leave some space between each wing. This helps them cook evenly and get crispy. Place the baking sheet in the oven. Bake the wings for 40-45 minutes. Halfway through, flip the wings. This helps them get golden and crispy on all sides. While the wings bake, make the garlic Parmesan sauce. In a small bowl, mix the grated Parmesan, parsley, lemon juice, and red pepper flakes. Stir until fully blended. This sauce adds rich flavor to your wings. Once the wings are done, take them out of the oven. Toss them in the garlic Parmesan sauce right away. Make sure they are well-coated. Put the wings back in the oven for 5 more minutes. This allows the cheese to melt and stick to the wings. After the final bake, remove the wings. For a nice look, garnish them with extra parsley. Serve them hot for the best taste. For crispy wings, space them well on the baking sheet. If they touch, they will steam instead of crisp. Flip the wings halfway through cooking to ensure even browning. This keeps them crisp all around. You can customize the spice blend to fit your taste. Try adding dried herbs like oregano or thyme for more depth. Experiment with other spices too, like chili powder for heat or lemon zest for brightness. Garnishing makes your wings look great. Sprinkle extra parsley on top for color. Serve them with lemon wedges for a fresh touch. Pair with your favorite dipping sauce, like ranch or blue cheese, for extra flavor. {{image_4}} You can easily make spicy garlic Parmesan wings. Start by adding different heat levels. Use hot sauce or cayenne pepper for more kick. I also like to add smoked paprika for a bold flavor. You can mix in a teaspoon of chili powder for extra heat. Want your wings extra crispy? First, space them out on the baking sheet. This helps hot air flow around each wing. For even more crunch, try adding baking powder to the mix. A teaspoon should do the trick. This will raise the pH and crisp up the skin. You can adapt this recipe for plant-based diets. Instead of chicken, try cauliflower or jackfruit. Cut cauliflower into bite-sized pieces. Toss them in the same oil and spice mix. Bake them just like you would the wings. For jackfruit, use canned and shred it. It absorbs flavors well and works great in this recipe. After you enjoy your garlic Parmesan wings, store any leftovers. Place them in an airtight container. They will stay fresh for up to four days in the fridge. If you want to keep them longer, freeze the wings. Wrap them in plastic wrap, then place them in a freezer bag. They can last up to three months in the freezer. When you are ready to eat the wings again, reheating them well is key. The best method is to use the oven. Preheat your oven to 350°F (175°C). Spread the wings on a baking sheet and heat them for about 10 to 15 minutes. This method helps keep them crispy. You can also use an air fryer for a quick and crispy option. Just heat them at 375°F (190°C) for about 5 to 7 minutes. Baked garlic Parmesan wings are tasty, but they have a shelf life. In the fridge, they stay fresh for about four days. In the freezer, they can last up to three months. Always check for signs of spoilage. If the wings smell bad, or if you see any mold, throw them away. Always trust your senses when it comes to food safety. Yes, you can use frozen chicken wings. Thaw them in the fridge overnight. If you need them fast, place them in a sealed bag and submerge in cold water for about an hour. This keeps them safe and ready for cooking. Bake the wings for 40 to 45 minutes at 400°F (200°C). This gives them a nice, crispy texture. Make sure to flip them halfway through. This step helps them brown evenly and adds to the crunch. There are many great sauces to try. Here are some options: - Ranch dressing - Blue cheese dressing - Spicy buffalo sauce - Sweet chili sauce - Honey mustard sauce Each sauce gives a different taste. Feel free to mix and match! You can grill the wings if you prefer that method. Grilling adds a smoky flavor. Bake them for about 25 minutes first, then finish them on the grill for 5 to 10 minutes. Just watch them closely to avoid burning. Enjoy the best of both worlds! Baking chicken wings at home is simple and rewarding. You learned the must-have ingredients and how to prepare them. We covered tips to enhance flavor and achieve crispiness. You can even try fun variations, from spicy wings to vegetarian options. Don't forget storage tips for leftovers, so nothing goes to waste. With this guide, you can enjoy delicious wings anytime. Now, go ahead and make your own tasty batch!

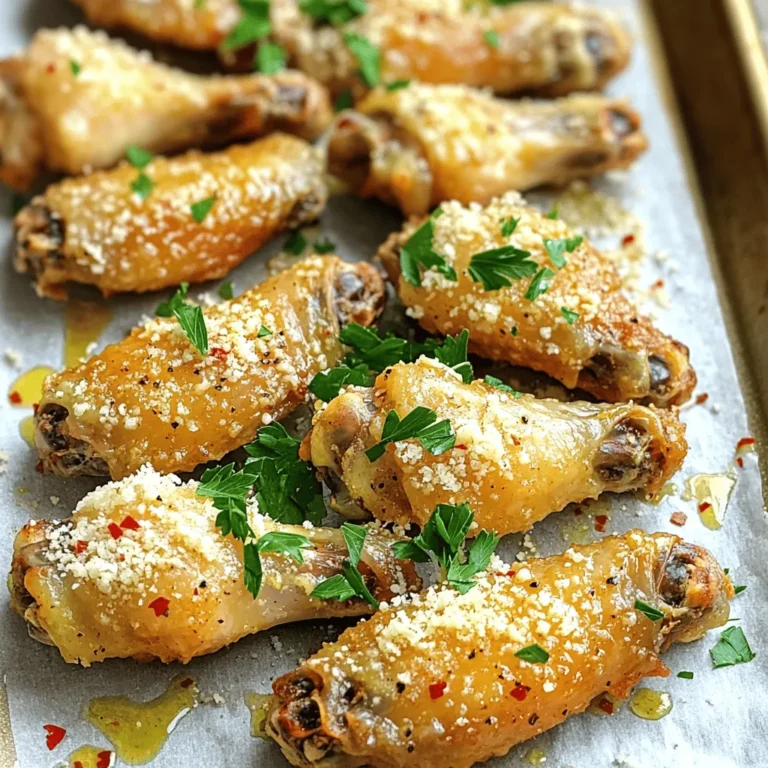
Baked Garlic Parmesan Wings Flavorful and Easy Recipe

- 1 cup rolled oats - 1 cup almond milk (or your preferred milk) - 1 medium apple, grated - 1 teaspoon ground cinnamon - 2 tablespoons honey or maple syrup (to taste) - 1 tablespoon chia seeds - 1/4 cup Greek yogurt (optional, for added creaminess) - A pinch of salt - Chopped nuts (walnuts or pecans) for topping - Sliced apple for garnish These ingredients form a simple and tasty base for your overnight oats. Rolled oats give a hearty texture, while almond milk keeps it light. Grated apple adds natural sweetness and flavor. Ground cinnamon brings warmth, and a pinch of salt enhances the taste. Chia seeds help thicken the mix and add healthy fiber. You can choose to add Greek yogurt if you want a creamier texture. Top it all off with chopped nuts and apple slices for a crunchy finish. This combo makes every bite satisfying and delicious. {{ingredient_image_2}} 1. Combining oatmeal with almond milk Start by taking a medium mixing bowl. Add 1 cup of rolled oats and 1 cup of almond milk. Stir well to blend the oats and milk. This step is key for a creamy texture. 2. Mixing in other ingredients Next, add in the grated apple, 1 teaspoon of ground cinnamon, and 2 tablespoons of honey or maple syrup. Don’t forget to include 1 tablespoon of chia seeds and a pinch of salt. Gently mix all these ingredients until they are well combined. 3. Incorporating Greek yogurt for creaminess If you want a richer taste, now is the time to add 1/4 cup of Greek yogurt. Stir it in thoroughly to make the mixture extra creamy. This optional step takes your oats to the next level. 4. Transfer to jars for refrigeration Now, divide the mixture evenly into individual jars or containers. Make sure they have airtight lids. This keeps your oats fresh and makes for easy grab-and-go breakfasts. 1. Importance of soaking time Seal those jars and pop them in the refrigerator. Let them soak overnight or at least for 4 hours. Soaking is crucial. It allows the oats to absorb the milk and soften. 2. Preparing oats for the next morning The next morning, take the jars out of the fridge. Give the oats a good stir. If you like them a bit thinner, add a splash of extra milk to reach your preferred consistency. 3. Tips for achieving desired consistency Before serving, top your oats with chopped nuts and a few slices of fresh apple. If you want a touch more sweetness, drizzle some honey or syrup on top. This adds a nice finish and makes the dish even tastier. Adjusting sweetness levels You can control how sweet your oats taste. Start with two tablespoons of honey or maple syrup. If you like it sweeter, add more. Taste as you go. Incorporating additional spices Cinnamon is great, but you can mix in other spices too. Try nutmeg or vanilla extract for a different taste. Just a pinch can change the whole dish. Choosing the right type of apple Use a sweet apple like Fuji or Honeycrisp. These apples add a nice crunch and natural sweetness. Avoid tart apples, as they can make the oats less tasty. How to prep in advance You can make these oats for the whole week. Just double or triple the recipe. Prepping in jars makes it easy to grab on busy mornings. Best storage practices Keep the oats in airtight containers. This keeps them fresh. If you add toppings, store them separately until you eat. This keeps your oats from getting soggy. Pro Tips Use Fresh Apples: Fresh, crisp apples will enhance the flavor and texture of your overnight oats. Try different varieties like Granny Smith for tartness or Honeycrisp for sweetness. Add a Pinch of Nutmeg: For a warm, comforting flavor, consider adding a pinch of nutmeg along with the cinnamon. It brings a delightful depth to the overall taste of the oats. Customize Your Sweetness: Adjust the amount of honey or maple syrup according to your taste preferences. You can also substitute with a sugar-free sweetener for a healthier option. Experiment with Toppings: Get creative with toppings! Try adding dried fruits, seeds, or different types of nuts to add variety and nutrition to your overnight oats. {{image_4}} You can switch up the oats you use. Try steel-cut oats for a chewier bite. Instant oats are fine if you like softer oats. Each type gives a distinct texture. You can also change the milk. Almond milk works great, but soy, oat, or cow's milk can be used too. Each milk adds its unique flavor. Get creative by adding fruits or nuts. Berries, bananas, or even dried fruits mix well with apple and cinnamon. Nuts like walnuts or pecans add crunch and protein. Don't shy away from spices and sweeteners. Try nutmeg or ginger for warmth. Maple syrup can replace honey for a different sweetness. Experiment and find your favorite blend! Your apple cinnamon overnight oats will last in the fridge for about 3 to 5 days. Keep them in airtight containers. This helps keep them fresh and stops them from drying out. If you want to change the flavor over time, add toppings like nuts or fresh apples right before eating. Yes, you can freeze overnight oats! This is a great way to save time. To store for long-term use, place the oats in freezer-safe containers. Make sure to leave some space at the top. The oats will expand as they freeze. They can stay in the freezer for up to 3 months. When you want to eat them, just thaw them in the fridge overnight. Add a splash of milk before serving to make them creamy again. Can I use quick oats instead of rolled oats? Yes, you can use quick oats. They cook faster and absorb liquid quickly. However, they may become mushy. Rolled oats give you a better texture and chew. How can I modify the recipe for a single serving? To make a single serving, just halve the ingredients. Use 1/2 cup of oats and 1/2 cup of milk. This keeps it simple and delicious without wasting any food. Are overnight oats healthy? Yes, overnight oats are healthy! They are high in fiber and keep you full. You can add fruits, nuts, and seeds for extra nutrients. They also have low sugar if you choose unsweetened milk and natural sweeteners. Can I make this recipe vegan? Absolutely! Just use plant-based milk like almond or oat milk. You can swap honey for maple syrup to keep it vegan. Enjoy your tasty, plant-based breakfast! Overnight oats are a simple and tasty breakfast option. You can create them with just a few ingredients, like rolled oats, almond milk, and apples. Following easy steps, you can prep them the night before for a quick morning meal. Don't forget to customize flavors with your favorite toppings. Store them well for freshness. With swaps and variations, you can enjoy a new twist each time. Try different fruits or spices to keep it exciting. Now, you have all the tools to make delicious overnight oats!

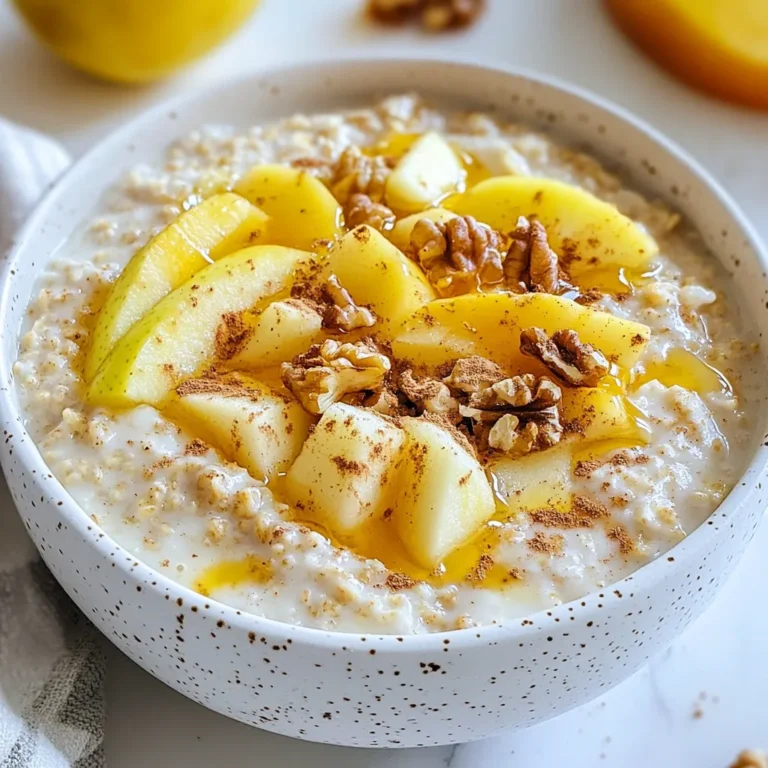
Savory Apple Cinnamon Overnight Oats Easy Breakfast Recipe

- 1 ripe peach, pitted and diced - 1 ripe mango, pitted and diced - 1 ripe banana, peeled and frozen - 1 cup fresh spinach, packed - 1 cup coconut milk (or any milk of your choice) - 1 tablespoon chia seeds - 1 tablespoon honey or maple syrup (optional, for added sweetness) The key to a great Peach Mango Smoothie Bowl is using fresh, ripe fruits. Ripe peaches and mangoes give a sweet and juicy flavor. The frozen banana adds creaminess, while the spinach gives a boost of nutrients without affecting taste. Coconut milk adds a rich texture, but you can use any milk you prefer. Chia seeds boost the nutrition and add a fun texture. If you like it sweeter, try honey or maple syrup. - Granola - Sliced almonds - Coconut flakes - Fresh fruit slices (peach and mango) Toppings make your smoothie bowl fun and tasty. Granola adds crunch, while sliced almonds provide a nutty taste. Coconut flakes give a tropical flair. Fresh fruit slices make your bowl look pretty and add more flavor. Get creative with your toppings to make each bowl unique! To start, gather all your ingredients. You need one ripe peach, one ripe mango, one frozen banana, one cup of fresh spinach, one cup of coconut milk, one tablespoon of chia seeds, and honey or maple syrup if you want extra sweetness. Place these ingredients in your high-powered blender. Blend everything on high speed. Your goal is a smooth and creamy texture. If you see any lumps, blend a bit longer. Scrape down the sides of the blender to mix everything well. Once blended, check how thick your smoothie is. If it's too thick for you, add more coconut milk. Do this one tablespoon at a time. Blend after each addition until you reach your favorite thickness. Adjusting the consistency makes the smoothie bowl enjoyable. Now, pour your vibrant smoothie into bowls. You can use one big bowl or two smaller ones for sharing. Next comes the fun part: adding toppings! Arrange a handful of granola in one spot, sprinkle sliced almonds in another, and add coconut flakes. Finish by placing fresh slices of peach and mango around the bowl. Your smoothie bowl is now bright, colorful, and ready to eat! To get the best creaminess for your smoothie bowl, blend your ingredients well. Start with soft fruits like ripe peach and mango. Use a high-powered blender for a smooth finish. Add a frozen banana for a thick and creamy base. If it feels too thick, pour in more coconut milk a little at a time. Blend again until it is just right. The goal is a silky-smooth mix without lumps. Serving your smoothie bowl can be fun! Choose a large, colorful bowl to make your dish pop. Use a bright spoon to add a playful touch. For garnishing, place granola in one spot for crunch. Sprinkle sliced almonds and coconut flakes in others. Add fresh slices of peach and mango on top for an inviting look. A light sprinkle of chia seeds adds beauty and texture. Want to boost your smoothie? Try adding protein powder for extra nutrients. You could also mix in a spoonful of nut butter for a rich flavor. These options can enhance the taste and make it more filling. Don’t hesitate to get creative with flavors that you love! {{image_4}} You can easily switch fruits in this recipe. Use berries like strawberries or blueberries. Bananas are also a great choice. They add creaminess and sweetness. You might even try kiwi for a tangy kick. Feel free to mix and match your favorites! This makes the smoothie bowl fun and unique. For a dairy-free option, use almond milk, oat milk, or soy milk. These non-dairy milks work well with the peach and mango flavors. If you want a sweeter taste without honey, use agave syrup or pure maple syrup. Both options keep your smoothie bowl vegan and delicious. Changing fruits with the seasons keeps your smoothie bowl fresh. In summer, add ripe berries or melons. In fall, try apples or pears for a cozy twist. Using seasonal fruits not only tastes better but also supports local farms. Enjoy a new flavor with each season! To store your peach mango smoothie bowl, place it in an airtight container. This keeps it fresh for up to 24 hours. If you want to add toppings later, store them separately. This way, your granola stays crunchy and your fruit stays fresh. You can freeze smoothie bowls if you want to enjoy them later. Pour the smoothie into freezer-safe containers. Leave some space at the top for expansion. Cover tightly and freeze for up to one month. When you're ready to eat, thaw it in the fridge overnight for a quick breakfast. Smoothie bowls are best served cold, but you can revive them if needed. To do this, let it sit at room temperature for a bit. If it’s too thick, add a splash of coconut milk and blend again. This will help restore the smooth texture. Yes, you can prep this smoothie bowl ahead of time. To do this, blend all your ingredients first. Pour the smoothie into a container and store it in the fridge. It will stay fresh for about 24 hours. When you are ready to eat, just give it a quick stir. If it's too thick, add a splash of milk. For the toppings, cut fresh fruits right before serving. This keeps them looking vibrant and fresh. If you want to swap spinach, try other leafy greens. Kale is a great option. It has a strong taste but blends well. Swiss chard is another choice, and it adds a nice color too. You can also use romaine lettuce. Just make sure to blend well so the texture stays smooth. To sweeten your smoothie naturally, use ripe fruits like bananas and mangos. They add natural sugar and flavor. You can also try dates or maple syrup. Both work well and add a nice taste. Another option is to add vanilla extract. It gives sweetness without sugar. This blog post shared how to make a delicious Peach Mango Smoothie Bowl. You learned about fresh ingredients like peaches and mangoes, plus how to blend and serve. I provided tips on achieving the right texture and customizing your bowl. Remember, you can use different fruits and adjust toppings to fit your taste. Enjoy experimenting with flavors and textures. Smoothie bowls are fun to make and can be a healthy treat. Stick to these steps, and you’ll make a tasty bowl every time.

Peach Mango Smoothie Bowl Delicious and Nutritious

- 1 medium head of cauliflower - 1 whole head of garlic - 2 tablespoons olive oil, divided - 1/4 cup unsweetened almond milk (or your preferred milk) - 2 tablespoons butter (or vegan alternative) - Salt and pepper, to taste - Fresh chives for garnish - Additional herbs or spices The main star of this dish is the cauliflower. I love using one medium head, cut into florets. This makes it easy to cook and mash. Next, I roast a whole head of garlic. Garlic adds a rich, sweet flavor. Olive oil and butter give the mash a lovely creaminess. I prefer using almond milk, but any milk works great. Finally, don’t forget salt and pepper for the perfect seasoning. For extra flavor, I add fresh chives as a garnish. They add color and a mild onion taste. You can also mix in other herbs or spices if you like. Try adding thyme or a pinch of chili flakes for a kick. Each choice enhances the dish's depth, making it even more delicious. - Preheat your oven to 400°F (200°C). - Cut the top off the garlic head to show the cloves. - Drizzle 1 teaspoon of olive oil on the exposed cloves. - Wrap the garlic tightly in aluminum foil. - Place it in the oven and roast for 30-35 minutes. - The garlic should be soft and golden brown when done. Roasting garlic makes it sweet and creamy. It adds a rich flavor to your dish that’s hard to beat. - Fill a large pot with water and add a lot of salt. - Bring the water to a rolling boil. - Add the cauliflower florets to the boiling water. - Cook for about 10-12 minutes until tender. - Drain the cauliflower well and set it aside. Cooking the cauliflower until tender is key. This helps it mash easily and become creamy. - Once the garlic is cool, unwrap it from the foil. - Squeeze the roasted garlic cloves into a large bowl. - Add the drained cauliflower, remaining olive oil, almond milk, and butter. - Use a potato masher or hand mixer to blend. - Mash until you reach a smooth and creamy texture. Feel free to use a food processor for a super smooth finish. Adjust the almond milk for your desired creaminess. To make your mashed cauliflower creamy, you need the right techniques. First, mash the cooked cauliflower while it’s hot. This helps break down the florets better. If you want an ultra-smooth texture, use a food processor. It blends well and gives you that creamy feel. A potato masher works too, but you may get a chunkier result. When mashing, keep your tools handy. A hand mixer can also work well. Just be careful not to overmix. Overmixing can make it gummy. Seasoning is key to great flavor. Start with salt and pepper. You can add garlic powder for more depth. Fresh herbs like thyme or rosemary can bring in nice layers. Taste as you go. Adjust your seasonings based on your palate. This step makes sure your dish is just right. Don’t forget to balance the creaminess. If you want it richer, add more almond milk or butter. A little goes a long way, so add slowly. How you serve your dish matters. A rustic bowl adds charm. Create a swirl on top for visual appeal. Drizzle some olive oil over it for a touch of elegance. For garnishes, chives are perfect. Their color and taste elevate the dish. Sprinkling some black pepper adds a nice finishing touch. This makes your Roasted Garlic Mashed Cauliflower look as good as it tastes! {{image_4}} If you want a vegan twist, swap the butter for a plant-based option. Use coconut oil or a vegan butter spread. Almond milk works great, but you can also try oat or soy milk for creaminess. Both options keep the dish rich and tasty. To make this dish your own, consider adding cheese. A sprinkle of parmesan or nutritional yeast gives depth. You can also add herbs like thyme or rosemary for a fresh taste. Want some heat? Toss in chili flakes for a spicy kick. Roasted garlic mashed cauliflower pairs well with grilled chicken or fish. It also complements roasted veggies beautifully. For a hearty meal, serve it alongside a rich stew. The creamy texture balances flavors nicely. To keep your roasted garlic mashed cauliflower fresh, use an airtight container. Glass containers work great. They prevent moisture loss and keep flavors intact. You can also use plastic containers, but make sure they seal well. When you want to reheat, use the stovetop or microwave. For the stovetop, add a splash of almond milk. Stir gently over low heat. This keeps the mash creamy. If using the microwave, cover the bowl loosely with a lid or microwave-safe wrap. Heat in short intervals, stirring in between. Freezing mashed cauliflower is easy. First, let it cool completely. Then, scoop it into freezer-safe bags or containers. Remove as much air as possible to prevent freezer burn. Label your bags with the date for easy tracking. To thaw, place the container in the fridge overnight. This keeps the texture nice. For quick thawing, use the microwave on low power. Reheat it in a pan with a bit of almond milk for creaminess. Stir until heated through. Yes, you can use frozen cauliflower! Here are some pros and cons: - Pros: Frozen cauliflower is easy and quick to use. It saves prep time since it comes pre-cut. - Cons: Frozen cauliflower may have more water. This can make your mash watery. To fix this, drain well after cooking. To make this dish dairy-free, use these alternatives for a creamy texture: - Almond milk: This is a great base for creaminess. - Vegan butter: Swap regular butter for vegan butter. - Nutritional yeast: Adds a cheesy flavor without dairy. Yes, you can prepare this dish ahead of time. Here are some tips: - Make it early: Prepare the mash and store it in the fridge. - Reheat gently: Warm it on the stove over low heat. Add a splash of almond milk if it seems dry. - Avoid the microwave: Microwaving can change the texture. This blog post covered how to create a delicious mashed cauliflower dish. You learned about essential and optional ingredients, from roasting garlic to mashing cauliflower. I shared tips for perfecting the texture and enhancing flavor. You also found variations for vegan options and storage tips. Remember, this dish is versatile and can be enjoyed in many ways. Whether served at a meal or saved for later, it's a tasty and healthy choice. Enjoy making your own creamy mashed cauliflower!

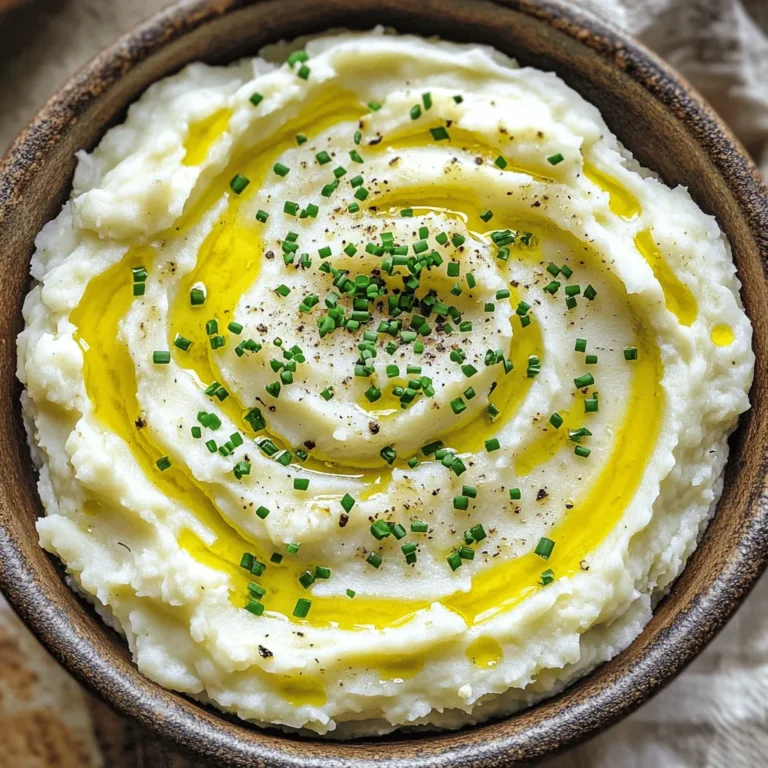
Roasted Garlic Mashed Cauliflower Creamy Delight

- 1 can (15 oz) chickpeas - 2 tablespoons extra virgin olive oil - 1 teaspoon chili powder - 1 teaspoon ground cumin - 1/2 teaspoon smoked paprika - 1/2 teaspoon garlic powder - 1/2 teaspoon onion powder - 1/4 teaspoon cayenne pepper (optional) - Sea salt, to taste - 1 tablespoon nutritional yeast (for a cheesy flavor) I love using chickpeas for snacks. They are full of protein and fiber. For this recipe, I start with one can of chickpeas. Rinse them well and drain them. You want them to be as dry as possible. This helps them get crispy. Next, I add two tablespoons of extra virgin olive oil. The oil coats the chickpeas, making them crunchy when roasted. Now, let’s talk spices. I use chili powder and ground cumin for that classic taco flavor. Smoked paprika adds a nice depth. Garlic and onion powder give a savory touch. If you like heat, toss in cayenne pepper. Adjust the amount to fit your taste. For a cheesy twist, I sometimes add nutritional yeast. It gives a nice flavor and is a great way to add nutrients. Lastly, sprinkle some sea salt to enhance all the flavors. These ingredients work together to create a tasty snack. They are simple, but the taste is amazing! Set your oven to 400°F (200°C). This heat helps the chickpeas get crispy and tasty. Rinse and drain one can of chickpeas. Then, place them in a bowl. Coat the chickpeas with two tablespoons of olive oil. Mix well, so every chickpea gets a nice layer of oil. In a small bowl, combine the spices. Use one teaspoon of chili powder, one teaspoon of ground cumin, half a teaspoon of smoked paprika, half a teaspoon of garlic powder, half a teaspoon of onion powder, and a quarter teaspoon of cayenne pepper. Add sea salt to your taste. If you want a cheesy flavor, stir in one tablespoon of nutritional yeast. Spread the seasoned chickpeas on a baking sheet. Make sure they are in a single layer for best results. Place the baking sheet in your preheated oven. Roast the chickpeas for 25 to 30 minutes. Halfway through, shake the pan to help them cook evenly. Keep an eye on them, so they don’t burn. Once they are golden brown and crispy, take the chickpeas out of the oven. Let them cool for a few minutes. Serve them in a vibrant bowl to make them look even more fun! To get the best crunch from your roasted chickpeas, spread them in a single layer. This means you should not pile them up. Each chickpea needs space to roast and get crispy. If they touch, they will steam instead of roast. Use a large baking sheet if needed. Want to change the heat? Adjust the cayenne pepper. If you like it mild, use less cayenne. If you love heat, add more. You can even skip it altogether for a milder flavor. Taste the spice mix before adding it to the chickpeas. This way, you can find your perfect level. Make your dish pop! Serve the roasted chickpeas in a bright bowl. Garnish them with chopped cilantro. A few lime wedges on the side add zest. This not only looks great but tastes fresh too. Enjoy your crispy, tasty treat! {{image_4}} You can easily change the taste of roasted chickpeas. Adding lime zest gives a fresh kick. You can also try other spices. For example, smoked chili powder adds depth. A bit of cumin can enhance the taco flavor even more. If you like sweet and spicy, add a touch of cinnamon. Each addition brings a new twist to your crunchy snack. Roasted chickpeas are great on their own. But they shine when paired with dips. Try serving them with guacamole or salsa. They also work well in salads. Toss them in a fresh green salad for added crunch. You can even sprinkle them on soups for extra flavor. These ideas make your dish more exciting. Roasted chickpeas are versatile. They mix well with grains like quinoa or rice. You can also add them to stir-fried veggies. This adds protein and texture to your meal. Try them in wraps or tacos for a fun twist. They can even be a topping for baked potatoes. The possibilities are endless! Store your taco seasoned roasted chickpeas in an airtight container. This keeps them crunchy and fresh. You can use glass jars or plastic containers. Make sure the lid seals tightly. Avoid metal containers, as they may trap moisture. Roasted chickpeas can last up to a week when stored properly. If you notice any softening, it’s best to eat them soon. For longer storage, consider freezing them. Frozen chickpeas will stay good for up to three months. Just remember to re-crisp them after thawing. To reheat and keep them crispy, use an oven or air fryer. Preheat your oven to 350°F (175°C). Spread the chickpeas on a baking sheet. Heat for about 10 minutes. In an air fryer, set it to 350°F (175°C) and cook for 5-7 minutes. Avoid using a microwave, as it makes them soggy. Yes, you can use dried chickpeas. Start by soaking them overnight. Rinse and drain the soaked chickpeas. Boil them in water for about an hour or until tender. Then, follow the same steps in the recipe. This gives you a fresh taste and a firmer texture. To reduce the spice, cut back on the cayenne pepper. You can also skip it entirely. Adding some extra olive oil can help balance the heat. If you like, mix in more garlic or onion powder for flavor without the spice. These chickpeas pair well with many dips. Try a creamy avocado dip or a zesty salsa. They also taste great with hummus or yogurt sauce. You can serve them alongside crunchy veggies or in a salad for a full meal. Roasting chickpeas is simple and rewarding. You need just a few key ingredients, like chickpeas and olive oil, plus spices to customize the flavor. Follow the steps to roast them perfectly, and you will have a delicious snack. Remember to adjust spices to your taste and serve them in fun ways. Store leftovers in an airtight container to keep them crispy. Roasted chickpeas are a healthy and tasty treat that can fit any meal. Enjoy experimenting with different flavors and serving ideas!

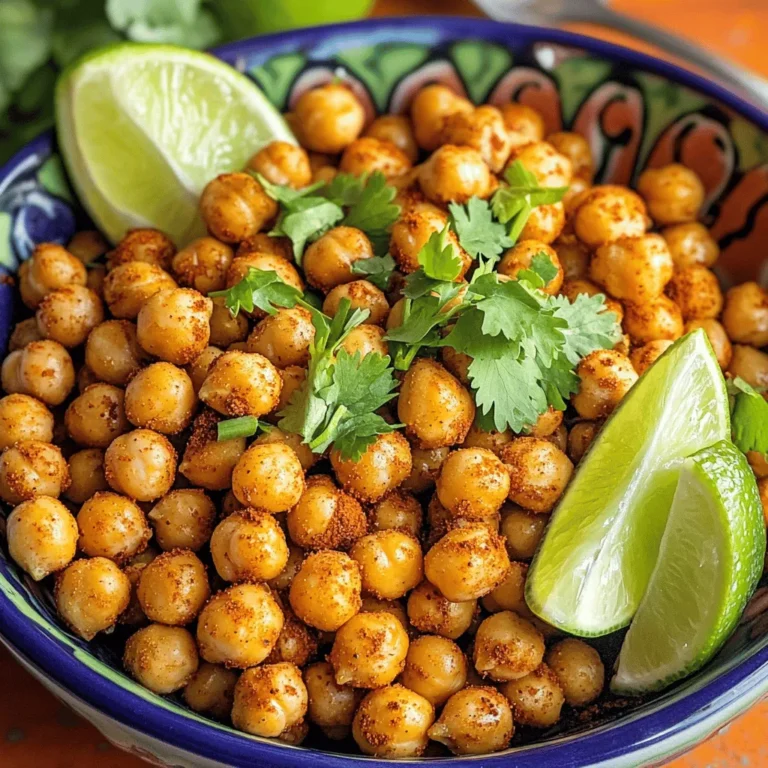
Taco Seasoned Roasted Chickpeas Crispy and Tasty Treat

To make tasty Chocolate Coconut Protein Balls, you need the following: - 1 cup rolled oats - 1/2 cup unsweetened cocoa powder - 1/2 cup protein powder (choose chocolate or vanilla) - 1/2 cup almond butter or peanut butter - 1/4 cup honey or pure maple syrup - 1/3 cup shredded unsweetened coconut - 1/4 cup dark chocolate chips - 1/4 teaspoon sea salt - 1 teaspoon pure vanilla extract You can swap ingredients for other options. If you want nut-free, use sunflower seed butter. You can also use agave syrup instead of honey. For a vegan option, choose plant-based protein powder and maple syrup. If you don’t like dark chocolate, milk chocolate chips work fine. These protein balls have many health benefits: - Rolled oats provide fiber and help with digestion. - Cocoa powder is rich in antioxidants and may boost mood. - Protein powder adds protein, which helps build muscles. - Nut butter offers healthy fats and keeps you full. - Honey or maple syrup gives natural sweetness and energy. - Coconut provides healthy fats and adds flavor. - Dark chocolate has antioxidants and can satisfy sweet cravings. - Sea salt enhances flavor and balances sweetness. - Vanilla extract adds a warm, sweet note to each bite. With these ingredients, you create a snack that is not only delicious but also good for your body. Enjoy these protein balls as a quick snack or a post-workout treat! Start by gathering your dry ingredients. In a large bowl, mix together: - 1 cup rolled oats - 1/2 cup unsweetened cocoa powder - 1/2 cup protein powder - 1/4 teaspoon sea salt Use a whisk or spoon to blend these until they are well combined. This step is crucial because it helps the flavors mix evenly. You want a consistent texture without lumps. Now, let's prepare the wet ingredients. In a medium bowl, combine: - 1/2 cup almond butter or peanut butter - 1/4 cup honey or pure maple syrup - 1 teaspoon pure vanilla extract Stir these together with a whisk or spatula until the mixture is smooth. This will add sweetness and creaminess to the protein balls. Once both mixtures are ready, pour the wet ingredients into the bowl of dry ingredients. Use a sturdy spoon or spatula to mix them together. Expect a thick batter; this means you're on the right track. Next, gently fold in: - 1/3 cup shredded unsweetened coconut - 1/4 cup dark chocolate chips Make sure these extras are evenly spread throughout the mix, but be careful not to overmix. With clean hands, scoop out tablespoon-sized portions of the mixture. Roll them into small balls, about 1 inch in size. Place each ball on a parchment-lined baking sheet, leaving some space between each one. After shaping all the protein balls, refrigerate them for about 30 minutes. This helps them firm up and makes them easier to eat. You can enjoy them right away or store them in an airtight container in the fridge for up to a week. Start by mixing the dry ingredients well. Use a large bowl to combine the oats, cocoa powder, protein powder, and sea salt. A whisk works great to break up clumps. This step ensures every bite is tasty. Next, mix the wet ingredients in a separate bowl. Stir the nut butter, honey, and vanilla extract until smooth. This keeps your protein balls creamy and rich in flavor. To prevent stickiness, measure your ingredients carefully. Use creamy nut butter; it mixes better. If your mix feels too wet, add more oats or protein powder. Mixing in a bit of coconut helps too. When rolling the balls, wet your hands slightly. This helps keep the mixture from sticking to your fingers. You can serve these protein balls in many fun ways. Place them on a nice platter and sprinkle extra coconut on top. This makes them look fancy. You can also pack them in small bags for snacks on the go. Pair them with fresh fruit or a smoothie for a balanced treat. Enjoy them right away or store them for later! {{image_4}} You can change the flavor of your Chocolate Coconut Protein Balls by adding spices or extracts. For a warm and cozy taste, try a pinch of cinnamon or a dash of nutmeg. You can also add a few drops of almond extract for a nutty twist. If you want a tropical vibe, mix in some pineapple extract. These small changes can make a big impact on taste. You have options when it comes to nut butter. If you want a different flavor, swap almond butter for cashew or sunflower seed butter. Each nut butter will bring its own unique taste. You can also use different sweeteners. Instead of honey, try agave syrup or date syrup for a vegan choice. These swaps keep the protein balls tasty and fun. You can easily adapt these protein balls to fit your diet. For a vegan version, simply use plant-based protein powder and maple syrup. To make them gluten-free, ensure your oats are certified gluten-free. With these simple swaps, everyone can enjoy these delicious snacks without worry. To keep your chocolate coconut protein balls fresh, store them in an airtight container. Place a piece of parchment paper between layers to avoid sticking. This method helps maintain their texture and flavor. These protein balls last up to one week in the fridge. After making them, cool them fully. Then, transfer them to your container. For best results, eat them within the week. If they look or smell off, discard them. You can freeze these protein balls for up to three months. First, lay them on a baking sheet and freeze until solid. Once frozen, transfer them to a freezer bag or container. This way, you can enjoy a quick snack anytime! When ready to eat, let them thaw in the fridge or at room temperature. A chocolate coconut protein ball has about 100 calories. This makes them a great snack choice. Each ball packs in protein, fiber, and healthy fats. You can enjoy them without worrying too much about calories. Yes, you can use any protein powder you like. Chocolate or vanilla works best for flavor. If you prefer plant-based options, choose pea or hemp protein. The key is to find a powder that suits your taste and needs. You can enjoy protein balls in many ways. Eat them as a quick snack. Pair them with fruit for a balanced treat. They also work well as a post-workout boost. Feel free to get creative with how you eat them! Yes, protein balls are healthy snacks! They have wholesome ingredients like oats, nut butter, and honey. These provide energy, protein, and healthy fats. Plus, they are easy to make and customize. Enjoy them knowing you are fueling your body right. In this post, we covered everything about chocolate coconut protein balls. We explored essential ingredients, tasty substitutes, and their health benefits. The step-by-step guide showed you how to mix and shape the balls perfectly. You learned tips to avoid sticky messes and ways to store them well. Lastly, we discussed fun flavor variations and dietary swaps to fit your needs. These protein balls are both fun and healthy. Enjoy making them and share them with friends!

Chocolate Coconut Protein Balls Easy Healthy Snack

PREV 1 … 9 10 11 … 18 NEXT
sweet savory saga

explore

DessertsDinnerAppetizersDrinks

Our Policies

  • Cookie Policy
  • Copyright Policy
  • Disclaimer
  • GDPR Policy
  • Terms Of Use
Back to Top
  • About
  • Contact Us
  • Privacy Policy
© 2025 sweet savory saga