FREE DINNER EBOOK! Get your copy!
  • Cookie Policy
  • GDPR Policy
  • Disclaimer
  • Terms Of Use
  • Visit my other site: Fun Cookie Recipes
sweet savory saga
  • Home
  • Dinner
  • Desserts
  • Drinks
  • Appetizers
  • Contact
  • About
  • Privacy Policy
  • Home
  • Dinner
  • Desserts
  • Drinks
  • Appetizers
  • Contact
  • About
  • Privacy Policy
  • Cookie Policy
  • GDPR Policy
  • Disclaimer
  • Terms Of Use
Visit my other site: Fun Cookie Recipes

HOME / CATEGORIES /

Latest

To make Roasted Red Pepper Hummus Wraps, you need a few key items: - 1 cup roasted red peppers (jarred or homemade) - 1 can (15 oz) chickpeas, drained and rinsed - 1/4 cup tahini (sesame seed paste) - 2 tablespoons extra virgin olive oil - 2 tablespoons freshly squeezed lemon juice - 1 clove garlic, finely minced - Salt and black pepper to taste - 4 large whole wheat tortillas - 1 cup fresh spinach leaves, washed and dried - 1 cup cherry tomatoes, halved - 1/2 cucumber, thinly sliced into rounds These ingredients create a creamy and tangy hummus base, perfect for wraps. You can customize your wraps with these tasty extras: - Feta cheese crumbles for added flavor - Fresh herbs like parsley or dill for garnish - Avocado slices for creaminess - Olives for a salty kick Adding these can elevate your wraps and make them even more delicious. Serve your wraps in style! Here are some fun ideas: - Arrange the wraps on a large platter. - Add halved cherry tomatoes and cucumber slices around them for color. - Drizzle extra virgin olive oil on top for shine. - Garnish with fresh herbs for a pop of flavor. These tips make your Roasted Red Pepper Hummus Wraps look as good as they taste! {{ingredient_image_2}} To start, gather your ingredients. You need roasted red peppers, chickpeas, tahini, olive oil, lemon juice, garlic, salt, and pepper. Place all these in a food processor. Blend them until the mix is smooth and creamy. This should take about a minute. If it gets too thick, add a little water. Taste your hummus. Adjust with more salt or lemon juice if needed. This hummus will be the heart of your wraps. Next, lay out your whole wheat tortillas on a clean surface. Grab a spatula or the back of a spoon. Use it to spread a thick layer of hummus on each tortilla. Leave about a half-inch border at the edges. Now, it’s time to add your fresh ingredients. Place fresh spinach leaves, halved cherry tomatoes, and cucumber rounds on top of the hummus. If you want, sprinkle feta cheese on the top for more flavor. Now, roll up each tortilla. Start at one end and roll tightly but not too tight. You don’t want to squish the fillings out. Once rolled, place the wraps seam-side down on a cutting board. Use a sharp knife to slice each wrap in half diagonally. This makes them easier to handle. Enjoy immediately or wrap them in parchment for later. For a nice touch, arrange the wraps on a platter with extra tomatoes and cucumbers around them. To get the best texture for your hummus, you must blend it well. Start with your roasted red peppers and chickpeas. Use a food processor for smooth mixing. Add tahini, olive oil, lemon juice, and garlic. Blend until silky. If your hummus is too thick, add a bit of water or more olive oil. Keep blending until you reach a creamy texture. Taste it! Adjust the salt and pepper as needed. A good texture makes your wraps even better. Rolling wraps can be tricky but fun! Start with a tortilla on a flat surface. Spread the hummus, leaving some space at the edges. Layer your spinach, tomatoes, and cucumbers on top. If you want cheese, sprinkle it on now. Begin to roll from one side, tucking as you go. Roll tightly but not too tight. You want to keep all the yummy stuff inside. Once rolled, place the seam side down. This keeps the wrap intact and ready to slice. Seasoning makes your wraps pop! After blending your hummus, taste it. If it needs a kick, add more lemon juice or garlic. For a smoky flavor, try a dash of smoked paprika. Fresh herbs can also brighten up your wraps. Consider adding chopped parsley or dill to the hummus. If you want a little heat, add some crushed red pepper. A little seasoning goes a long way in making your wraps delicious. Pro Tips Use Fresh Ingredients: Opt for fresh spinach and ripe tomatoes for the best flavor and texture in your wraps. Experiment with Flavors: Try adding different herbs or spices to the hummus, such as cumin or smoked paprika, for a unique twist. Wrap It Right: Ensure the wraps are snug but not too tight to prevent the filling from squeezing out when you cut them. Make Ahead: Prepare the hummus and chop the vegetables ahead of time for a quick assembly when you're ready to eat. {{image_4}} You can switch up the fillings in your wraps easily. Try adding grilled chicken or turkey for extra protein. Roasted veggies like zucchini or bell peppers add great flavor. Want a kick? Add jalapeños or hot sauce. You can also use sliced avocado for creaminess. Experiment with flavors to find what you love best. The type of tortilla can change the taste of your wrap. Whole wheat tortillas are healthy and filling. If you prefer something lighter, try spinach or tomato tortillas. Corn tortillas work well for a gluten-free option. You can even use lettuce leaves for a low-carb wrap that is fresh and crisp. You can change the hummus to switch up the taste. If you don’t have tahini, use sunflower seed butter. For a smoky flavor, add smoked paprika or chipotle powder. Instead of chickpeas, try black beans for a different texture. You can also use different roasted veggies like eggplant or carrots in your hummus. Each change can create a unique flavor profile! Each serving of Roasted Red Pepper Hummus Wrap has about 300 calories. Here’s a quick breakdown of the macros: - Protein: 10 grams - Fat: 12 grams - Carbohydrates: 40 grams - Fiber: 8 grams This wrap is a balanced meal with good protein, healthy fats, and plenty of fiber. Roasted red peppers are full of vitamin C. They help boost your immune system. Chickpeas are a great source of protein and fiber. They support healthy digestion. Tahini adds calcium and healthy fats, giving you energy. Fresh spinach brings iron and vitamins A and K. Adding tomatoes and cucumbers gives you hydration and antioxidants. - Use low-sodium chickpeas to cut salt intake. - Add more veggies like bell peppers or carrots for extra fiber. - Swap whole wheat tortillas for lettuce wraps for a low-carb option. - Use less tahini or olive oil if you're watching your fat intake. - Add herbs like parsley or cilantro for flavor without extra calories. Roasted Red Pepper Hummus Wraps can last for about 2 to 3 days in the fridge. Make sure to store them in an airtight container. If you notice any change in smell or texture, it’s best to throw them away. Enjoy them fresh for the best taste! Yes, you can freeze Roasted Red Pepper Hummus Wraps. To do this, wrap each one tightly in plastic wrap or foil. Place them in a freezer bag to keep them fresh. They can last up to a month in the freezer. To enjoy, thaw them in the fridge overnight before eating. These wraps pair well with many sides. Here are some ideas: - A fresh green salad with lemon vinaigrette - Crispy baked sweet potato fries - A bowl of Greek yogurt with herbs for dipping - A mix of fresh veggies like carrots and bell peppers Each of these sides adds color and crunch to your meal! You now know how to make tasty Roasted Red Pepper Hummus Wraps. We covered the key ingredients and optional add-ons. You learned how to prepare the hummus, assemble wraps, and serve them. I shared tips for perfect texture and rolling wraps. Don’t forget about variations and healthy swaps to keep things fun. Enjoy these wraps at home or share them with friends. Taste can be exciting when you try new things. Enjoy your cooking and have fun with these recipes!

Roasted Red Pepper Hummus Wraps Flavorful and Simple

To make Teriyaki Glazed Meatballs, gather these simple ingredients: - 1 pound ground chicken or turkey - 1/2 cup panko breadcrumbs - 1/4 cup green onions, finely chopped - 1/4 cup grated carrot - 1 large egg, beaten - 2 cloves garlic, minced - 1 teaspoon fresh ginger, finely grated - 1/2 cup teriyaki sauce (low sodium preferred for a lighter flavor) - 1 tablespoon sesame seeds (for garnish) - 1 tablespoon cooking oil (such as vegetable or canola) - Salt and pepper to taste Using these ingredients, you can create a dish that bursts with flavor. Ground chicken or turkey serves as a lean base. Panko breadcrumbs add a nice crunch. Green onions and grated carrot provide freshness and color. Garlic and ginger infuse warmth and depth. The teriyaki sauce is the star, giving a sweet and savory glaze. When I cook, I always taste as I go. Adjust the salt and pepper to fit your liking. Enjoy the process, and let your kitchen fill with amazing scents! To start, grab a large mixing bowl. In it, combine 1 pound of ground chicken or turkey with 1/2 cup of panko breadcrumbs. Next, add 1/4 cup of finely chopped green onions and 1/4 cup of grated carrot. Then, crack in one large beaten egg. Toss in 2 minced garlic cloves and 1 teaspoon of freshly grated ginger. Don’t forget a sprinkle of salt and pepper for flavor. Mix everything together well. You can use your hands or a spatula. It is key to mix evenly. This ensures every meatball has the same taste and texture. Now, heat your skillet over medium heat. Pour in 1 tablespoon of cooking oil and let it warm for about a minute. While that heats, shape the mixture into small meatballs. Aim for about 1 inch in diameter. Keep them uniform in size. This makes sure they cook at the same rate. When your skillet is hot, gently place the meatballs inside. Cook them until they are golden brown on all sides. This should take about 5 to 7 minutes. Make sure to turn them occasionally for even browning. After browning, take 1/2 cup of teriyaki sauce and pour it over the meatballs in the skillet. Lower the heat to a simmer and cover the skillet. Let them cook in the sauce for about 10 minutes. This step ensures the meatballs are fully cooked and bursting with flavor. Check that they reach an internal temperature of 165°F (75°C). When serving, sprinkle sesame seeds on top for a nice touch. Enjoy these teriyaki glazed meatballs over rice or with sautéed vegetables for a complete meal! For the best teriyaki glazed meatballs, start with the right ground meat. I prefer ground chicken or turkey. They keep the meatballs moist and tender. If you want a richer taste, use beef. Next, breadcrumbs play a key role. Panko breadcrumbs are light and airy. They help the meatballs stay fluffy. Adding a beaten egg binds all the ingredients. This mix gives a nice texture. You can cook the meatballs in two ways: in a skillet or the oven. Skillet cooking gives you a nice brown crust. It also allows you to control the heat better. Oven baking is easier if you are making a lot. Just spread them on a baking sheet and bake until cooked through. For even browning, place the meatballs at least an inch apart. This space helps hot air circulate. Turn them gently while cooking to brown all sides. Serving teriyaki glazed meatballs is simple and fun. Pair them with fluffy rice or vibrant veggies. This combo makes a complete meal. When presenting, arrange the meatballs on a platter. Drizzle extra teriyaki sauce on top for shine. Add a sprinkle of green onions and sesame seeds for color. This will make your dish pop! {{image_4}} You can swap ground chicken or turkey for other meats. Beef works well, adding a rich taste. For a lighter option, try ground pork. If you prefer plant-based meals, use lentils or chickpeas. These options keep the dish tasty and healthy. Each protein gives the meatballs a unique flavor. Mix in different seasonings for fun twists. Add soy sauce for a saltier bite. Try hoisin sauce for a sweet kick. You can also sprinkle in chili flakes for heat. Experiment with fresh herbs like cilantro or basil. These changes keep the dish exciting and fresh. Get creative with how you serve the meatballs. Make sliders by placing them in small buns with sauce. This is great for parties or casual meals. You can also skewer the meatballs for grilling. This makes them easy to handle and adds a smoky flavor. Enjoy them however you like! To keep your teriyaki glazed meatballs fresh, store them in an airtight container. This helps prevent moisture loss and keeps flavors intact. They will stay good in the fridge for about 3 to 4 days. Always check for any off smells or changes in texture before eating. If you want to save some meatballs for later, freezing is a great option. First, let the cooked meatballs cool completely. Then, place them in a single layer on a baking sheet. Freeze them for about 1 hour. After that, transfer the meatballs to a freezer bag or container. They can last in the freezer for up to 3 months. When you're ready to eat, simply reheat them in a skillet with a bit of water or teriyaki sauce until heated through. Leftover meatballs can be a fun way to create new dishes. Here are some ideas: - Meatball sandwiches: Place them in a bun with extra sauce and veggies for a filling meal. - Meatball stir-fry: Toss them in a hot pan with your favorite veggies and sauce for a quick stir-fry. - Meatball soup: Add them to broth with noodles and greens for a comforting soup. Teriyaki glazed meatballs can last in the fridge for up to three days. Store them in an airtight container. This keeps them fresh and tasty. If you notice any changes in smell or color, it is best to throw them out. Yes, you can make these meatballs ahead of time! Prepare the meatball mixture and shape them. Then, cover and chill in the fridge for up to 24 hours. When you're ready to cook, just follow the cooking steps. This saves time on busy days. There are many great sides for teriyaki glazed meatballs. Here are some ideas: - Fluffy steamed rice - Stir-fried vegetables - Noodles with soy sauce - A fresh green salad - Sweet potato fries These sides complement the sweet and savory flavor of the meatballs well. Enjoy experimenting with different combinations! These Teriyaki Glazed Meatballs are easy and fun to make. We covered the key ingredients, steps for cooking, and tips for perfecting the dish. Plus, I shared how to store your meatballs and creative uses for leftovers. Experiment with different proteins and flavors to make this recipe your own. Enjoy sharing these tasty meatballs with friends and family. Your cooking will impress them and fill their bellies! Now, it's time to get cooking and relish each bite!

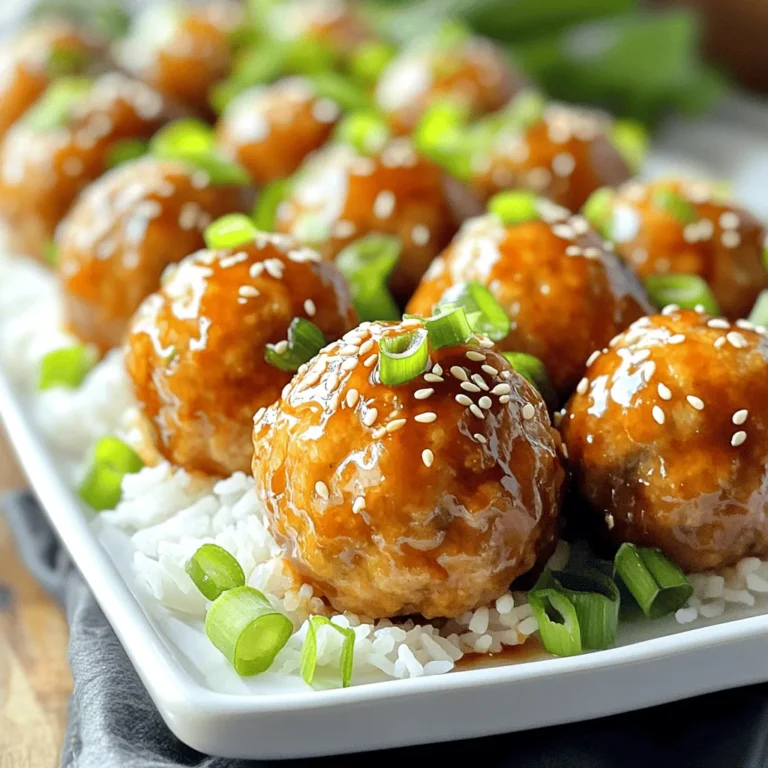
Teriyaki Glazed Meatballs Flavorful Asian Delight

- 2 medium sweet potatoes, peeled and diced into 1-inch cubes - 1 can (15 oz) black beans, rinsed and drained thoroughly - 1 cup corn kernels (can be fresh, frozen, or canned) - 1 large red bell pepper, diced - 1 jalapeño pepper, seeded and finely minced - 1 small red onion, chopped into small pieces - 2 cloves garlic, minced finely - 1 teaspoon ground cumin - 1 teaspoon smoked paprika - 1/2 teaspoon chili powder - Salt and black pepper to taste - 2 tablespoons extra virgin olive oil - Fresh cilantro, coarsely chopped, for garnish - Slices of avocado, for serving (optional but recommended) This dish is packed with nutrients. One serving offers around 300 calories. It has fiber from sweet potatoes and black beans, helping with digestion. Each serving provides about 10 grams of protein, making it filling and healthy. The dish is rich in vitamins A and C from sweet potatoes and peppers. It also has iron and potassium from beans and corn. You can easily adapt this dish to fit your needs. For a vegan option, it’s already perfect! If you need it gluten-free, this recipe has no gluten. You can replace black beans with chickpeas for a different taste. Try using quinoa instead of corn for added protein. If you want less heat, skip the jalapeño or use a milder pepper. 1. Heat Olive Oil: Pour 2 tablespoons of extra virgin olive oil into a large skillet. Turn the heat to medium. Let the oil warm for about 1 minute. 2. Sauté Onions: Add 1 chopped red onion to the skillet. Cook for 3-4 minutes. Stir occasionally until the onion turns soft and clear. 3. Add Garlic and Jalapeño: Mix in 2 minced garlic cloves and 1 finely minced jalapeño. Cook for 1-2 minutes. Stir constantly until you smell the garlic. 4. Combine Sweet Potatoes and Spices: Add 2 diced sweet potatoes to the skillet. Sprinkle in 1 teaspoon ground cumin, 1 teaspoon smoked paprika, and 1/2 teaspoon chili powder. Add salt and black pepper to taste. Stir well to coat the sweet potatoes in spices. 5. Cook Covered: Cover the skillet with a lid. Cook for 10 minutes, stirring often. This helps the sweet potatoes steam and soften. Check if they are tender by piercing a cube with a fork. 6. Incorporate Beans and Corn: Once the sweet potatoes are soft, gently fold in 1 can of rinsed black beans and 1 cup of corn. Cook for another 5 minutes. Stir often until everything is heated through. 7. Add Bell Pepper: Toss in 1 diced red bell pepper. Cook for 2 more minutes. Stir gently to mix the flavors. 8. Adjust Seasoning: Taste the dish. If needed, add more salt and pepper for flavor. - Serving Style: Serve the dish in a colorful cast-iron skillet for a rustic look. You can also spoon it onto individual plates. - Finishing Touches: For extra flavor and color, drizzle lime juice over the top before serving. Garnish with fresh chopped cilantro and add slices of avocado on the side for creaminess. To cook sweet potatoes well, first, cut them into small cubes. This helps them cook evenly. Heat the olive oil in your skillet before adding the onions. Sauté the onions until they are soft and see-through. Then, add garlic and jalapeño for a kick. Cook the sweet potatoes with spices covered. This steams them, making them tender. Stir occasionally and check them with a fork. Once they are soft, mix in the black beans and corn. Finally, add the bell pepper to keep it crisp. To keep leftovers fresh, let them cool first. Place them in an airtight container. This keeps moisture out and helps prevent spoilage. Store in the fridge for up to three days. When ready to eat, reheat in a skillet over medium heat. You can also microwave for quick warming. Just cover it with a lid or a towel to keep it moist. This dish pairs well with a simple green salad or rice. For garnishing, sprinkle fresh cilantro on top before serving. You can add creamy avocado slices for extra flavor. A squeeze of lime juice brightens the dish. For drinks, try it with iced tea or a light beer. These choices enhance the meal and make it even more delicious. {{image_4}} To make the Southwest Sweet Potato Skillet fit your diet, try these ideas: - Keto: Replace sweet potatoes with cauliflower. This keeps carbs low while still providing a hearty base. - Whole30: Eliminate beans and corn. Add extra vegetables like zucchini and mushrooms for more texture and flavor. - Vegan: The dish is already vegan! Just ensure your spices do not contain animal products. - Gluten-Free: This recipe is naturally gluten-free. Enjoy it without any modifications. You can switch up the flavors with different spices and herbs. Here are some ideas: - Add Heat: Include more jalapeño or a pinch of cayenne pepper for extra spice. - Herbs: Mix in fresh herbs like oregano or thyme for a fresh twist. - Cheese: If you eat dairy, sprinkle cheese on top right before serving for creaminess. - Other Veggies: Toss in spinach, kale, or carrots to add color and nutrients. You can alter ingredients based on what's in season. Here are some thoughts: - Autumn: Try adding butternut squash for a sweet touch. - Winter: Incorporate root vegetables like parsnips or turnips for a hearty flavor. - Spring: Use fresh asparagus or peas for a light, crisp taste. - Summer: Substitute fresh corn with zucchini or bell peppers for a bright flavor profile. To keep your Southwest Sweet Potato Skillet fresh, store it in an airtight container. Place it in the fridge within two hours of cooking. It will stay good for about three to four days. When you want to eat it again, just reheat it on the stove or in the microwave. You can freeze leftovers for later. Let the skillet cool completely before transferring it to a freezer-safe bag. Remove as much air as possible to avoid freezer burn. It will last up to three months in the freezer. When you're ready to eat, thaw it in the fridge overnight. Reheat in a skillet over medium heat until hot. To save time during the week, you can prep this dish ahead. Chop the sweet potatoes and veggies the night before. Store them in the fridge in separate containers. You can also cook the dish entirely and store it for easy meals. Just reheat when you are ready to eat. This makes weekday dinners quick and simple! Cooking sweet potatoes in a skillet takes about 20 minutes. You start by sautéing onions and garlic for around 5 minutes. Then, add the sweet potatoes and cover them for about 10 minutes. Stir occasionally to ensure they cook evenly. Check if they are soft by piercing them with a fork. If they need more time, cover and cook for 2-3 more minutes. Yes, you can make this dish ahead of time. Prepare the sweet potato skillet and let it cool. Store it in an airtight container in the fridge for up to 3 days. When you’re ready to eat, just reheat it on the stove or in the microwave. You can also freeze it for up to a month. To reheat, thaw overnight in the fridge before warming it up. You can spice up this dish in many ways. Try adding more chili powder for heat. A dash of cayenne pepper also works well. If you like a smoky flavor, add extra smoked paprika. Fresh lime juice adds brightness. You can even mix in some hot sauce for a kick. Experiment with your favorite spices to make it your own! This blog shows you how to create a tasty dish using sweet potatoes and more. You learned about the ingredients, their nutrition, and how to make smart swaps. I also covered cooking steps, plating, tips for leftovers, and variations for different diets. With these tools, you can enjoy a healthy meal tailored to your tastes. Now you can impress friends and family with your cooking skills. Enjoy your delicious creation!

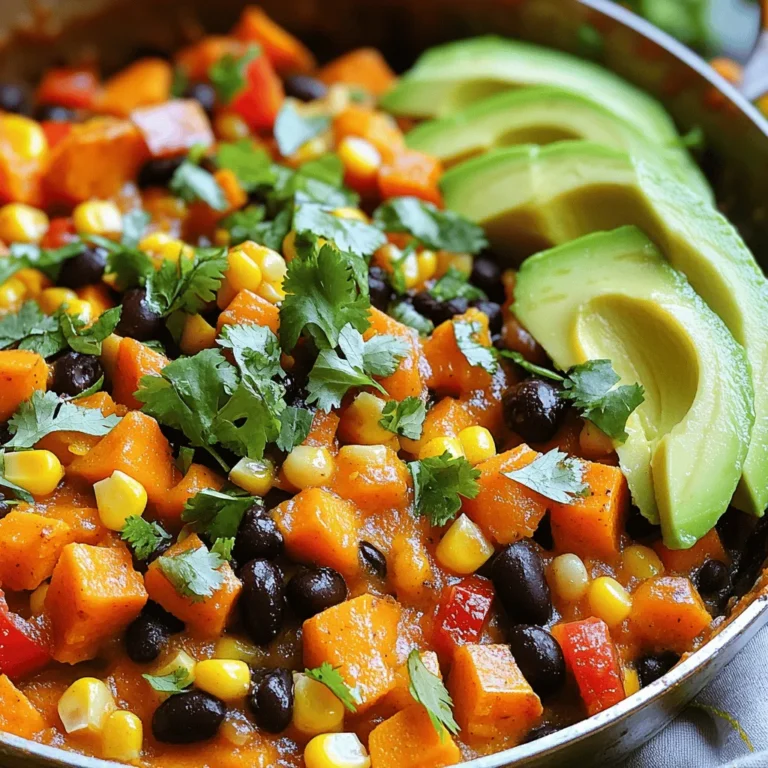
Southwest Sweet Potato Skillet Flavorful and Easy Dish

- 1 cup canned pumpkin puree - 1/2 cup vegetable oil - 1/2 cup packed brown sugar - 1/2 cup granulated sugar Canned pumpkin puree is the star of this bread. It gives moisture and a nice flavor. I use vegetable oil for a soft crumb. The mix of brown sugar and granulated sugar adds depth. The brown sugar makes it sweet, while the granulated sugar helps with texture. - 1 1/2 cups all-purpose flour - 1 teaspoon baking soda - 1/2 teaspoon baking powder - 1 teaspoon ground cinnamon - 1/2 teaspoon ground nutmeg - 1/2 teaspoon ground ginger - 1/2 teaspoon salt All-purpose flour is the base. Baking soda and baking powder help the bread rise. Spices like cinnamon, nutmeg, and ginger bring warmth. Salt balances the sweet flavors. Sifting these dry ingredients is key for a light loaf. - 1/4 cup granulated sugar (for the cinnamon swirl) - 2 teaspoons ground cinnamon (for the cinnamon swirl) The cinnamon swirl mixture is simple but magical. It adds a sweet, spicy ribbon to each slice. The sugar and cinnamon blend will create a lovely contrast with the pumpkin bread. This mix is what makes every bite special. First, set your oven to 350°F (175°C). This will ensure your bread bakes evenly. While the oven heats, prepare a 9x5-inch loaf pan. You can grease it lightly with oil or use parchment paper. Parchment makes it easier to lift the bread out later. In a large bowl, mix one cup of canned pumpkin puree, half a cup of vegetable oil, half a cup of brown sugar, and half a cup of granulated sugar. Use a whisk to combine these well until the mixture is smooth. Next, add in three large eggs, one at a time. Mix well after each egg until everything blends nicely. In a separate bowl, sift together the dry ingredients. This includes one and a half cups of all-purpose flour, one teaspoon of baking soda, half a teaspoon of baking powder, one teaspoon of ground cinnamon, half a teaspoon of ground nutmeg, half a teaspoon of ground ginger, and half a teaspoon of salt. Gradually fold this dry mix into the pumpkin batter. Be gentle to keep the bread light and fluffy. To make the cinnamon swirl, mix together a quarter cup of granulated sugar and two teaspoons of ground cinnamon in a small bowl. Stir until well combined. In the loaf pan, pour half of the pumpkin batter. Sprinkle half of the cinnamon mix over the batter. Then, add the rest of the batter and top it with the remaining cinnamon mixture. Place the loaf pan in your preheated oven. Bake the bread for 60 to 70 minutes. To check doneness, insert a toothpick into the center. If it comes out clean, your bread is ready. When baking is done, let the bread cool in the pan for about 10 minutes. Then, move it to a wire rack to cool completely. Using the right temperature for ingredients is key. I recommend bringing eggs and oils to room temperature before mixing. This helps the batter blend smoothly, giving your bread the perfect texture. Fresh spices make a huge difference in flavor. When you use fresh ground cinnamon, nutmeg, and ginger, your bread pops with taste. Always check your spice jars for freshness. Old spices can dull the flavor of your bread. Serve your cinnamon swirl pumpkin bread warm. A pat of butter or a spread of cream cheese makes it even better. Both add creaminess and richness that pairs well with the spices. For a lovely touch, sprinkle a little ground cinnamon on top before serving. You can also add a few pumpkin seeds for crunch. This simple garnish will make your bread look fancy and inviting. If your bread turns out dense, it may be due to overmixing. Mix the dry ingredients with the wet just until combined. This keeps the bread light and fluffy. Check for doneness by inserting a toothpick in the center. If it comes out clean, your bread is ready. If not, give it a few more minutes. Overbaking can dry it out, so stay close and watch it closely. {{image_4}} Adding nuts and seeds can boost flavor and texture. I suggest using: - Walnuts: Their slight bitterness pairs well with sweet pumpkin. - Pecans: These add a rich, buttery crunch. You can also sprinkle in seeds for extra nutrition. Try: - Pumpkin seeds: These add a nice crunch and echo the pumpkin flavor. - Sunflower seeds: Their mild taste makes them a great choice. You can make this bread a bit healthier. Consider these swaps: - Substituting oils: Instead of vegetable oil, use applesauce or coconut oil. This cuts fat and adds flavor. - Using whole wheat or alternative flours: Whole wheat flour adds fiber. You can also try almond or oat flour for different tastes. Don’t hesitate to change up the flavors. Here are some ideas: - Adding chocolate chips: These add sweetness and richness. Dark chocolate pairs well with pumpkin. - Experimenting with different spices: Try cardamom or allspice to add a unique twist. You can also increase the cinnamon for more warmth. These variations let you tailor the bread to your taste. Enjoy creating your perfect loaf! To keep your cinnamon swirl pumpkin bread fresh, let it cool completely. Wrap it in plastic wrap or foil. This helps keep moisture in and prevents it from drying out. Use an airtight container or a zip-top bag for best results. Store it at room temperature for up to three days. If you want to keep this bread longer, freezing is a great option. Slice the bread first, so it’s easy to grab a piece later. Wrap each slice in plastic wrap, then place them in a freezer bag. This keeps the bread safe from freezer burn. You can freeze it for up to three months. To thaw, simply take it out and leave it at room temperature for a few hours or overnight. When you’re ready to enjoy your bread again, reheating is easy. Preheat your oven to 350°F (175°C). Place the bread on a baking sheet. Cover it with foil to prevent it from drying out. Heat for about 10-15 minutes. You can also use a microwave. Just warm it for 15-20 seconds. This keeps the bread soft and tasty. Yes, you can use fresh pumpkin! To prepare fresh pumpkin, follow these steps: - Select a small sugar pumpkin. - Cut it in half and scoop out the seeds. - Roast the pumpkin halves face down on a baking sheet at 400°F for about 30-45 minutes. - Once soft, scoop out the flesh and blend it until smooth. Use this puree in place of canned pumpkin. Baking takes about 60-70 minutes. To check if it's done, insert a toothpick into the center. If it comes out clean, your bread is ready. If it has batter on it, bake for a few more minutes and check again. Yes, you can make it vegan! Here are some substitutes: - Replace eggs with flaxseed meal. Use 1 tablespoon of flaxseed meal mixed with 3 tablespoons of water per egg. - Use almond milk or oat milk instead of vegetable oil. If your bread is dense, try these tips: - Ensure you measure flour correctly. Too much flour can lead to density. - Make sure your baking soda and baking powder are fresh. - Do not overmix the batter; mix until just combined to keep it light. Yes, you can double the recipe! Here’s what to do: - Use two 9x5-inch loaf pans for even baking. - Make sure to adjust your baking time. Check the bread at 70-80 minutes. Cinnamon swirl pumpkin bread combines simple ingredients and easy steps for delicious results. We covered how to prepare the batter, create a tasty swirl, and bake the bread to perfection. Remember, fresh spices elevate flavor, and storage tips keep it fresh longer. Experiment with variations for new tastes or healthier choices. With this guide, you can bake a treat that warms the heart and home, perfect for any occasion. Enjoy every slice of your homemade delight!

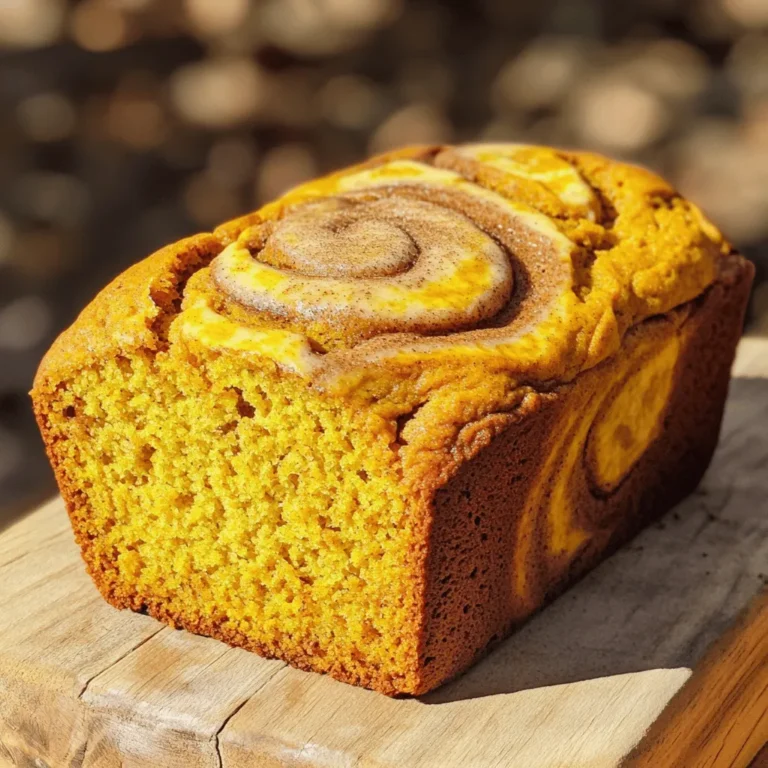
Cinnamon Swirl Pumpkin Bread Irresistible Fall Treat

- 1 lb large shrimp, peeled and deveined - 2 tablespoons olive oil - 1 tablespoon chili powder - 1 teaspoon ground cumin - 1 teaspoon smoked paprika - 1 teaspoon garlic powder - 1/2 teaspoon salt - 1/2 teaspoon freshly ground black pepper - 8 small corn or flour tortillas The main star of this dish is the shrimp. I like to use large shrimp for their great texture. The marinade makes the shrimp flavorful. Olive oil is key for a rich taste. The chili powder adds heat, while cumin and smoked paprika bring depth. Garlic powder gives it a nice kick. Salt and pepper enhance all the flavors, making each bite better. - 1 cup red cabbage, finely shredded - 1 cup green cabbage, finely shredded - 1 medium carrot, grated - 1/4 cup fresh cilantro, chopped - Juice of 1 lime - 2 tablespoons honey The crunchy slaw adds texture to the tacos. Red and green cabbage are perfect for crunch. The grated carrot gives a bit of sweetness. Fresh cilantro adds a burst of flavor. Lime juice brightens the slaw and balances the spice of the shrimp. Honey sweetens it just right, making every bite fresh and lively. - 1/2 teaspoon chili flakes (optional, for a spicy kick) If you love heat, chili flakes are your friend. Just a little can take your tacos to the next level. You can add them into the slaw or to the marinade. Adjust the amount based on your spice tolerance. Cooking should be fun, so feel free to experiment! To start, you need to make the marinade. Take a medium bowl. Whisk together 2 tablespoons of olive oil, 1 tablespoon of chili powder, 1 teaspoon of ground cumin, 1 teaspoon of smoked paprika, 1 teaspoon of garlic powder, 1/2 teaspoon of salt, and 1/2 teaspoon of black pepper. This mix will add lots of flavor to the shrimp. Next, you’ll marinate the shrimp. Add 1 pound of peeled and deveined shrimp to the marinade. Make sure every shrimp gets a good coat. Let them sit for 15 to 20 minutes. This step helps the shrimp soak up all those tasty spices. Now, let’s make the slaw. In a separate bowl, mix 1 cup of finely shredded red cabbage, 1 cup of finely shredded green cabbage, and 1 grated medium carrot. Add 1/4 cup of chopped cilantro for freshness. Drizzle the juice of 1 lime and 2 tablespoons of honey over the veggies. If you like heat, sprinkle in 1/2 teaspoon of chili flakes. Toss everything to combine, then set it aside. It’s time to cook the shrimp. Heat a large skillet over medium-high heat. Once hot, add the marinated shrimp in a single layer. Cook them for about 2 to 3 minutes on each side. They should turn pink and opaque when they’re done. Once cooked, remove the skillet from the heat. Next, warm the tortillas. Take a dry skillet and place the tortillas one at a time. Warm each for about 30 seconds on each side until they are soft and easy to fold. Finally, it’s taco time! Place a generous amount of the cooked shrimp on each tortilla. Top it with a hearty scoop of the crunchy slaw. For extra flavor, squeeze a bit of lime juice on top before serving. Enjoy your flavorful creation! To season the shrimp well, use a mix of spices. I love using chili powder, cumin, smoked paprika, garlic powder, salt, and pepper. These spices work together to create a beautiful flavor. Ensure the shrimp are coated evenly. Marinate them for 15-20 minutes. This allows the shrimp to soak up the flavors fully. You can also add chili flakes if you want more heat. Corn tortillas are traditional and gluten-free. They add a nice texture to the tacos. Flour tortillas are softer and easier to fold. You can use either based on your taste. If you want something different, try lettuce wraps. They are fresh and low-carb, perfect for a light meal. When chopping veggies for the slaw, keep the cuts uniform. This makes the slaw look nicer and helps with even mixing. Use a sharp knife for clean cuts. Shred the cabbage finely for a crunchy texture. Grate the carrot for a sweet touch and vibrant color. Mix everything in a bowl, then drizzle lime juice and honey over it. Toss well to combine and enjoy the fresh flavors! {{image_4}} You can easily make these tacos vegetarian. Swap shrimp for grilled veggies like zucchini, bell peppers, or mushrooms. These veggies add great flavor and texture. You can also use black beans or chickpeas as protein. They are rich and filling. The slaw can be dressed in many ways. You can use a simple mix of lime juice and olive oil. This keeps it light and fresh. Or, try a creamy dressing with yogurt or mayo, mixed with lime juice. For a tangy kick, add apple cider vinegar. Each dressing brings a unique taste to the tacos. You can create your own spice blend for the shrimp. Use your favorite spices like cayenne for heat or oregano for earthiness. Add cumin for a warm flavor or lemon zest for brightness. Feel free to mix and match until you find your perfect blend. This way, every taco can be a new adventure! To store leftover shrimp tacos, wrap them tightly in foil or plastic wrap. Place them in an airtight container. Keep them in the fridge for up to two days. If you separate the shrimp and slaw, they will stay fresh longer. Store the slaw in a separate container with a lid. To reheat the shrimp, place them in a skillet over medium heat. Heat for about 3-4 minutes until warm. Stir often to avoid burning. For the slaw, you can eat it cold. If you prefer warm slaw, heat it gently in the microwave for 30 seconds. You can freeze the shrimp before cooking. Place them in a freezer-safe bag. Remove as much air as possible. They will stay good for up to three months. Avoid freezing the slaw, as it may become soggy after thawing. When ready to use, thaw the shrimp in the fridge overnight. To make the shrimp less spicy, skip the chili flakes. You can also reduce the chili powder. Try adding more honey for sweetness. This balances the heat without losing flavor. Yes, you can use frozen shrimp. Just make sure to thaw them first. Place them in cold water for about 15 minutes. Drain well before marinating to avoid excess moisture. You can add many tasty toppings! Try avocado slices, diced tomatoes, or jalapeños. Crumbled queso fresco or a dollop of sour cream also works well. Fresh lime juice adds a nice zing too! You can store the slaw in the fridge for up to three days. Keep it in an airtight container to stay fresh. The slaw may lose some crunch over time, so eat it sooner for the best texture. The best tortillas for tacos are small corn or flour ones. Corn tortillas give a great flavor. However, flour tortillas are soft and pliable. Use whichever you like best or mix both! Here’s a quick recap of the recipe for easy reference: Ingredients: - 1 lb large shrimp, peeled and deveined - 2 tablespoons olive oil - 1 tablespoon chili powder - 1 teaspoon ground cumin - 1 teaspoon smoked paprika - 1 teaspoon garlic powder - 1/2 teaspoon salt - 1/2 teaspoon freshly ground black pepper - 8 small corn or flour tortillas - 1 cup red cabbage, finely shredded - 1 cup green cabbage, finely shredded - 1 medium carrot, grated - 1/4 cup fresh cilantro, chopped - Juice of 1 lime - 2 tablespoons honey - 1/2 teaspoon chili flakes (optional) Follow the steps to create a delicious meal everyone will enjoy! In this blog post, we explored how to create tasty spicy shrimp tacos. We covered vital ingredients for both the shrimp and the slaw. You learned to prepare, marinate, and cook the shrimp. We shared tips for seasoning and veggie chopping. You also discovered fun variations and storage tips for leftovers. These tacos are fun to make and even better to eat. Try them out and enjoy!

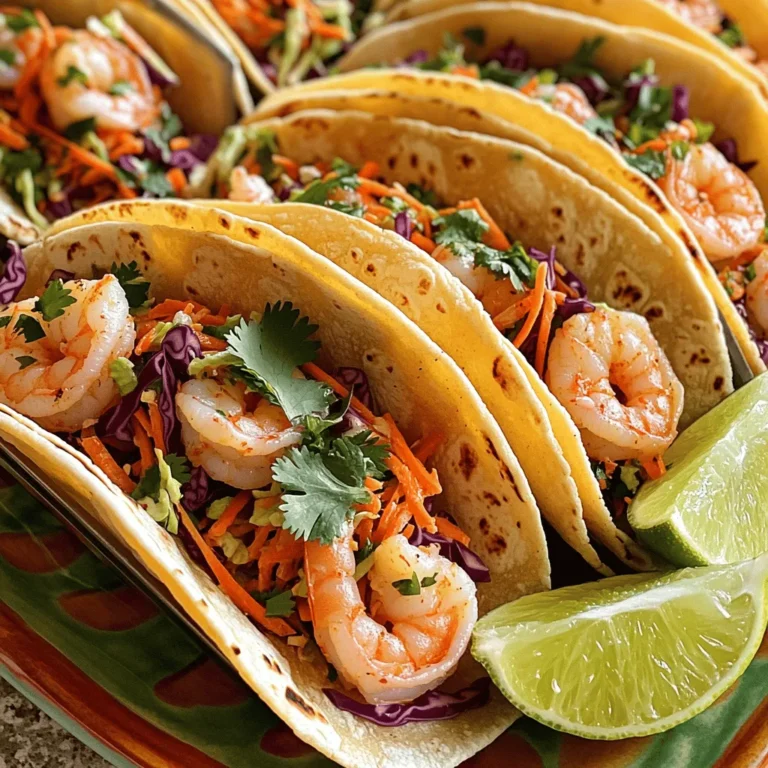
Spicy Shrimp Tacos with Slaw Fun and Flavorful Meal

The Garden Veggie Cream Cheese Spread is a simple and tasty dish. It takes just 10 minutes to prep and 30 minutes to chill. You can serve it as a dip or spread. This recipe makes about 8 servings. The fresh veggies add color and crunch. This spread is perfect for parties or snacks. - 8 oz cream cheese, softened to room temperature - 1 cup fresh spinach, finely chopped - 1 medium carrot, grated - 1/2 red bell pepper, finely diced - 1/4 cup red onion, finely chopped - 2 tablespoons fresh dill, finely chopped - 1 tablespoon fresh lemon juice - Salt and freshly ground black pepper to taste Each serving has about 100 calories. This spread is low in carbs and high in flavor. It offers fiber from veggies and protein from cream cheese. You also get vitamins from the fresh ingredients. Enjoy this tasty spread while keeping your meals healthy! Start by gathering all your ingredients. You need 8 ounces of softened cream cheese, a cup of fresh spinach, one grated carrot, half a red bell pepper, a quarter cup of red onion, two tablespoons of fresh dill, and one tablespoon of lemon juice. 1. In a mixing bowl, combine the cream cheese and lemon juice. Blend until smooth. 2. Add the finely chopped spinach, grated carrot, diced red bell pepper, red onion, and dill. 3. Season with salt and black pepper to taste. Mix until all ingredients blend well. Use a hand mixer for a quick blend. If you prefer, a spatula works too. Make sure the cream cheese is softened. This helps it blend smoothly. If you find lumps, keep mixing. The goal is a creamy texture. Cover your bowl with plastic wrap. Chill the spread in the fridge for at least 30 minutes. This allows the flavors to mix well. When ready to serve, transfer it to a nice bowl. Garnish with extra dill. Serve with crackers, pita chips, or fresh veggies. Enjoy your vibrant and tasty spread! To make the best garden veggie cream cheese spread, start with softened cream cheese. This helps mix it easily. Use a hand mixer or a spatula to get a smooth texture. You want no lumps. Chop your veggies finely. This ensures even distribution in the spread. If you have large pieces, they can dominate the flavor. Mix in the lemon juice early. It brightens the taste and keeps the cream cheese creamy. Want to add a twist? You can mix in garlic powder for a kick. Fresh herbs like basil or parsley also work well. If you like a spicy flavor, add some crushed red pepper flakes. Taste as you go. This lets you find the right balance for your palate. If your spread feels too thick, add a bit more lemon juice. It helps thin it out while keeping it fresh. For a sweeter note, mix in some finely chopped bell pepper. It adds color and flavor. To keep your cream cheese spread fresh, store it in an airtight container. This helps it last longer. Always chill it in the fridge right after making it. You can enjoy it for up to five days. When serving leftovers, check for freshness first. Make sure it still smells and tastes great. If any liquid forms on top, stir it back in. This keeps the spread creamy and tasty. {{image_4}} You can switch up the veggies in your cream cheese spread. Try adding: - 1/2 cup diced cucumber for crunch. - 1/2 cup grated zucchini for moisture. - 1/4 cup chopped cherry tomatoes for a burst of flavor. - 1/4 cup minced green onions for a mild onion taste. These additions keep the spread fresh and exciting. Each veggie brings a unique taste and texture. Want to spice things up? Try these flavor twists: - Spicy: Add a pinch of cayenne pepper or some diced jalapeños. - Herb-Infused: Mix in fresh basil or parsley for a garden taste. - Smoky: Add smoked paprika for a deep, rich flavor. Experiment with these ideas. You can create a spread that suits your taste. This spread is great on various foods. Here are some ideas: - Use it on bagels for a tasty breakfast. - Spread it in sandwiches for added flavor. - Serve it with crackers for a fun snack. - Pair it with fresh veggies for a healthy appetizer. These serving ideas are simple yet delicious. Enjoy the versatility of garden veggie cream cheese spread! Garden Veggie Cream Cheese Spread is a creamy blend of cream cheese and fresh veggies. I use spinach, carrots, bell peppers, and onions for a colorful mix. Fresh dill and lemon juice add a bright flavor. This spread is great on crackers, bread, or as a dip. This spread lasts about one week in the fridge. Store it in an airtight container to keep it fresh. If you notice any changes in smell or texture, it’s best to toss it out. Yes, you can easily customize this spread. Add your favorite veggies like cucumbers or zucchini. You could also try herbs like basil or parsley for a new flavor. Adjust the seasoning too, adding more salt or pepper to taste. I often hear from people who love this spread. They say it tastes fresh and bright. Many enjoy how easy it is to make. The mix of veggies and cream cheese works well together. Some users even add their own twist by using different veggies. This spread gets high marks for flavor and texture. When it comes to store-bought options, a few brands stand out. Philadelphia and Kite Hill offer tasty versions. Philadelphia has a classic cream cheese taste. Kite Hill is a great choice for those who want a dairy-free option. Each brand brings its own style to the table, so you can find one that fits your taste. You can find garden veggie cream cheese spread in many places. Local grocery stores often stock it in the dairy aisle. You might also check health food stores for unique brands. Online retailers like Amazon can deliver it right to your door. Look for sales and discounts to save money on your next purchase. We explored the world of Garden Veggie Cream Cheese Spread. You learned key ingredients, recipe steps, and nutritional info. Plus, I shared tips for blending and serving options. Final thoughts: This spread is fun to make and customize. Whether for breakfast or snacks, it enhances meals. Enjoy experimenting with different flavors and ingredients. With these tips, your cream cheese spread will be a hit!

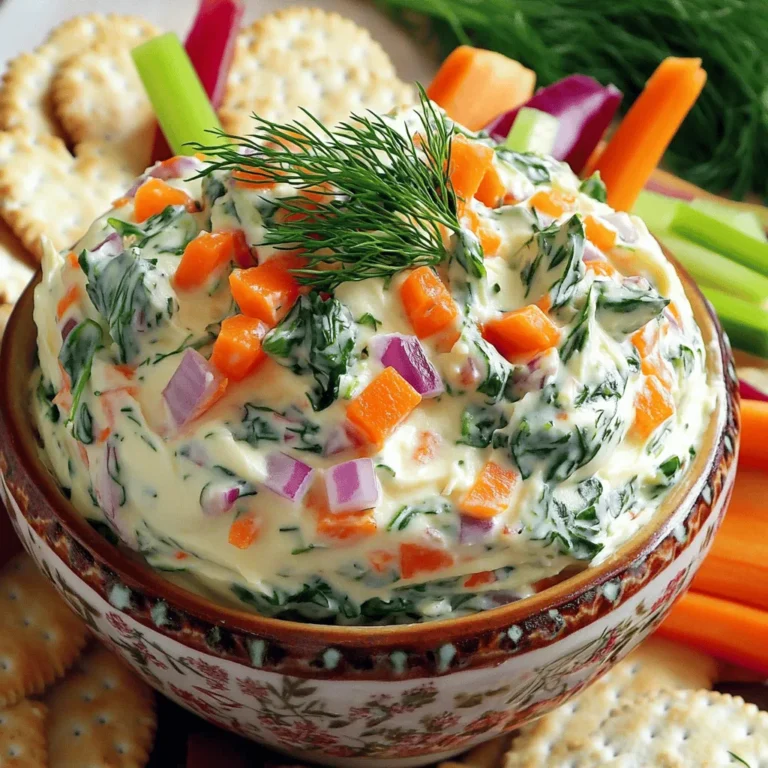
Garden Veggie Cream Cheese Spread Flavorful Delight

To make these tasty mini apple hand pies, you need just a few simple ingredients: - 2 medium-sized apples (Granny Smith or Honeycrisp) - 1 teaspoon ground cinnamon - 1/4 teaspoon ground nutmeg - 1/4 cup packed brown sugar - 1 tablespoon fresh lemon juice - 1 tablespoon cornstarch - 1 package (14 oz) refrigerated pie crusts - 1 large egg, beaten (for egg wash) - 1 tablespoon granulated sugar (for sprinkling) These ingredients create a perfect balance of sweet and spicy flavors. The apples bring a fresh taste, while the spices add warmth. You can change up the flavors in your mini apple hand pies. Here are some ideas: - Different Fruits: Try pears or peaches instead of apples. - Nut Mix: Add chopped walnuts or pecans for crunch. - Spices: Use allspice or cardamom for a unique twist. These variations keep the recipe fresh and exciting. Toppings can make your hand pies even better. Consider these options: - Icing: Drizzle a simple glaze of powdered sugar and milk on top. - Caramel Sauce: Add a rich caramel drizzle for extra sweetness. - Ice Cream: Serve warm with a scoop of vanilla ice cream. These toppings add fun and flair to your hand pies, perfect for serving at gatherings or a cozy night in. To start, gather your apples. I like to use Granny Smith or Honeycrisp for their sweet and tart balance. Peel, core, and dice them into small pieces. Place the diced apples in a bowl. Add one teaspoon of ground cinnamon and a quarter teaspoon of ground nutmeg for warmth. Sprinkle in a quarter cup of packed brown sugar to sweeten. Add one tablespoon of fresh lemon juice to brighten the flavors. Finally, mix in one tablespoon of cornstarch to help thicken the filling. Stir everything well and let it sit for 15 minutes. This waiting time allows the flavors to come together nicely. Next, preheat your oven to 400°F (200°C). While that heats up, roll out your pie crusts on a floured surface. Use a 4-inch round cutter to cut out circles. You should get about 8 to 10 circles. Place about one tablespoon of apple filling in the center of each circle. Be careful not to overfill, or they might leak while baking. Fold each circle to form a half-moon shape. Press the edges firmly to seal, and use a fork to crimp them for a fun design. Now, brush the tops of your hand pies with a beaten egg. This gives them a lovely shine. Sprinkle a bit of granulated sugar on top for added sweetness. Place the hand pies on a baking sheet lined with parchment paper. Bake them for 20 to 25 minutes. They should turn golden brown and fill your kitchen with a wonderful aroma. Once baked, let them cool on a wire rack for about 10 minutes. This cooling time helps the filling set and makes them easier to eat. Enjoy your mini apple hand pies warm! To keep your mini apple hand pies crisp, use cornstarch in the filling. Cornstarch absorbs the juices from the apples. This prevents the dough from getting soggy. Also, make sure to seal the edges tightly. This helps keep the filling inside while baking. Lastly, bake on a preheated baking sheet. This gives the bottom a nice crunch. Granny Smith apples are perfect for hand pies. They have a tart flavor that balances well with sweetness. Honeycrisp apples are another excellent choice. They offer a juicy, sweet flavor that many love. You can also mix different apple types for added depth. Just avoid soft apples like McIntosh, as they may turn mushy. To seal your hand pies well, press the edges firmly together. Use a fork to crimp the edges for a decorative touch. This also ensures no filling leaks out during baking. If the dough feels dry, add a bit of water to the edges. This helps them stick better. Lastly, make small slits on top of each pie. This allows steam to escape and keeps them from bursting. {{image_4}} You can change the flavor of your hand pies easily. Try adding ginger or allspice instead of cinnamon. These spices add warmth and depth to the filling. Another great option is cardamom. It gives a floral note that complements apples well. Mix and match your favorite spices to make them unique! A caramel drizzle takes these pies to the next level. After baking, let them cool slightly. Then, use a spoon to drizzle warm caramel over the top. This adds sweetness and a gooey texture. You can use store-bought caramel sauce or make your own. Just melt sugar until it turns golden brown, then mix in cream. If you need gluten-free options, you can use gluten-free pie crusts. Many brands offer tasty alternatives that work well. For a vegan version, swap the egg wash with almond milk or soy milk. This gives the tops a nice shine without using eggs. You can also use maple syrup instead of brown sugar for sweetness. These options make hand pies friendly for everyone! To keep your mini apple hand pies fresh, let them cool completely. Place them in an airtight container. You can store them at room temperature for up to two days. If you want to keep them longer, refrigeration is best. Just make sure to cover them well to avoid drying out. Freezing is a great option for hand pies. Once they have cooled, wrap each pie in plastic wrap. Then, place them in a freezer-safe bag or container. They can last up to three months in the freezer. When you are ready to enjoy them, just take out what you need. To reheat your hand pies, preheat your oven to 350°F (175°C). Place the hand pies on a baking sheet. Heat them for about 10-15 minutes until warm. This method keeps the crust nice and crispy. If you’re in a hurry, you can also microwave them for about 30 seconds. However, this may make the crust a bit soft. Yes, you can use canned apples. They save time and still taste good. Drain them well to remove excess liquid. This helps keep the filling from getting too soggy. If you want more flavor, mix in some cinnamon and nutmeg. To make dough from scratch, mix flour, salt, and cold butter. Use a pastry cutter or your hands to blend until it looks like crumbs. Add cold water a bit at a time until it forms a ball. Chill the dough for at least 30 minutes before rolling it out. Yes, these hand pies are perfect for a crowd. They are easy to grab and eat. Plus, they can be made ahead of time and served warm or at room temperature. This makes them great for parties or family gatherings. You can find pre-made mini apple hand pies at grocery stores. Look in the frozen section or the bakery aisle. Many bakeries also sell them fresh. Check local markets for homemade options too. Homemade mini apple hand pies last for about 2-3 days at room temperature. Store them in an airtight container to keep them fresh. If you want them to last longer, freeze them. They can last for up to 3 months in the freezer. Making mini apple hand pies is fun and simple. We covered ingredients, cooking steps, and helpful tips. Try new spices or add caramel for variety. Remember to store them well or freeze for later use. With this guide, you can create tasty pies that everyone will enjoy. Baking is all about trying new things. So, get in the kitchen and start making your own mini apple hand pies today!

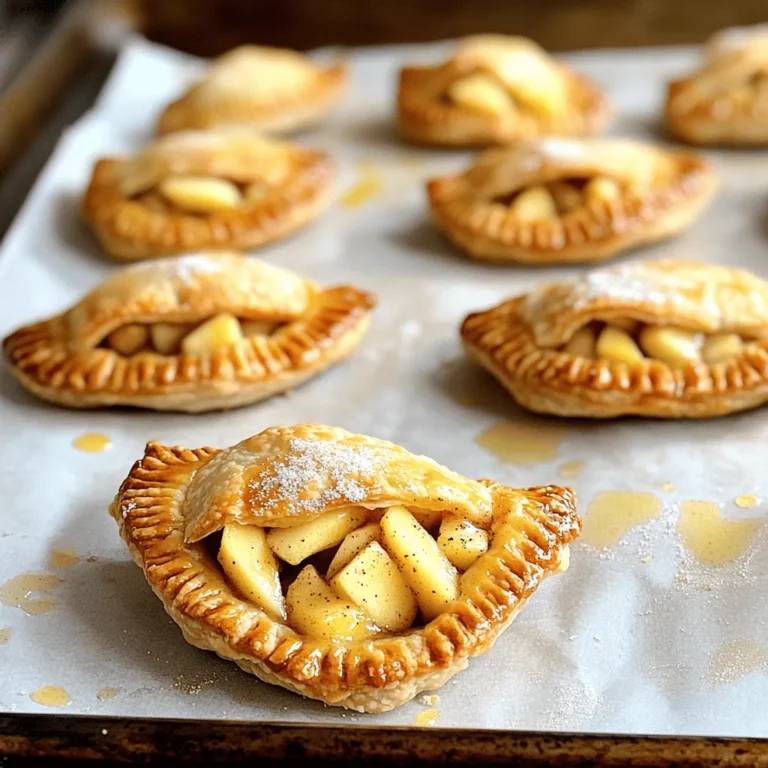
Mini Apple Hand Pies Delicious Treat for Everyone

To make delicious mushroom spinach lasagna rolls, gather these ingredients: - 8 lasagna noodles - 1 tablespoon olive oil - 1 small onion, finely chopped - 2 cloves garlic, minced - 8 ounces mushrooms, sliced (cremini or button) - 4 cups fresh spinach, washed and roughly chopped - 1/2 teaspoon dried oregano - 1/2 teaspoon salt - 1/4 teaspoon freshly ground black pepper - 1 cup ricotta cheese - 1 cup shredded mozzarella cheese, divided - 1/2 cup grated Parmesan cheese, divided - 1 cup marinara sauce I suggest using Barilla for lasagna noodles. They cook well and hold shape. For cheese, I love BelGioioso for ricotta and mozzarella. Their taste is rich and creamy. If you want a great Parmesan, try Grana Padano. It has a wonderful flavor that enhances the dish. For marinara, Rao's is a favorite. It is thick and packed with flavor. You can make this recipe fit various diets. For gluten-free needs, use gluten-free lasagna noodles. If you're vegan, swap ricotta with tofu or cashew cheese. For a lower-fat version, use part-skim ricotta and mozzarella. If you want more greens, add kale or Swiss chard in place of spinach. {{ingredient_image_2}} First, you need to cook your lasagna noodles. Bring a large pot of salted water to a boil. Add the noodles and cook them until they are al dente, which usually takes about 8-10 minutes. Once done, drain them well. Lay the noodles flat on a clean kitchen towel. This keeps them from sticking together. Next, grab a large skillet and heat one tablespoon of olive oil over medium heat. Add one finely chopped onion. Sauté the onion for about 3-4 minutes until it turns translucent. Then, add two minced garlic cloves and eight ounces of sliced mushrooms. Cook this mixture for 5-7 minutes. The mushrooms should soften and release their moisture. After that, toss in four cups of chopped fresh spinach, half a teaspoon of dried oregano, half a teaspoon of salt, and a quarter teaspoon of black pepper. Cook this until the spinach wilts, which should take about 2-3 minutes. Remove the skillet from heat and let the mixture cool slightly. Now, it’s time to mix the filling. In a bowl, combine the cooled mushroom-spinach mix with one cup of ricotta cheese, half a cup of shredded mozzarella cheese, and a quarter cup of grated Parmesan cheese. Stir this mix well. In a 9x13 inch baking dish, spread a thin layer of marinara sauce on the bottom. For each lasagna noodle, spoon about 2-3 tablespoons of the filling onto one end of the noodle and roll it tightly. Place each roll seam-side down in the baking dish. Repeat this until you use all the noodles and filling. Once all the rolls are in the dish, pour the rest of the marinara sauce over them. Make sure they are well covered. Sprinkle the remaining mozzarella and Parmesan cheese on top. Cover the baking dish with aluminum foil, then bake in a preheated oven at 375°F for 25 minutes. After that, remove the foil and bake for another 15 minutes. The cheese should be bubbly and golden. Let the rolls cool for about 5 minutes before serving. Enjoy your delicious Mushroom Spinach Lasagna Rolls! To craft perfect mushroom spinach lasagna rolls, follow these simple tips: - Cook noodles al dente: This keeps them firm and easier to handle. - Cool the filling: Letting the mushroom-spinach mix cool helps it stick better. - Use a clean towel: Lay cooked noodles on a towel to prevent them from sticking together. - Don’t overfill: Use only 2-3 tablespoons of filling per noodle. Too much can cause spills. You can try various methods to cook these delicious rolls: - Instant Pot: Place the rolls in a pan, add some marinara sauce, and cook on high pressure for 10 minutes. - Skillet: Heat a bit of sauce in a large skillet. Place the rolls seam-side down and cover. Cook for about 20 minutes on low heat until heated through. Avoid these common mistakes to ensure success: - Skipping the cooling step: Filling should not be hot when you roll it. - Not covering with sauce: Always pour sauce over rolls; this keeps them moist and flavorful. - Using too much cheese: While cheese is great, too much can overpower the dish. Stick to the recipe amounts for balance. - Rushing the bake: Allowing the rolls to bake properly ensures they turn golden and bubbly. Pro Tips Use Fresh Ingredients: Fresh spinach and mushrooms will elevate the flavor of your lasagna rolls. Opt for seasonal produce whenever possible for the best taste. Customize Your Cheese: Feel free to mix different types of cheese, such as ricotta or goat cheese, to add unique flavors and textures to your filling. Experiment with Sauces: While marinara is classic, try using pesto or a white sauce for a twist on the traditional lasagna rolls. Make Ahead: Prepare the rolls in advance and refrigerate them. They can be baked straight from the fridge, just add a few extra minutes to the cooking time. {{image_4}} You can switch up the cheese in your lasagna rolls. Try using cottage cheese instead of ricotta. It adds a nice texture and flavor. You can also use goat cheese for a tangy twist. If you love strong flavors, add blue cheese in small amounts. Mixing different cheeses gives your dish more depth. Want to make your lasagna rolls heartier? Add some protein! Cooked chicken or Italian sausage can be great options. Just chop them into small pieces and mix them into your filling. This will give your dish extra flavor and make it more filling. If you use sausage, go for sweet or spicy based on your taste. You can make these rolls vegan or dairy-free with simple swaps. Use cashew cheese or tofu instead of ricotta. Nutritional yeast adds a cheesy flavor without dairy. For mozzarella, try a vegan cheese brand that melts well. You can mix in some cooked lentils for added protein. This way, everyone can enjoy a delicious meal! After you enjoy your Mushroom Spinach Lasagna Rolls, store any leftovers in an airtight container. Make sure to let them cool first. Place the container in the fridge. They will stay fresh for up to three days. If you want to enjoy them later, freezing is a great option. To freeze your lasagna rolls, wrap each roll tightly in plastic wrap. Then, place them in a freezer-safe bag or container. Be sure to remove as much air as possible. You can freeze them for up to three months. When you’re ready to eat, just thaw them in the fridge overnight. To reheat, you can use the oven or microwave. If using the oven, preheat it to 350°F (175°C). Place the rolls in a baking dish and cover with foil. Heat for about 20 minutes. For the microwave, place the rolls on a plate and cover with a damp paper towel. Heat for 2-3 minutes, checking often. Enjoy your meal just as it was made! Yes, you can use no-boil lasagna noodles. They save time and effort. Just spread a little extra sauce in the baking dish. This helps the noodles cook well. Follow the package instructions for the best results. These lasagna rolls will stay fresh for about 3 to 4 days. Store them in an airtight container. You can also cover them with plastic wrap. Just make sure they cool down before storing. Some great sides include: - Mixed greens salad - Garlic bread - Steamed broccoli - Roasted vegetables These sides add freshness and crunch to your meal. Absolutely! You can prepare these rolls a day ahead. Just assemble them and cover tightly. Store them in the fridge. When you're ready to bake, add a few extra minutes to the cooking time. This post covered everything you need for Mushroom Spinach Lasagna Rolls. We explored ingredients, brands, and substitutions. I shared clear steps for prep, cooking, and assembling. You learned tips for perfect rolls and common mistakes to watch for. In the end, you can make tasty lasagna rolls your way. Use the tips and variations provided to suit your taste and needs. Enjoy your meal and impress your family and friends!

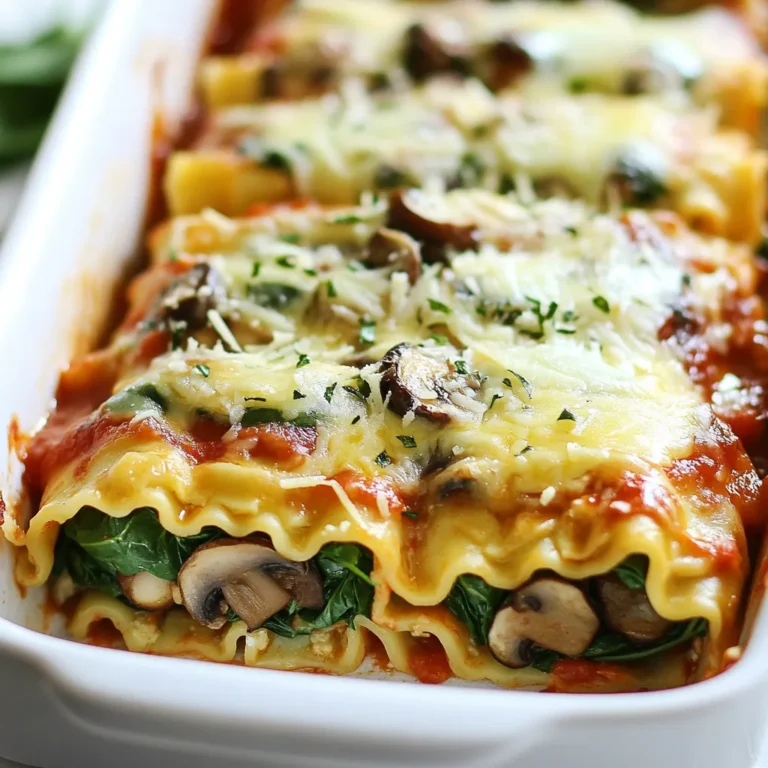
Mouthwatering Mushroom Spinach Lasagna Rolls Recipe

To make a fresh and tasty Avocado Mango Salsa, you need simple and colorful ingredients: - 1 ripe avocado, diced into small cubes - 1 ripe mango, peeled and diced into small cubes - 1 small red onion, finely chopped - 1 jalapeño pepper, deseeded and minced - 1/4 cup fresh cilantro, roughly chopped - Juice of 2 limes - 1 teaspoon honey (optional) - Salt and freshly cracked black pepper to taste Each ingredient plays an important role in the salsa. The avocado brings creaminess, while the mango adds sweetness. The red onion gives a nice crunch and sharpness. The jalapeño adds heat, and cilantro adds a fresh taste. Lime juice brightens everything up. You can add honey if you want a sweeter touch. When selecting your ingredients, look for ripe fruits. A ripe avocado will yield slightly when you press it. The mango should be firm but slightly soft to the touch. Using fresh ingredients makes the salsa burst with flavor. You’ll enjoy making this dish as much as eating it! - Start with the avocado. Cut it in half and remove the pit. Scoop out the flesh with a spoon and dice it into small cubes. - Next, peel the mango and cut it in half. Remove the pit and dice the mango into small cubes, just like the avocado. - For the red onion, slice it in half and chop it finely. This adds a nice crunch and flavor. - Finally, take the jalapeño pepper. Cut it in half, remove the seeds, and mince it finely. Adjust the amount if you want less heat. - In a large bowl, gently mix the diced avocado and mango. This forms the base of your salsa. - Add the chopped red onion and minced jalapeño to the bowl. Toss in the roughly chopped cilantro, too. Mix everything together lightly. - Squeeze the juice of two limes over the mixture. This adds a fresh and tangy flavor. - If you like a hint of sweetness, add the honey now and mix it in. - With gentle hands, toss all the ingredients together so they are coated in lime juice. Avoid mashing the avocado. - Finally, season your salsa with salt and freshly cracked black pepper. Taste and adjust the seasoning to your liking. Let the salsa sit for about 10-15 minutes. This helps the flavors blend beautifully before you serve it. - Look for avocados that yield gently when pressed. - Mangoes should feel slightly soft to the touch. - An overripe avocado may feel mushy and darken at the stem. - A mango that is too ripe will have a strong, sweet smell. To choose the best fruit, examine the color and texture. Use these signs to find ripe avocados and mangoes. This ensures a fresh and tasty salsa. - Adjust sweetness by adding honey if needed. - Control heat by using less jalapeño or more if you like spice. - Let the salsa sit for 10-15 minutes before serving. This waiting period helps the flavors blend together. You’ll notice a big difference in taste after allowing it to rest. - Use a colorful bowl to serve your salsa. - Add a sprig of cilantro for a fresh look. - Pair with crispy tortilla chips or grilled meats. A great presentation makes your dish more inviting. These simple tips will impress your guests and make your salsa shine. {{image_4}} You can make your avocado mango salsa even better by adding fruits or veggies. Consider adding diced bell peppers. They add a nice crunch and a pop of color. You can use any color you like—red, yellow, or green. Each type brings its own flavor. Another great option is to add fresh pineapple. It gives a sweet touch that pairs well with the avocado and mango. Just chop it into small pieces and mix it in. If you love heat, you can spice up your salsa. Try using different types of peppers. For a mild kick, you can use a poblano pepper. If you want more heat, jalapeños work well. You can also add a splash of hot sauce. This will give your salsa a zesty boost. Always taste as you go to find the right level of spice for you. This salsa is naturally vegan and gluten-free. You can enjoy it without worry if you follow these diets. If you're looking for a lower-carb option, skip the honey. The natural sweetness from the mango is often enough. You can also serve it with veggies instead of chips for a healthy snack. This way, everyone can enjoy this fresh and vibrant dish, no matter their diet! To keep your Avocado Mango Salsa fresh, store it in an airtight container. This helps prevent air from getting in and causing browning. Make sure the container is clean before use. If you can, press plastic wrap directly onto the salsa surface. This reduces air exposure even further. Refrigeration is key. Place your salsa in the fridge as soon as you finish making it. The cool temperature slows down spoilage. It’s best to enjoy it within a few days for optimal taste. Avocado Mango Salsa stays fresh for about 2 to 3 days in the fridge. After this time, the avocado may turn brown and mushy. If you want to keep it longer, freezing is an option, but it may change the texture. The salsa can lose its crunch when thawed. If you decide to freeze it, use a freezer-safe container. Leave some space at the top for expansion. You can enjoy it later, but remember the texture may not be the same. Yes, you can make Avocado Mango Salsa ahead of time. To keep it fresh, do these things: - Mix all ingredients but the avocado and lime juice. - Store in an airtight container in the fridge. - Add the avocado and lime juice just before serving. This way, the salsa stays bright and tasty. Avocado Mango Salsa works well with many dishes. Here are some great pairings: - Grilled chicken or fish for a fresh topping. - Tacos for a burst of flavor. - Crispy tortilla chips for a fun dip. - Salads for added taste and color. These options enhance your meals and bring joy to your table. To stop avocados from browning, use these tips: - Squeeze lime juice over the avocado right away. - Keep the salsa covered and refrigerated until serving. - Use a little onion, as it can help slow browning. These steps help maintain the fresh look and taste of your salsa. This blog post covered how to make Avocado Mango Salsa. You learned about the fresh ingredients, preparation steps, and tips for the best flavors. I shared ideas for variations and storage methods, too. Avocado Mango Salsa is tasty and simple to make. It adds a fresh touch to many meals. Now, you can enjoy it at home or impress guests. Grab those ingredients and get started!

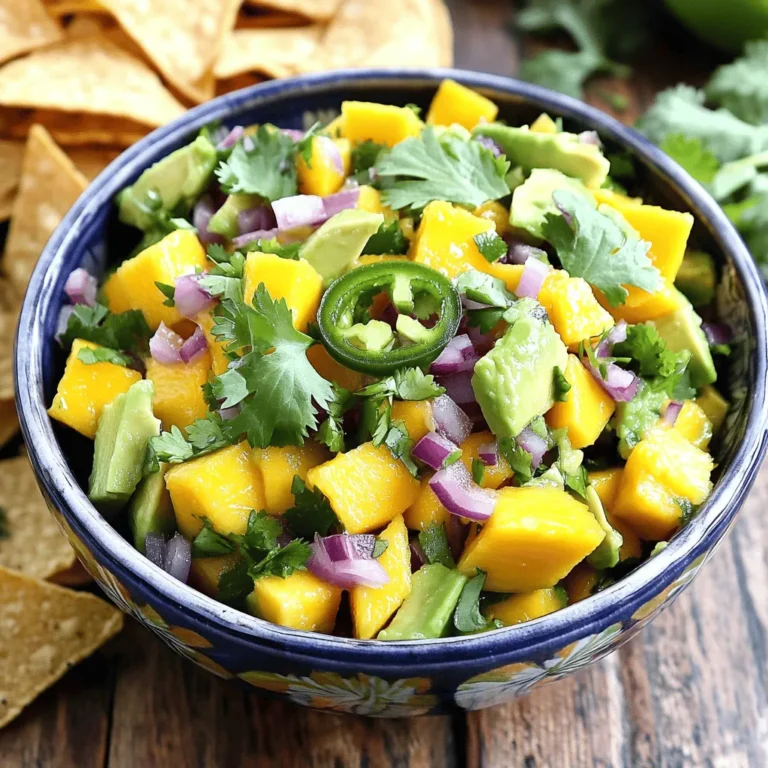
Avocado Mango Salsa Fresh and Flavorful Dip

- 1 ½ cups chocolate graham cracker crumbs - ½ cup unsalted butter, melted - 1 cup creamy peanut butter - 1 cup powdered sugar - 8 oz cream cheese, softened to room temperature - 1 ½ cups whipped cream (or whipped topping) - ½ cup chocolate chips (for garnish) - Chopped peanuts (for garnish) Serving size for this pie is about 8-10 slices. If you need more or less, just adjust the ingredients. For example, double everything for a bigger pie. For the crust, you can swap chocolate graham crackers with regular graham crackers. This will change the flavor a bit but will still taste great. If you want a nut-free option, use crushed cookies instead. If you cannot find creamy peanut butter, try crunchy peanut butter. It adds a fun texture. You can also use almond or cashew butter for a different taste. If you need a dairy-free option, use a non-dairy cream cheese and whipped topping. Just check the labels to ensure they fit your needs. These simple swaps can help you make the pie your own while keeping it delicious! To make the chocolate graham cracker crust, start by mixing the crumbs and melted butter. In a medium bowl, combine 1 ½ cups of chocolate graham cracker crumbs with ½ cup of melted unsalted butter. Stir until it looks like wet sand. This step is key for a great crust. Next, press the mixture into a 9-inch pie dish. Make sure to cover the bottom and up the sides evenly. Use the back of a measuring cup to help you press it down flat. This helps the crust hold together. Chill the crust in the fridge for about 10 minutes. This will firm it up nicely. For the filling, mix 1 cup of creamy peanut butter with 8 oz of softened cream cheese. Use an electric mixer to beat them until smooth. This will create a creamy base for your pie. Next, sift in 1 cup of powdered sugar while mixing. This adds sweetness and makes the filling rich. After that, gently fold in 1 ½ cups of whipped cream. This gives the filling a light, airy texture. Be careful not to deflate the whipped cream; it should stay fluffy. Now it’s time to pour the filling into the chilled crust. Spread it evenly using a spatula. Make sure the top is smooth and nice. This step is important for a beautiful pie. After assembling, return the pie to the fridge. Chill it for at least 2 hours. This helps the filling set properly. When it is firm, your pie will be ready to slice and enjoy! - Overmixing the filling: When you mix the peanut butter and cream cheese, stop when it's smooth. Overmixing can make it too dense. - Not chilling the pie long enough: Be patient! Let the pie chill for at least two hours. This helps the filling set properly. - Tips for making the filling fluffier: Fold the whipped cream gently into the peanut butter mixture. This keeps the filling light and airy. - Serving suggestions for paired toppings: Try adding a drizzle of melted chocolate or a dollop of whipped cream on top. Chopped peanuts also add a nice crunch. - Creative ways to garnish the pie: Sprinkle chocolate chips and chopped peanuts on top. You can also add fresh berries for color. - Plate arrangements for stunning visuals: Serve slices on colorful dessert plates. Drizzle chocolate sauce around the plate for an extra touch. {{image_4}} You can create fun twists on this pie. Try different types of chocolate, like dark or white chocolate. Each type adds a new flavor. You can also substitute peanut butter with almond or cashew butter. This gives the pie a nice nutty taste. Explore these options to find your favorite! Want a vegan pie? Use plant-based cream cheese and whipped topping. Make sure your crust is vegan too. You can use coconut oil instead of butter. For a gluten-free version, swap chocolate graham crackers with gluten-free crumbs. These changes keep the pie tasty and friendly for various diets. Mini no-bake pies are easy to make! Use muffin tins or small jars. This way, each person gets their own pie. You can also turn the pie into parfaits. Layer the filling and crust in glasses for a fun presentation. This makes a great treat for parties or gatherings! To keep your Chocolate Peanut Butter No-Bake Pie fresh, store it in the fridge. Cover it tightly with plastic wrap or foil. This prevents it from absorbing other smells and flavors. If you want to save it longer, you can freeze it. Cut the pie into slices, wrap each piece in plastic, then place them in a freezer-safe bag. This method keeps the pie tasty for later enjoyment. In the fridge, this pie lasts about 4 to 5 days. Always check for signs of spoilage. If the pie looks dry or has an off smell, it’s best to toss it. Mold is another clear sign that the pie is no longer good. When you see these signs, do not eat it. When you’re ready to enjoy your stored pie, thaw it in the fridge overnight. This keeps the texture nice. If you’ve frozen slices, let them sit at room temperature for about 15 minutes before eating. To refresh the pie, add a dollop of whipped cream on top. This makes it look fresh and tasty! The pie needs to chill for at least 2 hours. This allows the filling to firm up nicely. I recommend checking it after this time. If it feels soft, give it more time. Yes, you can use crunchy peanut butter. This will add a nice texture to the pie. It gives little bites of peanut that add fun. The flavor remains rich and nutty, which I love. Cream cheese is important for a creamy texture. However, you can swap it with Greek yogurt or silken tofu. These options will change the taste slightly. They can still keep the pie smooth and delicious. You can definitely add more chocolate! Try adding chocolate syrup or more chocolate chips. Just be careful not to add too much. This can make the pie too heavy and change the texture. This blog post covered everything you need for a delicious no-bake peanut butter pie. We discussed the key ingredients, proper measurements, and tasty variations. I shared step-by-step instructions to guide you through the process and offered tips to avoid common mistakes. With some creativity, you can present this pie beautifully and store it properly. Enjoying this treat can be fun and easy. Now, it's time for you to gather your ingredients and start making your own pie masterpiece!

Chocolate Peanut Butter No-Bake Pie Delightful Treat

PREV 1 … 11 12 13 … 18 NEXT
sweet savory saga

explore

DessertsDinnerAppetizersDrinks

Our Policies

  • Cookie Policy
  • Copyright Policy
  • Disclaimer
  • GDPR Policy
  • Terms Of Use
Back to Top
  • About
  • Contact Us
  • Privacy Policy
© 2025 sweet savory saga