FREE DINNER EBOOK! Get your copy!
  • Cookie Policy
  • GDPR Policy
  • Disclaimer
  • Terms Of Use
  • Visit my other site: Fun Cookie Recipes
sweet savory saga
  • Home
  • Dinner
  • Desserts
  • Drinks
  • Appetizers
  • Contact
  • About
  • Privacy Policy
  • Home
  • Dinner
  • Desserts
  • Drinks
  • Appetizers
  • Contact
  • About
  • Privacy Policy
  • Cookie Policy
  • GDPR Policy
  • Disclaimer
  • Terms Of Use
Visit my other site: Fun Cookie Recipes

HOME / CATEGORIES /

Latest

- 1 cup fresh blackberries - 6 to 8 fresh sage leaves - 1 cup granulated sugar - 1 cup freshly squeezed lemon juice - 4 cups filtered water - Ice cubes - Garnish options Fresh vs. frozen blackberries I always choose fresh blackberries when possible. They bring vibrant flavor and color to your drink. Frozen blackberries can work, but they may lack some freshness. If you use frozen, let them thaw first. Importance of fresh sage Fresh sage adds a unique, earthy note to the lemonade. Dried sage does not have the same bright flavor. Fresh herbs make a big difference in the taste of your drink. Alternatives for sugar You can adjust the sweetness to your taste. If you want a healthier option, try honey or agave syrup. Both will add sweetness and enhance the flavor of the lemonade. For the full recipe, check out the detailed steps in the article. First, grab a medium saucepan. Combine 1 cup of fresh blackberries, 6 to 8 sage leaves, and 1 cup of filtered water. Place the saucepan over medium heat. Bring the mix to a gentle simmer. Let it cook for about 10 minutes. Stir it occasionally. You want the blackberries to soften and release their juices. The smell will be amazing. After 10 minutes, take the saucepan off the heat. Strain the mixture through a fine mesh sieve into a bowl. Press down gently on the solids. This helps to get more liquid out. Discard the solids left in the sieve. Now, let the blackberry-sage syrup cool completely at room temperature. In a large pitcher, combine the cooled blackberry-sage syrup, 1 cup of freshly squeezed lemon juice, and 3 cups of filtered water. Stir well until everything is mixed together. Now, taste the lemonade. If it is not sweet enough, add more sugar little by little. Stir well after each addition. Put the pitcher in the refrigerator. Let it chill for at least 30 minutes. This time helps the flavors blend perfectly. When ready to serve, fill each glass with ice cubes. Pour the cool blackberry sage lemonade over the ice. For a nice touch, garnish with whole blackberries and a fresh sage sprig. Enjoy this refreshing summer drink! For the full recipe, check out the details above. To make your blackberry sage lemonade shine, find the right balance between sweetness and acidity. You want it sweet, but not too sweet. Start with the sugar in the recipe. Taste as you go. Add more sugar if you like it sweeter. If it’s too sweet, add extra lemon juice to bring back the zing. For a stronger flavor, consider using more blackberries. You can also steep the sage longer to boost its herbal notes. You can prepare your syrup up to a week in advance. Store it in an airtight container in the fridge. It keeps well, so you can have it ready for a quick drink. The lemonade tastes best fresh, but you can mix the syrup and lemon juice a day ahead. Just add water before serving. For a beautiful presentation, consider garnishing with fresh blackberries and sage sprigs. You can also rim your glasses with sugar for a fun touch. Use clear glassware to show off the lovely color of the drink. Serve on a nice tray to impress your guests. This drink looks as good as it tastes! {{image_4}} You can change the taste of your blackberry sage lemonade easily. Adding herbs like mint or basil gives a fresh twist. Mint adds coolness, while basil offers a sweet, peppery hint. You can also try different fruits. Strawberries or raspberries work well with blackberries. Mixing fruits creates unique flavors. If you want a healthier option, consider using honey or agave syrup. These sweeteners add flavor without refined sugar. They also have a lower glycemic index. If you want to cut calories, try low-calorie sweeteners like stevia or monk fruit. These options keep your drink sweet without extra calories. You can turn this refreshing drink into a fun cocktail. Adding spirits can elevate the experience. Vodka or gin pairs well with the lemonade. For a more robust flavor, try bourbon. Mix in 1 to 2 ounces of your chosen spirit per glass. Your friends will love this adult version of blackberry sage lemonade. For the full recipe, check out my earlier instructions! You can keep your blackberry sage lemonade in the fridge for up to five days. Just store it in a sealed container. If you make the syrup separately, it lasts longer. The syrup can stay fresh for about two weeks in the fridge. You can freeze the blackberry-sage syrup if you want to save it for later. Pour the cooled syrup into ice cube trays. Once frozen, transfer the cubes to a freezer bag. This way, you can use them whenever you want lemonade. To use the frozen syrup, take out a few cubes and let them thaw in the fridge. You can mix them with fresh lemon juice and water for a quick drink. Enjoy the taste of summer anytime! For the full recipe, check out the main article. You can use sugar substitutes like honey, agave, or stevia. These options give sweetness without adding sugar. Honey adds a floral note, while agave is mild. Stevia is very sweet, so use less. Start with one tablespoon of honey or agave, or a pinch of stevia. Taste and adjust as needed. Yes, but the flavor will change. Dried sage is stronger and more concentrated. Use about one teaspoon of dried sage for each fresh leaf. This helps keep the taste balanced. If you can, use fresh sage for the best flavor. Fresh herbs bring brightness and depth that dried cannot match. Blackberries are high in vitamins C and K. They also have antioxidants that help fight free radicals. Sage has health benefits too. It can support digestion and may help reduce inflammation. Together, these ingredients create a drink that is tasty and good for you. Enjoy this refreshing summer drink while boosting your wellness! In this post, we explored making delicious Blackberry Sage Lemonade. I shared key ingredients, detailed steps, and tips to perfect the drink. You can adjust the flavors, use different sweeteners, and even turn this into a fun cocktail. Remember to store any leftovers properly, ensuring your drink stays fresh. With creativity, you can make this recipe suit any taste. Enjoy experimenting with flavors and impressing friends with your refreshing beverages.

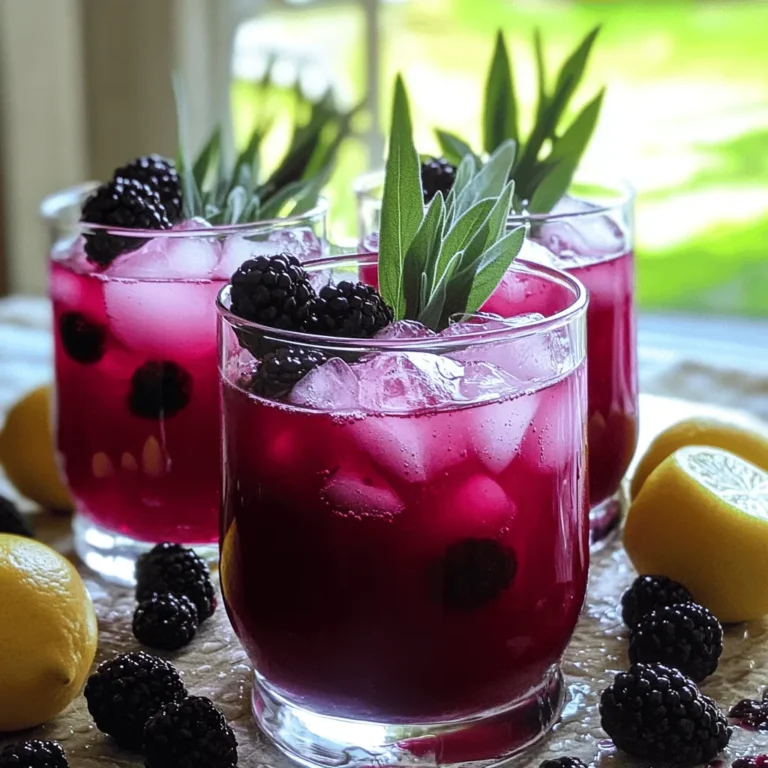
Blackberry Sage Lemonade Refreshing Summer Drink

To make this tasty dish, you'll need the following main ingredients: - 1 lb (450g) boneless, skinless chicken breasts, cut into bite-sized pieces - 2 tablespoons Cajun seasoning - 2 tablespoons olive oil - 1 medium onion, diced - 3 cloves garlic, minced - 1 red bell pepper, sliced - 1 green bell pepper, sliced - 1 can (14 oz) diced tomatoes, with juices - 4 cups chicken broth - 8 oz (225g) penne pasta - 1 cup heavy cream - 1 cup shredded cheddar cheese - 1 cup fresh spinach, roughly chopped - Salt and black pepper to taste - Fresh parsley, chopped (for garnish) These ingredients come together to create a dish full of flavor and comfort. The chicken and veggies mix well with the spices, making every bite special. You can tweak the recipe to fit your taste. Here are some optional ingredients: - 1 cup sliced mushrooms - 1 teaspoon red pepper flakes for heat - 1 cup corn for sweetness - 1 tablespoon lemon juice for brightness Feel free to experiment with these options. They can add a new twist to your meal! Garnishes can make your dish look and taste even better. Here are some ideas: - Extra shredded cheddar cheese - Sliced green onions - Additional fresh parsley - A sprinkle of paprika Adding these garnishes not only enhances the look but also the flavor. Enjoy your One Pot Cajun Chicken Pasta! For the complete cooking steps, check out the Full Recipe. Gather all your ingredients before you start. This makes cooking easier and faster. Here’s what you need: - 1 lb (450g) boneless, skinless chicken breasts, cut into bite-sized pieces - 2 tablespoons Cajun seasoning - 2 tablespoons olive oil - 1 medium onion, diced - 3 cloves garlic, minced - 1 red bell pepper, sliced - 1 green bell pepper, sliced - 1 can (14 oz) diced tomatoes, with juices - 4 cups chicken broth - 8 oz (225g) penne pasta - 1 cup heavy cream - 1 cup shredded cheddar cheese - 1 cup fresh spinach, roughly chopped - Salt and black pepper to taste - Fresh parsley, chopped (for garnish) Start by heating the olive oil in a large pot over medium-high heat. While the oil heats, sprinkle the Cajun seasoning on the chicken pieces. Once hot, add the chicken to the pot. Cook it for 5-7 minutes until it is browned and cooked through. Remove the chicken and set it aside. Next, without cleaning the pot, add the diced onion. Cook it for 2-3 minutes until it turns soft. Then, add the minced garlic along with the sliced bell peppers. Stir this mix for another 3-4 minutes, letting the peppers soften. Now, pour in the diced tomatoes with their juices and the chicken broth. Stir well and bring this mixture to a boil. Once boiling, add the penne pasta to the pot. Lower the heat, cover the pot, and let it simmer for 12-15 minutes. Stir it often to prevent sticking and keep an eye on the pasta. When the pasta is al dente, return the chicken to the pot. Stir in the heavy cream and shredded cheddar cheese. Mix until everything is creamy and well combined. Fold in the fresh spinach and cook for another minute, just until the spinach wilts. Finally, taste and adjust with salt and black pepper. Serve the Cajun chicken pasta hot, topped with fresh parsley for a pop of color. Enjoy your rich, flavorful meal! For the complete recipe, check out the Full Recipe section. To cook pasta well, use a large pot. Fill it with water and add salt. This helps flavor the pasta. Bring the water to a boil before adding your pasta. Stir the pasta often to prevent it from sticking. Cook it until it's al dente, firm yet tender. Follow the cooking time on the package for best results. Drain the pasta once cooked, but save some pasta water. This starchy water can help thicken your sauce later. Cajun flavors shine with a few key steps. Start with a good Cajun seasoning. Use a blend that includes paprika, cayenne, and thyme for a great kick. Don’t be shy about using garlic and onions; they add depth. Fresh peppers bring sweetness and crunch. Adding diced tomatoes enhances the dish’s richness. For an extra touch, finish with fresh parsley and a squeeze of lemon juice. This brightens the dish and balances the spices. Avoid cooking pasta in too little water. This leads to uneven cooking. Don’t skip the salt; it’s key for flavor. Make sure your chicken is cooked through; no one wants undercooked meat. When adding cream, turn down the heat to prevent curdling. Not stirring pasta in the pot can lead to sticking. Lastly, always taste before serving. Adjust seasoning based on your preference. These small steps make a big difference in your meal. For the full recipe, check out the detailed guide to One Pot Cajun Chicken Pasta. {{image_4}} You can make Cajun pasta without meat and keep it tasty. Just swap the chicken for vegetables. Use hearty veggies, like mushrooms, zucchini, or eggplant. You can also add chickpeas for protein. The Cajun seasoning stays the same, bringing that flavorful kick. Add more colorful bell peppers and fresh spinach to keep it vibrant. If you want to mix things up, try different proteins. Shrimp works great in Cajun pasta. Cook it quickly after the veggies for a nice flavor. You can also use sausage for a hearty twist. Just slice it and add it with the chicken. For a lighter option, turkey can replace chicken too. For a gluten-free meal, swap out regular pasta for gluten-free options. Brown rice pasta or quinoa pasta are excellent choices. These options cook differently, so check the package for timing. You can still enjoy all the flavors of Cajun chicken pasta while keeping it gluten-free. Just make sure to watch your cooking times closely to keep everything perfect. For the full recipe, refer to the [Full Recipe]. To store leftovers, let the One Pot Cajun Chicken Pasta cool completely. Use airtight containers for best results. This helps keep the dish fresh. You can store it in the fridge for up to three days. If you want to keep it longer, consider freezing it. When you are ready to eat, take out the pasta. You can reheat it in the microwave or on the stove. For the microwave, place it in a bowl and cover it. Heat it for about two to three minutes. Stir halfway through for even heating. On the stove, add a splash of chicken broth to a pot. Heat it on low, stirring until warm. This keeps the pasta creamy and delicious. Freezing is a great way to save this meal for later. Make sure it is completely cool before you freeze it. Place the pasta in freezer-safe bags or containers. Remove as much air as possible. This helps prevent freezer burn. You can freeze it for up to three months. When you’re ready to eat, thaw it overnight in the fridge. Reheat as mentioned above for the best taste. If you follow these tips, your Cajun chicken pasta will still taste great! Cajun seasoning is a mix of spices. It usually has paprika, cayenne, garlic powder, and herbs. This blend gives dishes a bold and spicy flavor. You can find it in stores or make your own at home. Adjust the spice levels to your taste for a perfect kick. Yes, you can use frozen chicken. Just make sure to thaw it first for even cooking. If you add it frozen, cooking time will increase. Aim for an internal temperature of 165°F (75°C) to ensure safety. To add heat, increase the Cajun seasoning. You can also add sliced jalapeños or red pepper flakes. For a smoky flavor, try smoked paprika. Always taste as you go. Adjust spice to suit your preference for a deliciously fiery meal. For the full recipe, check out the ingredients and steps to create this dish. One Pot Cajun Chicken Pasta is a fun and easy dish to make. We covered the key ingredients and how to customize them for your taste. I shared steps for prep and cooking, plus tips to avoid errors. You learned about variations, storage, and frequently asked questions. In the end, this dish is versatile and delicious. It’s perfect for busy days or family dinners. Enjoy trying out different flavors and ingredients, and don’t be afraid to make it your own. Happy cooking!

One Pot Cajun Chicken Pasta Quick and Tasty Meal

- 2 cups fresh blackberries - 1 cup freshly squeezed lemon juice (approximately 4-5 medium lemons) - 1/2 cup granulated sugar - 2 cups water, divided - Zest of 1 lemon - Fresh mint leaves for garnish (optional) I love the burst of flavor blackberries bring. They give a sweet and tart taste that pairs well with lemon. Fresh blackberries are key for the best flavor. You can also use frozen blackberries, but fresh ones taste better. Squeezing your lemons is important too. Use 4 to 5 medium lemons to make one cup of juice. The zest adds more lemon flavor. You need sugar to sweeten the mix. Adjust the amount to match your taste. Water helps to balance the flavors. You will divide it into two cups. One cup goes with the blackberries and the other with the lemonade. Optional mint leaves make a nice touch for garnish. This recipe is simple and fun to make. Enjoy creating this refreshing treat on a hot day! For the full recipe, check out the instructions provided earlier. First, grab a medium saucepan. Combine 2 cups of fresh blackberries with 1 cup of water. Heat this mixture on medium flame. Stir it occasionally. After about 5 to 7 minutes, the blackberries will soften. You will see the juices release, and the mix will get syrupy. Next, take a fine mesh sieve. Carefully pour your cooked blackberry mixture through it into a bowl. Use a spoon to press down on the solids. This step helps you extract as much juice as possible. Discard the solids left in the sieve. You should now have rich, flavorful blackberry juice. In the same saucepan, add the remaining ingredients. Combine 1 cup of water, 1 cup of freshly squeezed lemon juice, 1/2 cup of granulated sugar, and the zest of 1 lemon. Heat this mix on medium, stirring often. Keep stirring until the sugar fully dissolves. Once dissolved, remove it from heat and let it cool slightly. Once both the blackberry juice and lemonade have cooled to room temperature, combine them in a large pitcher. Stir the two mixtures well. Take a moment to taste it. If you want it sweeter, add more sugar until you get your perfect balance. Carefully pour the mixture into popsicle molds. Leave a small gap at the top of each mold. This space allows for expansion as they freeze. If your molds do not come with sticks, insert wooden popsicle sticks into the center of each one. After at least 6 hours, check if the popsicles are solid. To remove them, run warm water over the outside of the molds for a few seconds. This helps loosen them. Gently pull the popsicles out and serve them right away for the best taste. Enjoy this refreshing treat! To get the best texture in your blackberry lemonade popsicles, cooling the mixtures is key. After you cook the blackberries, let them cool to room temperature. This helps the flavors blend better and ensures a smooth popsicle. Next, adjust the sweetness to your taste. Start with half a cup of sugar, but feel free to add more if you like it sweeter. Tasting the mixture before freezing helps you find the perfect balance. Presentation matters, especially for a fun treat like popsicles. Garnish your popsicles with fresh mint leaves. This adds a pop of color and a hint of freshness. You can also drizzle some leftover blackberry syrup over the popsicles before serving. It adds extra flavor and looks beautiful on a platter. Using the right tools can make your popsicle-making easier. For molds, silicone popsicle molds work best. They help pop the treats out easily. You’ll also need a fine mesh sieve for straining the blackberry juice. A medium saucepan is essential for cooking the berries and making the lemonade. These tools will set you up for success in creating your delicious popsicles. For the full recipe, check out the detailed steps above. {{image_4}} You can make these blackberry lemonade popsicles even more fun by adding other fruits. Strawberries and raspberries mix well with blackberries. Their sweet and tart flavors blend nicely. You can mash them or slice them and add them to the mixture before freezing. Another tasty option is using different citrus juices. Try lime or orange juice for a fresh twist. Each fruit brings its unique taste, making your popsicles even more exciting. For those watching their sugar intake, there are easy swaps. You can use sugar substitutes like stevia or monk fruit. They add sweetness without the calories. If you want a different base, try coconut water instead of regular water. Coconut water adds a hint of tropical flavor. You can also use herbal teas, like chamomile or mint, for a refreshing twist. These options keep your popsicles delicious and a bit healthier. To add depth to your popsicles, consider flavor infusions. Fresh herbs like basil or rosemary can make the popsicles unique. Just add a few leaves to the mixture before blending. The herbs add a nice scent and flavor. Another option is mixing in flavored extracts. A drop of vanilla or almond extract can enhance the taste. Experiment with different combinations to find your favorite. Each infusion can turn a simple popsicle into a gourmet treat. For the full recipe, check out [Full Recipe]. To keep your popsicles fresh, freeze them for up to eight weeks. This time frame offers the best taste and texture. If you plan to keep them longer, wrap the molds in plastic wrap or foil. This helps prevent freezer burn. Freezer burn can ruin the flavor, making them taste bland. Cleaning popsicle molds is easy. Just wash them with warm, soapy water. Rinse well to remove all soap. To remove popsicles easily, let them sit at room temperature for a minute. You can also run warm water over the outside of the molds. This trick helps loosen the popsicles for a smooth release. To check if your popsicles are still good, look for ice crystals or a strange odor. These signs mean they may have gone bad. If they look or smell off, it's best to toss them. The recommended shelf life for these popsicles is about two months in the freezer. Enjoy them while they're fresh for the best taste! Yes, you can use frozen blackberries. They are convenient and easy to find. However, frozen blackberries may have a different taste and texture. Fresh blackberries taste brighter and have more juice. You might notice that the texture is a bit softer when using frozen ones, but they still work well for popsicles. You can use natural sweeteners. Honey or maple syrup is a great choice. You can also try agave nectar. These options add sweetness without refined sugar. Just remember to adjust the amount based on your taste. Start with less, and add more if needed. Absolutely! These popsicles are great for making ahead of time. You can prepare them a few days in advance. Just store them in the freezer until you're ready to enjoy. This way, you always have a cool treat on hand. If your popsicles are hard to remove, don't worry. There are simple tricks. Run warm water over the molds for a few seconds. This helps loosen them. You can also twist the molds gently to release the popsicles. If they still stick, let them sit at room temperature for a minute. Then, try again. Enjoy your popsicles without the fuss! Blackberry lemonade popsicles are easy and fun to make. We covered the main ingredients, step-by-step instructions, and tips for the best texture. You can also explore fruit variations or health-conscious options. Remember to use proper freezing techniques and check for spoilage. These tasty treats will cool you off all summer. Enjoy making them and share them with friends! You’ll love watching smiles as each popsicle gets devoured.

Blackberry Lemonade Popsicles Refreshing Summer Treat

- 4 chicken thighs, bone-in and skin-on - 1/4 cup honey - 1/4 cup low sodium soy sauce - 3 garlic cloves, minced - 1 tablespoon fresh ginger, grated - 1 tablespoon apple cider vinegar - 1 teaspoon sesame oil - 1/2 teaspoon freshly ground black pepper - 2 green onions, finely chopped (for garnish) - Sesame seeds (for garnish) To make honey garlic chicken thighs, you need simple yet rich flavors. Chicken thighs are juicy and perfect for this dish. Honey adds sweetness, while soy sauce brings saltiness. Fresh garlic and ginger give a nice kick. Apple cider vinegar adds a touch of tang. Sesame oil adds depth, and black pepper rounds it out. - Baking dish - Mixing bowl and whisk - Meat thermometer Using the right tools makes cooking easier. A baking dish holds the chicken while it cooks. A mixing bowl and whisk help mix the marinade well. A meat thermometer ensures your chicken reaches the right temperature. These tools help create a flavorful and safe meal. For the complete cooking process, check the Full Recipe. To make the marinade, mix these ingredients in a bowl: - 1/4 cup honey - 1/4 cup low sodium soy sauce - 3 garlic cloves, minced - 1 tablespoon fresh ginger, grated - 1 tablespoon apple cider vinegar - 1 teaspoon sesame oil - 1/2 teaspoon freshly ground black pepper Whisk them together until they blend well. This blend gives the chicken a sweet and savory taste. Marinating is key. Let the chicken soak for at least 15 minutes. If you have time, let it marinate for up to an hour. The longer it sits, the better the flavor. Now, it’s time to bake the chicken thighs. First, preheat your oven to 375°F (190°C). Next, arrange the chicken thighs in a baking dish. Pour the honey garlic marinade over them. Make sure every piece is coated. Bake for 30 to 35 minutes. Check that the chicken's internal temperature hits 165°F (74°C). The skin should look golden and crispy. It’s all about that perfect bake! As the chicken cooks, baste it in the last 10 minutes. Use the marinade for extra flavor. This gives the chicken a sticky glaze that’s hard to resist. After baking, take the chicken out and let it rest for about 5 minutes. This helps the juices stay in the meat. For the final touch, garnish with green onions and sesame seeds. This adds color and crunch. Follow this guide for your Honey Garlic Chicken Thighs and enjoy a delicious meal. For the complete method, check the Full Recipe. For that crispy skin, start with dry chicken thighs. Pat them with a paper towel. This helps the skin crisp up nicely. Use a hot oven set to 375°F. If you want more crunch, broil it for the last few minutes. Check the chicken's internal temperature. It should reach 165°F to ensure safety. Use a meat thermometer for accuracy. This will help you avoid undercooked or dry chicken. Marinate your chicken thighs for at least 15 minutes. This gives the flavors time to soak in. For deeper taste, let them sit for an hour. You can also add extra flavors, like crushed red pepper or lemon juice. These tweaks can make the dish pop with more taste. When serving, arrange the chicken thighs on a nice platter. Drizzle any leftover sauce over the top. This adds shine and flavor. Top the dish with green onions and sesame seeds for color. For sides, serve with jasmine rice or stir-fried veggies. These pair well with the sweet and sticky chicken. Check out the Full Recipe for more details on making this dish shine. {{image_4}} You can switch up the protein in this dish. Chicken breast works well for a leaner option. Drumsticks are also great if you want more flavor. Each protein brings a unique taste and texture. You can create alternative marinades too. Try using maple syrup instead of honey for a deeper flavor. A citrus marinade with lime juice adds a bright twist. Soy sauce’s salty notes blend well with many proteins. If you enjoy heat, add chili flakes to the marinade. Start with half a teaspoon and adjust to your taste. You can also use spicy sauces like sriracha or gochujang. They give a nice kick and add depth to the dish. Another option is to marinate the chicken in a spicy garlic sauce. This adds flavor and heat. Experiment with different spice levels until you find your perfect balance. You can cook honey garlic chicken on the stovetop too! Using a skillet gives a nice sear. Start by heating oil in the pan and browning the chicken. Then, pour the marinade over and cover. Oven baking is easier for larger batches. It cooks evenly and keeps the chicken juicy. Both methods work well; it depends on your preference. Try both to see which you like best! For the complete dish, check the Full Recipe. After enjoying your honey garlic chicken thighs, store any leftovers right away. Place them in an airtight container. This helps keep the chicken moist and full of flavor. Make sure to refrigerate the chicken within two hours of cooking. It will stay fresh for up to three days. To reheat the chicken thighs, use the oven for the best results. Preheat the oven to 350°F (175°C). Place the chicken on a baking sheet. Cover it with foil to keep it from drying out. Heat for about 15-20 minutes. You can also use a microwave. Just make sure to cover it, and heat in short bursts. This will keep the chicken tender and juicy. If you want to freeze your honey garlic chicken thighs, do so within two days. Wrap each piece tightly in plastic wrap. Then place them in a freezer bag. Try to remove as much air as possible. They can stay good for up to three months. When ready to eat, thaw the chicken in the fridge overnight. This keeps the flavor intact. You can pair Honey Garlic Chicken Thighs with several tasty sides. Here are some ideas: - Fluffy jasmine rice - Steamed broccoli - Stir-fried mixed vegetables - Creamy mashed potatoes - Fresh garden salad These sides will complement the sweet and savory flavors of the chicken. They will also add color and texture to your meal. Yes, you can prepare this dish ahead of time. Here are some meal-prepping tips: - Marinate the chicken thighs a day before. - Store the marinated chicken in the fridge. - Bake the chicken on the day you plan to serve it. This method will save you time. You can enjoy a delicious meal without stress. To keep chicken thighs juicy, follow these key tips: - Use bone-in, skin-on thighs for more flavor. - Marinate the chicken for at least 15 minutes. - Bake at the right temperature and time. Check the internal temperature with a meat thermometer. It should be 165°F (74°C). This ensures the chicken is cooked perfectly without drying out. You can easily adjust the sweetness of the dish. Here are some tips: - Use less honey if you prefer it less sweet. - Add a splash of soy sauce for a savory balance. - Mix in some lime juice for a tangy kick. These adjustments will help you find the right flavor balance for your taste. This post covered everything you need for perfect honey garlic chicken thighs. You learned about key ingredients like chicken thighs, honey, and soy sauce, and how to prepare your marinade. We discussed baking, cooking times, and resting your chicken for the best flavor. Remember to use proper storage techniques to enjoy leftovers. You can even explore variations to keep things fresh. With these tips and tricks, you will create a delicious meal every time. Enjoy your cooking!

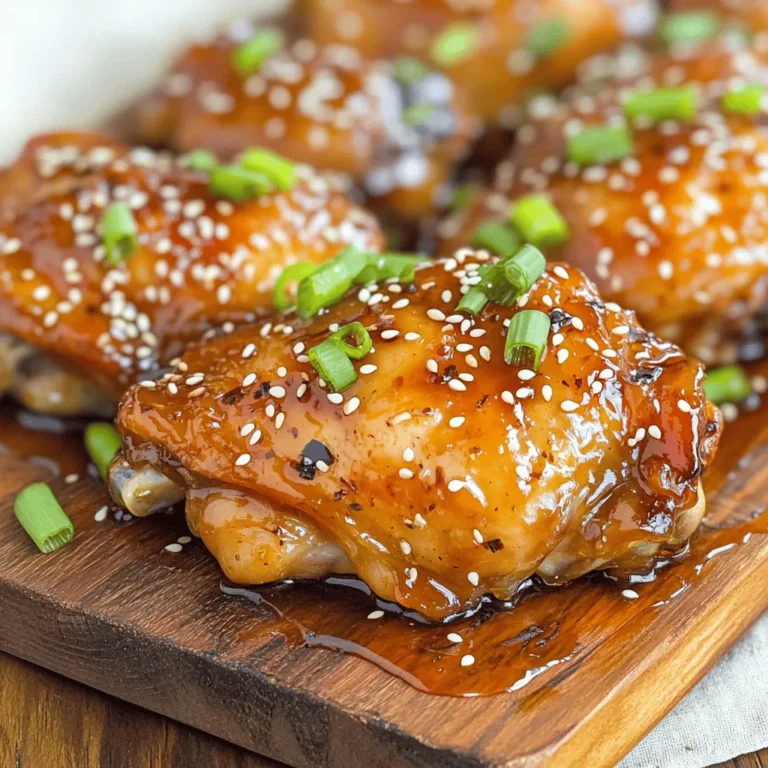
Honey Garlic Chicken Thighs Flavorsome Easy Recipe

- 1 lb large shrimp, peeled and deveined - 2 tablespoons chipotle chili powder - 1 teaspoon garlic powder - 1 teaspoon ground cumin - Zest and juice of 1 lime - 2 tablespoons olive oil - Salt and freshly ground pepper to taste - 8 small corn tortillas - 1 cup red cabbage, finely shredded - 1 ripe avocado, diced - 1/2 cup fresh cilantro, roughly chopped - 1/4 cup sour cream or Greek yogurt - 1 tablespoon lime juice (for the dressing) You need some great ingredients for chipotle lime shrimp tacos. First, the shrimp brings a sweet taste. The chipotle chili powder adds heat. Garlic powder enhances the flavor. Cumin gives it a warm earthiness. Next, zesting and juicing a lime brightens the whole dish. Olive oil helps the spices stick to the shrimp. Don’t forget salt and pepper; they balance the flavors. For the tacos, small corn tortillas work best. They are soft and tasty. Red cabbage adds crunch and color. Avocado brings creaminess. Fresh cilantro gives a burst of freshness. The sour cream or Greek yogurt adds a nice tang. A little lime juice in the dressing makes it zesty. For the full recipe, check the cooking section. Enjoy your cooking adventure! - Combine chipotle chili powder, garlic powder, ground cumin, lime juice, olive oil, salt, and pepper. - Add shrimp and toss to coat. - Marinate for 20-30 minutes. First, you need to make a marinade for the shrimp. Mix the chipotle chili powder, garlic powder, and ground cumin in a large bowl. Next, squeeze the lime juice and add the olive oil. Sprinkle in some salt and pepper to taste. Whisk everything together until smooth. Now, add the shrimp. Toss them gently to coat in the marinade. Cover the bowl and let it sit in the fridge for 20 to 30 minutes. This makes the shrimp full of flavor. - Mix sour cream or Greek yogurt with lime juice. - Stir until smooth and set aside. While the shrimp marinates, prepare the lime dressing. In a small bowl, mix the sour cream or Greek yogurt with a tablespoon of lime juice. Stir until it is smooth and creamy. Set it aside for later. This dressing adds a nice tang to the tacos. - Heat skillet over medium-high heat. - Cook shrimp for 2-3 minutes on each side until pink. - Remove skillet from heat. Now, it’s time to cook the shrimp. Heat a skillet over medium-high heat. Once hot, add the marinated shrimp. Cook them for 2 to 3 minutes on each side. They will turn a beautiful pink when done. Remove the skillet from the heat. The shrimp will be juicy and packed with flavor. - Warm corn tortillas in the same skillet for 30 seconds on each side. In the same skillet, quickly warm the corn tortillas. Place them in the pan for about 30 seconds on each side. This makes them soft and ready for filling. - Lay shrimp on tortillas, top with cabbage, avocado, cilantro, and drizzle dressing. To build the tacos, lay the cooked shrimp on each warm tortilla. Top with shredded cabbage, diced avocado, and fresh cilantro. Finally, drizzle the lime dressing on top. This adds a creamy finish and bright flavor. Enjoy your delicious chipotle lime shrimp tacos! For the full recipe, refer to the section above. - Use fresh lime juice for a brighter flavor. Fresh juice adds a zing that enhances the dish. - Allow shrimp to marinate longer for a deeper taste. Marinating for 30 to 60 minutes helps the flavors soak in. - Ensure shrimp are not overcrowded in the skillet for even cooking. This helps them cook properly and stay juicy. - Adjust cooking time based on shrimp size. Larger shrimp may need an extra minute or two to cook through. - Serve with lime wedges for extra flavor. Squeezing fresh lime on top brightens each bite. - Pair with sides like rice or beans for a complete meal. This makes your meal more filling and satisfying. For the full recipe, check out the complete instructions and details. {{image_4}} You can switch the shrimp for chicken or tofu. Both work well and taste great. If you want a different texture, use flour tortillas instead of corn. This small change can make a big difference in how your tacos feel. Want some heat? Add pickled onions or jalapeños. They bring a nice kick to your tacos. You can also top your tacos with your favorite salsa. This adds even more flavor and makes them extra tasty. If you want to make it dairy-free, skip the sour cream. You can use a plant-based alternative instead. For a gluten-free option, choose gluten-free tortillas. This way, everyone can enjoy these tacos without worry. Refrigerate your tacos in an airtight container for up to 2 days. This keeps them fresh. For the best taste and texture, store shrimp and toppings separately. The shrimp will stay juicy, and the veggies will remain crunchy. You can freeze marinated shrimp before cooking. This is great for quick meals later. However, tacos are best enjoyed fresh. If you have extras, you can freeze them without toppings. Just remember to wrap them well. To reheat shrimp, use a skillet over low heat. This helps keep them tender. Warm tortillas in a pan or microwave to soften them. This way, they will be easy to fold around the shrimp. Enjoy your flavorful chipotle lime shrimp tacos! For the full recipe, check out the detailed instructions above. Yes, just make sure to thaw and drain before marinating. Frozen shrimp works well if you prepare it right. Thawing helps the shrimp absorb the marinade better. Add more chipotle powder or include diced jalapeños as toppings. Both options give the tacos a nice kick. If you love heat, try both for extra flavor. Suggested sides include Mexican rice, beans, or a fresh salad. Each side adds a unique taste and texture. You can mix and match to find what you love best. Shrimp should be pink and opaque when done, typically taking 2-3 minutes per side. This quick cooking time keeps the shrimp tender and juicy. You can check by cutting one in half; it should not be translucent. You can add cheese, lettuce, or corn for variety. Each topping brings its own flavor, making your tacos even more delicious. Feel free to get creative with what you have on hand. For the full recipe, please refer to the main article. These chipotle lime shrimp tacos combine bold flavors with fresh ingredients. You learned about main and additional ingredients, step-by-step cooking methods, and tasty variations. Try different proteins and toppings to suit your taste. Remember to store leftovers properly for the best experience. Enjoy cooking and sharing these tacos with family and friends. They will love the flavors!

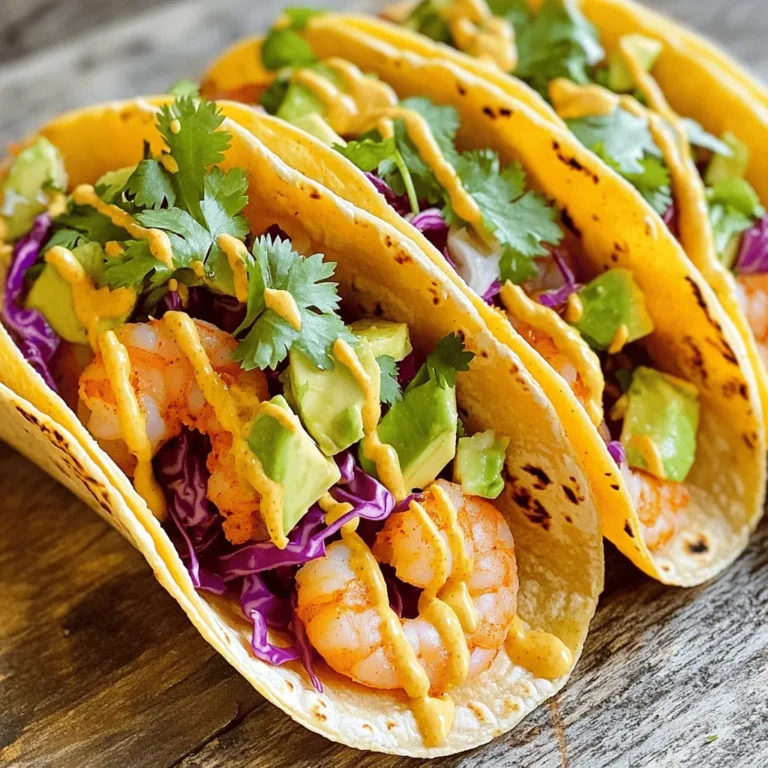
Chipotle Lime Shrimp Tacos Flavorful and Fresh Delight

To make the Cherry Pie Cheesecake Dip, you need a few simple ingredients. Each one adds to the flavor and texture, making this dip a treat. Here’s what you’ll need: - 1 package (8 oz) cream cheese, softened to room temperature - 1 cup powdered sugar, sifted for smoothness - 1 teaspoon pure vanilla extract - 1 cup whipped cream (or whipped topping like Cool Whip) - 1 cup cherry pie filling - 1 teaspoon almond extract for a nutty undertone - 1 cup graham cracker crumbs for a crunchy texture - Fresh cherries or sprigs of mint leaves for garnish Each ingredient plays a role in creating a rich and creamy dip. Cream cheese gives it that smooth base. Powdered sugar adds sweetness, while vanilla and almond extracts enhance the flavor. The whipped cream helps to keep it light and airy. Cherry pie filling adds a burst of fruity goodness, and graham cracker crumbs provide a satisfying crunch on top. Garnishes like fresh cherries or mint leaves make it look pretty, too. If you want the full recipe, check out the detailed steps later! 1. Mixing cream cheese: Start by taking your softened cream cheese and placing it in a mixing bowl. Use an electric mixer to beat the cheese for about 2-3 minutes. You want it to be smooth and creamy. 2. Incorporating powdered sugar and vanilla: Next, add the sifted powdered sugar and vanilla extract into the bowl. Mix on low speed until it is well combined. This should take about 2 more minutes. Your mix should be free of lumps. 3. Folding in the whipped cream: Now, gently fold in the whipped cream with a spatula. Take care not to deflate it. The dip should remain light and fluffy for the best texture. 1. Preparing each layer: Grab a decorative serving dish. Take half of the cherry pie filling and spoon it evenly into the bottom. This creates a nice base layer. 2. Layering cherry filling and cheesecake dip: Next, spread the prepared cheesecake dip over the cherry filling. Make sure to smooth out the top for an even look. 3. Final touches with graham cracker crumbs: Pour the rest of the cherry pie filling over the cheesecake layer. Spread it evenly for a beautiful look. Then, sprinkle the graham cracker crumbs on top. This adds a crunchy texture that everyone will love. 4. Garnish for color: To finish, garnish with fresh cherries or sprigs of mint. This adds a pop of color and makes the dip even more inviting. For the full recipe, check out the details above. Enjoy this easy and tasty treat! For the best experience, serve your Cherry Pie Cheesecake Dip with graham crackers, fresh fruit, or even pretzels. These options add crunch and flavor. You can also use apple slices for a fresh twist. Choose a colorful bowl to highlight the beautiful layers. It makes your dip look even more appealing! You can change ingredients to fit your needs. For a dairy-free version, use vegan cream cheese and whipped topping. If you want a gluten-free dip, swap graham crackers for gluten-free options. To adjust sweetness, add more powdered sugar if you like it sweeter. If you prefer less sweetness, reduce the sugar. You can also try different extracts for flavor. Use vanilla or coconut for a fun twist! {{image_4}} You can switch up the fruit filling in your dip. Try using strawberry or blueberry for a new twist. Each fruit brings its own taste and color. You can also explore different extracts. Vanilla adds warmth, while coconut gives a tropical vibe. Both can enhance the flavor, making each bite exciting. Just a small change can make a big difference in your dip. If you need a gluten-free option, use gluten-free graham crackers. They taste great and keep the crunch. For a dairy-free version, swap cream cheese for a plant-based cream cheese. Use coconut whipped cream instead of regular whipped cream. These changes keep the dip creamy and delicious without dairy. With these variants, everyone can enjoy this tasty treat! To keep your Cherry Pie Cheesecake Dip fresh, store it in the fridge. Use an airtight container. This helps prevent the dip from absorbing other odors. If you want to freeze it, place it in a freezer-safe container. Leave some space at the top. This allows for expansion as it freezes. In the fridge, your dip stays fresh for about three days. Look for changes in texture or smell. If it seems slimy or has an off odor, it's time to toss it. For the frozen dip, it can last up to two months. Just remember to thaw it in the fridge before serving. Storing it correctly ensures you enjoy every creamy, cherry bite! For the Full Recipe, check the earlier section. Can I make this dip ahead of time? Yes, you can make this dip ahead of time. I recommend making it a few hours before your event. This allows the flavors to blend well. Just cover it tightly and store it in the fridge. Serve it cold for the best taste. How long does Cherry Pie Cheesecake Dip last? Cherry Pie Cheesecake Dip lasts about 3 to 5 days in the fridge. Keep it covered to maintain freshness. If it looks or smells off, it's best to throw it away. What can I serve with Cherry Pie Cheesecake Dip? You can serve this dip with several tasty options. Try graham crackers, pretzels, or fresh fruit like apple slices. This makes for fun and interactive eating! Can I use homemade cherry pie filling? Absolutely! Homemade cherry pie filling works great in this recipe. It adds a personal touch to the dip. Plus, you can adjust the sweetness to your liking. Is this recipe suitable for a crowd? Yes, this recipe is perfect for a crowd. It makes enough for 6 to 8 servings. You can easily double the recipe to serve more people. Just make sure you have enough dippers! This blog post detailed how to make a delicious Cherry Pie Cheesecake Dip. We covered all the ingredients, from cream cheese to cherry pie filling. I shared step-by-step instructions to guide you through mixing, layering, and finishing touches. You also learned tips for serving and variations to fit your taste. In conclusion, this treat is easy to make and customizable. Enjoy it with friends or at gatherings. Happy dipping!

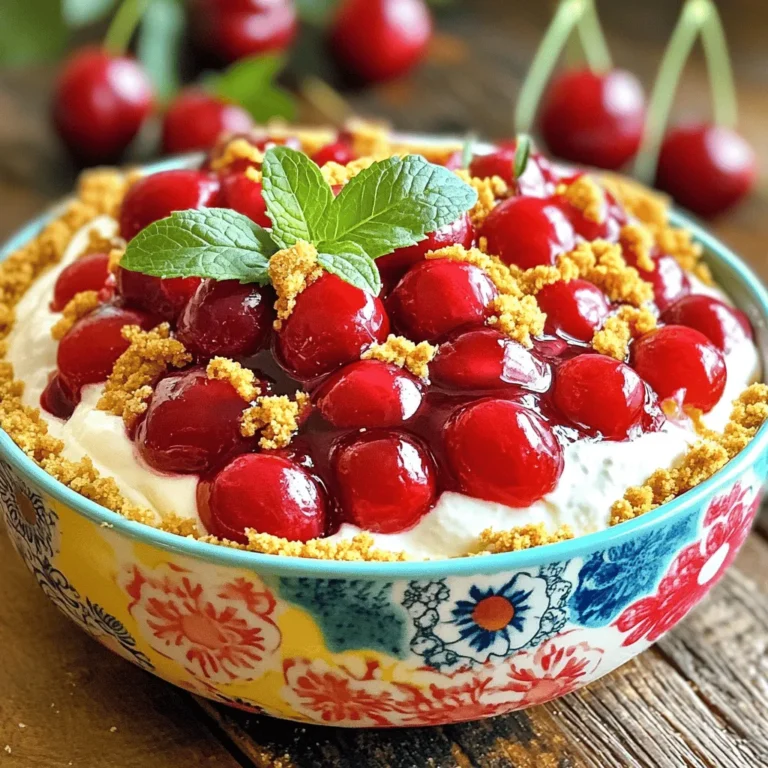
Cherry Pie Cheesecake Dip Delightful and Easy Treat

- 1 cup plain Greek yogurt (low-fat) - 1 cup low-fat cream cheese (softened to room temperature) - 3 tablespoons honey or pure maple syrup - 1 teaspoon pure vanilla extract - 2 cups mixed berries (strawberries, blueberries, raspberries) - 1 cup granola (nutty or berry-flavored) - Optional: fresh mint leaves for garnish The main ingredients create a creamy base for your parfaits. Greek yogurt adds protein and tanginess. Softened cream cheese gives a rich mouthfeel. Honey or maple syrup sweetens the mixture. Vanilla extract adds depth and warmth. Fresh produce is key for flavor. The mixed berries bring sweetness, tartness, and vibrant color. They make your parfaits pop with freshness. Granola adds crunch, making each bite exciting. It complements the creamy and fruity layers perfectly. For a touch of elegance, add fresh mint leaves. They brighten the look and offer a hint of flavor. These simple ingredients make a delightful treat that is both healthy and satisfying. {{ingredient_image_2}} - In a large bowl, combine 1 cup of soft cream cheese and 1 cup of Greek yogurt. - Add 3 tablespoons of honey or maple syrup and 1 teaspoon of vanilla extract. - Whisk or beat until you have a smooth, creamy mix. Make sure there are no lumps left. - Grab your serving glasses or jars. Start with a generous spoonful of the cheesecake mix for the first layer. - For the second layer, add 2 cups of mixed berries. Use strawberries, blueberries, and raspberries. - Sprinkle a bit of granola on top for the third layer. This adds a nice crunch. - Keep layering: cheesecake mixture, berries, and granola until you fill each glass. - Finish with a lovely layer of berries on top. - Cover your parfaits and chill them in the fridge for at least 30 minutes. This helps the flavors blend. To get a smooth cheesecake mixture, start with softened cream cheese. This helps blend easily with Greek yogurt. Use a whisk or an electric mixer on low speed. Mix until no lumps remain. This step ensures a creamy texture. A smooth mixture makes for a delightful parfait. For an elegant look, use clear glass jars. This showcases the layers beautifully. Place your parfaits on a decorative platter. Add extra berries around the base for flair. Consider pairing with a drizzle of honey or a sprinkle of nuts for added flavor. These small touches elevate your dessert. You can swap ingredients to fit your diet. Try dairy-free yogurt for a vegan option. Use agave syrup instead of honey if you prefer. For toppings, consider shredded coconut or dark chocolate chips. These add fun flavors and textures. Enjoy making your parfaits your own! Pro Tips Use Fresh Ingredients: Always opt for fresh, in-season berries to enhance the flavor and nutritional value of your parfaits. Experiment with Flavors: Feel free to mix different flavors of yogurt or add a splash of lemon juice for a zesty kick to the cheesecake mixture. Make Ahead: These parfaits can be prepared a day in advance. Just remember to keep the granola separate until serving for that crunchiness. Presentation Matters: Use clear glasses or jars to showcase the beautiful layers. A decorative platter with extra berries can elevate the overall look. {{image_4}} You can switch up the flavors for fun. Try a chocolate protein version! Just add cocoa powder to the cheesecake mix. This gives it a rich, chocolate taste. You can also use chocolate granola for extra crunch. Another great option is a citrus-infused cheesecake parfait. Add lemon or orange zest to the cheesecake mixture. It adds a bright, zesty flavor that pairs well with berries. You can even drizzle some citrus juice over the berries for more zing. If you need gluten-free options, use gluten-free granola. This lets everyone enjoy the parfaits without worry. There are many tasty brands available in stores. For toppings, consider using fresh fruit or nuts. You can also try coconut flakes or seeds. These options are safe for those with gluten sensitivity and add nice textures to the dish. You can make this parfait vegan with simple swaps. Use dairy-free cream cheese and yogurt. Cashew or almond-based versions work well. They have similar textures and flavors. For sweeteners, opt for maple syrup or agave nectar. These plant-based sweeteners add a lovely touch. You can also try mashed bananas for natural sweetness. They blend nicely into the cheesecake mixture. To keep your parfaits fresh, store them in airtight containers. This keeps moisture out and flavors in. You can use glass jars or plastic containers. They stay good in the fridge for up to three days. After that, the berries may lose their texture and flavor. If you want to freeze the parfaits, first, layer them in freezer-safe containers. Leave some space at the top since they will expand when frozen. They can last for up to a month in the freezer. Before serving, take them out and thaw them in the fridge overnight. This way, they stay creamy and tasty. Enjoy your delicious treats anytime! This recipe makes 4 to 6 parfaits. You can adjust the portions based on your needs. Each serving is packed with flavor and nutrition. Yes, you can prepare these parfaits ahead. Just make them 30 minutes before serving or even a day in advance. Store them in the fridge. They stay fresh and tasty. Each parfait has about 200 calories and 10 grams of protein. This makes them a healthy treat. They offer a good balance of nutrients without being heavy. Yes, you can use frozen berries! They work well in parfaits. Just thaw them before adding. Frozen berries can be a great option when fresh ones are out of season. This blog post shared a simple and tasty parfait recipe using yogurt, cream cheese, and berries. You learned how to layer the ingredients for a beautiful presentation and get the right texture. I provided tips for customization, serving suggestions, and storage. In the end, you can enjoy these parfaits any way you like, making them perfect for your taste or needs. Try it out, and make this treat your own!

Berry Protein Cheesecake Parfaits Healthy Delightful Treat

To make Korean BBQ beef bowls, gather these key ingredients: - 1 lb thinly sliced beef (ribeye or sirloin is best) - 1/4 cup soy sauce (low sodium is better) - 2 tablespoons brown sugar (light or dark works) - 2 tablespoons sesame oil (adds rich flavor) - 4 cloves garlic, minced (fresh is best) - 1 inch ginger, grated (for a zesty kick) - 1 tablespoon gochujang (adjust for spice) - 2 green onions, chopped (for garnish) - 2 cups cooked jasmine or sticky rice (base of the bowl) - 1 cucumber, julienned (adds crunch) - 1 carrot, julienned (adds sweetness) - 1 cup kimchi (store-bought or homemade) - Sesame seeds for garnish (nutty flavor) - Optional: lettuce leaves (for wrapping) Using quality ingredients makes a big difference. Choose fresh beef for tenderness. Look for vibrant vegetables. Fresh garlic and ginger enhance the dish. Low-sodium soy sauce helps control saltiness. Gochujang can vary in heat, so pick one that suits your taste. If you can’t find certain items, here are some swaps: - Beef: Chicken or tofu can work well. - Soy sauce: Use tamari for a gluten-free option. - Gochujang: Sriracha can replace it if needed. - Rice: Quinoa or cauliflower rice can be a healthy swap. - Kimchi: Any pickled vegetable can add a tangy touch. These options keep the dish tasty while catering to your needs. Enjoy exploring flavors! {{ingredient_image_2}} First, gather your ingredients for the marinade. You will need: - 1/4 cup soy sauce - 2 tablespoons brown sugar - 2 tablespoons sesame oil - 4 cloves garlic, minced - 1 inch ginger, grated - 1 tablespoon gochujang In a mixing bowl, whisk together the soy sauce, brown sugar, and sesame oil. Add in the minced garlic and grated ginger. Finally, stir in the gochujang. This mixture gives a sweet, spicy, and savory flavor to the beef. Now, take your 1 lb of thinly sliced beef. I recommend ribeye or sirloin for the best taste. Place the beef into the marinade. Make sure each piece gets coated well. Cover the bowl with plastic wrap. Let it sit in the fridge for at least 30 minutes. If you have time, marinate for up to 2 hours. This deeper flavor makes a big difference. Next, it’s time to cook! Preheat a large skillet or grill pan over medium-high heat. Once hot, take the marinated beef out of the fridge. Cook the beef in batches. Avoid overcrowding the pan to get that nice sear. Sear each side for 2-3 minutes. The beef should be browned and cooked through. Remove the cooked beef from the pan and set it aside. Now, you are ready to build your Korean BBQ beef bowls! To make the best marinade, use fresh ingredients. The right mix of soy sauce and brown sugar creates a great balance. Add garlic and ginger for flavor. Use gochujang for a spicy touch. Whisk everything well before adding the beef. This step ensures all flavors mix well. Let the beef soak in the marinade for at least 30 minutes. Longer marinating times give more flavor. Cooking the beef properly makes it tender. Use a hot skillet or grill pan. This helps sear the beef quickly. Cook in small batches to avoid steaming. Each side should cook for about 2-3 minutes. You want a nice brown crust. This adds flavor and keeps the beef juicy. Avoid overcooking, as it can make the beef tough. Presentation matters for these bowls. Start with a scoop of rice as the base. Layer the beef neatly on top. Add colorful vegetables like cucumber and carrot. This creates a vibrant look. Sprinkle green onions and sesame seeds for a finishing touch. For fun, serve with lettuce leaves. They make great wraps for the beef and veggies. This adds to the dining experience! Pro Tips Marinate for Maximum Flavor: Allow the beef to marinate for at least 2 hours for a deeper flavor infusion, but if you're short on time, even 30 minutes will help enhance the taste. Choose the Right Cut: Opt for ribeye or sirloin as they are tender and will absorb the marinade beautifully, resulting in juicy and flavorful beef. Cook in Batches: Avoid overcrowding the pan when cooking the beef. This ensures even cooking and a nice sear on the meat, enhancing the overall texture. Garnish Smartly: Don't skimp on the garnishes like green onions and sesame seeds; they add a fresh crunch and nutty flavor that elevates the dish. {{image_4}} You can change the spice level in your Korean BBQ beef bowls. If you like it mild, use less gochujang. Start with one teaspoon and taste. You can always add more later. For extra heat, add more gochujang or sprinkle in some red pepper flakes. This way, you control the spice to suit your taste buds. Not a fan of beef? No problem! You can swap the beef for chicken, pork, or tofu. Thinly sliced chicken thighs work well and cook quickly. For pork, try pork tenderloin or belly. If you want a vegetarian option, use firm tofu. Marinate it just like the beef for great flavor. Each protein brings a unique taste and texture to your bowl. You can serve these bowls in many ways. For a lighter meal, use lettuce leaves instead of rice. Wrap the beef and veggies in the lettuce for a fun bite. You can also try it as a taco, using small tortillas. If you prefer a warm bowl, add some stir-fried vegetables. This adds color and nutrition. Experiment with different styles to find your favorite! After enjoying your Korean BBQ beef bowls, store leftovers in an airtight container. This keeps them fresh. Let the food cool to room temperature before sealing. Leftovers can last up to three days in the fridge. If you want to keep them longer, consider freezing. To reheat your leftovers, use the microwave or a skillet. If using the microwave, place the beef and rice in a bowl. Heat for 1-2 minutes, stirring halfway through. If using a skillet, add a splash of water to prevent sticking. Heat on medium until warm. Avoid overcooking, as this can dry out the beef. You can freeze your Korean BBQ beef bowls for a quick meal later. To freeze, place the beef and rice in a freezer-safe container. Be sure to leave space for expansion. The dish can stay fresh for up to three months. When ready to eat, thaw in the fridge overnight before reheating. I recommend using ribeye or sirloin beef. Both cuts are tender and flavorful. Ribeye has a rich taste due to its marbling. Sirloin is leaner but still juicy. Thinly slice the beef to help it soak up the marinade better. This makes each bite tasty and satisfying. Yes, you can make parts of this recipe ahead of time. Marinate the beef up to two hours before cooking. This lets the flavors blend well. You can also prepare the rice and chop the veggies in advance. Store them in the fridge. Assemble the bowls right before serving for the best taste. Several side dishes complement Korean BBQ beef bowls. Kimchi is a classic choice. It adds tang and spice. You can also serve pickled vegetables for crunch. A light salad with sesame dressing works well too. For a refreshing touch, add sliced cucumbers. These sides balance the rich flavors of the beef. This blog post guides you through making Korean BBQ bowls. You learned about key ingredients, their quality, and substitutes. I shared step-by-step instructions for marinating and cooking beef and provided tips for a great dish. You can customize spice levels and protein types, and I covered how to store leftovers. In summary, enjoy the process and make it your own. Cooking can be fun and creative. You’ll love the tasty results!

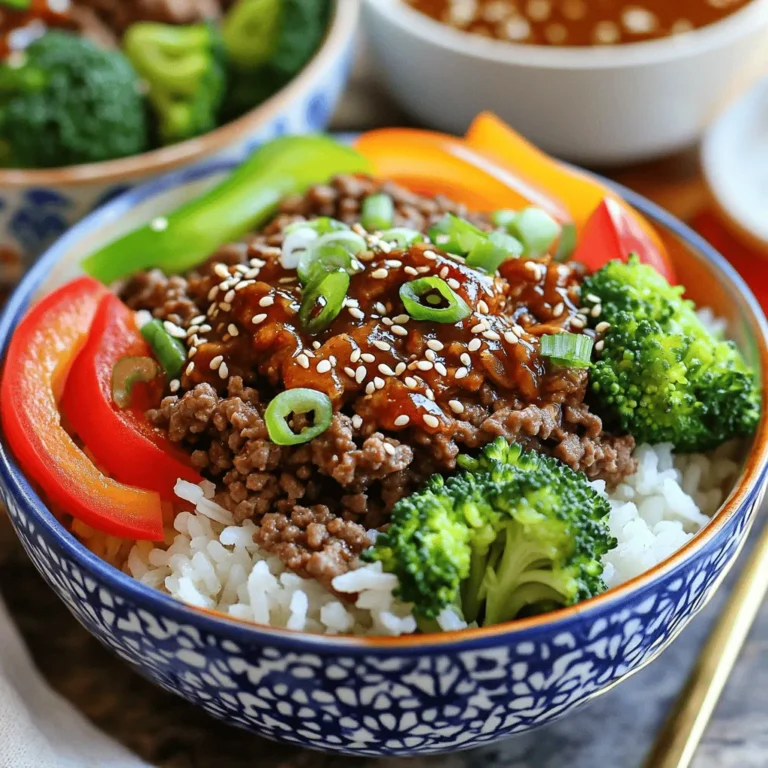
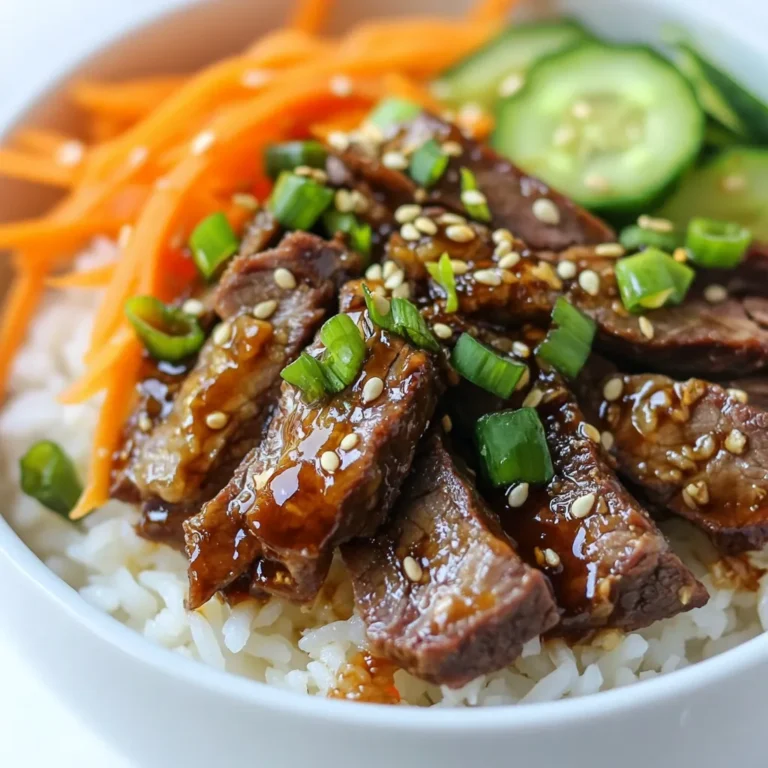
Korean BBQ Beef Bowls Flavorful and Easy Dinner Recipe

Chia pudding is simple and fun to make. Here’s what you need: - 1 cup coconut milk (canned or carton) - 1/2 cup almond milk (or your preferred milk) - 1/4 cup chia seeds - 2 tablespoons honey or maple syrup - 1 ripe mango, diced into small cubes - 1/4 teaspoon pure vanilla extract - A pinch of sea salt - Fresh mint leaves for garnish These ingredients come together to create a creamy and tasty treat. Coconut milk gives a rich flavor. Almond milk adds a light touch. Chia seeds are packed with nutrients. They also help thicken the pudding. The honey or maple syrup adds sweetness. Mango brings a fruity burst. Vanilla extract and sea salt enhance the overall taste. You can easily switch out the almond milk for any milk you like. This recipe is flexible and fun to customize. You can find the full recipe in the previous section. Enjoy making this delicious pudding! 1. In a medium bowl, combine 1 cup coconut milk and 1/2 cup almond milk. 2. Whisk in 2 tablespoons honey or maple syrup until it fully dissolves. 3. Add 1/4 teaspoon vanilla extract and a pinch of sea salt. Mix well. 4. Gradually stir in 1/4 cup chia seeds. Ensure they are evenly mixed in the liquid. 1. Cover the bowl tightly with plastic wrap or a lid. 2. Place it in the refrigerator. Chill for at least 4 hours or overnight. 3. This allows the chia seeds to absorb the liquid. They will swell and create a creamy texture. 1. After chilling, remove the pudding from the fridge. 2. Stir gently to break up any clumps. 3. Use a spoon to scoop the pudding into bowls. 4. Top each bowl with diced 1 ripe mango, spreading it evenly over the pudding. 5. For added creaminess, drizzle a bit of extra coconut milk over the mango. 6. Garnish with fresh mint leaves for a refreshing touch. You can enjoy your Coconut Mango Chia Pudding as a nutritious snack or dessert! For a detailed recipe, check out the Full Recipe. - How to adjust sweetness to taste: Start with two tablespoons of honey or maple syrup. Taste it! Add more if you like it sweeter. You can also use a sugar substitute if you want. - Ensuring the right pudding texture: The key is to mix the chia seeds well in the liquid. Stir them in slowly to avoid clumps. After chilling, stir again to keep the texture creamy and smooth. - Alternative milks for dietary preferences: You can switch almond milk for oat milk, soy milk, or any plant-based milk. Each milk brings a unique flavor. Choose what you like best. - Best time to prepare for maximum flavor: Make this pudding the night before. Let it chill overnight for the best taste and texture. The longer it sits, the more the chia seeds absorb the liquid. - Storing leftovers for freshness: Keep any leftover pudding in an airtight container in the fridge. It stays fresh for up to five days. Just remember to stir it before serving. - Adding spices or extracts for extra flavor: You can add a pinch of cinnamon or nutmeg for warmth. A splash of coconut extract can also boost the coconut taste. Experiment with what you enjoy! - Suggested garnishing ideas for visual appeal: Top your pudding with diced mango, coconut flakes, or fresh berries. A sprig of mint makes it look fancy and adds a fresh taste. Let your creativity shine! {{image_4}} You can easily make coconut mango chia pudding vegan. Just swap honey for maple syrup. Both sweeteners work well in this recipe. For a high-protein version, try adding protein powder. Just mix it into the liquid before adding chia seeds. This small change boosts the nutrition without changing the taste much. Mixing fruits with coconut mango can enhance the taste. Try adding berries, bananas, or even kiwi. Each fruit brings its unique flavor. You could also use flavored coconut milk, like vanilla or chocolate. These add-ins make your pudding even more exciting. Adding nuts or granola gives your pudding a nice crunch. Almonds, walnuts, or cashews work great. They add contrast to the smooth texture of the pudding. Layering your chia pudding with yogurt adds creaminess. You can also top it with fresh fruits or seeds for an extra boost. Remember, this coconut mango chia pudding is just a base. You can mix and match to find your favorite combinations. For the full recipe, check out the [Full Recipe]. To keep coconut mango chia pudding fresh, store it in a sealed container. A glass jar or airtight plastic container works best. This keeps air out and helps maintain the pudding's smooth texture. Always ensure the container is clean before use. You can store coconut mango chia pudding in the fridge for up to five days. After that, it may lose its flavor and texture. Check for signs of spoilage before eating. If the pudding smells sour or has an odd color, it is best to throw it away. Yes, you can freeze chia pudding! To freeze, place it in a freezer-safe container. Leave some space at the top for expansion. When you want to eat it, move it to the fridge to thaw overnight. Stir well before serving to regain its creamy texture. Chia pudding is a creamy dessert made with chia seeds. These tiny seeds absorb liquid and swell up, creating a smooth texture. They are packed with fiber, protein, and omega-3 fatty acids, making them a healthy choice. Chia pudding is great for gut health and keeps you full for longer. You can enjoy it for breakfast, snacks, or dessert. Yes, you can use many fruits! Some tasty options include strawberries, blueberries, and bananas. Simply chop the fruit into small pieces and add it to your pudding. You can mix fruits for exciting flavor combinations. Try layering different fruits in your serving for a colorful look! To make your chia pudding thicker, add more chia seeds. If you want it thinner, add more milk. A good ratio is about ¼ cup of chia seeds to 1 ½ cups of liquid. Stir well and let it sit. The longer it sits, the thicker it gets, so check it after a few hours. Yes, coconut mango chia pudding is healthy! Chia seeds are rich in fiber and protein. Coconut milk adds healthy fats, while mango provides vitamins A and C. This pudding is a nutrient-dense treat that supports energy levels and boosts your immune system. Absolutely! You can prepare coconut mango chia pudding up to three days in advance. Store it in the fridge in airtight containers. This makes it perfect for meal prep. Just add the mango topping right before serving for the best flavor and freshness. For the full recipe, check out the recipe section! Coconut mango chia pudding is easy to make and full of flavor. We covered the key ingredients and steps to prepare it simply. You can adjust sweetness and textures to fit your taste. Don’t be afraid to get creative with flavors or toppings. Proper storage keeps leftovers fresh for longer. Enjoy your delicious and healthy treat!

Coconut Mango Chia Pudding Delightful and Healthy Treat

To make Spicy Korean Beef Bowls, gather these simple ingredients: - 1 lb ground beef (preferably lean) - 1 tablespoon sesame oil - 2 tablespoons soy sauce - 2 tablespoons gochujang (Korean chili paste) - 2 teaspoons brown sugar - 3 cloves garlic, minced - 1-inch piece ginger, grated - 1 cup broccoli florets - 1 red bell pepper, sliced - 1 cup cooked jasmine rice - 2 green onions, thinly sliced (for garnish) - Sesame seeds (for garnish) These ingredients create a great mix of flavors. The gochujang adds heat and depth. The sesame oil gives a nice nutty taste. Use fresh vegetables for the best crunch. You can find gochujang at Asian markets or online. Fresh ginger and garlic make the dish smell amazing while cooking. This recipe is flexible. You can swap the beef for chicken or tofu if you prefer. Each option will change the flavor but keep it tasty. For a heartier meal, add more veggies like carrots or snap peas. For the full recipe, you can check the section below. Enjoy the process! Before you start cooking, gather all your ingredients. This helps the process go smoothly. Here’s what you need: - 1 lb ground beef (preferably lean) - 1 tablespoon sesame oil - 2 tablespoons soy sauce - 2 tablespoons gochujang (Korean chili paste) - 2 teaspoons brown sugar - 3 cloves garlic, minced - 1-inch piece ginger, grated - 1 cup broccoli florets - 1 red bell pepper, sliced - 1 cup cooked jasmine rice - 2 green onions, thinly sliced (for garnish) - Sesame seeds (for garnish) Start by washing the vegetables. Cut the red bell pepper into thin slices. Grate the ginger and mince the garlic. This prep makes cooking fast and easy. For a great outcome, use a large skillet. This ensures even cooking. Also, make sure your beef is at room temperature. This helps it cook evenly. Now let’s cook! First, heat the skillet. Pour in the sesame oil and warm it over medium-high heat. Once hot, add the ground beef. Use a wooden spoon to break it apart. Cook for about 5-7 minutes. You want the beef to be browned and fully cooked. Next, it's time to add flavor. Stir in the soy sauce, gochujang, brown sugar, minced garlic, and grated ginger. Cook for another 2-3 minutes. Stir occasionally, so everything mixes well. While the beef cooks, it’s time to steam the veggies. In a small pot, boil water. Place the broccoli and red bell pepper in a steamer basket. Steam for about 4-5 minutes until they are vibrant and tender. Now, let’s plate your dish! Start by adding a generous scoop of jasmine rice to each bowl. Top it with the spicy beef mixture. Artfully arrange the steamed broccoli and red bell pepper around the beef. For a beautiful finish, garnish with sliced green onions and a sprinkle of sesame seeds. This adds crunch and flavor. To make your meal even more appealing, serve with chopsticks or a fork. You can also place extra sesame seeds in a small dish on the side. This way, guests can add more if they like. Using colorful bowls will enhance the overall look of your meal. Enjoy! - To brown the beef perfectly, use high heat. This helps to create a nice crust. Make sure not to overcrowd the pan. Cook in batches if needed. Stir the beef often for even cooking. - For the vegetables, steaming helps keep their bright color and crunch. Bring water to a boil in a pot. Place broccoli and red bell pepper in a steamer basket. Cover and steam for about 4-5 minutes. They should be tender but still vibrant. - To adjust the spice level, simply add more or less gochujang. Taste as you go to find your sweet spot. If you're sensitive to heat, start with a smaller amount. You can always add more later. - Get creative with toppings! Try adding sliced cucumbers or shredded carrots for freshness. A sprinkle of crushed peanuts adds a great crunch. Fresh herbs like cilantro can also boost flavor. - Essential tools for this recipe include a large skillet for the beef and a steamer basket for the veggies. A wooden spoon is great for breaking apart the beef while cooking. - I recommend brands like T-fal for skillets and OXO for steamers. They provide good heat distribution and durability. Having the right tools makes cooking more enjoyable and easier. {{image_4}} For those who need gluten-free options, try using tamari instead of soy sauce. Tamari has a similar taste but contains no gluten. You can also swap out gochujang for a gluten-free chili paste. For vegetarians, replace the beef with tofu or tempeh. These non-meat proteins soak up flavors well. You can easily switch out the beef for chicken or turkey. These meats give a lighter feel to the dish. If you prefer, try using tofu for a plant-based option. Don’t forget to add unique veggies. Carrots, snap peas, or mushrooms can bring new flavors and textures. Korean recipes vary by region. You might find variations that include different spices or side dishes. For example, some regions add kimchi for extra heat and flavor. You can also take flavors from other cuisines. Adding sesame oil and soy sauce with a splash of lime can create a fusion twist! To keep your Spicy Korean Beef Bowls fresh, store them in an airtight container. Place the beef, rice, and veggies in separate containers to prevent sogginess. This meal will stay fresh in the fridge for about 3 days. After that, it may lose flavor and texture. To reheat your beef bowls, use the microwave for quick convenience. Heat in 30-second intervals, stirring in between. This method keeps the beef juicy and the veggies crisp. If you want to freeze the dish, pack it in a freezer-safe container. It can last up to 3 months. To use, thaw overnight in the fridge and reheat as described. For busy weeknights, cook the beef and veggies ahead of time. You can make a large batch of rice too. Store everything separately in containers. When you're ready to eat, just combine and heat. A great combo is to pair the beef with steamed broccoli and sliced bell peppers. This meal is not only tasty but also easy to prepare! For a full recipe, check the Spicy Korean Beef Bowls instructions above. To cook this dish fast, prep your ingredients first. Chop veggies and measure sauces ahead. Use lean ground beef for quick cooking. A large skillet heats up quickly, speeding up the process. Cook beef for just 5-7 minutes. Stir in sauces for a quick flavor boost. Yes, you can! Cook the beef mixture and cool it down. Store it in an airtight container in the fridge. You can make the rice and veggies ahead as well. When ready to eat, just reheat and serve. This way, you enjoy a fresh meal with less fuss. Serve this dish with steamed rice for a complete meal. You can also add a side of kimchi for extra flavor. A light salad or pickled veggies pairs well too. For drinks, try iced tea or a light beer to balance the spice. Gochujang has a unique heat that can vary. If you're sensitive to spice, start with less. You can mix it with other sauces to tone it down. Adding sugar helps balance the heat too. Taste as you go to find your perfect level. Spicy Korean Beef Bowls come from Korean home cooking. This dish reflects the bold flavors of Korean cuisine. Gochujang is a staple, adding depth and spice. It’s often enjoyed as a simple meal that brings family together. The dish showcases the love for fresh ingredients and balance in flavors. Enjoying it connects you to Korean culture and its vibrant food scene. For the complete recipe, check out the Full Recipe section. In this blog post, we explored how to make Spicy Korean Beef Bowls. We covered the ingredients, cooking steps, and serving ideas. You learned tips for enhancing flavor and modifying the recipe for various diets. Remember, storing leftovers properly keeps them fresh. Whether you're cooking for yourself or a crowd, this dish is both tasty and easy. Try it with different proteins or spices to make it your own. Enjoy your cooking adventure and savor each bite!

Spicy Korean Beef Bowls Flavorful and Easy Meal

PREV 1 … 13 14 15 … 18 NEXT
sweet savory saga

explore

DessertsDinnerAppetizersDrinks

Our Policies

  • Cookie Policy
  • Copyright Policy
  • Disclaimer
  • GDPR Policy
  • Terms Of Use
Back to Top
  • About
  • Contact Us
  • Privacy Policy
© 2025 sweet savory saga