FREE DINNER EBOOK! Get your copy!
  • Cookie Policy
  • GDPR Policy
  • Disclaimer
  • Terms Of Use
  • Visit my other site: Fun Cookie Recipes
sweet savory saga
  • Home
  • Dinner
  • Desserts
  • Drinks
  • Appetizers
  • Contact
  • About
  • Privacy Policy
  • Home
  • Dinner
  • Desserts
  • Drinks
  • Appetizers
  • Contact
  • About
  • Privacy Policy
  • Cookie Policy
  • GDPR Policy
  • Disclaimer
  • Terms Of Use
Visit my other site: Fun Cookie Recipes

HOME / CATEGORIES /

Latest

To make creamy garlic mashed cauliflower, you will need: - 1 large head of cauliflower, cut into small florets - 4 cloves garlic, finely minced - ½ cup cream cheese (or your preferred dairy-free alternative) - ¼ cup unsalted butter (or plant-based butter for a vegan option) - ½ cup shredded Parmesan cheese (optional, or substitute with vegan cheese) - ½ teaspoon salt - ¼ teaspoon freshly ground black pepper - ¼ teaspoon smoked paprika for added depth of flavor - Fresh chives or parsley for an aromatic garnish Feel free to get creative with your ingredients. You can add: - Extra garlic for a stronger flavor - Other cheeses like feta or goat cheese for a unique twist - Fresh herbs such as rosemary or thyme for added aroma - Nutritional yeast for a cheesy flavor without dairy - Cauliflower florets can be replaced with other veggies like broccoli Creamy garlic mashed cauliflower is not just tasty; it also has some great nutrition. Here’s a quick breakdown per serving: - Calories: Approximately 180 - Protein: 4g - Fat: 15g - Carbohydrates: 8g - Fiber: 3g This dish is lower in carbs than traditional mashed potatoes, making it a smart choice for many diets. Plus, it’s packed with vitamins and minerals from the cauliflower. For the full recipe, check out [Full Recipe]. First, gather your ingredients. You will need 1 large head of cauliflower, 4 cloves of garlic, ½ cup cream cheese, ¼ cup unsalted butter, ½ cup Parmesan cheese (if desired), salt, black pepper, and smoked paprika. Next, fill a large pot with water. Add a generous amount of salt to the water. Bring it to a rolling boil. Carefully add the cauliflower florets. Cook them for about 10 to 12 minutes. You want them to be fork-tender. Once the cauliflower is tender, drain it using a colander. Return the drained cauliflower to the pot you used to cook it. While the cauliflower cooks, prepare the garlic butter. In a small skillet, melt the butter over medium heat. Once it melts, add the finely minced garlic. Sauté the garlic for 2 to 3 minutes. You want it fragrant and golden but not burnt. This step is key. The garlic adds a rich flavor that makes the dish special. After draining the cauliflower, pour the garlic butter mixture over it. Then, add the cream cheese, Parmesan cheese (if using), salt, black pepper, and smoked paprika. To achieve a creamy texture, use an immersion blender. Blend until it is smooth and creamy. Alternatively, you can use a food processor for a silkier finish. Taste your mashed cauliflower. Adjust the seasoning if needed. Serve it hot. Garnish with fresh chives or parsley for a pop of color and flavor. For the full recipe, refer to the beginning of this article. When preparing cauliflower, freshness matters. Look for a large head with firm florets. Avoid any spots or soft areas. Start by cutting it into small, even florets. This helps it cook evenly. Always rinse the florets under cold water to remove dirt. If you want a quicker cook time, you can steam them instead of boiling. To get a creamy texture, draining is key. After boiling, make sure to drain the cauliflower well. Excess water can make it watery. Using an immersion blender gives you control. It helps you reach the desired smoothness without over-blending. If you prefer a richer flavor, add more cream cheese or butter during blending. Garlic is the star here, so use fresh cloves. Sauté them carefully to avoid burning. You can add herbs like thyme or rosemary for more depth. For a twist, try adding a splash of lemon juice. This brightens the dish nicely. Finally, don’t skip the smoked paprika; it adds a unique flavor that sets this dish apart. Remember, for the full recipe, check out the complete details to create this creamy garlic mashed cauliflower. {{image_4}} You can easily make creamy garlic mashed cauliflower vegan. Instead of cream cheese, use a dairy-free cream cheese. This option keeps the dish rich and smooth. For butter, try plant-based butter. Both swaps help maintain flavor and texture. You can boost flavor in many ways. Adding fresh herbs like thyme or rosemary gives a nice touch. For a spicy kick, try a pinch of cayenne pepper. If you want cheesy goodness, sprinkle in nutritional yeast. You can also use vegan cheese to keep it plant-based. Each addition changes the taste without losing the creamy base. Creamy garlic mashed cauliflower pairs well with many dishes. Serve it alongside roasted chicken or a hearty steak. It also works great with grilled vegetables for a lighter meal. For a cozy night in, add it to a warm bowl of soup. You can enjoy it as a side or make it the star of your meal. For more ideas, check out the Full Recipe. After enjoying your creamy garlic mashed cauliflower, let it cool down. Place the leftovers in an airtight container. Make sure the lid seals tightly. Store the container in the fridge. This keeps the dish fresh for up to three days. If you want to save it for later, freezing is a great option. To reheat, scoop the mashed cauliflower into a microwave-safe bowl. Add a splash of milk or cream to keep it moist. Heat in the microwave for about one to two minutes. Stir halfway through to ensure even warming. You can also reheat it on the stove. Just place it in a saucepan over low heat. Stir often until it’s warmed through. If you want to freeze your creamy garlic mashed cauliflower, use a freezer-safe container. Leave some space at the top, as it may expand when frozen. It can stay good in the freezer for up to two months. When ready to enjoy, thaw it in the fridge overnight. Reheat it as mentioned before. This way, you’ll have a tasty dish ready whenever you want! For the full recipe, check out the recipe section. What is creamy garlic mashed cauliflower? Creamy garlic mashed cauliflower is a smooth, flavorful side dish. It uses cauliflower instead of potatoes. This dish is lower in carbs, making it a great alternative. How do I make it taste more garlicky? Add extra minced garlic during cooking. You can also roast the garlic for a sweeter taste. Can I make this dish vegan? Yes! Use plant-based butter and dairy-free cream cheese. You can also skip the cheese or use vegan cheese. Why is my mashed cauliflower watery? This happens if you do not drain the cauliflower well. Make sure to drain it fully before blending. What if my mixture is too thick? If it is too thick, add a bit of milk or vegetable broth. Blend again until you reach the desired creaminess. How do I fix lumpy mashed cauliflower? If you see lumps, blend it longer. An immersion blender works well for this. This recipe serves four people. Each serving is about one cup. If you have leftovers, they make a great side for lunch or dinner. Enjoy creamy garlic mashed cauliflower warm for the best flavor. You can find the full recipe in the previous section. Creamy garlic mashed cauliflower is a great dish. It uses simple ingredients and step-by-step instructions to make it easy. I shared tips to get the creamiest texture and added flavor ideas. You can even find vegan options! Proper storage and reheating are key for leftovers too. Try this recipe and enjoy its smooth texture and rich flavor. With a few tweaks and tips, you can make it just right. Now, get cooking and impress your friends and family with this tasty side dish!

Creamy Garlic Mashed Cauliflower Simple and Delicious Dish

- Chicken Breast: I use 1 pound of chicken breast. It’s tender and juicy. Cut it into bite-sized pieces. This helps it cook evenly and soak up the flavors. - Orange Juice and Flavor Enhancers: Freshly squeezed orange juice is key. I love the bright flavor it brings. I also use low-sodium soy sauce and rice vinegar for a savory kick. Honey adds sweetness. - Essential Seasonings and Oils: Sesame oil creates a nutty flavor. I also use minced garlic and grated ginger for warmth. Finally, toasted sesame seeds give a nice crunch, and chopped green onions add freshness. These ingredients come together to create a dish that's both tasty and simple. You can find the full recipe at the end for all the details. Coating the Chicken Start by cutting the chicken breast into bite-sized pieces. This makes it easy to cook and eat. In a mixing bowl, toss these pieces with cornstarch. Make sure each piece gets a nice, even coat. This will make the chicken extra crispy when cooked. Heating Up the Skillet Next, heat the vegetable oil in a large skillet or wok over medium-high heat. Let it warm up for a couple of minutes. You want the oil hot enough to sear the chicken, but not smoking. Perfecting the Golden Brown Sear Once the oil is ready, add the chicken pieces in a single layer. Avoid crowding the pan, as this helps with even cooking. Cook for about 5-7 minutes. You want the chicken to turn golden brown and be fully cooked. Flip the pieces halfway through for a nice sear on both sides. Setting Chicken Aside After cooking, remove the chicken from the skillet. Place it on a plate and set it aside. This keeps the chicken warm and ready for the sauce. Sautéing Aromatics In the same skillet, lower the heat to medium. Add the minced garlic and grated ginger. Sauté these for about 30 seconds. Stir constantly to avoid burning. You want them to release their lovely aroma. Combining Key Sauce Ingredients Now, pour in the orange juice, low-sodium soy sauce, rice vinegar, honey, and sesame oil. Stir well to mix everything. Let the sauce simmer for 3-5 minutes. This helps it thicken and deepen in flavor. Tossing Chicken in the Sauce Return the cooked chicken to the skillet. Make sure each piece gets coated in the vibrant orange sauce. Cook for another 2-3 minutes. This allows the chicken to soak up those delicious flavors. Finishing Touches with Sesame Seeds Sprinkle the toasted sesame seeds over the chicken. Gently mix to combine. The seeds add a nice crunch to each bite. Plating for Presentation Serve the sesame orange chicken over fluffy jasmine rice or alongside steamed broccoli. Garnish with finely chopped green onions for a fresh touch. This dish looks as good as it tastes! For the complete recipe, check out the Full Recipe. Importance of Cornstarch Cornstarch is key for crispy chicken. It forms a light coating that fries well. This keeps the chicken juicy inside while creating a crunchy outside. Always toss your chicken pieces in cornstarch before cooking. This step is simple but very important. Optimal Cooking Temperature Cooking chicken at the right heat matters. Use medium-high heat when frying. This helps the chicken sear quickly. A good sear locks in moisture. If the heat is too low, the chicken may turn soggy. Balancing Sweetness and Acidity The sauce needs a good balance. Orange juice brings sweetness, but too much can be cloying. Add a splash of rice vinegar to cut through the sweetness. This makes the flavor bright and fresh. Adjust the honey too, if needed. Enhancing Flavor Profiles To make the sauce pop, think about adding more layers. You can add crushed red pepper for heat. This gives the dish a spicy kick. A squeeze of lime juice can also add zest and depth. Best Accompaniments Serve sesame orange chicken over fluffy jasmine rice. The rice soaks up the sauce well. Steamed broccoli adds color and crunch. You can also try it with a light salad for freshness. Presentation Ideas Make your plate look great! Use a white plate to show off the vibrant colors. Sprinkle toasted sesame seeds on top. Add finely chopped green onions as a bright garnish. This makes the dish pop and look appetizing. {{image_4}} You can easily switch up the protein in this sesame orange chicken recipe. - Tofu for a Vegetarian Version: Tofu makes a great substitute. It absorbs flavors well and gives a nice texture. Use firm or extra-firm tofu. Press it to remove excess water. Cut it into cubes and coat it with cornstarch just like chicken. Cook it until golden and crisp. - Using Shrimp for a Seafood Twist: Shrimp adds a different taste. Choose large shrimp for the best bite. Peel and devein them before cooking. Sauté the shrimp for just a few minutes until they turn pink. They cook faster than chicken, so watch them closely. You can also change up the flavor of your dish. - Add Spice with Chilis: If you enjoy heat, add chilis. You can use fresh chilis or dried red pepper flakes. This will give your dish a nice kick without overpowering the orange flavor. Add them when you sauté the garlic and ginger for the best results. - Incorporating Additional Vegetables: Adding vegetables makes the dish more colorful and healthy. Bell peppers, snap peas, or broccoli are great options. Slice them thin and toss them in the pan with the chicken. They will cook quickly and add crunch to your meal. For the complete recipe, check out the Full Recipe. - Refrigerating Leftovers: After enjoying your sesame orange chicken, allow it to cool down. Once cool, place leftovers in an airtight container. This helps keep the chicken fresh. Store it in the fridge for up to three days. Always remember to label the container with the date. - Freezing for Long-Term Preservation: To freeze, use a freezer-safe container or bag. Make sure to remove as much air as possible. This prevents freezer burn. Frozen sesame orange chicken stays good for about two to three months. When you're ready to eat it, just thaw in the fridge overnight. - Best Methods for Maintaining Texture: To reheat, I suggest using the stovetop. Heat a skillet over medium heat, then add the chicken. Stir occasionally to warm it through. This keeps the chicken crispy. If you're in a hurry, you can use a microwave. Place the chicken in a microwave-safe dish and cover it. Heat in short bursts to avoid drying it out. How long does it take to prepare and cook? It takes about 15 minutes to prep and 15 minutes to cook. In total, you need around 30 minutes. This makes it a quick meal for busy nights. Can I adjust the sweetness in the recipe? Yes, you can adjust the sweetness easily. If you want less sweetness, reduce the honey. You can also add more orange juice for a more balanced flavor. What are some side dishes that pair well with this recipe? I love serving sesame orange chicken with jasmine rice or steamed broccoli. You can also try it with fried rice or a fresh salad. These sides add great texture and flavor. How can I make this dish gluten-free? To make it gluten-free, use tamari instead of soy sauce. Most brands offer gluten-free options. Check the labels to be sure! For the complete Sesame Orange Chicken recipe, refer to the [Full Recipe]. We explored how to make juicy Sesame Orange Chicken, starting with key ingredients and easy steps. You learned the best ways to prepare the chicken, create a flavorful sauce, and serve it up nicely. Remember, small changes can make a big impact on taste. Try different proteins and flavor tweaks to keep things exciting. With smart storage tips, your leftovers can taste great even days later. Enjoy your cooking adventure and make this dish your own!

Sesame Orange Chicken Flavorful and Simple Recipe

- 2 cups Greek yogurt (plain or vanilla) - 1 cup mixed berries (strawberries, blueberries, raspberries, blackberries) - 1/2 cup granola (store-bought or homemade) - 2 tablespoons honey or maple syrup (optional) - 1 teaspoon vanilla extract (optional) - Fresh mint leaves for garnishing To make a mixed berry yogurt parfait, you need simple, fresh ingredients. First, choose your yogurt. I love Greek yogurt for its creaminess and protein. You can pick plain for a tangy taste, or vanilla for a hint of sweetness. Next, gather your mixed berries. I use strawberries, blueberries, raspberries, and blackberries for a colorful mix. Look for berries that are firm and bright. They should smell sweet and fresh. Granola adds a nice crunch. You can buy it or make it at home. I often make my own to control the sweetness and add nuts. Sweeteners like honey or maple syrup help balance the tartness of the yogurt. You can skip them if you prefer less sweetness. Vanilla extract is optional, but it adds a nice flavor. Lastly, fresh mint leaves make the parfait look pretty and add a refreshing touch. These ingredients create a tasty and healthy parfait that is fun to eat. You can mix and match based on your preferences. Enjoying this treat is easy, and it looks great in any glass! {{ingredient_image_2}} To start, rinse your mixed berries gently under cold water. This helps remove dirt and keeps them fresh. For strawberries, remove the green tops and slice them into halves or quarters. The size depends on how big they are. Pat the berries dry with a paper towel. This step is important to keep your parfait from getting soggy later. Next, grab a medium bowl and add 2 cups of Greek yogurt. You can choose plain or vanilla yogurt. If you like it sweet, stir in 2 tablespoons of honey or maple syrup. Add 1 teaspoon of vanilla extract for extra flavor. Mix everything well until it’s creamy and smooth. This sweetened yogurt will be the base of your parfait. Now comes the fun part! Take individual serving glasses or bowls. Start by adding about 1/3 cup of the sweetened yogurt to the bottom of each glass. This will be your first layer. Then, spoon a generous amount of mixed berries over the yogurt. Follow this with a hearty sprinkle of granola. Repeat these layers until your glasses are full. Make sure the top layer shows off a mix of colorful berries. To make your parfaits look amazing, add a few extra fresh berries on top. A sprig of fresh mint will add a nice touch too. It not only looks good but also smells great. This garnishing will elevate your parfaits and impress your guests. Once you finish layering, place the parfaits in the fridge. Chill them for about 10 to 15 minutes. This helps the flavors blend nicely. When ready to serve, you can present them on a rustic wooden board or slate. Add some extra mint leaves around for a beautiful display. Enjoy your delicious and healthy Mixed Berry Yogurt Parfait! For a great parfait, start with yogurt. Greek yogurt is my top choice. It’s thick and creamy. You can use plain or vanilla yogurt. Plain yogurt gives a tangy taste. Vanilla yogurt adds sweetness. Next, think about granola. You can buy your favorite granola or make your own. Homemade granola lets you control the flavor. You can add nuts or seeds for crunch. Now, let’s talk about berries. Fresh berries are a must for the best taste. Look for bright colors and firm texture. Strawberries should be red and ripe. Blueberries should be plump and shiny. Raspberries and blackberries should be dark and fragrant. Layering is key to a stunning parfait. Start with yogurt, then add the berries, and finish with granola. Repeat this process. Aim for three layers in total for the best look. Make sure you can see each layer. Use clear glasses or bowls. This way, guests can admire the vibrant colors. A beautiful presentation makes the parfait more appetizing. You can prepare your parfaits ahead of time. Just layer the ingredients in your glasses. Cover them and store in the fridge. They taste great after chilling for 10 to 15 minutes. If you're serving guests, place them on a wooden board. This adds a rustic touch. You can also decorate the board with mint leaves. It’s a simple way to impress everyone! Pro Tips Freshness Matters: Use fresh, ripe berries for the best flavor. Overripe or mushy berries can affect the overall taste of your parfait. Customize Your Layers: Feel free to mix and match your favorite fruits and toppings. Try adding sliced bananas or a drizzle of nut butter for an extra twist! Chill for Perfection: Allowing the parfaits to chill for a bit not only enhances the flavors but also gives the yogurt a refreshing texture. Presentation is Key: Layering in clear glasses not only looks appealing but also allows everyone to see the beautiful colors of the ingredients! {{image_4}} If you want a vegan version of this parfait, use plant-based yogurt. Options like coconut or almond yogurt work well. For sweeteners, try agave syrup or stevia instead of honey or maple syrup. This keeps it healthy and delicious. For gluten-free granola, look for brands that use oats without gluten. You can also make your own using nuts and seeds. This way, everyone can enjoy this treat. You can mix up the fruits in your parfait. Try using peaches, mangoes, or kiwi for a fun twist. These fruits bring their own sweetness and flavor. Adding spices like cinnamon or nutmeg can make your parfait special. Just a pinch can add warmth and depth. This gives your parfait a unique taste that surprises your guests. Serving your parfait in unique glassware can impress your friends. Use mason jars or tall glasses for a fun look. You can also create themed parfaits for special events. For a birthday, add colorful sprinkles or birthday cake pieces. For a holiday, use seasonal fruits like cranberries or pears. These ideas make your parfaits not just tasty, but also festive and fun! Store your mixed berry yogurt parfaits in the fridge. Use airtight containers to keep them fresh. You can stack them in the fridge for easy access. They taste best within two days. This way, the yogurt stays creamy and the berries remain juicy. You can freeze yogurt parfaits for later use. However, keep in mind that the texture may change. To freeze, layer the parfaits in freezer-safe containers. Leave some space at the top for expansion. When ready to eat, thaw them in the fridge overnight. Enjoy them within a month for the best taste. Check your parfait for freshness before eating. Look for any discoloration in the yogurt or berries. If the yogurt smells sour or off, it’s best to throw it away. Berries should be firm and not mushy. Always trust your senses; they guide you well! You can use several options for yogurt. Here are some great choices: - Plain yogurt: Regular or low-fat. - Non-dairy yogurt: Almond, coconut, or soy. - Skyr: A thick Icelandic yogurt. - Cottage cheese: Blend until smooth for a creamy base. Each option adds a different taste. Non-dairy yogurts work well for those who avoid dairy. Yes, you can use frozen berries. They are easy to store and use. However, they may change the texture. Frozen berries can be softer after thawing. They also may release more juice. This can make the parfait a bit watery. If you want to keep the texture, let them thaw before use. You can store a yogurt parfait in the fridge for up to 2 days. Make sure to cover it well. This keeps it fresh. If you add granola, it may get soggy. To keep it crunchy, add granola just before serving. Yes, this parfait is great for kids! It has healthy yogurt and berries. Greek yogurt has protein, which helps kids grow. Berries are full of vitamins and fiber. You can adjust the sweetness with honey or maple syrup. Kids love the layers and colors too! Absolutely! If you want to skip granola, try these options: - Nuts: Chopped almonds or walnuts for crunch. - Seeds: Chia or sunflower seeds add nutrition. - Oats: Rolled oats can give a chewy texture. - Coconut flakes: Add a tropical twist. These alternatives can keep your parfait tasty and interesting! This blog post covers how to make a delicious yogurt parfait with Greek yogurt, mixed berries, and granola. You learned the best ingredients, step-by-step instructions, and clever tips for dazzling layers. I offered options for dietary needs and ways to store parfaits for freshness. Parfaits are not just tasty; they are also simple to customize. Get creative and enjoy healthier treats that fit your taste. You have the tools to make great parfaits at home!

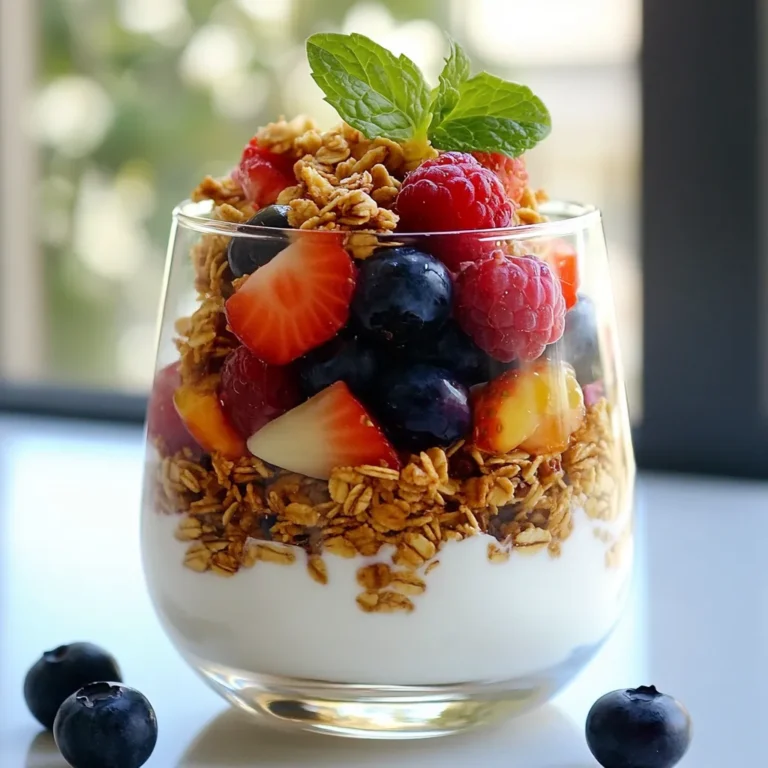
Mixed Berry Yogurt Parfait Easy and Healthy Recipe

To make Cajun chicken Caesar wraps, you need key ingredients: - 2 boneless, skinless chicken breasts - 1 tablespoon Cajun seasoning - 1 tablespoon extra virgin olive oil - 4 large flour tortillas - 2 cups romaine lettuce, chopped - 1/2 cup Caesar dressing (store-bought or homemade) - 1/2 cup freshly grated Parmesan cheese - 1/4 cup cherry tomatoes, halved - Salt and freshly ground black pepper to taste These ingredients combine to create a tasty and satisfying meal. You can add your twist with these optional ingredients: - Fresh herb sprigs like parsley or cilantro for garnish - Avocado slices for creaminess - Red onion slices for a bit of bite - Sliced cucumbers for extra crunch These additions can enhance flavor and texture, making your wraps unique. Each wrap is packed with nutrients. Here’s a quick look: - Protein from chicken and cheese - Vitamins from romaine and tomatoes - Healthy fats from olive oil A full wrap provides a good balance of protein and carbs. Enjoy these wraps for a quick lunch or dinner that won’t weigh you down! {{ingredient_image_2}} Start by seasoning your chicken. Take the two chicken breasts and rub them with Cajun seasoning. Make sure to cover all sides well. Add salt and pepper to taste. This adds great flavor to your chicken. Now, heat one tablespoon of olive oil in a skillet over medium-high heat. When the oil is hot, add the chicken breasts carefully. Cook each side for about 5 to 7 minutes. Look for a golden-brown color. Check that the internal temperature hits 165°F (75°C). Once done, take the chicken out and let it rest for 5 minutes. This helps keep it juicy. After resting, slice the chicken into thin strips. Lay a tortilla flat on a clean surface. In the center, add 1/2 cup of chopped romaine lettuce. Layer the sliced chicken on top, followed by halved cherry tomatoes. Sprinkle freshly grated Parmesan cheese over everything. Next, drizzle your choice of Caesar dressing on top. To wrap it up, fold the sides of the tortilla inward. Then, start rolling from the bottom to keep all the fillings inside. Finally, slice each wrap in half for easy eating. Arrange the wraps on a platter and add fresh herb sprigs for a nice touch. To make your chicken pop, use Cajun seasoning well. I like to rub the seasoning all over the chicken. Make sure it covers every part. Add salt and black pepper to taste. This adds more depth and flavor to each bite. Let it sit for a few minutes before cooking. This helps the spices soak in and enhances the taste. Choosing the right tortilla can make a big difference. I recommend using large flour tortillas for a soft, chewy wrap. They hold the filling well and are easy to roll. If you want a healthier option, try whole wheat tortillas. They add extra fiber and a nice nutty flavor. Corn tortillas work too, but they can be crisper and more fragile. Caesar dressing is key to this wrap. You can use store-bought, but homemade is special. For a twist, add a squeeze of lemon juice for brightness. Mixing in some Greek yogurt can make it creamy and lighter. If you like spice, try adding hot sauce or a pinch of cayenne pepper. This can elevate the flavor profile and satisfy your taste buds. Pro Tips Rest Your Chicken: Always let the cooked chicken rest for a few minutes before slicing. This helps retain the juices, ensuring your wraps are moist and flavorful. Customize the Spice: If you prefer a milder flavor, reduce the amount of Cajun seasoning or use a different spice mix that suits your taste. Fresh Ingredients Matter: Use freshly grated Parmesan and fresh romaine lettuce for the best flavor and texture in your wraps. Wrap Technique: To prevent the fillings from spilling out, make sure to wrap the tortillas tightly and secure the sides well. {{image_4}} If you want a veggie option, try using grilled tofu or tempeh. These alternatives soak up the Cajun spices well. You can also use roasted chickpeas for added crunch and protein. They add a nice texture and flavor to the wrap. While romaine is tasty, other lettuces can work too. Try using butter lettuce for a softer bite. Iceberg lettuce gives a nice crunch. You can even mix different greens for a colorful look. Each type brings its own taste and texture. To spice things up, consider adding extra seasonings. A pinch of smoked paprika adds depth. You can also try a dash of hot sauce for heat. For dressings, swap Caesar for ranch or a yogurt-based option. These small changes can make your wrap unique and exciting. After enjoying your wraps, store any leftovers in the fridge. Place them in an airtight container. This helps keep the wraps fresh and tasty. They can last up to three days. If you want to save them longer, consider freezing. To freeze, wrap each Cajun chicken Caesar wrap tightly in plastic wrap. Then, place them in a freezer-safe bag. Squeeze out as much air as possible. They can last up to three months in the freezer. When you're ready to eat, thaw them in the fridge overnight. To reheat your wraps, you have a few options. The best way is to use a skillet. Heat the skillet over medium heat. Place the wrap in the skillet for about 3-4 minutes on each side. You want it warm and slightly crispy. You can also use a microwave if you're in a hurry. Just wrap them in a damp paper towel and heat for about 30-60 seconds. You can use a mix of paprika, garlic powder, and onion powder. Add some cayenne for heat. This mix gives a nice kick and helps you enjoy the flavors. You can also try other spice blends, like Creole seasoning, if you have it on hand. Yes, you can make these wraps ahead of time. Just prepare the chicken and filling, but don’t wrap them yet. Store the chicken and veggies in the fridge. When you’re ready to eat, wrap them up fresh. This keeps the wraps from getting soggy. Cajun Chicken Caesar Wraps work great for meal prep. You can store the chicken, veggies, and dressing in separate containers. This way, you can mix and match as you like. Just remember to wrap them just before eating for the best taste. Cajun Chicken Caesar Wraps are tasty and easy to make. We covered essential ingredients, preparation, and cooking steps. I shared tips on seasoning and tortilla choices. You can also explore vegetarian options and storage methods. Overall, these wraps are great for a quick meal or meal prep. With these ideas, you can make them your own. Enjoy your cooking, and have fun customizing every wrap!

Cajun Chicken Caesar Wraps Flavorful and Easy Meal

To make Garlic Butter Shrimp Rice, gather these fresh ingredients: - 1 lb (450g) large shrimp, peeled and deveined - 2 cups jasmine rice - 4 tablespoons unsalted butter - 5 garlic cloves, finely minced - 1 cup chicken broth (low sodium recommended) - 1 cup fresh or filtered water - 1 cup green peas (fresh or frozen) - 1 tablespoon fresh lemon juice - 1 teaspoon smoked paprika - Sea salt and freshly ground black pepper, to taste - Fresh parsley, finely chopped (for garnish) You can easily swap ingredients based on what you have on hand: - Shrimp: Use chicken or tofu for a different protein option. - Jasmine rice: Substitute with basmati rice or long-grain rice. - Chicken broth: Use vegetable broth for a veggie option. - Green peas: Try corn or diced bell peppers instead. - Butter: Use olive oil or vegan butter for a dairy-free choice. To create this delightful dish, you will need: - A medium saucepan for cooking the rice - A large skillet to sauté the shrimp and garlic - A measuring cup for liquid amounts - A sharp knife and cutting board for chopping garlic and parsley - A fork for fluffing the rice With these ingredients and tools, you are all set to cook a tasty Garlic Butter Shrimp Rice meal. Enjoy the cooking experience! {{ingredient_image_2}} To start, rinse the jasmine rice under cold water. This step is key. It removes excess starch that can make your rice gummy. Rinse until the water runs clear. Next, grab a medium saucepan. Combine the rinsed rice, chicken broth, water, and a pinch of sea salt. Bring this mix to a boil over medium-high heat. Stir it occasionally to avoid sticking. Once it starts boiling, reduce the heat to low. Cover the saucepan with a tight lid. Let it simmer for 15 minutes. This helps the rice soak up all the liquid. After 15 minutes, remove it from heat but keep it covered for another 5 minutes. This extra time makes the rice fluffy and tender. While the rice cooks, it’s time to prepare the shrimp. Grab a large skillet and melt the unsalted butter over medium heat. Once it melts, add the finely minced garlic. Sauté it for about 1-2 minutes. You want it to be aromatic and lightly golden, but don’t let it burn. After this, add the peeled and deveined shrimp to the skillet. Season with smoked paprika, sea salt, and freshly ground black pepper. Cook the shrimp for 2-3 minutes on each side. They should turn a vibrant pink and become opaque. Next, toss in the green peas and cook for another 2 minutes. This warms them up and adds a nice color. Remove the skillet from heat and drizzle with fresh lemon juice for a bright flavor kick. Now, let’s put it all together. First, fluff the cooked jasmine rice with a fork. This separates the grains and keeps it light. Divide the rice among your serving plates. Then, spoon the garlic butter shrimp and peas mixture generously over the rice. For a lovely finish, garnish with finely chopped fresh parsley. This adds a pop of color and fresh taste to your dish. Enjoy your meal! To make fluffy rice, start by rinsing jasmine rice. Rinsing removes extra starch and prevents gummy rice. Use cold water and rinse until it runs clear. This takes a few minutes but is worth it. Next, combine the rinsed rice with chicken broth and water in a medium saucepan. Bring it to a boil over medium-high heat. After boiling, lower the heat and cover the pot tightly. Let it simmer for 15 minutes, then keep it covered for 5 more minutes. This steams the rice and keeps it fluffy. Cooking shrimp well is easy. First, make sure your shrimp are peeled and deveined. Heat butter over medium heat in a large skillet. Once melted, add minced garlic and cook briefly. You want it fragrant but not burnt. Then, add the shrimp and season with smoked paprika, salt, and pepper. Cook them for about 2-3 minutes on each side. They should turn pink and opaque. This means they are done! Overcooking shrimp makes them tough, so watch the time. Boost the flavor of your garlic butter shrimp rice with simple enhancements. Start with smoked paprika for a warm, smoky taste. Fresh lemon juice brightens the dish and adds zing. You can also add fresh herbs like parsley for a pop of color. If you want more heat, try red pepper flakes. For a touch of earthiness, consider adding a pinch of cumin. These small tweaks can change your dish from good to great! Pro Tips Rinse the Rice: Rinsing the jasmine rice under cold water before cooking removes excess starch, ensuring a fluffy texture in the final dish. Perfectly Cooked Shrimp: Cook shrimp just until they turn pink and opaque; overcooking can make them rubbery. Keep an eye on them for the best texture. Add Freshness: Incorporating fresh lemon juice right before serving enhances the flavors and adds a refreshing zing to the dish. Garnishing Tips: Fresh parsley not only adds color but also a burst of fresh flavor. Feel free to experiment with other herbs like cilantro or chives for variation. {{image_4}} You can add many tasty veggies to this dish. Think about using bell peppers, broccoli, or zucchini. Each adds flavor and color. Just chop them small so they cook quickly. - Bell Peppers: Use red or yellow for sweetness. - Broccoli: Cut into small florets for a nice crunch. - Zucchini: Sauté until tender; it takes only a few minutes. Add these veggies when you cook the shrimp. This way, they stay fresh and bright. If you want a change, try using chicken or tofu. Chicken has a great flavor and pairs well with garlic butter. - Chicken: Use boneless, skinless thighs or breasts. Cook them until golden brown. - Tofu: Firm tofu works best. Cut it into cubes and sauté until crispy. Both options bring new tastes to this dish. Just replace the shrimp with your chosen protein. You can make this dish vegan too. Instead of shrimp and butter, use tasty plant-based options. - Vegan Butter: Use a plant-based butter for a rich flavor. - Mushrooms: Sauté mushrooms for a meaty texture. - Chickpeas: Add canned chickpeas for protein and fiber. These swaps keep the dish enjoyable and satisfying while fitting a vegan diet. Enjoy your meal in many delightful ways! After enjoying your garlic butter shrimp rice, let it cool. Place leftovers in an airtight container. Store it in the fridge for up to three days. This keeps the shrimp and rice fresh and tasty. If you need to keep it longer, consider freezing. To reheat, use a microwave or a skillet. If using a microwave, cover the dish. Heat it for about 1-2 minutes, stirring halfway. This helps it heat evenly. When using a skillet, add a splash of water. Cook over low heat until warmed through. This keeps the rice from drying out. For freezing, portion the shrimp rice into containers. Make sure they are freezer-safe. It can last for up to three months in the freezer. When ready to enjoy, thaw in the fridge overnight. Reheat it as mentioned above. Enjoy your meal just like the first time! Yes, you can use frozen shrimp. Just thaw them first. Place them in cold water for about 20 minutes. This will help them cook evenly and keep their flavor. Remember to pat them dry before cooking. This step helps the shrimp sear nicely in the pan. Cooking jasmine rice takes about 20 minutes. You bring it to a boil, then cover it and let it simmer. After 15 minutes, take it off the heat but keep the lid on for 5 more minutes. This lets the rice finish cooking and become fluffy. You can use basmati rice or long-grain white rice. Both options will work well and give good results. Just remember to adjust the cooking times as needed. Always rinse the rice to remove excess starch for the best texture. This blog post covered the ingredients and steps to make garlic butter shrimp rice. You learned how to prepare fluffy rice and cook shrimp well. We discussed helpful tips, tasty variations, and proper storage. In the end, this dish is easy and fun to make. You can also customize it to fit your tastes. Enjoy your cooking and share your delicious meals with others!

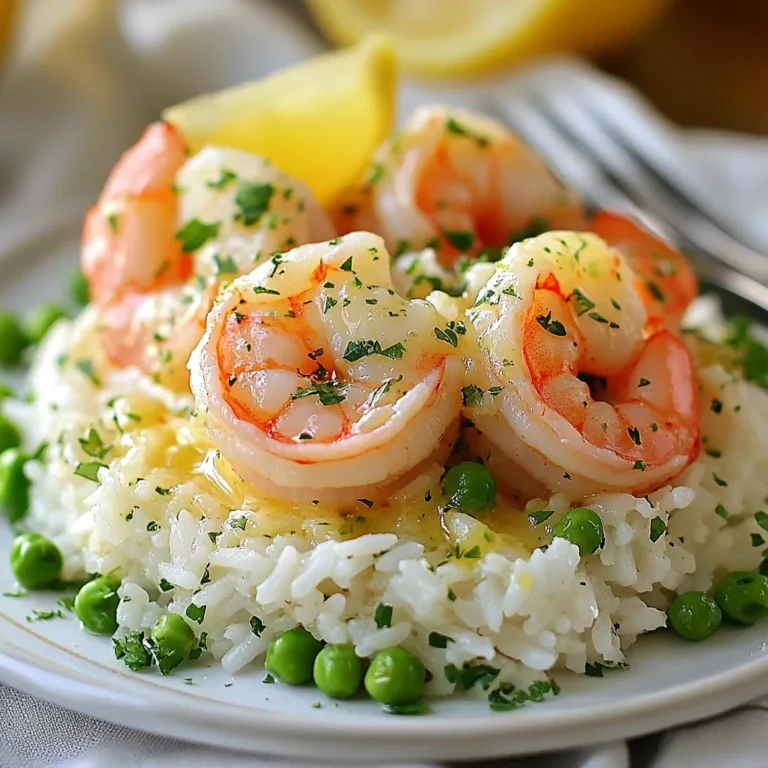
Garlic Butter Shrimp Rice Tasty and Simple Meal

- 1 lb (450g) ground beef - 1 cup broccoli florets - 1 cup carrots, julienned - 3 cloves garlic, minced - 1 inch fresh ginger, grated - 1 tablespoon sesame oil - 1/4 cup soy sauce - 2 tablespoons gochujang (Korean chili paste) - 2 tablespoons brown sugar - 1 tablespoon rice vinegar - 2 green onions, sliced (plus extra for garnish) - Sesame seeds - Cooked rice These ingredients make your Spicy Korean Beef Bowls both tasty and colorful. Ground beef gives the dish its hearty base. Broccoli and carrots add a nice crunch and nutrition. Garlic and ginger bring warmth and depth to the flavor. For flavoring, sesame oil adds richness. Soy sauce gives a savory taste, while gochujang adds heat. Brown sugar balances the heat and rice vinegar adds a hint of tang. To serve, you will need cooked rice. This will soak up all the delicious sauce. Top with green onions and sesame seeds for a lovely finish. Enjoy the vibrant colors and bold flavors! {{ingredient_image_2}} - Heating the sesame oil: Start by heating 1 tablespoon of sesame oil in a large skillet. Use medium heat until it shimmers slightly. This oil adds a rich flavor to the dish. - Sautéing garlic and ginger: Next, add 3 cloves of minced garlic and 1 inch of grated ginger. Sauté for about 30 seconds. Stir often until you smell a nice aroma. Be careful not to let them brown. - Browning the ground beef: Increase the heat to medium-high. Add 1 pound of ground beef to the skillet. Use a wooden spoon to break it into small pieces. Cook this until the beef turns brown, which takes about 5 to 7 minutes. Stir occasionally for even cooking. - Incorporating the sauce: In a bowl, whisk together 1/4 cup of soy sauce, 2 tablespoons of gochujang, 2 tablespoons of brown sugar, and 1 tablespoon of rice vinegar. Pour this sauce over the beef in the skillet. Mix well to coat the meat evenly. - Cooking broccoli and carrots: Add 1 cup of broccoli florets and 1 cup of julienned carrots to the skillet. Cook for another 5 minutes. Stir occasionally until the veggies are tender but still bright and crunchy. - Final mixing with green onions: Remove the skillet from heat and fold in 2 sliced green onions. Make sure they mix well with the beef and veggies. Reserve a few for garnish later. - To cook beef and veggies evenly, stir often. This helps mix everything well. - For less spice, use less gochujang. For more heat, add more. Taste as you go! - Use short-grain rice for a stickier texture. It holds the beef well. - Try garnishing with sliced cucumbers or radishes for a fresh crunch. - Store leftovers in an airtight container. Keep them in the fridge for up to three days. - To reheat, use a skillet over medium heat. Stir until hot. You can also use the microwave. Pro Tips Use Fresh Ingredients: The quality of your beef and vegetables will greatly impact the flavor of your dish. Opt for fresh, high-quality ingredients for the best results. Adjust the Spice Level: If you prefer a milder dish, reduce the amount of gochujang or add more sugar to balance the heat. You can always add more spice later, but it’s hard to take it out! Meal Prep Friendly: This recipe is perfect for meal prepping! Cook a larger batch and store it in the fridge for up to 3 days, or freeze it for later. Just reheat and serve over fresh rice. Garnish for Flavor: Don't skip the sesame seeds and extra green onions on top! They add not only visual appeal but also an additional crunch and flavor that complements the dish beautifully. {{image_4}} You can easily swap the ground beef with turkey or tofu. Both options work well. Turkey gives a leaner taste. Tofu adds a great plant-based protein. For vegetables, consider bell peppers or snap peas. These add crunch and color to your dish. Gochujang comes in many forms. You might try a sweet gochujang for a milder taste. If you want more heat, look for a spicy version. You can also use different vinegars. Apple cider vinegar adds a fruity note, while rice vinegar keeps it classic. Try serving this dish in lettuce wraps for a fun twist. The crisp lettuce pairs well with the spicy beef. You could also make a burrito bowl. Just add beans and avocado to the mix for a filling meal. Explore these options to keep the dish exciting! Each serving of Spicy Korean Beef Bowls has about 500 calories. This number may vary based on your rice choice and portion size. - Protein: 30 grams - Fat: 20 grams - Carbohydrates: 45 grams The protein mainly comes from the ground beef, making it filling. The fat content includes healthy fats from sesame oil. Carbs mainly come from the rice and vegetables. This dish packs a punch with healthy ingredients. Ground beef gives you iron and protein. Broccoli boosts your vitamins C and K. Carrots add beta-carotene, which is great for your eyes. Garlic and ginger have anti-inflammatory properties. Gochujang adds flavor and may help boost metabolism. Using sesame oil adds healthy fats. Overall, these ingredients come together for a tasty and nutritious meal. Gochujang is a Korean chili paste. It has a deep red color and a rich taste. This paste is made from red chili powder, glutinous rice, fermented soybeans, and salt. It brings heat and sweetness to dishes. If you can't find gochujang, you can use sriracha or red pepper flakes mixed with a bit of sugar. These will add spice but may lack the unique flavor. Yes, you can meal prep Spicy Korean Beef Bowls. Cook the beef and veggies in advance. Store them in airtight containers. You can keep them in the fridge for up to three days. When ready to eat, just reheat the beef and veggies in a skillet. Serve over freshly cooked rice for the best taste. The spice level in this recipe comes from gochujang. It offers a nice kick but is not overwhelming. If you prefer less heat, reduce the amount of gochujang you use. You can also add more sugar to balance the spice. For those who love heat, feel free to add extra gochujang or chili flakes to ramp it up. This dish combines ground beef, veggies, and flavorful sauces. We covered how to prepare the beef, add vegetables, and mix everything well. Remember to adjust spice levels to suit your taste. There are plenty of variations, such as using turkey or tofu. Proper storage and reheating keep leftovers tasty. With the nutritional benefits, this meal is both satisfying and healthy. Dive into this recipe and enjoy your cooking!

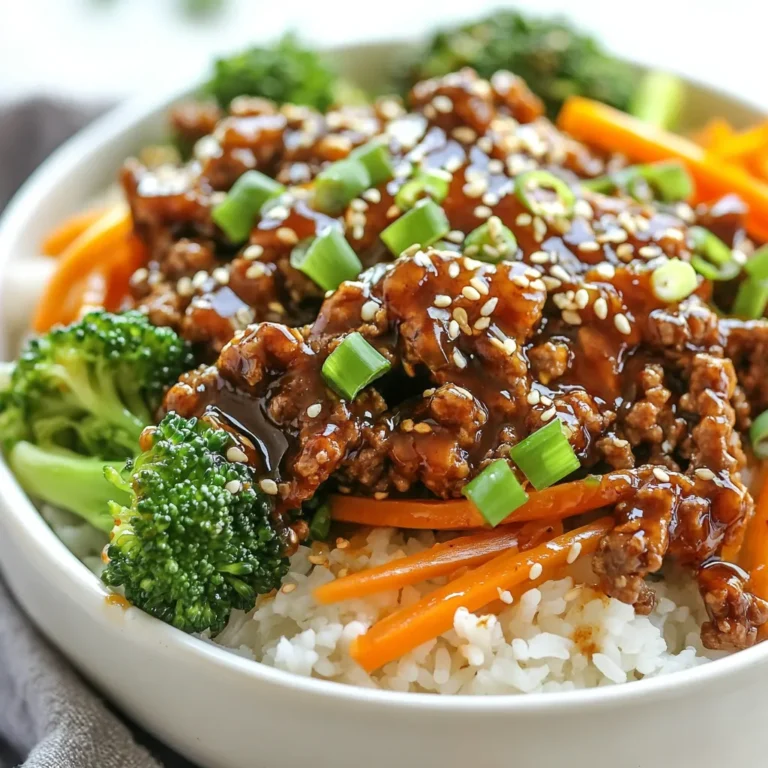
Spicy Korean Beef Bowls Flavorful and Easy Recipe

- 4 medium sweet potatoes - 2 cups shredded cooked chicken - 1/2 cup barbecue sauce - 1/2 cup corn - 1/2 cup black beans - 1/2 cup shredded cheddar cheese - 1/4 cup green onions - 1 tablespoon olive oil - Salt and pepper to taste - Sour cream - Diced avocado - Sliced jalapeños The main ingredients in BBQ chicken stuffed sweet potatoes create a rich and hearty meal. Sweet potatoes offer a sweet and creamy base. Shredded chicken adds protein and flavor. A good barbecue sauce gives a smoky touch, enhancing the dish. In addition, corn and black beans add texture and nutrients. Corn brings sweetness, while black beans add fiber. Shredded cheddar cheese melts beautifully on top, giving a savory finish. The green onions add a fresh crunch, balancing the flavors. You can customize your meal with optional toppings. Sour cream adds creaminess, while diced avocado brings richness. Sliced jalapeños give a spicy kick. Each topping allows you to adjust the dish to your taste. This recipe is simple, tasty, and packed with nutrition. The ingredients work together to create a filling meal that is sure to please. {{ingredient_image_2}} - Preheat the oven to 400°F (200°C). - Rinse the sweet potatoes under cold water. Scrub them to remove any dirt. Use a fork to poke several holes in each potato. This helps steam escape while they bake. - Place the sweet potatoes on a baking sheet lined with parchment paper. Bake for 45-60 minutes. They are ready when a fork pierces them easily. Once done, take them out and let them cool slightly before handling. - In a medium bowl, mix the shredded chicken, barbecue sauce, corn, black beans, and chopped green onions. Stir well until all the ingredients are coated in the sauce. This mixture adds flavor and nutrition to the dish. - When the sweet potatoes are cool, slice each one in half lengthwise. Use a spoon to scoop out some flesh, leaving about 1/4 inch for support. Fill each half with the BBQ chicken mixture. Press down slightly for a packed filling. - Sprinkle shredded cheddar cheese on top of each stuffed potato. Make sure to cover the filling evenly. Return them to the oven for 10-15 minutes. Bake until the cheese is melted and bubbly. This creates a tasty golden crust. How to know when sweet potatoes are done? Sweet potatoes are done when they feel soft. You can check by poking them with a fork. If it easily pierces through, they are ready. Keep an eye on them; they usually take 45-60 minutes. Best techniques for mixing filling: Mixing the filling is simple! Grab a bowl and add the chicken, barbecue sauce, corn, black beans, and green onions. Use a fork or spoon to blend everything well. Make sure each piece of chicken gets coated in sauce. This helps to keep the filling moist and tasty. Presentation tips for serving: To wow your guests, serve the stuffed sweet potatoes on a big platter. Drizzle some extra barbecue sauce on top for flair. You can also add small bowls with toppings like sour cream or avocado on the side. This lets everyone customize their meal. Suggested side dishes to complement the meal: Pair your stuffed sweet potatoes with a fresh salad or some grilled veggies. Corn on the cob works great too! You can also serve a light coleslaw for a crunchy texture. These sides balance the richness of the sweet potatoes. Ideas for additional seasonings: If you want to spice things up, add some cumin or chili powder to the filling. A pinch of garlic powder or onion powder can also enhance the flavor. Just a little goes a long way! Suggestions for changing up the barbecue sauce: Feel free to switch out the barbecue sauce! You can use a spicy version for heat or a honey barbecue for sweetness. Try a homemade sauce with mustard or vinegar for a unique taste. The options are endless, so get creative! Pro Tips Perfectly Cooked Sweet Potatoes: To ensure your sweet potatoes are evenly baked, choose potatoes that are similar in size and shape. This will help them cook uniformly and achieve the desired tenderness. Customize Your Filling: Feel free to add other ingredients to your BBQ chicken mixture. Chopped bell peppers, diced tomatoes, or even a dash of hot sauce can enhance the flavor profile and add more texture. Cheese Variations: Experiment with different types of cheese for unique flavors. Try pepper jack for a spicy kick or feta for a tangy contrast to the sweetness of the potatoes. Meal Prep Friendly: These stuffed sweet potatoes can be made in advance. Prepare the filling and bake the potatoes, then assemble and reheat when ready to serve for a quick and easy meal. {{image_4}} - Gluten-free modifications: Use gluten-free barbecue sauce. Always check labels to ensure no gluten is present. - Vegan alternative options: Swap chicken for shredded jackfruit or chickpeas. Use a vegan barbecue sauce and skip the cheese or use a plant-based alternative. - Spicy BBQ chicken stuffed sweet potatoes: Add diced jalapeños to the filling for heat. You can also use a spicy barbecue sauce for an extra kick. - Southwestern-style variations with different spices: Mix in cumin, paprika, or chili powder. This gives the dish a warm, smoky flavor that pairs well with sweet potatoes. - Alternative ingredients for BBQ sauce: If you want a different taste, try using teriyaki sauce or a homemade sauce with ketchup and vinegar. - Different types of cheese to use: Cheddar is great, but feel free to try Monterey Jack or pepper jack. These cheeses melt well and add unique flavors. To store your BBQ chicken stuffed sweet potatoes, first let them cool. Once they are at room temperature, place them in an airtight container. You can keep them in the fridge for up to three days. If you want to freeze them, wrap each stuffed sweet potato tightly in plastic wrap. Then, place them in a freezer-safe bag or container. This method helps to prevent freezer burn. Frozen stuffed sweet potatoes will stay good for about three months. When it's time to enjoy your leftovers, you can reheat them in two ways. 1. Oven: Preheat the oven to 350°F (175°C). Place the stuffed sweet potatoes on a baking sheet. Cover them with foil to keep them moist. Bake for about 20-25 minutes, or until heated through. 2. Microwave: If you're in a hurry, you can use the microwave. Place one sweet potato on a microwave-safe plate. Heat on high for about 2-3 minutes, checking every minute until hot. Leftovers will stay fresh in the fridge for about three days. If you freeze them, they can last for up to three months. Remember to check for any signs of spoilage before eating. If they look or smell off, it’s best to throw them out. Keeping track of the dates can help you enjoy your stuffed sweet potatoes safely. The best sweet potatoes for stuffing are medium-sized ones. Look for smooth skin and no bruises. I recommend using orange-fleshed varieties like Beauregard or Jewel. They are sweet and creamy when cooked. You can also try the purple-fleshed varieties for a fun twist. Their color adds a nice look to your dish. Yes, you can use rotisserie chicken for this recipe. It saves time and adds great flavor. Just shred the meat and mix it with your BBQ sauce. You can also use leftover cooked chicken from another meal. This is an easy way to enjoy BBQ chicken stuffed sweet potatoes on a busy day. To make this recipe in advance, prepare the sweet potatoes first. Bake them and let them cool. You can make the filling, too. Mix the chicken, BBQ sauce, corn, black beans, and green onions. Store the filling in the fridge. On the day you want to eat, stuff the sweet potatoes and bake them. This way, you save time and enjoy a quick meal. You can serve BBQ chicken stuffed sweet potatoes with a fresh salad. A simple green salad or coleslaw pairs well. You could also add roasted vegetables or corn on the side. For a crunch, try tortilla chips with salsa. These sides make a complete meal. This blog post shares a simple, tasty recipe for BBQ chicken stuffed sweet potatoes. You learned about the main and additional ingredients needed, plus optional toppings. I also outlined step-by-step instructions for preparation and baking. The tips and variations help you customize the dish. Enjoy creating your meal, and don’t hesitate to experiment with flavors. With these ideas, you can make a delicious dish that fits your taste. Happy cooking!

BBQ Chicken Stuffed Sweet Potatoes Nourishing Delight

When making Sweet Chili Tofu Buddha Bowls, you need fresh and vibrant ingredients. I find that using high-quality items makes a big difference in taste. Here’s what you will need: - Tofu - 1 block (14 oz) firm tofu, drained and pressed - Sauces and Oils - 3 tablespoons sweet chili sauce - 1 tablespoon soy sauce - 1 tablespoon sesame oil - Vegetables - 2 cups cooked quinoa (or substitute with brown rice) - 1 cup broccoli florets - 1 red bell pepper, thinly sliced - 1 large carrot, shredded - 1 ripe avocado, sliced - Toppings - 1/4 cup green onions, finely chopped - 1 tablespoon sesame seeds - Salt and pepper to taste These ingredients create a colorful and tasty bowl. The tofu gives protein, while the veggies add crunch and nutrition. The sweet chili sauce brings a nice balance of flavor. When combined, they make a meal that is both healthy and satisfying. Enjoy using these fresh items to create a beautiful dish! {{ingredient_image_2}} First, set your oven to 400°F (200°C). This heat helps the tofu get nice and crispy. Grab a baking sheet and line it with parchment paper. This step makes cleanup easy and keeps the tofu from sticking. Next, take your block of firm tofu. Drain it and press it well to remove extra water. Cut the tofu into bite-sized cubes. Place these cubes into a large mixing bowl. This size helps them cook evenly and absorb the sauce better. In a separate bowl, mix 3 tablespoons of sweet chili sauce, 1 tablespoon of soy sauce, and 1 tablespoon of sesame oil. Whisk these together until smooth. Pour this sauce over the tofu cubes. Use a spatula or your hands to toss well, coating each piece. Spread the marinated tofu on the baking sheet in a single layer. Sprinkle with salt and pepper. Bake for 25-30 minutes. Flip the cubes halfway through to ensure they turn golden and crispy. While the tofu bakes, it’s time to prep the veggies. Steam 1 cup of broccoli florets in a pot with a steamer basket for about 5-7 minutes. You want them bright and tender. Once done, keep them covered to stay warm. Now, let’s put it all together! Start with a scoop of cooked quinoa in each bowl. Top it with the baked tofu, steamed broccoli, sliced red bell pepper, shredded carrot, and avocado slices. For the finishing touch, sprinkle each bowl with chopped green onions and sesame seeds. If you like it a bit sweeter, drizzle some extra sweet chili sauce on top before serving. This adds flavor and makes your bowl pop! To get your tofu crispy, start with firm or extra-firm tofu. Drain it well and press it to remove excess water. This step is key to getting that perfect crunch. Cut your tofu into bite-sized cubes. Marinate these cubes in a mix of sweet chili sauce, soy sauce, and sesame oil. This will add flavor while helping them crisp up nicely. Spread the marinated tofu on a lined baking sheet in a single layer. Bake at 400°F (200°C) for 25 to 30 minutes. Flip them halfway through for even cooking. This method gives you crispy tofu that is golden and tasty. Serve your Sweet Chili Tofu Buddha Bowls warm. Start with a base of quinoa or brown rice for great texture. Top it with the crispy tofu and a variety of colorful veggies. Include steamed broccoli, fresh bell pepper, and shredded carrot. Don't forget to add avocado slices for creaminess. For extra flavor, drizzle more sweet chili sauce on top just before serving. This adds a sweet kick that pairs well with the other ingredients. Make your Buddha bowl visually appealing by arranging the ingredients in sections. Place the quinoa at the bottom, then artfully arrange the tofu and veggies on top. This not only looks great but also highlights the colors of the fresh ingredients. Sprinkle chopped green onions and sesame seeds over the top for a final touch. Serve immediately to enjoy the fresh flavors and beautiful look of your meal. Pro Tips Press Tofu Thoroughly: Ensure you press the tofu well to remove excess moisture, which helps achieve a crispier texture when baking. Customize Your Veggies: Feel free to swap out the vegetables for your favorites or whatever is in season to keep it fresh and exciting. Extra Flavor Boost: Marinate the tofu for a longer time, if possible, to deepen the flavor profile before baking. Perfect Quinoa Cooking: Rinse quinoa before cooking to remove its natural bitterness, and use vegetable broth instead of water for added flavor. {{image_4}} You can change the grain in your Buddha bowl. Quinoa is great, but brown rice works well too. Try farro or barley for a nutty taste. Both grains add fiber and nutrients. They give your bowl a hearty base. You can mix in other veggies for more flavor. Try snap peas or zucchini for crunch. Sweet corn adds a pop of color and sweetness. You can also add spinach or kale for extra greens. Use what’s in season for the best taste. If you wish to swap tofu, try chickpeas or lentils. These options are packed with protein. You can also use tempeh for a firmer texture. For a non-vegan option, grilled chicken fits well too. Each swap offers a unique flavor profile. To store any leftover Sweet Chili Tofu Buddha Bowls, let them cool first. Transfer the bowls to airtight containers. This keeps the food fresh and tasty. You can store them in the fridge for up to three days. If you want to reheat them, you will enjoy the same great flavor. When it's time to eat your leftovers, you can reheat them easily. The microwave works well for this. Place the bowl in the microwave and heat for about 1-2 minutes. Stir halfway through to warm it evenly. You can also reheat the bowl in an oven at 350°F (175°C) for about 10-15 minutes. This method keeps the tofu crispy. If you want to freeze your Buddha bowls, do so before adding fresh toppings. The tofu and veggies freeze well. Use freezer-safe containers to store them. They can last up to two months in the freezer. When ready to eat, thaw them overnight in the fridge. Then reheat as mentioned before for a quick meal. Yes, you can use extra-firm tofu. It has less moisture and may give a firmer bite. Just remember to press it well. This helps remove even more water for better texture. Extra-firm tofu works great in stir-fries and baking. It will still soak up the sweet chili sauce nicely. If you need a substitute, you can mix honey with hot sauce. This gives you sweetness and heat. Another option is to use teriyaki sauce, but it will change the flavor a bit. You can also make your own sweet chili sauce with sugar, vinegar, and chili flakes. Yes, this dish can be gluten-free! Use gluten-free soy sauce or tamari instead of regular soy sauce. The other ingredients like tofu, quinoa, and fresh veggies are naturally gluten-free. Just check all labels to be sure. A Sweet Chili Tofu Buddha Bowl has about 450 calories per serving. This count can change based on the toppings and portion sizes. It’s a filling meal packed with protein and nutrients. Enjoy it as a satisfying lunch or dinner option! This blog post covered how to make a delicious Sweet Chili Tofu Buddha Bowl. We discussed the key ingredients, step-by-step cooking instructions, and tips for crispy tofu. We explored variations for grains, veggies, and proteins. Lastly, we shared how to store leftovers and clear up common questions. Enjoy your cooking and feel free to experiment. Your Buddha Bowl will be tasty and satisfying.

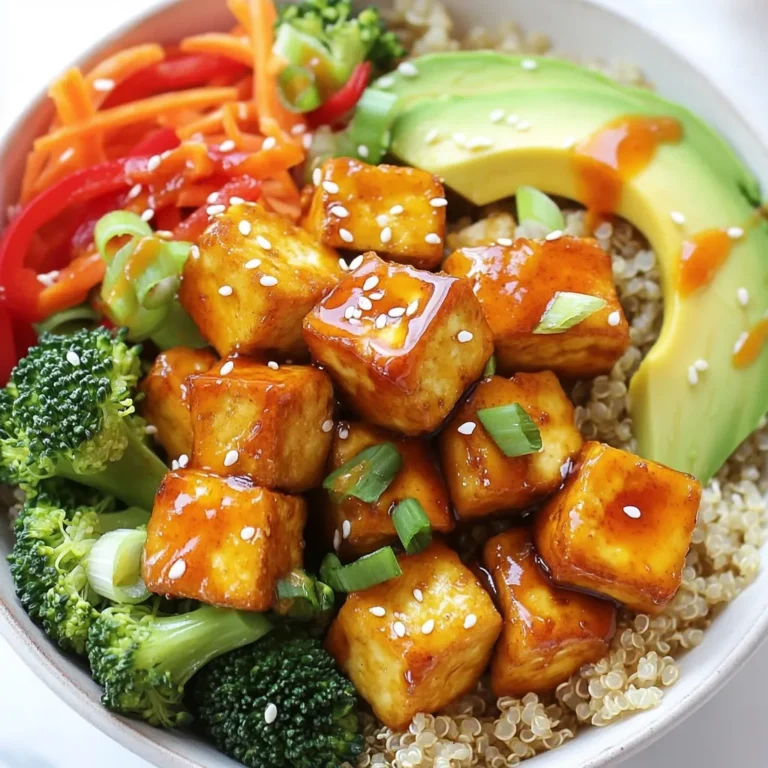
Sweet Chili Tofu Buddha Bowls Flavorful Vegan Meal

To make Chipotle Black Bean Chili, you need a few simple items. Here's what to gather: - 2 tablespoons olive oil - 1 large onion, diced - 3 cloves garlic, minced - 1 red bell pepper, diced - 2 medium carrots, diced - 2 cans (15 oz each) black beans, rinsed and drained - 1 can (15 oz) diced tomatoes, with juices - 2 tablespoons chipotle in adobo sauce, finely chopped - 1 tablespoon ground cumin - 1 tablespoon chili powder - 1 teaspoon smoked paprika - 1 cup vegetable broth - Salt and black pepper to taste - Fresh cilantro, chopped, for garnish - Lime wedges, for serving These ingredients create a rich and flavorful chili. The black beans add protein, while the chipotle gives it a nice kick. Remember to have fresh cilantro and lime wedges ready for serving. They will brighten up the dish and make it even tastier! {{ingredient_image_2}} 1. Start by heating the olive oil in a large pot over medium heat. I like to wait until the oil shimmers. 2. Add the diced onion and sauté for about five minutes. You want it to turn translucent. 3. Next, stir in the minced garlic. After a minute, add the diced red bell pepper and diced carrots. Cook them for three to four minutes. They should soften and smell amazing. 1. Now, it’s time to mix in the black beans and diced tomatoes. Make sure to include their juices for extra flavor. 2. Add the chipotle in adobo sauce, ground cumin, chili powder, and smoked paprika. Pour in the vegetable broth, then stir everything thoroughly. This step ensures all the flavors blend well together. 1. Increase the heat to bring the mixture to a boil. Once boiling, lower the heat to let it simmer. 2. Cover the pot with a lid and let it cook for about 30 to 35 minutes. Stir occasionally to keep it from sticking. 3. After simmering, taste the chili. Adjust with salt and black pepper as needed. If you want more heat, add extra chipotle. 4. Once it thickens and the flavors meld, remove the pot from heat. 5. Serve hot, topped with fresh cilantro and lime wedges on the side. Enjoy this delicious chili with friends or family! Using fresh herbs brings bright notes to Chipotle Black Bean Chili. Fresh cilantro adds a punch that dried cannot match. You can also try fresh lime juice for zest. Adjusting spice levels is key. Start with the chipotle in adobo sauce. If you want more heat, add more. You can also mix in some cayenne pepper for an extra kick. Always taste as you go to find your perfect balance. A heavy-bottomed pot is best for cooking chili. It helps distribute heat evenly. This prevents the chili from burning. A Dutch oven works great for this. Simmering time is super important. Let the chili cook for at least 30 minutes. This allows flavors to blend well. Stir occasionally to keep it from sticking. A longer simmer can deepen the taste even more. Pro Tips Use Fresh Ingredients: Fresh vegetables and herbs enhance the flavor and nutritional value of your chili. Opt for organic, seasonal produce when possible. Customize the Heat: Adjust the amount of chipotle in adobo sauce based on your spice preference. For a milder chili, start with less and add more to taste. Let it Rest: Allow the chili to sit for a few minutes after cooking to let the flavors meld together. It often tastes even better the next day! Serve with Toppings: Enhance your chili with a variety of toppings like avocado, shredded cheese, or sour cream for added texture and flavor. {{image_4}} You can switch black beans for pinto or kidney beans. Pinto beans add a creamier texture. Kidney beans offer a firmer bite. Both types work well with the spices in the chili. Feel free to mix beans for a fun twist. This makes your chili more colorful and interesting. If you want to add protein, try ground meat or tofu. Ground beef or turkey makes a hearty option. If you prefer a plant-based choice, use firm tofu. Crumble the tofu and sauté it with the veggies. Both choices bring great flavor and make the dish more filling. Adjust the heat by changing the chipotle amount. If you like mild chili, use less chipotle. For extra heat, add more chipotle or try cayenne pepper. You can also use sweet paprika for flavor without heat. This way, you can tailor the spice level to your taste. To store leftover chili, let it cool first. Once cool, place it in an airtight container. This keeps it fresh and safe. Store it in the fridge for up to five days. When you are ready to eat, reheat the chili on the stove or in the microwave. Stir it well to heat evenly. If it seems thick, add a splash of broth or water. Freezing is a great way to save extra chili. First, let it cool completely. Then, transfer it to a freezer-safe container or bag. Be sure to leave some space for the chili to expand. It can last up to three months in the freezer. To reheat, thaw it overnight in the fridge or use the microwave. Heat it gently on the stove until it is hot throughout. Stir often to make it creamy and delicious again. Enjoy your warm chili! You can serve many tasty sides with this chili. Here are some great options: - Cornbread: It pairs well and soaks up the chili. - Rice: White or brown rice adds a filling touch. - Tortilla chips: They add crunch and fun to each bite. - Fresh avocado: Slices or guacamole brighten the dish. - Sour cream: A dollop cools the heat and adds creaminess. - Lime wedges: Squeezing lime over the chili adds a zesty kick. Yes, you can easily make this chili in a slow cooker. Here are some tips: - Sauté the onion and garlic first, then add them to the slow cooker. - Combine all other ingredients in the slow cooker. - Cook on low for 6-8 hours or high for 3-4 hours. - Stir occasionally, if possible, for even cooking. - Taste before serving and adjust seasoning as needed. Chipotle Black Bean Chili lasts well in the fridge. Here’s what you should know: - It stays fresh for about 4-5 days in an airtight container. - Check for signs of spoilage, like off-smells or mold. - If you see any of these signs, it's best to throw it away. This chili combines fresh veggies, rich spices, and beans for a tasty dish. You start by sautéing onions and garlic, then mix in other vegetables and beans. Adjust the heat and let it simmer to meld flavors. Remember, you can customize with different beans or proteins. Store it well to enjoy later. Chili is simple and fun to make. Each bowl warms your spirit and feeds your body. Happy cooking!

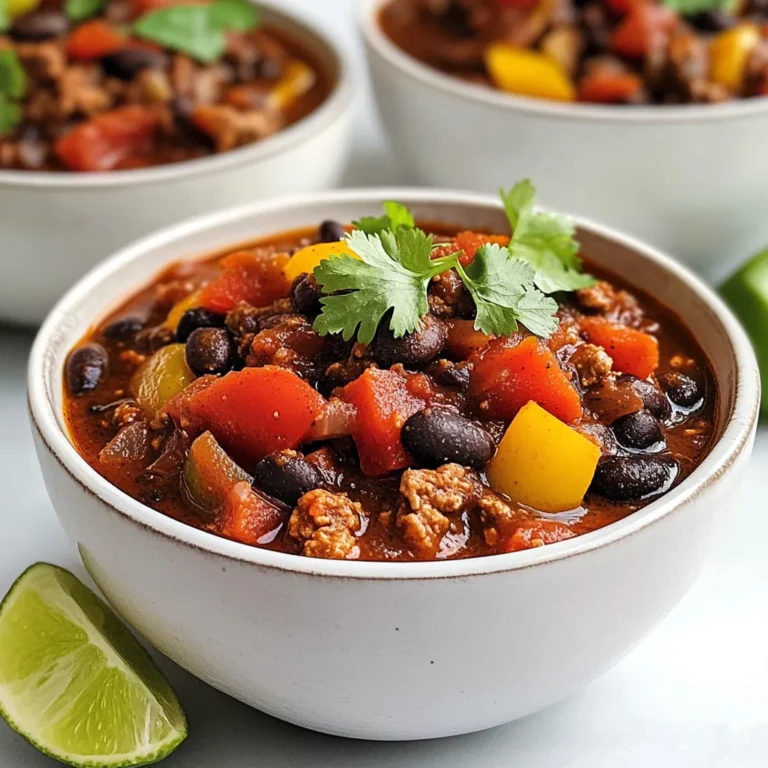
Chipotle Black Bean Chili Flavorful and Easy Recipe

- 4 boneless, skinless chicken breasts - 1 cup pretzel crumbs (finely crushed pretzels) - 1/2 cup whole wheat breadcrumbs - 1/2 cup Dijon mustard - 1/4 cup honey - 1 teaspoon garlic powder - 1 teaspoon onion powder - Salt and pepper to taste - 2 tablespoons olive oil - Fresh parsley, chopped (for garnish) You can use panko breadcrumbs instead of pretzel crumbs. They add a nice crunch too. If you want a twist, try using spicy mustard or maple syrup in place of honey. These swaps can change the flavor and vibe of the dish. When choosing chicken breasts, look for ones that are pink and firm. Avoid those that look dull or have a smell. For pretzels, look for hard, crunchy types. They crush better and give a great texture. Avoid the soft pretzels; they won’t work well for this recipe. {{ingredient_image_2}} First, I preheat my oven to 400°F (200°C). This step is key for a crispy finish. Next, I prepare a baking sheet by lining it with parchment paper. This prevents the chicken from sticking and makes cleanup easy. I grab a small mixing bowl. I combine 1/2 cup of Dijon mustard, 1/4 cup of honey, 1 teaspoon of garlic powder, 1 teaspoon of onion powder, salt, and pepper. I whisk this mixture until it is smooth. Then, I set aside 1/4 cup of this sauce for later. I take 4 boneless, skinless chicken breasts and place them in a shallow dish or zip-top bag. I pour the honey mustard mixture over the chicken. I make sure each piece is coated well. For the best flavor, I let the chicken marinate for at least 15 minutes. In a separate bowl, I mix 1 cup of pretzel crumbs with 1/2 cup of whole wheat breadcrumbs. After marinating, I take the chicken out of the sauce. I let any extra sauce drip off. I then dredge each chicken breast in the breadcrumb mixture, pressing down lightly so the crumbs stick. Before baking, I drizzle each piece with olive oil to boost crispiness. I place the coated chicken on the prepared baking sheet. I bake the chicken for 20-25 minutes. I check that it is golden brown and cooked through. A meat thermometer should read 165°F (74°C) for safety. After baking, I take the chicken out of the oven and let it rest for a few minutes. This helps keep it juicy. Before serving, I drizzle the reserved honey mustard sauce over the chicken. For a pop of color, I garnish with freshly chopped parsley. To get a crunchy coating on your chicken, start by preheating your oven to 400°F (200°C). This ensures even cooking. I recommend using a baking sheet lined with parchment paper. It helps the chicken not stick. Next, oiling the breadcrumbs is key. Drizzle a little olive oil over them before coating the chicken. This adds flavor and makes them crisp. To boost the taste of your chicken, think about adding extra spices. You can mix in paprika or cayenne for some heat. A pinch of smoked paprika gives a nice depth. Fresh herbs like thyme or rosemary can also elevate the dish. Chop them finely and mix them into the pretzel crumbs. The fresh herbs will add a burst of flavor. For the best side dishes, consider serving the chicken with roasted veggies or a simple salad. Mashed potatoes or quinoa also pair well. For presentation, slice the chicken into strips for easy serving. Arrange it on a platter and drizzle the reserved honey mustard sauce on top. Garnish with chopped parsley to add a bright touch. It makes the dish look fresh and inviting. Pro Tips Marinate for Flavor: Allow the chicken to marinate for at least 30 minutes to 1 hour for deeper flavor penetration. If time permits, marinating overnight in the refrigerator will yield even better results. Coat Evenly: When dredging the chicken in the breadcrumb mixture, press down firmly to ensure the crumbs adhere well. This will create a thicker, crunchier crust when baked. Use a Meat Thermometer: To ensure perfectly cooked chicken, use a meat thermometer to check that the internal temperature reaches 165°F (74°C). This will prevent overcooking and keep the chicken juicy. Garnish for Presentation: Don’t skip the fresh parsley garnish! It adds a pop of color and a hint of freshness that enhances the overall presentation of the dish. {{image_4}} You can tweak the flavor of Honey Mustard Pretzel Chicken in fun ways. For a sweet and spicy kick, add hot sauce to the honey mustard mix. Just a few drops can turn up the heat. You can also play around with different mustards. Try spicy brown mustard or whole grain mustard for added texture. Each choice brings new taste and excitement to your dish. You can easily adapt this recipe for air frying. Air fryers cook chicken quickly and keep it crispy. Set your air fryer to 375°F (190°C) and cook for about 15-20 minutes. Remember to flip the chicken halfway for even cooking. If you crave a smoky flavor, grilling is a great option. Grill the coated chicken over medium heat for about 6-8 minutes per side. This method adds a charred taste that pairs well with the honey mustard. For those who need gluten-free meals, make this dish with gluten-free pretzel crumbs. You can find these at most grocery stores. They provide the same crunch as regular pretzels. If you need a binder, use egg or a mixture of water and cornstarch. This will help the crumbs stick to the chicken just right. Enjoy your crunchy, flavorful meal without worry! To store leftover Honey Mustard Pretzel Chicken, use airtight containers. Glass or plastic containers work well. Make sure the chicken cools first. You can keep it in the fridge for up to three days. This way, it stays fresh and tasty. When reheating, keep the chicken's crunch. The oven is best for this. Preheat your oven to 350°F (175°C). Place the chicken on a baking sheet. Heat for about 10-15 minutes. This helps keep it crispy. If you use a microwave, heat in short bursts. Check often to avoid soggy chicken. To freeze the chicken, wrap it tightly in plastic wrap. Then place it in a freezer bag. This prevents freezer burn. The chicken can last for up to three months. When ready to eat, thaw it in the fridge overnight. Reheat in the oven for the best texture. I recommend marinating the chicken for at least 15 minutes. This time helps the chicken soak up the honey mustard flavor. For a deeper taste, you can marinate it for up to 2 hours. Just remember to keep it in the fridge while it marinates. Yes, you can use boneless chicken thighs. They have more fat, so they stay juicy and tender. If you use thighs, check them a bit earlier. They may take 5-10 minutes less to cook than breasts. If pretzel crumbs are not available, you can use panko breadcrumbs or regular bread crumbs. Crush some crackers or chips for a fun twist. Each option will change the taste a bit, but they will still add crunch. To check if the chicken is done, use a meat thermometer. The inside should reach 165°F (74°C). If you don’t have a thermometer, cut into a piece to check. The meat should be white, and the juices should run clear. Yes, this recipe is great for meal prep. You can make the chicken in advance and store it in the fridge. It stays good for 3-4 days. Just reheat it in the oven or microwave when you're ready to eat. This blog post covers all you need for Honey Mustard Pretzel Chicken. We discussed key ingredients, cooking methods, and tips for perfecting your dish. I shared ideas for variations like gluten-free options and different flavor profiles. You now have all the tools to create a tasty meal. Enjoy making this simple, delicious chicken and impress yourself and your guests. Each bite promises to be flavorful and satisfying. Get cooking and make it your own!

Honey Mustard Pretzel Chicken Crunchy and Flavorful Meal

PREV 1 … 14 15 16 … 18 NEXT
sweet savory saga

explore

DessertsDinnerAppetizersDrinks

Our Policies

  • Cookie Policy
  • Copyright Policy
  • Disclaimer
  • GDPR Policy
  • Terms Of Use
Back to Top
  • About
  • Contact Us
  • Privacy Policy
© 2025 sweet savory saga