FREE DINNER EBOOK! Get your copy!
  • Cookie Policy
  • GDPR Policy
  • Disclaimer
  • Terms Of Use
  • Visit my other site: Fun Cookie Recipes
sweet savory saga
  • Home
  • Dinner
  • Desserts
  • Drinks
  • Appetizers
  • Contact
  • About
  • Privacy Policy
  • Home
  • Dinner
  • Desserts
  • Drinks
  • Appetizers
  • Contact
  • About
  • Privacy Policy
  • Cookie Policy
  • GDPR Policy
  • Disclaimer
  • Terms Of Use
Visit my other site: Fun Cookie Recipes

HOME / CATEGORIES /

Latest

- 1 loaf of challah bread (or thick bread of your choice), cubed - 4 large eggs - 2 cups milk (or almond milk for a dairy-free option) - 1 cup pumpkin puree - 1/2 cup brown sugar, packed - 1 teaspoon vanilla extract - 1 teaspoon pumpkin pie spice - 1/2 teaspoon ground cinnamon - Pinch of salt - 1/2 cup pecans, chopped (optional for added texture) - Maple syrup, for serving You can use any thick bread for this dish. Brioche or sourdough works well. If you want a twist, try using cinnamon raisin bread. For a dairy-free option, almond milk or oat milk is great. You can swap brown sugar with coconut sugar for a healthier touch. If you don't have pumpkin pie spice, mix nutmeg and allspice for a similar taste. This casserole provides a balanced meal. Each serving has about: - Calories: 310 - Protein: 8g - Carbs: 50g - Fat: 10g - Fiber: 2g - Sugar: 12g This meal offers some healthy fats from the pecans and protein from the eggs. You can reduce sugar by cutting back on the brown sugar or using less maple syrup. Enjoy this warm, cozy dish that brings joy to any table! Start by preheating your oven to 350°F (175°C). This step is key to ensuring your casserole cooks evenly. While the oven heats up, grab a 9x13-inch baking dish. Grease it well with butter or cooking spray. This helps prevent the casserole from sticking later. In a large bowl, crack open four large eggs. Whisk them until they are well beaten. Next, pour in two cups of milk. You can use almond milk if you prefer a dairy-free option. Add in one cup of pumpkin puree. This gives the casserole its rich pumpkin flavor. Now, mix in half a cup of packed brown sugar, one teaspoon of vanilla extract, one teaspoon of pumpkin pie spice, half a teaspoon of ground cinnamon, and a pinch of salt. Whisk this mixture until it is smooth and well blended. You want all the flavors to combine perfectly. Now it’s time for the bread! Take your loaf of challah bread and cut it into small cubes. Carefully add these bread cubes into your wet mixture. Use a spatula or a wooden spoon to gently fold the bread into the mixture. Make sure each piece is coated well. This step is vital for soaking up all the flavors. Let the bread soak in the mixture for about 15 minutes. This allows the bread to absorb the creamy pumpkin goodness, making each bite a delight. If you want to add a crunchy texture, fold in half a cup of chopped pecans at this point. Once everything is mixed, pour the entire mixture into your greased baking dish. Spread it out evenly to ensure it cooks well. For this casserole, I love using challah bread. It has a soft texture and sweet flavor. You can also try brioche or thick country bread. These types soak up the pumpkin mixture well. Choose bread with a sturdy crust. It helps hold the shape during baking. To make sure your casserole shines, use fresh pumpkin puree. You can buy canned puree, but homemade gives a richer taste. Add a pinch more pumpkin pie spice for extra warmth. A splash of vanilla extract enhances the flavors too. Don’t skip the brown sugar; it adds a lovely sweetness. Keep an eye on your baking time. Cover the dish with foil to keep it moist. Remove the foil in the last 15 minutes to get a nice brown top. Check the center with a knife. It should come out clean when it’s ready. Let it cool for about 10 minutes before serving. This helps it set and makes for easier slices. Enjoy every bite of this cozy treat! {{image_4}} If you want a dairy-free version, you can easily swap out regular milk for almond milk. Almond milk works well and keeps the casserole creamy. You can also try oat milk or coconut milk for different flavors. Each option keeps the dish rich without dairy. To cater to different diets, you can change the bread type. Gluten-free bread is an excellent choice for those avoiding gluten. For a low-sugar option, use a sugar substitute in place of brown sugar. You can also try using egg substitutes, like flax eggs, for a vegan version. This makes the casserole fit for many diets. Adding nuts or fruits can enhance the casserole's taste. Pecans or walnuts add a nice crunch. If you like fruit, consider adding sliced bananas or apples. Dried cranberries or raisins can also bring sweetness and a chewy texture. Get creative and mix your favorite flavors into this cozy dish! After enjoying your Pumpkin Spice French Toast Casserole, let it cool down. Once it's cool, cover it with plastic wrap or store it in an airtight container. Keep it in the fridge for up to three days. This way, you can enjoy it again without losing its flavor. To reheat, preheat your oven to 350°F (175°C). Place the casserole in an oven-safe dish. Cover it with foil to keep it moist. Heat for about 15-20 minutes or until warm. You can also use a microwave. Place a slice on a microwave-safe plate and heat for 30 seconds to 1 minute. Just make sure it gets warm all the way through. If you want to save some for later, freezing is a great option. Cut the casserole into slices and wrap each slice in plastic wrap. Place them in a freezer bag. Make sure to label the bag with the date. You can freeze it for up to three months. When you’re ready to eat, thaw it in the fridge overnight, then reheat as mentioned above. Enjoy your cozy dish anytime! Yes, you can make this casserole ahead of time. Prepare it the night before. Follow all steps to mix the bread and wet ingredients. Then, cover the dish tightly and place it in the fridge. Bake it the next morning for a warm breakfast. You can omit the pumpkin puree if you prefer. This will change the flavor and texture. Instead, use an extra egg and some milk. You can add more spices to keep it tasty. Try using mashed bananas or applesauce for a different flavor. This casserole pairs well with many items. Here are some tasty ideas: - Fresh fruit like berries or sliced bananas - Whipped cream for a sweet touch - Yogurt for some creaminess - Sausages or bacon for a savory bite - Extra maple syrup for drizzling Feel free to mix and match these sides for a great breakfast! This blog post covered all you need to know about Pumpkin Spice French Toast Casserole. We explored the key ingredients and possible swaps for various diets. I shared step-by-step cooking tips and offered advice on perfecting flavor and texture. You also learned how to store leftovers and reheat them for later. Embrace your cooking skills and try this dish. It’s a fun way to enjoy fall flavors anytime!

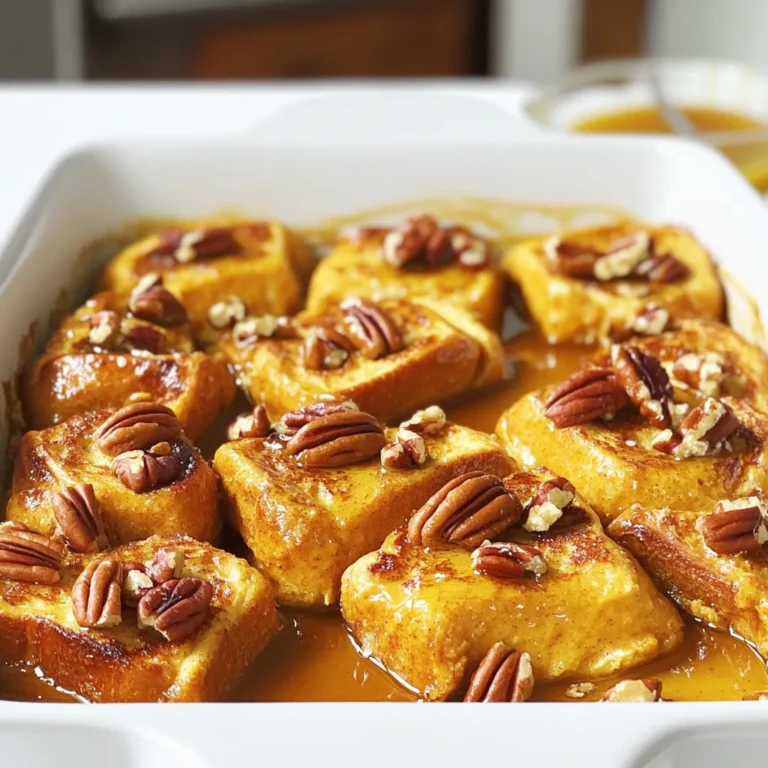
Pumpkin Spice French Toast Casserole Flavorful Delight

To make the Sheet-Pan Garlic Butter Gnocchi and Veggies, you will need: - 1 package (16 oz) gnocchi - 2 cups cherry tomatoes, halved - 1 cup zucchini, diced - 1 cup bell peppers, diced (your choice of colors) - 1/2 cup red onion, thinly sliced - 4 tablespoons unsalted butter, melted - 4 cloves garlic, finely minced - 1 teaspoon dried Italian herbs (a blend of oregano, basil, and thyme) - Salt and freshly cracked black pepper to taste - Fresh parsley, finely chopped (for garnish) - Grated Parmesan cheese (optional, for serving) Using the right measurements helps keep the dish balanced. If you need a substitute: - You can use frozen gnocchi instead of fresh. Just follow the package instructions for cooking. - Any colorful bell pepper works well. Feel free to mix red, yellow, or green. - Swap zucchini for yellow squash or eggplant if you prefer. - For a dairy-free option, use vegan butter in place of unsalted butter. - If you don’t have fresh parsley, try basil or cilantro for a different flavor. Choosing fresh veggies makes all the difference in flavor and health. Here are some tips: - Look for vibrant colors in bell peppers and tomatoes. Bright colors mean fresh and tasty. - Choose zucchini that feels firm and has smooth skin. Avoid any that seem soft or wrinkled. - For red onions, pick ones with a shiny surface and no dark spots. - If possible, buy organic produce for better taste and fewer chemicals. - Check the stem end of cherry tomatoes; it should be green and fresh-looking. These tips and ingredient details will help you create a delicious and colorful dish that everyone will enjoy! Start by preheating your oven to 400°F (200°C). This helps the gnocchi cook evenly. Next, grab a large baking sheet. Line it with parchment paper. Make sure the paper is smooth and flat. This will make cleanup a breeze. In a large mixing bowl, combine the gnocchi, halved cherry tomatoes, diced zucchini, diced bell peppers, and sliced red onion. Use a spatula to gently stir the mixture. It’s important to mix well so the veggies and gnocchi blend together. In a small bowl, whisk together the melted butter, minced garlic, dried Italian herbs, salt, and black pepper. This sauce adds a rich flavor to your dish. The garlic brings a nice kick, while the herbs add depth. Drizzle the garlic butter sauce over the gnocchi and veggies in the bowl. Toss everything well to make sure all pieces are coated. Then, spread the mixture onto the lined baking sheet in a single layer. This helps everything cook evenly. Bake for 20-25 minutes. Halfway through, stir the mix to promote even browning. Look for a golden-brown color and tender veggies. Once done, take the sheet pan out of the oven. Sprinkle fresh parsley over the dish for color and flavor. If you like cheese, add some grated Parmesan on top. Serve hot for the best taste. A light drizzle of olive oil can add a nice finish. To get gnocchi just right, follow these tips: - Use fresh gnocchi. Fresh gnocchi cooks better. - Cook in boiling water. Boil gnocchi for about 2-3 minutes. They are done when they float. - Don't overcrowd the pan. If you cook too much at once, they may stick together. - Bake until golden. In the oven, look for a nice golden color. This means they are crispy outside and soft inside. Enhance flavors in your dish with these ideas: - Add fresh herbs. Basil or thyme boosts taste. - Use quality butter. Good butter makes the sauce richer. - Experiment with spices. A pinch of red pepper flakes adds a kick. - Try different cheeses. Feta or goat cheese can change the flavor profile. Here are mistakes to watch for: - Using cold ingredients. They need to be at room temperature for even cooking. - Not stirring halfway. This can lead to uneven browning. - Ignoring cooking times. Keep an eye on your oven. Overcooking can ruin the dish. - Skipping garnishes. Fresh parsley or cheese adds color and flavor. These tips will make your Sheet-Pan Garlic Butter Gnocchi and Veggies stand out. Enjoy your cooking! {{image_4}} You can switch up the veggies in this dish. Try using asparagus, broccoli, or carrots. These options add new flavors and colors. You can also use spinach or kale for a leafy twist. Keep the basic cooking method the same. Just make sure to adjust the cooking time for denser veggies. To make this dish vegan, swap the butter for plant-based butter. You can also use olive oil instead. For cheese, try nutritional yeast or a vegan Parmesan. This keeps the dish creamy and flavorful without dairy. You won’t lose the taste, and it stays delicious. If you like heat, add red pepper flakes to the garlic butter. You can also toss in diced jalapeños for a spicy kick. Adjust the amount to your liking. If you prefer milder flavors, skip the heat. The dish will still be tasty and satisfying. After cooking your sheet-pan garlic butter gnocchi and veggies, let it cool. Place it on a wire rack for even cooling. Once cooled, transfer the dish to an airtight container. This helps keep the flavors fresh. Store it in the fridge for up to three days. To reheat, preheat your oven to 350°F (175°C). Spread the gnocchi and veggies on a baking sheet. Heat for about 10-15 minutes, stirring halfway through. This will keep them from drying out. You can also use the microwave. Heat in short bursts, stirring in between until hot. You can freeze the leftovers for later use. Place the cooled gnocchi and veggies in a freezer-safe container. Label it with the date. Frozen, it lasts up to three months. To thaw, move it to the fridge overnight. Reheat as mentioned above. This dish stays tasty even after freezing! Yes, you can use homemade gnocchi. It adds a personal touch. Homemade gnocchi often has a fresh taste. Ensure it’s cooked properly before using it in your dish. If your gnocchi is fresh, it may cook faster than store-bought. Keep an eye on it in the oven. To keep gnocchi firm, avoid overcooking it. Cook it just until it floats in boiling water. Drain it well before mixing with the veggies. The garlic butter sauce should coat it lightly. Spreading gnocchi in a single layer on the sheet pan helps too. Stir halfway through baking for even cooking. This dish goes great with a simple salad. A green salad with lemon dressing works well. Garlic bread or crusty rolls complement the flavors too. You could also serve it with a light soup, like a tomato or vegetable soup. These sides can enhance your meal's overall experience. Absolutely! Doubling the recipe is easy. Just make sure you have a larger sheet pan. You may need to bake it in batches. Watch the cooking time as it may vary. Stir halfway through to ensure even cooking for the larger batch. Using parchment paper is not strictly necessary. It helps with easy cleanup and prevents sticking. If you don’t have it, lightly grease the sheet pan. This will help the gnocchi and veggies cook well. Just be careful not to overcrowd the pan for the best results. This blog post covered all you need to know for a great gnocchi dish. We explored the key ingredients, shared detailed steps, and included helpful tips. Remember to choose fresh produce and pay attention to cooking time. Avoid common mistakes to get the best results. Variations let you customize the recipe to your taste. Finally, our storage tips will help you keep leftovers fresh. With this guidance, you will impress your family and friends with your cooking skills. Enjoy making your gnocchi!

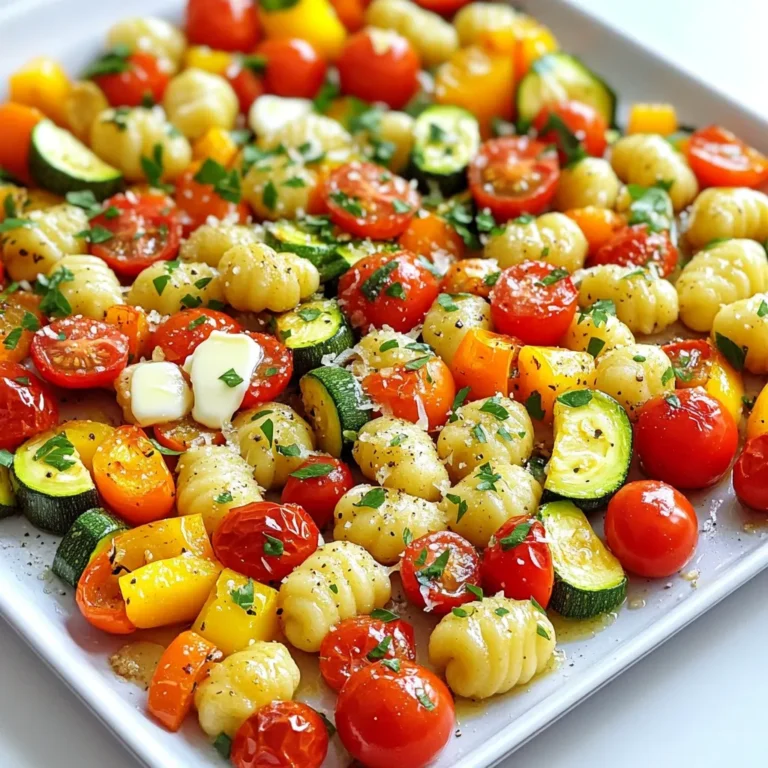
Sheet-Pan Garlic Butter Gnocchi and Veggies Delight

- 3 pounds beef short ribs - 2 tablespoons olive oil - 1 large onion, finely chopped - 4 cloves garlic, minced (plus more for mashing) - 2 carrots, diced - 2 celery stalks, diced - 2 cups beef broth - 1 teaspoon dried thyme - 1 teaspoon smoked paprika - Salt and pepper, to taste - 2 pounds potatoes, peeled and cut into chunks - ½ cup milk - 4 tablespoons unsalted butter - Fresh parsley, chopped (for garnish) Gathering all the right ingredients is key. Start with the beef short ribs. Look for good quality meat for the best flavor. Olive oil gives a nice sear to the ribs. Next, you need some veggies. The onion adds sweetness, while garlic gives that wonderful aroma. Carrots and celery add depth to the dish. Don't forget the seasonings! Beef broth will keep the ribs moist. Thyme and smoked paprika bring out rich flavors. You can adjust salt and pepper to your taste. For the garlic mash, gather potatoes, milk, and butter. These will create a creamy base for the ribs. Fresh parsley adds a touch of color at the end. With everything ready, you will create a dish that warms the heart and soul. First, heat 2 tablespoons of olive oil in a large skillet over medium-high heat. Season the 3 pounds of beef short ribs with salt and pepper on all sides. When the oil shimmers, add the ribs. Sear each rib for about 3-4 minutes until they are golden brown. Once done, transfer the ribs to the slow cooker. In the same skillet, add 1 large chopped onion, 4 minced garlic cloves, 2 diced carrots, and 2 diced celery stalks. Cook these for 5-7 minutes. Stir often until the onions soften and turn translucent. After this, add the vegetable mixture to the slow cooker, spreading it evenly over the ribs. Next, gently pour 2 cups of beef broth over the ribs and vegetables in the slow cooker. Sprinkle 1 teaspoon of dried thyme and 1 teaspoon of smoked paprika on top. Use a spoon to stir gently, mixing the spices and liquids with the meat and veggies. Cover the slow cooker with its lid. Set it to cook on low for about 8 hours or on high for 4-5 hours. This slow cooking helps the beef become very tender. You will know it’s ready when the meat pulls apart easily with a fork. About 30 minutes before serving, bring a large pot of salted water to boil. Add 2 pounds of peeled and chopped potatoes. Cook them for about 15-20 minutes until they are fork-tender. Once done, drain the potatoes and return them to the pot. To the drained potatoes, mix in the minced garlic, ½ cup of milk, and 4 tablespoons of unsalted butter. Mash until creamy and smooth. Season with salt and pepper to taste. When the ribs are ready, serve each rib on a scoop of garlic mash. Drizzle with some of the tasty braising liquid from the slow cooker for extra flavor. Finally, garnish with freshly chopped parsley for a nice touch. - Sear the ribs well to boost flavor. Start with hot oil to get a nice crust. - Season the meat generously with salt and pepper. This step adds depth to your dish. When I sear the ribs, I take my time. A good sear means a rich taste. I love the golden-brown color that forms. It makes the ribs look great and taste even better. - Use warm milk for a smoother mash. This small step makes a big difference in texture. - Adjust the garlic based on your taste. More garlic gives a stronger flavor, which I enjoy. For the garlic mash, I always mash the potatoes while they are hot. It helps them blend better with the milk and butter. I like to add just the right amount of garlic to match my mood. - Avoid overfilling the slow cooker. It helps the food cook evenly and safely. - Check the internal temperature of the ribs. They should be tender and reach at least 190°F for the best texture. With the slow cooker, I like to set it up and forget it. Just make sure to check it once in a while. This way, you can enjoy a great meal without too much fuss. {{image_4}} You can change up the garnish for your dish. Instead of parsley, try using chives or green onions. Both options add a fresh look and taste. You might also sprinkle cheese on top. Cheese adds a layer of richness that is hard to resist. If you want a quicker option, use an Instant Pot. It cooks the ribs faster while keeping them tender and juicy. If you don’t have a slow cooker, you can oven-braise the ribs. Just place them in a Dutch oven with the same ingredients and cook at a low temperature. This method gives great flavor, too. To add depth to the taste, consider using red wine or balsamic vinegar. Both ingredients enhance the sauce and make it richer. You can also play with different spice blends to find your favorite. A hint of cumin or a dash of chili powder can bring new life to the dish. Don't hesitate to get creative and adjust the flavors to your liking! To keep your braised short ribs fresh, place them in an airtight container. Make sure the lid is tight. This helps keep the meat juicy. Store your garlic mashed potatoes in a separate container. This prevents them from getting soggy. You can freeze braised ribs with sauce. They last for up to 3 months. Just pack them in a freezer-safe container. For the mashed potatoes, you can also freeze them. This gives you quick sides later. When it’s time to eat, reheat in the microwave or on the stovetop. Stir often to heat evenly. For the mashed potatoes, add a splash of milk. This helps bring back their creamy texture. Enjoy your meal again, just like the first time! Yes, you can braise short ribs on the stovetop or in the oven. For stovetop braising, sear the ribs in a heavy pot. Then, add your veggies, broth, and spices. Cover the pot and cook on low heat for about 3 hours. For oven braising, sear the ribs in an oven-safe pot, add the ingredients, and cover. Bake in a preheated oven at 325°F for 2.5 to 3 hours. Both methods yield tender, flavorful ribs. To lighten the garlic mash, swap out regular potatoes for cauliflower. Steam the cauliflower instead of boiling. Blend it with garlic, a splash of low-fat milk, and a little olive oil. You can also reduce the butter and use Greek yogurt for creaminess. This will keep the mash delicious but lower in calories. Braised short ribs pair well with many sides. Here are some great options: - Roasted vegetables for color and texture. - A simple green salad to add freshness. - Creamy polenta for a smooth, comforting side. - Steamed green beans for a crisp bite. These sides will complement the rich flavors of the ribs. You can store leftovers in the fridge for up to 3 days. Make sure to place the ribs and garlic mash in airtight containers. If you want to keep them longer, freeze them. When stored properly, the ribs can last up to 3 months in the freezer. Always reheat until hot before serving. This blog post covered a delicious recipe for braised short ribs and creamy garlic mash. We discussed the key ingredients, step-by-step instructions, and helpful tips to get it just right. Remember to sear the ribs well for deep flavor and test your mash for creaminess. You can also try different spices or cooking methods to make the dish your own. Enjoy your meal, and don’t forget to share your twists! Cooking should be fun, and I hope you find joy in making this dish.

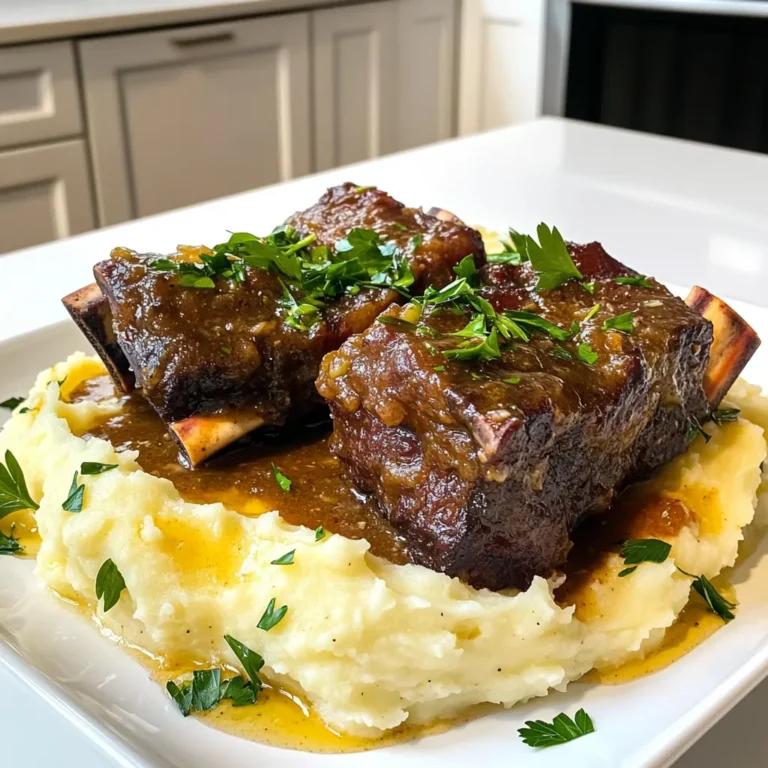
Braised Short Ribs with Garlic Mash Simple Comfort Food

- 2 cups all-purpose flour - 3/4 cup granulated sugar - 1 cup buttermilk (or homemade buttermilk) - 2 large eggs - 1/2 cup unsalted butter, melted - 1/4 cup sugar - 1 tablespoon ground cinnamon - Vanilla extract - Cooking spray or muffin liners To make these muffins, you need simple ingredients. First, all-purpose flour gives structure. The granulated sugar adds sweetness. Buttermilk keeps the muffins moist. Eggs help bind the batter. Melted butter adds richness. For the topping, mix sugar and cinnamon. This gives a sweet and spicy crust. You can add vanilla extract for extra flavor. Cooking spray or muffin liners help prevent sticking. Using fresh ingredients is key. It helps the muffins rise and taste great. If you don’t have buttermilk, make your own. Just add vinegar to regular milk. This works well and is easy. When you gather these ingredients, you're ready to bake. This recipe is simple and delicious. Each bite is soft and sweet, just like a bakery treat. - Preheat oven to 375°F (190°C) - Prepare muffin pan with liners or spray To start, heat your oven to 375°F. This step is key for perfect muffins! Next, get your muffin pan ready. You can use paper liners or spray the pan with cooking spray. This will help the muffins come out easily. - Combine flour, sugar, baking powder, baking soda, cinnamon, and salt In a big bowl, mix the dry ingredients. Add 2 cups of flour, 3/4 cup of sugar, 2 teaspoons of baking powder, 1 teaspoon of baking soda, 1 teaspoon of ground cinnamon, and 1/2 teaspoon of salt. Whisk them well until they blend nicely. - Whisk butter, buttermilk, eggs, and vanilla until smooth In a separate bowl, combine the wet ingredients. Mix 1/2 cup of melted butter, 1 cup of buttermilk, 2 large eggs, and 1 teaspoon of vanilla extract. Whisk until the mixture is smooth and creamy. - Fold wet ingredients into dry ingredients carefully Now, it’s time to combine the two bowls. Pour the wet mixture into the bowl with the dry mix. Use a spatula to fold them together gently. Don't worry about lumps! Overmixing can make your muffins tough. - Mix sugar and cinnamon in a separate bowl For the topping, grab a small bowl. Mix 1/4 cup of sugar with 1 tablespoon of ground cinnamon. This will create a sweet crust on top of your muffins. - Fill muffin cups and sprinkle with topping; bake for 18-20 minutes Using a muffin scoop or a spoon, fill each muffin cup about two-thirds full with batter. Then sprinkle the cinnamon sugar topping generously on each muffin cup. Bake them in the oven for 18-20 minutes. They're done when they look golden brown and a toothpick comes out clean when poked in the center. To get the best texture in your muffins, avoid overmixing the batter. When you combine the wet and dry ingredients, mix just until you see no more flour. A few lumps are okay. Overmixing makes muffins tough and chewy. Using fresh ingredients is key. Old baking powder or stale flour can change the taste and rise. Always check expiration dates for the best results. Fresh eggs and butter also help create a softer, fluffier muffin. For a great presentation, serve your muffins warm. This makes them feel extra cozy. You can also drizzle them with honey for added sweetness. Another fun idea is to dust them with powdered sugar. This gives them a charming look and makes them more enjoyable. Having the right tools makes baking easier. Here are my top picks for this recipe: - Muffin pan - Paper liners or cooking spray - Mixing bowls - Whisk - Spatula or wooden spoon - Muffin scoop Using these tools will help you create perfect bakery-style muffins every time. {{image_4}} You can easily change the flavor of your cinnamon sugar muffins. Adding chocolate chips gives them a delicious twist. Use about 1 cup of mini chocolate chips for a sweet touch. You can also add nuts like walnuts or pecans for crunch. Just chop them up and mix them in with the dry ingredients. If you want to try different spices, think about nutmeg. It adds a warm, cozy flavor. Just swap out half a teaspoon of cinnamon for nutmeg. You can mix both spices for a unique taste too. If you need a gluten-free option, use a 1:1 gluten-free flour blend. This makes the muffins soft and tasty without gluten. Make sure to check the blend for xanthan gum, as it helps with texture. For a dairy-free version, use almond or oat milk instead of buttermilk. You can mix one tablespoon of vinegar with non-dairy milk to create a similar effect. Replace the butter with coconut oil or a dairy-free butter for a full dairy-free treat. In fall, add apples or pumpkin for a seasonal twist. For apple muffins, use about 1 cup of peeled, chopped apples. Toss them in a little flour before mixing to prevent sinking. For pumpkin muffins, replace half a cup of buttermilk with pumpkin puree. This gives a moist and flavorful muffin. In winter, consider using cranberries for a tart flavor. Just fold in one cup of fresh or dried cranberries into the batter. Each of these additions brings a new taste and feel to your muffins, making them perfect for any season. To keep your cinnamon sugar muffins fresh, store them at room temperature in a sealed container. This way, they stay soft for up to three days. If you want to keep them longer, freeze them. Wrap each muffin in plastic wrap, then place them in a freezer bag. They will stay good for up to three months in the freezer. When you want to enjoy a muffin, warm it gently. Preheat your oven to 350°F (175°C). Place the muffin on a baking sheet and heat it for about 5-10 minutes. This warms the muffin without drying it out. You can also use the microwave. Heat for 15-20 seconds. Just be sure to watch it closely. At room temperature, these muffins last for about three days. If you refrigerate them, they can last up to one week. However, refrigeration may make them dry. In the freezer, they can last for three months. Just remember to thaw them in the fridge before reheating for the best taste. Yes, you can make these muffins ahead of time. Here are some tips: - Cool completely: After baking, let the muffins cool down fully. - Store properly: Place them in an airtight container. They stay fresh for 2-3 days at room temperature. - Freeze for later: To freeze, wrap each muffin tightly in plastic wrap. Place them in a freezer bag. They can last up to three months. - Reheat before serving: Warm them in the oven for a few minutes for the best taste. If you don’t have buttermilk, don’t worry! Here are some easy alternatives: - Vinegar and milk: Add 1 tablespoon of vinegar to 1 cup of regular milk. Let it sit for 5 minutes. - Yogurt: Use plain yogurt, thinned with a little water to match buttermilk consistency. - Sour cream: Thin sour cream with milk to reach the right texture. Dry muffins happen for a few reasons. Here’s how to avoid them: - Don’t overmix: Mix your batter gently. Overmixing makes muffins tough. - Measure flour correctly: Use a spoon to scoop flour, then level it off. Too much flour leads to dryness. - Check baking time: Remove muffins from the oven once golden brown and a toothpick comes out clean. Keep an eye on them! These cinnamon sugar muffins are easy to make and delicious. We covered key ingredients like flour, sugar, and buttermilk. I shared step-by-step instructions from mixing the batter to baking. You learned tips for the best texture and how to store them. With fun variations and serving ideas, these muffins fit any occasion. Make them your own and enjoy! Baking should be fun and rewarding, and these muffins will surely please everyone.

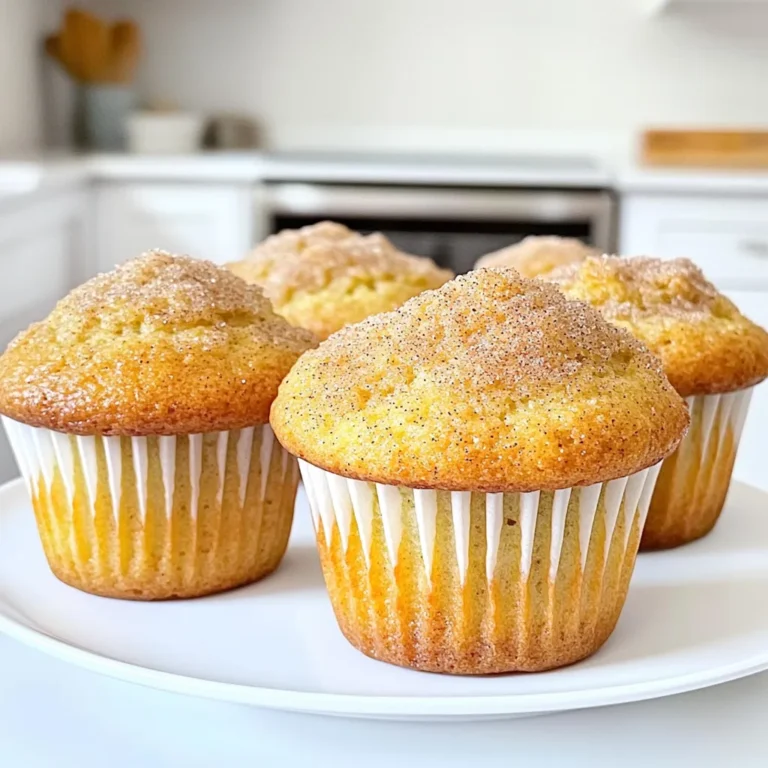
Cinnamon Sugar Muffins Bakery-Style Easy Recipe

- 4 bone-in, skin-on chicken thighs - 2 medium sweet potatoes, peeled and cut into cubes - 1 large red onion, cut into wedges - 3 tablespoons pure maple syrup - 2 tablespoons extra virgin olive oil - 1 teaspoon dried thyme - 1 teaspoon garlic powder - Salt and freshly cracked black pepper - Fresh parsley or cilantro for garnish - Other vegetables (carrots, bell peppers) - Spices (paprika, cumin) - Sheet pan - Mixing bowls - Measuring spoons To make this dish, you need a few key ingredients. The chicken thighs bring rich flavor, while sweet potatoes add sweetness. Red onion gives a nice bite to the mix. Maple syrup adds a touch of sweetness that will caramelize beautifully in the oven. Feel free to customize! You can add other veggies like carrots or bell peppers. Spices like paprika or cumin also add depth. For tools, a sheet pan is a must for roasting. Mixing bowls help with combining ingredients. Measuring spoons ensure you get the right amounts. With these ingredients and tools, you're ready to enjoy a delightful meal! - Preheat oven to 425°F (220°C). - Peel and cut sweet potatoes into 1-inch cubes. - Cut the red onion into wedges. - Pat the chicken thighs dry with paper towels. - In a bowl, mix sweet potatoes and onion with 1 tablespoon of olive oil. - Add half of the maple syrup, dried thyme, garlic powder, salt, and pepper. - Toss until the veggies are well coated. - Spread the mixture on a sheet pan, leaving space for the chicken. - Place the chicken thighs in the center of the pan. - Drizzle with the remaining olive oil and maple syrup for shine. - Place the pan in the oven and bake for 35-40 minutes. - Check that the chicken reaches 165°F (75°C) to ensure it is safe to eat. - The sweet potatoes should be tender and slightly caramelized. To get that perfect crispy skin, start by using paper towels to pat the chicken thighs dry. This step removes moisture and helps the skin crisp up nicely. Once dry, season generously with salt and pepper on both sides. Don't skip this! It adds flavor and texture. Caramelizing sweet potatoes gives them a sweet and rich flavor. To achieve this, make sure to space the sweet potatoes evenly on the pan. If they're too close, they will steam instead of roast. For stacking, keep the cubes in a single layer. This ensures they cook evenly and get that lovely caramel color. For extra flavor, think about using marinades. A mix of olive oil, garlic, and herbs can boost taste. You can also add a splash of citrus, like lemon or orange juice. This brightens the dish and adds a fresh touch. It's a simple way to elevate the meal. {{image_4}} You can swap chicken for turkey or tofu. Turkey thighs work well. They cook similarly and stay juicy. Tofu is a great plant-based choice. Choose firm tofu for the best texture. Just make sure to press it to remove extra moisture. This helps it absorb flavors better during cooking. You can change the veggies based on the season. In fall, try adding brussels sprouts. They roast nicely and add a great crunch. In spring, use asparagus for a fresh touch. Just cut them into bite-sized pieces. This keeps the cooking time short and the flavors bright. If you want to switch up the glaze, try honey or agave. Honey gives a rich sweetness. It pairs nicely with the chicken and sweet potatoes. Agave syrup is also a good choice. It has a mild flavor and is vegan-friendly. Adjust the amount based on how sweet you want it. After enjoying this meal, you may have some leftovers. Store them in airtight containers. This keeps your chicken and sweet potatoes fresh. You can put them in the fridge for up to four days. If you want to keep them longer, freeze them. They can last for about three months in the freezer. To reheat your leftovers, use the oven for the best results. Preheat the oven to 350°F (175°C). Place the chicken and sweet potatoes on a baking sheet. Heat for about 15-20 minutes. This will help keep your chicken skin crispy. You can also use a microwave. Just be careful not to overcook them. Start with one minute, then check if they are warm. You can prepare ingredients ahead of time. Chop the sweet potatoes and onions the night before. Store them in the fridge. This makes cooking quicker. You can also season the chicken a few hours before roasting. This will save time on busy weeknights. Enjoy a delicious meal with less stress! Yes, you can use boneless chicken thighs for this recipe. However, you need to adjust the cooking time. Boneless thighs cook faster than bone-in ones. Start checking for doneness around 25 to 30 minutes. The chicken should still reach an internal temperature of 165°F (75°C). To make this dish healthier, consider these tips: - Use skinless chicken thighs to reduce fat. - Cut back on the olive oil. You can use just one tablespoon instead of two. - Increase the number of vegetables. This adds fiber and nutrients. This meal goes well with many side dishes. Here are some ideas: - A fresh green salad adds crunch and freshness. - Warm bread is great for soaking up the maple glaze. - Cooked grains like quinoa or brown rice add a hearty touch. - You can also serve it with roasted or steamed veggies for more color and flavor. This recipe blends tasty chicken, sweet potatoes, and vibrant veggies for a delightful meal. You can customize it with different proteins, spices, and glazes to suit your taste. Don't forget to store your leftovers right. Proper storage keeps your meal fresh for later. Enjoy this easy, flavorful dish any night of the week. With a few simple steps, you can impress friends and family. Happy cooking!

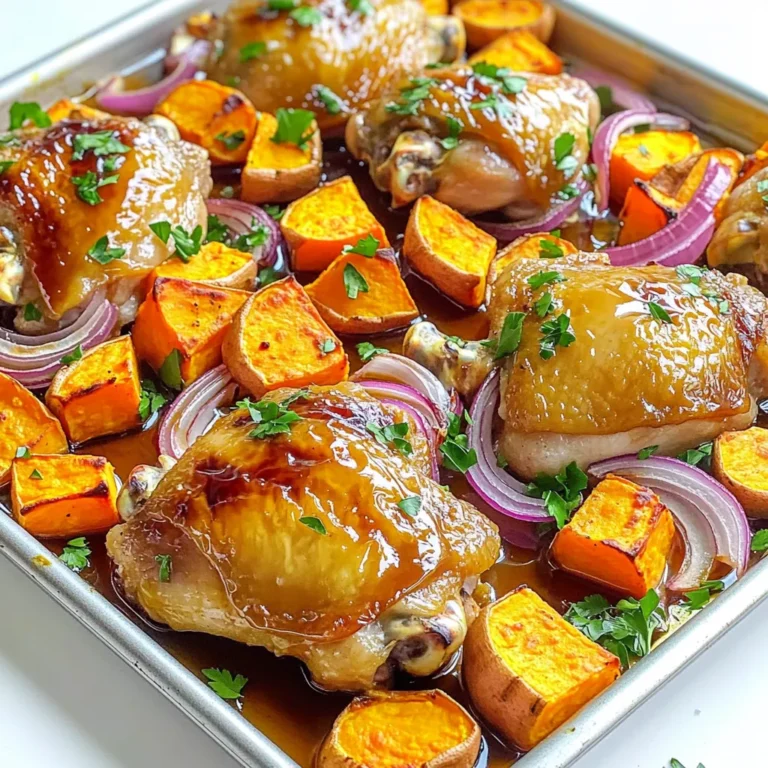
Sheet-Pan Maple Roasted Chicken and Sweet Potatoes Delight

- 4 salmon fillets (about 6 oz each) - 2 tablespoons extra virgin olive oil - 4 cloves garlic, finely minced - 1 teaspoon dried oregano - 1 teaspoon dried thyme - 1 teaspoon smoked paprika - Sea salt and freshly cracked black pepper, to taste - Fresh lemon wedges, for serving - Fresh parsley, finely chopped, for garnish - A pinch of red pepper flakes for spice - Fresh dill for a different herb profile - Capers for a briny touch - Air fryer for cooking - Small mixing bowl for the marinade - Whisk for combining ingredients - Brush or hands for applying the marinade - Tongs for handling the cooked salmon - Serving plate for an appealing presentation Gather these ingredients and tools before you start. This way, you can enjoy a smooth and fun cooking experience. Each item adds a unique touch to your garlic herb salmon. The optional ingredients can help you tailor the dish to your taste. Enjoy the process of creating this flavorsome delight! Start with fresh salmon fillets. Gently pat them dry with paper towels. This step is key for a crispy texture. Drying helps the marinade stick well. Lay them on a clean plate. Ensure they are evenly spaced for ease of handling. In a small bowl, mix the marinade. Add 2 tablespoons of olive oil. Then, add 4 cloves of minced garlic. Sprinkle in 1 teaspoon each of oregano and thyme. Next, add 1 teaspoon of smoked paprika. Don’t forget to season with salt and black pepper. Whisk the mixture well until combined. Preheat your air fryer to 400°F (200°C). This takes about 3-5 minutes. While it heats, brush the marinade on both sides of the salmon. Make sure every inch is coated. Once preheated, place the salmon fillets in the basket. Don’t overcrowd them; leave space for air to flow. Air fry the salmon for 8-10 minutes. Check for doneness; it should flake easily with a fork. When ready, carefully transfer to a plate. Let it rest for a minute. This helps keep the salmon juicy. Serve with lemon wedges and a sprinkle of parsley for a fresh touch. To get that perfect crisp on your salmon, start by drying the fillets. Use paper towels to remove any moisture. This helps the skin get crispy. Next, apply your marinade well. Make sure you coat both sides. Preheating your air fryer is key too. Set it to 400°F for about 3-5 minutes. When cooking, do not overcrowd the basket. Leave space between the fillets for air to flow. This way, they cook evenly and get that nice golden crust. While the garlic herb marinade is great, you can mix it up. Try different herbs like dill or cilantro for fresh taste. You can add a touch of honey for sweetness or red pepper flakes for heat. If you want a citrus twist, mix in some orange zest. Let your creativity shine! Marinades work best when you let them sit for at least 30 minutes. This gives the flavors time to soak into the salmon. When serving your air fryer garlic herb salmon, think about balance. Fresh lemon wedges add a zesty touch that brightens the dish. A sprinkle of chopped parsley gives it color and freshness. Serve the salmon with a side salad or roasted veggies. These sides add crunch and nutrients. You can also pair it with rice or quinoa for a hearty meal. For a fun twist, try a mango salsa on top. It adds sweetness and pairs well with the herbs. {{image_4}} You can change the herbs for your garlic herb salmon. Try fresh dill for a bright taste. Basil adds a sweet note. Rosemary brings a woody flavor. Each herb gives a different twist to the dish. Experimenting with herbs keeps meals interesting. Use what you love or what you have on hand. You can cook salmon in the oven or on the grill. For the oven, preheat to 400°F (200°C). Place the salmon on a baking sheet. Bake for 12-15 minutes until it flakes easily. For grilling, heat your grill on medium. Oil the grates and cook the salmon for 6-8 minutes. Both methods yield tasty results. Salmon pairs well with several sides and salsas. A fresh salad adds crunch and color. Quinoa or rice gives a nice base. For a zesty kick, serve with mango salsa or avocado salsa. Roasted veggies also complement the salmon well. These sides enhance the meal and make it more filling. To keep leftover salmon fresh, let it cool. Once cooled, wrap each fillet tightly in plastic wrap or aluminum foil. Place the wrapped salmon in an airtight container. This method keeps the fish from drying out. You can store the salmon in the fridge for up to three days. If you want to keep it longer, freezing is a great option. Reheating salmon can be tricky. To keep it moist, I suggest using the air fryer. Preheat your air fryer to 350°F (175°C). Place the leftover salmon in the basket. Heat for about 4-5 minutes. Check if it’s warmed through. You can also use a microwave, but be careful. Heat on low power for 30-second intervals to avoid drying it out. If you want to freeze your salmon, do it right away. Wrap each fillet in plastic wrap, then in foil. This prevents freezer burn. Put the wrapped salmon in a freezer bag. It can last up to three months in the freezer. To thaw, leave it in the fridge overnight. This keeps the texture nice and firm. Salmon cooks quickly in an air fryer. You only need 8 to 10 minutes at 400°F (200°C). Cooking time may change based on fillet thickness. The salmon is ready when it flakes easily with a fork. If you prefer it a bit crispy, leave it for an extra minute. Always check it to avoid overcooking. Yes, you can use fresh herbs! Fresh herbs bring bright flavors to the dish. Use about three times more fresh herbs than dried. For this recipe, try 3 teaspoons of fresh oregano and 3 teaspoons of fresh thyme. Chop them finely and mix them with the garlic and oil. This switch adds a nice aroma and taste. Garlic herb salmon pairs well with many sides. Here are some great options: - Steamed vegetables: Broccoli or asparagus work well. - Fresh salad: A simple green salad adds crunch. - Rice or quinoa: These grains soak up flavors nicely. - Potatoes: Roasted or mashed potatoes are a hearty choice. Add fresh lemon wedges for a zesty touch. This meal is both colorful and full of flavor! This blog post covered how to make delicious garlic herb salmon. We listed all needed ingredients and tools. We shared step-by-step instructions for preparing and cooking the salmon. You learned tips for a perfect crisp and marinade variations. We also gave ideas for serving and storing leftovers. Cooking salmon can be fun and easy. Feel free to try new flavors and methods. Enjoy your tasty meal!

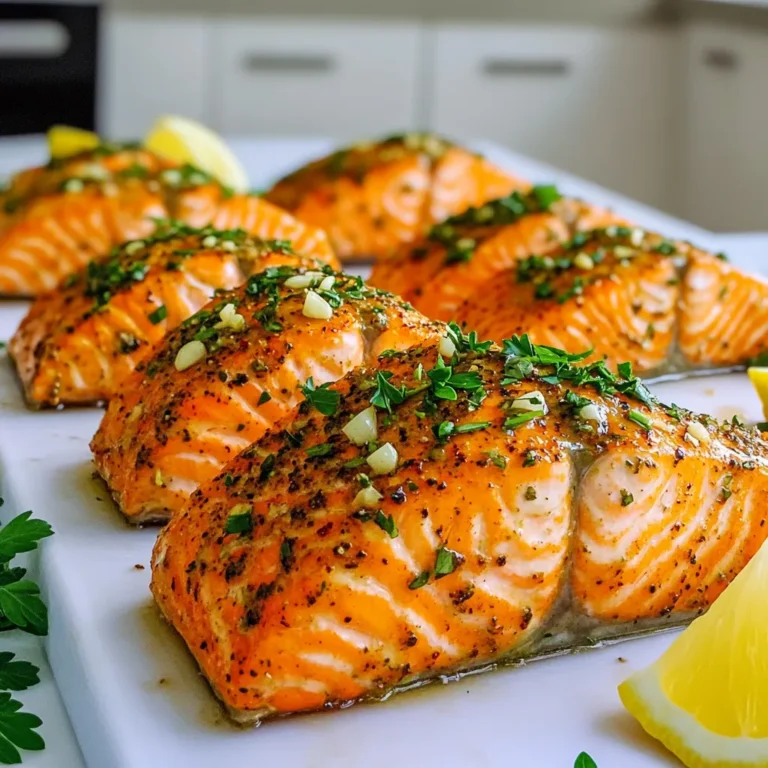
Air Fryer Garlic Herb Salmon Fillets Flavorsome Delight

To make High Protein Peanut Butter Overnight Oats, gather these items: - 1 cup rolled oats - 2 cups unsweetened almond milk (or any milk of your choice) - 1/2 cup Greek yogurt (or a dairy-free yogurt alternative) - 2 tablespoons natural peanut butter - 1 tablespoon chia seeds - 1 tablespoon maple syrup or honey (optional for added sweetness) - 1 teaspoon vanilla extract - 1/2 banana, sliced (for topping) - 2 tablespoons chopped nuts (optional, for a delightful crunch) - A sprinkle of cinnamon (to enhance flavor) You can swap ingredients for a different taste or diet: - Use rolled oats or quick oats, based on your texture preference. - If you want a nut-free option, almond milk can change to oat or soy milk. - Replace Greek yogurt with coconut yogurt for a dairy-free choice. - Use almond butter or sunflower seed butter instead of peanut butter. - Chia seeds can be swapped with flax seeds or omitted. - Maple syrup can change to agave syrup or leave out for less sweetness. Each ingredient offers unique health perks: - Rolled oats provide fiber, which aids digestion and keeps you full. - Almond milk is low in calories and rich in vitamin E, good for skin health. - Greek yogurt adds protein and probiotics, which support gut health. - Peanut butter is a good source of healthy fats and protein. - Chia seeds are packed with omega-3 fatty acids and fiber for heart health. - Maple syrup adds a touch of sweetness with some antioxidants. - Vanilla extract can enhance flavor without added sugar. - Bananas offer potassium, which helps maintain healthy blood pressure. - Chopped nuts provide healthy fats, protein, and a satisfying crunch. - Cinnamon can help regulate blood sugar and adds a warm flavor. To make high protein peanut butter overnight oats, start by gathering your ingredients. You will need rolled oats, almond milk, Greek yogurt, peanut butter, chia seeds, maple syrup, vanilla extract, banana, nuts, and cinnamon. 1. In a large bowl, mix the rolled oats and almond milk first. 2. Next, add the Greek yogurt and peanut butter. Stir well to blend them. 3. Then, mix in the chia seeds, maple syrup (if you want it sweeter), and vanilla extract. 4. Ensure the peanut butter breaks up well. This helps create a smooth blend. 5. Once mixed, divide the oats into two jars or containers. 6. Seal them tightly and place them in the fridge for at least 8 hours. When mixing, use a sturdy spoon or spatula. This helps you break up any clumps of peanut butter. If you find it hard to mix, warm the peanut butter slightly. This will make it easier to blend. Make sure to stir until everything is well combined. If the mixture seems dry, you can add a little more almond milk. Mixing well helps the oats absorb the liquid fully. Store your overnight oats in airtight containers to keep them fresh. Glass jars work great for this. They also look nice if you want to take them on the go. Keep them in the fridge for up to five days. If you notice any separation, just stir the mixture before serving. For best taste and texture, eat them within two to three days. Enjoy your delicious and healthy breakfast! To get the best texture for your overnight oats, focus on the mixing. Combine the oats, almond milk, Greek yogurt, peanut butter, chia seeds, and vanilla well. Break up any clumps of peanut butter. This helps create a smooth, creamy mix. After soaking overnight, stir the oats before serving. If they feel too thick, add a splash of milk to loosen them. Meal prep can save time and stress. Start by making a double batch. This way, you can enjoy them for breakfast or snack twice. Use airtight containers to keep your oats fresh. Label each jar with the date, so you know when to eat them. Overnight oats stay good for about 3-5 days in the fridge. To make your oats even better, add toppings or mix-ins. Sliced bananas give sweetness and creaminess. Chopped nuts add crunch and healthy fats. A sprinkle of cinnamon boosts flavor and has health benefits too. If you want more protein, consider adding a scoop of protein powder or more Greek yogurt. Maple syrup or honey can sweeten the mix, but you can skip them if you want to keep it healthy. {{image_4}} You can easily change up the flavor of your overnight oats. I love adding cocoa powder for a chocolate twist. Just mix in 1-2 tablespoons with the oats and other ingredients. You can also add fresh or frozen berries. Blueberries and strawberries add great taste and color. Try adding a scoop of your favorite protein powder for an extra boost. If you want plant-based options, use almond yogurt instead of Greek yogurt. Soy milk or oat milk can replace almond milk. These swaps give you protein without dairy. For those who want dairy, Greek yogurt is thick and creamy. It packs a protein punch, making your oats even better. To make this recipe gluten-free, choose certified gluten-free oats. They taste just as good and are safe for those with gluten issues. For a vegan option, just swap the Greek yogurt for a plant-based yogurt. Use maple syrup instead of honey to keep it vegan-friendly. These simple changes keep your oats tasty and suitable for everyone. To store your high protein peanut butter overnight oats, use airtight containers. After mixing, divide the oats into jars or containers. Make sure to seal them tightly. This keeps your oats fresh and tasty. These oats last up to five days in the fridge. If you want the best flavor, eat them within three days. Always check for any signs of spoilage, like off smells or changes in texture. If you notice any, it’s best to toss them. While overnight oats are best cold, you can heat them if you prefer. To reheat, simply put the oats in a microwave-safe bowl. Heat them in short bursts of 30 seconds, stirring in between. Add a splash of milk to keep them creamy. Enjoy your oats warm or cold, whichever you like best! Overnight oats are a no-cook breakfast. You mix oats with liquid and let them sit overnight. This makes oats soft and ready to eat in the morning. They are full of fiber and protein, making them a healthy choice. You can also add flavors and toppings, like fruits or nuts. Overnight oats can last up to five days in the fridge. Keep them in airtight containers to stay fresh. The flavors get better over time. However, if you notice any strange smells or colors, it's best to toss them out. You can use instant oats, but the texture will be different. Instant oats soak up liquid quickly and become mushy. Rolled oats are firmer and hold their shape better. If you prefer instant oats, reduce the soaking time. If your oats are too thick, add a splash of milk. Stir well to mix the liquid in. You can also use more almond milk or yogurt when mixing. Finding the right consistency is key to enjoying your oats! High protein peanut butter overnight oats are easy and fun to make. We explored key ingredients, their health benefits, and step-by-step prep. I offered tips on texture and flavor. You can customize your oats with various tastes and proteins. Proper storage keeps your oats fresh and tasty. In the end, these oats can fit any diet, and they make meal prep simple. Enjoy making your own tasty and healthy breakfast!

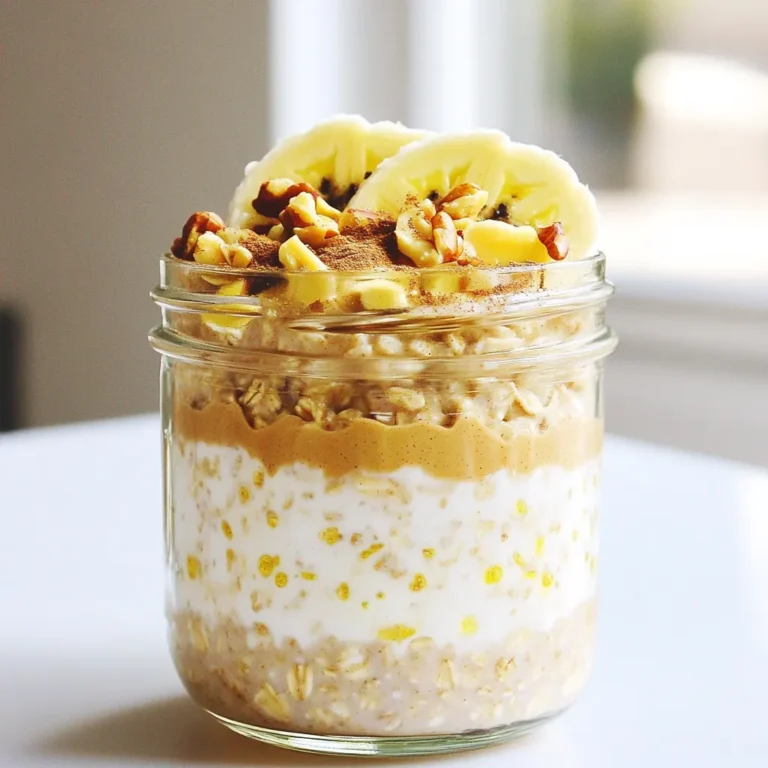
High Protein Peanut Butter Overnight Oats Delight

- 1 cup water - 1/2 cup unsalted butter, cut into pieces - 1 cup all-purpose flour - 1/2 teaspoon salt - 1 teaspoon pumpkin spice blend (a mix of cinnamon, nutmeg, ginger, and allspice) - 3 large eggs, at room temperature - Vegetable oil, for frying - 1/2 cup granulated sugar - 1 tablespoon pumpkin spice blend (for coating) - Optional: 1/2 cup chocolate sauce, for dipping Gathering the right ingredients is key to making pumpkin spice churro bites. Each item plays a role in creating that warm, cozy flavor. The water and butter form the base of your dough. The flour gives it structure. Salt enhances all the flavors. The pumpkin spice blend adds that special fall taste we all love. Using eggs lets the dough rise and become light. The vegetable oil is crucial for frying. It gives the churros their crispy outer layer. The granulated sugar and extra pumpkin spice blend for coating make them sweet and spiced perfectly. If you want to make it extra special, consider adding chocolate sauce for dipping. It’s a delightful combo that adds richness to your bites. With these ingredients, you’re ready to create a treat that captures the essence of fall. 1. Combining Water and Butter: Start by taking a medium saucepan. Add 1 cup of water and 1/2 cup of unsalted butter. Heat this over medium heat. Stir it gently. Wait until the butter melts completely. This will take a few minutes. 2. Adding Dry Ingredients: Once the butter melts, bring the mixture to a gentle simmer. Remove it from the heat. Gradually sprinkle in 1 cup of all-purpose flour and 1/2 teaspoon of salt. Add 1 teaspoon of pumpkin spice blend. Stir with a wooden spoon. Keep mixing until the dough forms a ball. It should pull away from the pan's sides. 3. Incorporating Eggs: Let the dough cool for about 5 minutes. This step is important. It helps prevent cooking the eggs. Now add 3 large eggs, one at a time. Mix well after each egg. Your dough should be smooth and creamy at the end. 1. Preparing the Frying Setup: In a deep skillet, pour enough vegetable oil to reach about 2 inches deep. Make sure you have enough oil for frying. 2. Ensuring Oil Temperature: Heat the oil over medium-high heat. You want it to reach 375°F (190°C). Use a thermometer for this step. This temperature is key for crispy churro bites. 1. Piping the Dough: Transfer the dough into a piping bag. Use a large star tip for this. Pipe small churro bites, about 1-2 inches long, directly into the hot oil. Remember not to overcrowd the pan. Fry in small batches if needed. 2. Frying Technique and Timing: Fry the churro bites for about 2-3 minutes on each side. They should turn golden brown and crispy. Keep an eye on them for even cooking. 3. Removing and Draining Excess Oil: Use a slotted spoon to remove the churros. Place them on a plate lined with paper towels. This will help soak up any extra oil. 1. Sugar and Spice Mixture: In a shallow bowl, mix together 1/2 cup of granulated sugar and 1 tablespoon of pumpkin spice blend. Stir until combined well. 2. Rolling Churros in the Mixture: While the churro bites are warm, roll them in the sugar mixture. Make sure they are coated evenly. This adds sweetness and spice. 3. Plating Suggestions and Serving Options: Arrange the churro bites neatly on a serving plate. You can serve them warm. For extra fun, add a small bowl of chocolate sauce for dipping. Enjoy your delightful fall treat! - Maintaining oil temperature: Keep the oil at 375°F (190°C). Use a thermometer for accuracy. The right temperature ensures your churro bites fry evenly. If the oil is too cold, the churros will absorb more oil and become greasy. If too hot, they may burn on the outside while remaining raw inside. - Avoiding overcrowding the pan: Fry in small batches. This keeps the oil hot and helps the churros cook evenly. If you add too many at once, the temperature drops. This can lead to soggy churros instead of crispy bites. - Adjusting spice levels: Taste your dough before frying. If you want more flavor, add a bit more pumpkin spice blend. Remember, the balance of flavors matters. You want the spice to shine but not overpower the churro. - Tips for dough consistency: Your dough should be thick and smooth. If it’s too runny, the churro bites will lose shape in the oil. If it’s too stiff, they won’t puff up. Aim for a dough that holds its shape well when piped. - Pairing with dips: Chocolate sauce is a great choice for dipping. You can also try caramel or a cream cheese dip for a fun twist. These enhance the churro bites and add a rich flavor contrast. - Presentation tips: Arrange churro bites on a colorful plate. Sprinkle some extra cinnamon-sugar on top for visual appeal. Consider adding a small bowl of dip in the center to make it inviting. {{image_4}} You can change the spice blend for unique flavors. Try using allspice or cardamom. Mix in a little vanilla for warmth. Seasonal blends can also bring a twist. For winter, use a touch of clove. In spring, consider fresh mint. Each option adds a new layer to the churro bites. If you are gluten-free, swap all-purpose flour for a gluten-free blend. Many brands offer great options. For a vegan version, replace eggs with flaxseed meal. Combine one tablespoon of flaxseed with three tablespoons of water. Let it sit for five minutes until it thickens. This keeps the churro bites light and fluffy. You can infuse your churro bites with chocolate or caramel. Drizzle chocolate sauce or dip them before serving. This adds a rich taste that many enjoy. Nuts can also enhance the texture. Toss in chopped pecans or walnuts. They add crunch and flavor to each bite. To keep your churro bites fresh, store them in an airtight container. This method helps maintain their taste and texture. Place a paper towel at the bottom of the container to absorb moisture. You can put them in the fridge for up to three days. If you want to save them longer, freezing is a great option. Lay the churro bites on a baking sheet in a single layer. Freeze them for about an hour until firm. Once frozen, transfer them to a freezer bag. They can last up to three months in the freezer. To reheat your churro bites, the oven is your best friend. Preheat it to 350°F (175°C). Place the churro bites in a single layer on a baking sheet. Bake for about 5-7 minutes. This method keeps them crispy. Avoid using the microwave, as it can make them soggy. If you must use it, reheat in short bursts. Check often to prevent them from losing their crunch. Enjoy your delightful fall treat warm! To get crispy churro bites, the oil must be hot. Heat your oil to 375°F (190°C). If the oil is too cool, the churros absorb more oil. Fry in small batches. This gives each churro space to cook. Fry each side for 2-3 minutes until golden brown. Drain on paper towels to remove excess oil. Rolling them in sugar while warm adds sweetness and crunch. You can make churro bites ahead of time. To store them, keep in an airtight container at room temperature. They taste best fresh, but you can refrigerate them for a few days. If you refrigerate, reheat them in the oven. Set the oven to 350°F (175°C) for about 5-10 minutes. This helps restore their crispness. Churro bites are great on their own, but dips make them even better. You can serve them with chocolate sauce for a rich touch. Caramel sauce is another sweet option. If you want a tangy contrast, try cream cheese frosting. It’s fun to have a variety for guests to enjoy. Pumpkin spice churro bites stay fresh for about 2 days at room temperature. They can last longer if refrigerated. However, they lose some crispness after a day. If you freeze them, they can last up to a month. To keep them fresh, wrap them tightly in plastic wrap or foil. You learned how to make tasty pumpkin spice churro bites. We covered the key ingredients and steps, from mixing the dough to frying and serving. I shared tips to achieve crunchy bites and even suggested variations for special diets or flavors. Make these delicious treats at home, and enjoy sharing them with friends. With these easy steps, you can impress anyone with your cooking skills. Happy frying!

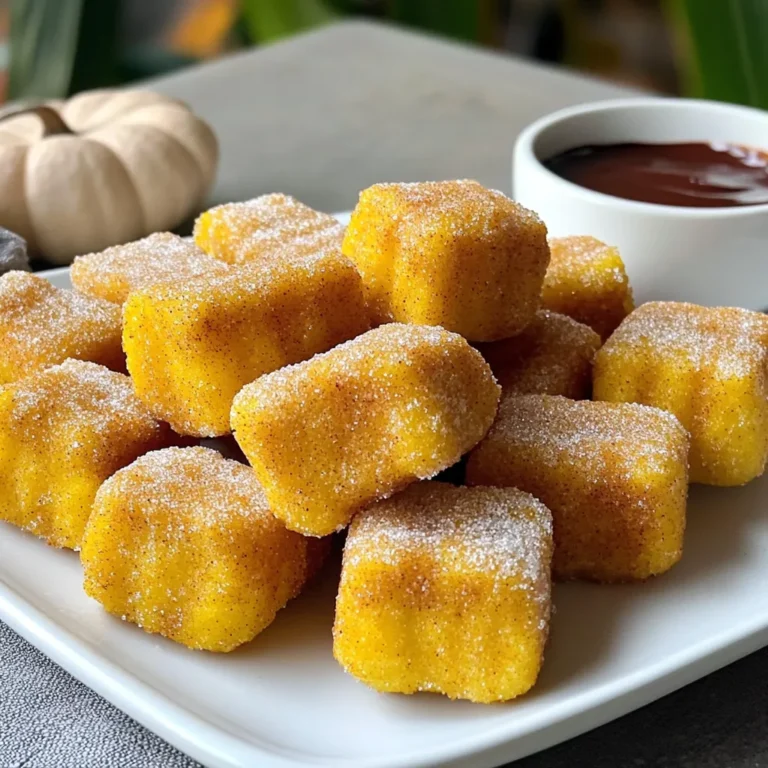
Pumpkin Spice Churro Bites Delightful Fall Treat

- 1 pound ground beef (or ground turkey for a lighter option) - 1/2 cup breadcrumbs (preferably panko for extra crunch) - 1/4 cup grated Parmesan cheese - 1 tablespoon fresh parsley, finely chopped - 1 teaspoon garlic powder - 1 teaspoon onion powder - 1 teaspoon salt - 1/2 teaspoon freshly ground black pepper - 1/4 cup honey - 1/4 cup soy sauce (or tamari for a gluten-free option) - 1 tablespoon rice vinegar The main ingredients are key for flavor. Ground beef or turkey gives meatballs a solid base. Breadcrumbs and Parmesan keep them moist and tasty. Honey, soy sauce, and rice vinegar make a sweet and tangy sauce. - 1 bell pepper, sliced into strips (any color you prefer) - 1 large zucchini, sliced into half-moons - 1 red onion, cut into wedges The vegetables add color and nutrition. Bell peppers bring sweetness and crunch. Zucchini offers a mild taste and soft texture. Red onion adds a bit of sharpness to the dish. - 2 tablespoons extra virgin olive oil - 1 teaspoon garlic powder - 1 teaspoon onion powder - 1 teaspoon salt - 1/2 teaspoon freshly ground black pepper Seasonings boost the flavor. Garlic and onion powders make the meatballs pop. Salt and pepper enhance all the tastes. Olive oil helps the veggies roast well and adds richness. First, you need to preheat your oven to 400°F (200°C). This helps cook everything evenly. To make cleanup easy, line your large baking sheet with parchment paper. In a big bowl, mix 1 pound of ground beef or turkey with the binders. Add 1/2 cup of breadcrumbs, 1/4 cup of grated Parmesan cheese, and 1 tablespoon of fresh parsley. Toss in 1 teaspoon of garlic powder, 1 teaspoon of onion powder, 1 teaspoon of salt, and 1/2 teaspoon of black pepper. Use your hands or a fork to blend everything well. Shape the mixture into 1-inch meatballs. Place them on one half of the sheet pan. Shape the meat mixture into small, round meatballs. You should have about 20 meatballs. Place them in a single layer on your prepared sheet pan. Make sure they have space to cook evenly. For the sauce, grab a small bowl. Whisk together 1/4 cup of honey, 1/4 cup of soy sauce, and 1 tablespoon of rice vinegar. This mix will give the meatballs a sweet and savory flavor. Drizzle half of this sauce over the meatballs, covering them well. On the other side of the pan, spread out the sliced bell pepper, zucchini, and red onion. Use 1 bell pepper, 1 large zucchini, and 1 red onion. Drizzle 2 tablespoons of extra virgin olive oil on the veggies, and season lightly with salt and pepper. Toss them gently to coat. Place the sheet pan in the oven and roast for 20-25 minutes. The meatballs should reach 165°F (74°C) inside, and the vegetables should become tender. After the time is up, take the pan out and drizzle the rest of the honey garlic sauce over the meatballs and veggies. Return the pan to the oven for 5 more minutes. This will make everything nice and glazed. Enjoy your tasty meal! To get the best meatball texture, mix your meat with the other ingredients well. The best mixture feels moist but not too wet. Use about one cup of breadcrumbs to help bind the meat. This keeps the meatballs tender and juicy. You can boost the flavor of your meatballs with a few spices. Consider adding: - 1 teaspoon smoked paprika for a smoky taste - 1 teaspoon dried oregano for a herby flavor - 1/2 teaspoon red pepper flakes for some heat These small changes can make a big difference in taste. Feel free to experiment with other spices you enjoy! It’s important to cook the meatballs until they reach 165°F (74°C). Use a meat thermometer for the best results. This ensures that your meal is safe to eat. Check the internal temperature in the center of a meatball. Also, keep an eye on the veggies. They should be tender and nicely caramelized by the end of cooking. {{image_4}} You can use different meats for this dish. Ground beef gives a rich flavor. Ground turkey works well if you want a lighter meal. If you like chicken, try ground chicken instead. For a plant-based option, use lentils or chickpeas. They make tasty meatballs too. Feel free to swap the veggies based on what you have. Carrots add sweetness and crunch. Broccoli or cauliflower can add a nice texture. Asparagus or green beans can also work well. Just think about what is in season or what you enjoy most. If you need gluten-free meatballs, use gluten-free breadcrumbs or oats. Tamari is a great choice instead of soy sauce. For low-carb meals, skip the breadcrumbs. You can bind with eggs or ground nuts. This keeps the meatballs moist and tasty while fitting your diet. To store your sheet-pan honey garlic meatball dinner, let it cool first. Place the meatballs and veggies in an airtight container. This keeps them fresh. You can refrigerate leftovers for up to three days. Make sure to keep the sauce separate if you can. This helps maintain the best flavor and texture. You can freeze the meatballs for later meals. Form the meatballs and cook them as the recipe states. Let them cool, then place them in a single layer on a baking sheet. Once frozen, transfer them to a freezer-safe bag. You can freeze them for up to three months. This makes meal prep easy! To reheat, you can use the oven or the microwave. For the oven, preheat to 350°F (175°C). Place the meatballs and veggies in a baking dish. Cover with foil to retain moisture. Heat for about 15-20 minutes. If using a microwave, place servings on a microwave-safe plate. Heat for 2-3 minutes, stirring halfway through. Enjoy your meal like it’s fresh from the oven! Yes, you can use frozen meatballs. Just place them on the sheet pan as usual. You may need to increase the cooking time by 5 to 10 minutes. Check that they reach an internal temperature of 165°F (74°C) to ensure they are cooked through. To add heat, try these options: - Mix in red pepper flakes with the meatball mixture. - Add sriracha to the honey garlic sauce. - Use a spicy soy sauce for added kick. Adjust to your taste, and enjoy the added flavor! You can serve these meatballs with: - Steamed rice for a complete meal. - Quinoa for a healthy twist. - A fresh salad for a light side. - Crusty bread to soak up the sauce. Choose what you like best! Yes, you can! Prepare the meatballs and veggies, then store them in the fridge. Assemble the pan before you cook. This makes for an easy dinner later! This recipe serves 4 and includes: - About 350 calories per serving. - 20g of protein from the meat. - Healthy fats from olive oil. - Fiber from the veggies. Adjust ingredients for your dietary needs! This recipe combines key ingredients, easy steps, and handy tips for delicious sheet-pan meatballs. You learned about the right meat, veggies, and seasonings to make this dish shine. With variations for different diets and storage tips for leftovers, you can enjoy this meal anytime. Remember, cooking can be fun and flexible. Experiment with flavors and ingredients to find what you love. Enjoy your cooking adventure!

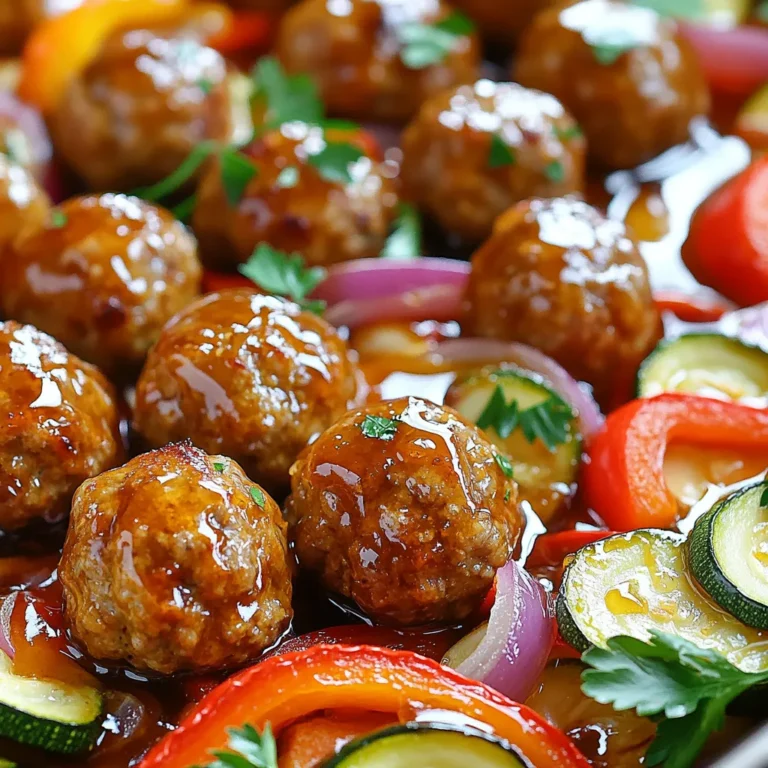
Sheet-Pan Honey Garlic Meatball Dinner Delight

Here is the list of ingredients you need for Instant Pot Creamy Mushroom Wild Rice: - 1 cup wild rice (rinsed and drained) - 2 cups vegetable broth - 1 tablespoon olive oil - 1 medium onion, finely chopped - 2 cloves garlic, minced - 8 ounces mushrooms (cremini or button), sliced - 1 cup heavy cream (or substitute with coconut cream for a vegan option) - 1 teaspoon dried thyme - 1 teaspoon dried rosemary - Salt and black pepper to taste - Fresh parsley, chopped (for garnish) Each ingredient plays an important role in this dish. The wild rice gives a nutty flavor and chewy texture. The vegetable broth adds depth to each bite. Olive oil brings richness and helps sauté the onions and garlic. Onion and garlic provide a fragrant base that enhances the dish’s flavor. Mushrooms add earthiness and a meaty bite. Heavy cream or coconut cream makes the dish smooth and rich. Finally, herbs like thyme and rosemary offer a hint of freshness. Salt and pepper are essential for balancing the flavors. Fresh parsley adds a pop of color and brightens the dish. Gather these ingredients, and you're ready to create a warm and comforting meal! 1. Start by setting your Instant Pot to the Sauté setting. Add 1 tablespoon of olive oil. Let it heat up. 2. Chop 1 medium onion finely. Mince 2 cloves of garlic. Add them to the pot. Sauté for 2-3 minutes. The onion should turn translucent and smell great. 3. Slice 8 ounces of mushrooms. Cremini or button mushrooms work well. Add them to the pot. Sauté for about 5 minutes. The mushrooms should soften and turn light golden. 4. Rinse 1 cup of wild rice under cold water. Add it to the pot. Sprinkle in 1 teaspoon of dried thyme and 1 teaspoon of dried rosemary. Mix well to combine all the ingredients. 1. Pour in 2 cups of vegetable broth. Season with salt and black pepper to taste. Stir everything together. 2. Secure the lid of the Instant Pot. Make sure the valve is set to Sealing. Cook on Manual or Pressure Cook high for 30 minutes. 3. Once the timer goes off, let it sit for 10 minutes. This is called natural pressure release. After that, switch the valve to Venting to let out any remaining pressure. 1. Carefully open the lid. Stir in 1 cup of heavy cream or coconut cream. Mix until the dish is creamy and smooth. 2. Taste the dish. Adjust seasoning with more salt or pepper if needed. 3. Serve the creamy wild rice hot. Garnish with fresh chopped parsley for added flavor and color. - Ensuring perfect rice texture: Rinse wild rice before cooking. This removes excess starch. It helps the rice stay fluffy and not sticky. Use the right amount of broth. The liquid should be double the rice for best results. - Flavor enhancements: For more taste, add a splash of white wine or a squeeze of lemon juice. You can also try adding a pinch of nutmeg for warmth. Fresh herbs can deepen the flavor even more. - Adjusting cooking times based on rice type: Wild rice takes longer to cook than regular rice. If you use brown rice, reduce cooking time by 10 minutes. Always check the package for specific timing. - Garnishing suggestions: Fresh parsley adds a nice touch. You can also use grated Parmesan for a richer flavor. A few toasted nuts, like almonds or walnuts, add crunch. - Serving styles for gatherings: Serve in deep bowls. This keeps the dish warm and looks inviting. Drizzle a little olive oil on top for shine. You can pair it with a green salad or crusty bread for a complete meal. {{image_4}} To make this dish vegan, start by substituting heavy cream with coconut cream. This swap keeps the dish creamy and delicious. Pour in one cup of full-fat coconut cream at the end. It adds a hint of sweetness that pairs well with the savory flavors. You can also add extra plant-based ingredients. Consider tossing in some spinach or kale for a boost of color and nutrients. These greens will cook down nicely and add a fresh touch. You can switch up grains in this recipe. Quinoa or brown rice can work well. Just adjust the cooking time based on the grain you choose. Quinoa cooks faster, while brown rice takes longer. If you want to play with vegetables, try adding carrots or peas. They add sweetness and texture to your dish. You can also mix in fresh herbs like basil or dill for a new flavor. These small changes can make your creamy mushroom wild rice feel unique every time. How long will it last in the fridge? This dish can last up to four days. Make sure it cools down before placing it in the fridge. Use a clean, airtight container to keep it fresh. Best practices for storing leftovers include separating the creaminess from the rice. This way, the rice will not absorb too much moisture. Keep the creamy mixture in one container and the rice in another. Freezing the dish is a great option if you want to enjoy it later. Place the creamy mushroom wild rice in airtight containers. Leave some space at the top for expansion. You can freeze it for up to three months. Reheating tips for frozen portions include letting the dish thaw in the fridge overnight. Then, heat it gently on the stove or in the microwave. Add a splash of broth or cream to keep it creamy. Stir well to combine everything once it's heated. Yes, you can use other types of rice. Long grain or brown rice work well. Just adjust the cooking time. Brown rice may need more time to cook. Always rinse the rice before use for better texture. You can use coconut cream for a dairy-free option. It adds a nice flavor too. Other options include cashew cream or almond milk. However, these may change the dish's creaminess. To make this dish gluten-free, ensure your vegetable broth is gluten-free. Most store-bought broths are safe. The other ingredients listed are naturally gluten-free, so you’re already on the right track! If you double the recipe, keep the cooking time the same. The Instant Pot will take longer to come to pressure, but once it hits pressure, it cooks for the same time. Just make sure not to exceed the pot's capacity. In this blog post, we explored how to make a creamy wild rice dish. We covered the key ingredients, including wild rice, mushrooms, and cream. You learned step-by-step instructions for preparing and cooking the dish in an Instant Pot. We also shared tips for perfecting flavors and presenting your meal. Remember, you can experiment with variations to suit your taste and dietary needs. Whether you keep it classic or add your twist, enjoy this dish and the joy it brings to your table.

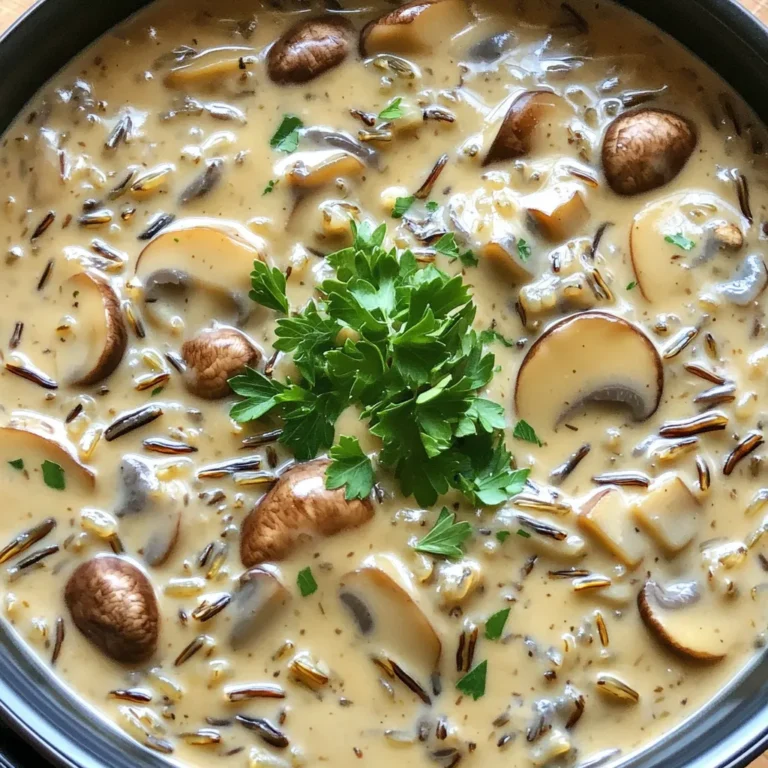
Instant Pot Creamy Mushroom Wild Rice Delight

PREV 1 2 3 … 18 NEXT
sweet savory saga

explore

DessertsDinnerAppetizersDrinks

Our Policies

  • Cookie Policy
  • Copyright Policy
  • Disclaimer
  • GDPR Policy
  • Terms Of Use
Back to Top
  • About
  • Contact Us
  • Privacy Policy
© 2025 sweet savory saga