FREE DINNER EBOOK! Get your copy!
  • Cookie Policy
  • GDPR Policy
  • Disclaimer
  • Terms Of Use
  • Visit my other site: Fun Cookie Recipes
sweet savory saga
  • Home
  • Dinner
  • Desserts
  • Drinks
  • Appetizers
  • Contact
  • About
  • Privacy Policy
  • Home
  • Dinner
  • Desserts
  • Drinks
  • Appetizers
  • Contact
  • About
  • Privacy Policy
  • Cookie Policy
  • GDPR Policy
  • Disclaimer
  • Terms Of Use
Visit my other site: Fun Cookie Recipes

HOME / CATEGORIES /

Latest

To make Garlic Herb Roasted Chicken, you need: - 1 whole chicken (about 4-5 pounds) - 1 head of garlic, cloves separated and peeled - 2 tablespoons olive oil - 1 tablespoon fresh rosemary, finely chopped - 1 tablespoon fresh thyme leaves - 1 tablespoon fresh parsley, finely chopped - 1 lemon, halved - Salt and freshly ground black pepper, to taste - 1 teaspoon smoked paprika - 1 onion, quartered Fresh herbs add brightness to your chicken. I love using rosemary, thyme, and parsley. These herbs create a nice mix. They bring out the chicken's rich taste. The garlic cloves add a wonderful aroma and flavor. Stuffing the chicken with lemon and onion gives it extra moisture. This makes every bite juicy and delicious. You can enhance the flavor with a few optional items: - Fresh sage leaves for an earthier taste - A splash of white wine for deeper flavor - Other spices like cumin or oregano for a twist These additions let you customize the chicken. Feel free to play with flavors and make it your own. {{ingredient_image_2}} Start by gathering all your ingredients. You need a whole chicken, garlic, herbs, olive oil, a lemon, and onion. Make sure you have salt and pepper too. Preheat your oven to 425°F (220°C). This heat is key for a crispy skin. In a small bowl, mix olive oil, rosemary, thyme, parsley, smoked paprika, salt, and pepper. Stir the mix well. This herb paste gives your chicken a punch of flavor. The fresh herbs make a big difference in taste. Take a paper towel and dry the chicken inside and out. This step helps the skin get crispy. Generously season the cavity with salt and pepper. Next, rub the herb paste all over the chicken's skin. Make sure to cover every part. Then, stuff the cavity with halved lemon, quartered onion, and garlic cloves. The stuffing adds moisture and aroma. Place the chicken in a roasting pan, breast side up. If you have a roasting rack, use it. This helps the air flow. Roast for about 1 hour and 15 minutes. Check the chicken’s internal temperature. It should reach 165°F (75°C). This ensures it's cooked fully and stays juicy. Halfway through cooking, baste the chicken with its own juices. Use a spoon to drizzle the juice over the skin. This step keeps the chicken moist and enhances its flavor. Basting is essential for that golden-brown skin. Once cooked, take the chicken out of the oven. Let it rest for 10-15 minutes on a cutting board. This resting time helps the juices settle in. When carving, slice the chicken carefully. Serve it on a large platter. Garnish with extra herbs and roasted garlic for a beautiful display. Enjoy your tasty creation! To get crispy chicken skin, start with a dry bird. You can pat it with a paper towel. This simple step makes a big difference. Next, use olive oil in your herb paste. The oil helps the skin brown nicely. Rub the herb mix all over the chicken. Make sure to cover every inch. Don’t forget to baste the chicken halfway through cooking. This keeps the skin moist and adds flavor. After roasting, let the chicken rest for 10-15 minutes. This step is key for juicy meat. Resting helps the juices move back into the chicken. If you cut too soon, the juices will run out. This makes the meat dry. So, be patient! Use this time to set the table or prepare sides. One common mistake is not seasoning enough. Always season the inside and outside of the chicken. Another mistake is opening the oven too often. Each time you open it, heat escapes. Try to keep the door closed as much as possible. Lastly, don’t skip the resting step. Rushing can ruin the juicy texture you want. Pro Tips Pat Your Chicken Dry: Ensuring the chicken is thoroughly dried before seasoning helps achieve a crispy skin during roasting. Use Fresh Herbs: Fresh herbs provide a more vibrant flavor compared to dried ones. Always choose fresh for the best results. Baste Regularly: Basting the chicken with its own juices halfway through roasting helps keep the skin moist and enhances flavor. Let It Rest: Allowing the roasted chicken to rest after cooking prevents juices from running out, ensuring every bite is tender and juicy. {{image_4}} You can mix up the herbs for fun and fresh tastes. Try using basil or oregano for a nice twist. You can also swap in tarragon for a hint of anise. If you want a spicy kick, add some crushed red pepper flakes to the herb mix. Each herb gives the chicken a unique flavor, making it special every time. Roasting is a classic way to cook chicken. It gives you crispy skin and juicy meat. You can also try spatchcocking. This means removing the backbone to flatten the chicken. It cooks faster and browns better. Both methods work well, so pick the one you like most! Pair your chicken with tasty sides for a complete meal. Roasted veggies, like carrots and potatoes, match perfectly. A fresh green salad adds crunch and color. You can also serve garlic bread for a cozy touch. Don’t forget a creamy coleslaw for a cool contrast. These sides make your meal even more delicious! To keep your Garlic Herb Roasted Chicken fresh, let it cool first. Place pieces in an airtight container. Store them in the fridge for up to three days. Keep the skin on for better flavor. If you have more leftovers, consider slicing the chicken. This makes it easier to use in meals later. The best way to reheat the chicken is in the oven. Preheat your oven to 350°F (175°C). Place the chicken pieces on a baking sheet. Cover them with foil to keep moisture in. Heat for about 15-20 minutes. This helps the chicken stay juicy. You can also use a microwave for quick reheating. Place the chicken in a microwave-safe dish. Cover it and heat for 1-2 minutes. Freezing is a great option for longer storage. Wrap the chicken tightly in plastic wrap or foil. Place it in a freezer bag, removing as much air as possible. You can freeze it for up to three months. To thaw, place it in the fridge overnight. This keeps the chicken safe and tasty. Always reheat thoroughly before eating. The ideal cooking time is about 1 hour and 15 minutes. You should roast the chicken at 425°F (220°C). This high heat helps create crispy skin while keeping the meat juicy. Always check the chicken's internal temperature. It needs to reach 165°F (75°C) in the thickest part of the breast for safety. Yes, you can use dried herbs. However, fresh herbs give a brighter flavor. If you use dried herbs, use about one-third of the amount. For example, if the recipe calls for 1 tablespoon of fresh herbs, use 1 teaspoon of dried ones. Mix them with olive oil to create a paste. To tell if the chicken is cooked, use a meat thermometer. Insert it into the thickest part of the breast. If it reads 165°F (75°C), the chicken is done. You can also check for clear juices. If the juices run clear, the chicken is likely cooked. Some great side dishes include: - Roasted vegetables like carrots and potatoes - A fresh green salad with lemon vinaigrette - Garlic mashed potatoes - Steamed green beans These sides complement the chicken's flavors and make a complete meal. You can store leftover chicken in the fridge for up to 3-4 days. Make sure to keep it in an airtight container. If you want to keep it longer, freeze it. Leftovers can last up to 4 months in the freezer. Just remember to thaw them in the fridge before reheating. You now have a complete guide to making Garlic Herb Roasted Chicken. We covered the key ingredients, how to prep, and cooking techniques to ensure your chicken is juicy and flavorful. Remember to let your chicken rest and enjoy crispy skin. You can mix herbs, try different cooking methods, and pair with tasty side dishes. Store leftovers properly to keep them fresh. Dive into your own kitchen adventure and impress everyone with your delicious meal!

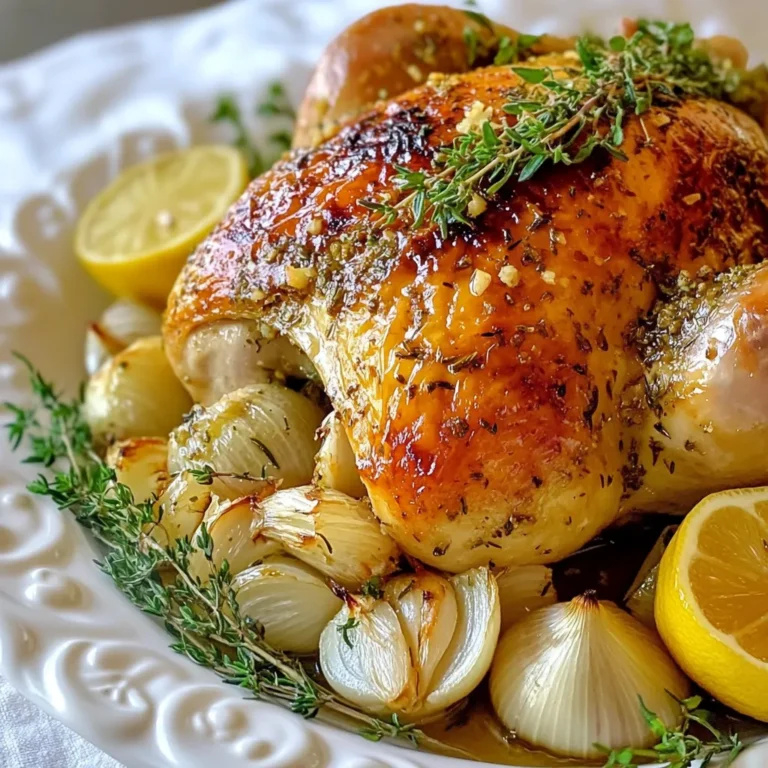
Garlic Herb Roasted Chicken Juicy and Flavorful Meal

To make creamy pumpkin sage gnocchi, you'll need a few simple ingredients. Here’s what you should gather: - 1 pound store-bought gnocchi - 1 cup pure pumpkin puree (canned or fresh) - 1 cup heavy cream - 1/2 cup freshly grated Parmesan cheese - 2 tablespoons unsalted butter - 2 cloves garlic, finely minced - 10 fresh sage leaves, finely chopped - 1/2 teaspoon freshly grated nutmeg - Salt and freshly ground black pepper to taste - Toasted pumpkin seeds for garnish (optional) These ingredients create a rich and creamy sauce that pairs well with the soft gnocchi. The pumpkin gives a warm, earthy flavor, while the sage adds a nice touch of freshness. The Parmesan cheese makes the sauce extra smooth and cheesy. Using store-bought gnocchi saves time, but you can make your own if you prefer. The heavy cream ensures the sauce stays creamy. If you can find fresh sage, it will elevate your dish. Don’t forget the nutmeg; it adds a warm spice that enhances the pumpkin flavor. Gather these items, and you are ready to cook a delicious fall dish! Start by bringing a large pot of salted water to a boil. You want the water to be bubbling vigorously. Once boiling, add 1 pound of store-bought gnocchi. Cook them for about 2-3 minutes. You know they are done when they float to the surface. This means they are ready. Carefully drain them and set aside. Next, grab a large skillet and set it over medium heat. Add 2 tablespoons of unsalted butter and let it melt until it foams. Then, stir in 2 cloves of finely minced garlic and 10 chopped fresh sage leaves. Sauté this mix for 1-2 minutes. You want to smell that fragrant garlic and crisp sage. Now, gradually add 1 cup of pure pumpkin puree and 1 cup of heavy cream to the skillet. Stir well and bring the sauce to a gentle simmer. This helps all the flavors blend nicely. It’s time to bring it all together. Carefully fold the drained gnocchi into the pumpkin sauce. Make sure each piece gets coated with that creamy goodness. Cook for an extra 2-3 minutes. Stir gently to heat everything evenly. You want every bite to be warm and flavorful. Enjoy the delightful smell filling your kitchen! - Proper boiling and treating gnocchi: Start with a large pot of salted water. Wait for a rolling boil before adding the gnocchi. They usually float when ready, which takes about 2-3 minutes. Be gentle when draining to keep them intact. - Avoiding overcooking the sauce: Cook the sauce on medium heat. Once you add the cream and pumpkin, keep an eye on it. Stir gently and let it simmer. Avoid boiling, as this can change the sauce's texture. - Garnishing ideas for the final dish: For a beautiful touch, sprinkle freshly cracked black pepper and more grated Parmesan on top. You can also add toasted pumpkin seeds for crunch and flavor. - Elevating flavor and appearance: A light drizzle of olive oil adds shine and richness. This simple step makes the dish look fancy and taste even better. - Issues with sauce consistency: If your sauce is too thick, add a splash of water or broth. If it's too thin, let it simmer longer to thicken. - Overcooking gnocchi and sauce: Overcooked gnocchi turns mushy. Keep an eye on them while cooking. For the sauce, simmer it gently, as high heat can change the creaminess. {{image_4}} If you want to change things up, try swapping heavy cream with almond milk. This makes the dish lighter but still creamy. You can also use Greek yogurt for a tangy twist. For cheese, instead of Parmesan, you can use pecorino or even goat cheese. Each offers a unique flavor that can change the dish significantly. To boost the taste, consider adding thyme or rosemary. These herbs pair well with pumpkin and sage. Just chop them finely and mix them in when you add the garlic. If you want more protein, try adding cooked chicken or sausage. This makes the dish heartier. Shrimp also works great if you want seafood. In fall, add roasted Brussels sprouts or butternut squash for extra veggies. They add great flavor and texture. If it's a holiday, consider mixing in cranberries for a sweet touch. For special occasions, you can top with crispy pancetta or fried sage leaves. This adds crunch and a burst of flavor that is sure to impress your guests. To keep leftovers fresh, store them in an airtight container. Place the container in the fridge right away. The gnocchi will stay good for about three days. After that, the sauce may lose its creaminess and flavor. When reheating gnocchi, use a skillet over medium heat. Add a splash of cream or broth to help the sauce. Stir gently until everything is warm. This keeps the sauce creamy. You can also use a microwave, but be cautious. Heat it in short bursts and stir in between. This way, you avoid overcooking. You can freeze the gnocchi, but the sauce is best fresh. If you freeze it, the texture may change. To freeze, place the cooled dish in a freezer-safe container. It lasts up to three months. To thaw, move it to the fridge overnight. Reheat it slowly on the stove with a splash of cream. This helps bring back the creamy texture. Gnocchi is a type of pasta. It is often made from potatoes, flour, and eggs. The dough is rolled and cut into small pieces. Some gnocchi uses ricotta cheese or semolina flour. You can find different types in stores, but potato gnocchi is the most common. Yes, you can use homemade gnocchi. Making it at home lets you control the flavors and texture. Homemade gnocchi is often softer and lighter. To make it, boil potatoes until soft. Then, mash them and mix in flour and egg. Roll the dough, cut into pieces, and form into small dumplings. You can cook them in the same way as store-bought gnocchi. To make this dish vegetarian, focus on the ingredients. You can skip any meat-based products. Use vegetable broth instead of chicken broth if needed. Ensure your cheese is made without animal rennet. You can replace butter with olive oil for a vegan option. Add more veggies like spinach or mushrooms for extra flavor. This recipe combines store-bought gnocchi with rich pumpkin sauce for a simple, tasty dish. I shared tips for cooking, serving, and avoiding common mistakes. You can customize this meal with different herbs or proteins. Whether for a busy weeknight or a special occasion, this dish shines. Remember to store leftovers properly and use reheating techniques to keep it creamy. Enjoy your culinary journey with this delightful meal!

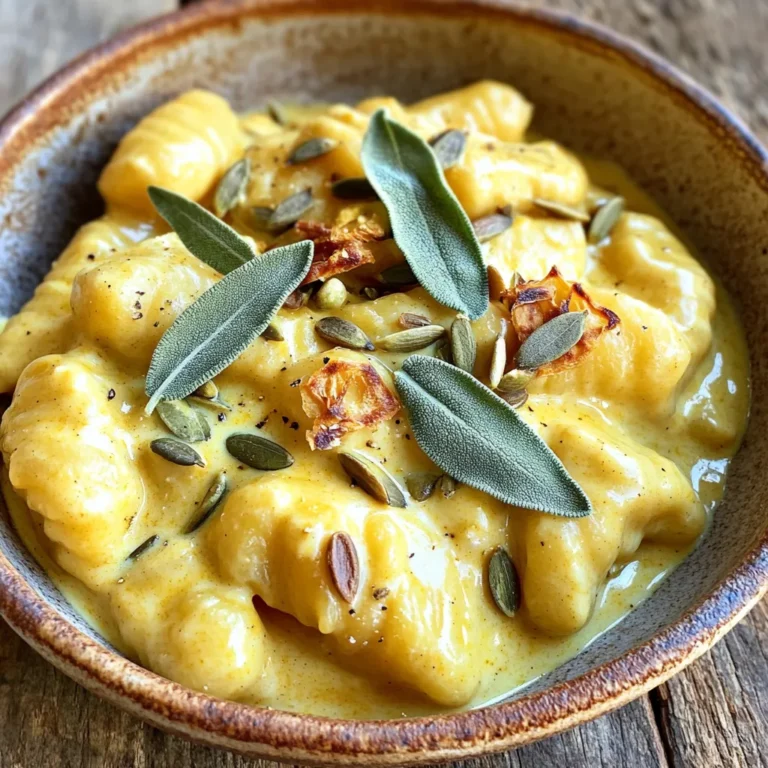
Creamy Pumpkin Sage Gnocchi Flavorful Fall Dish

- 2 cups baby potatoes, halved - 3 tablespoons extra virgin olive oil - 4 cloves garlic, finely minced - 1 teaspoon dried oregano - ½ teaspoon smoked paprika - ½ cup freshly grated Parmesan cheese - Sea salt and freshly ground black pepper, to taste - Fresh parsley, finely chopped (for garnish) Baby potatoes are best for this recipe. They cook evenly and stay tender. Use fresh garlic for a strong flavor. Smoked paprika adds a nice depth. Freshly grated Parmesan melts better than pre-grated cheese. Always season with sea salt and black pepper to enhance taste. You need an air fryer for cooking these potato bites. A mixing bowl helps combine the ingredients well. Use a sharp knife for halving the potatoes and mincing the garlic. A spatula is handy for tossing the mix evenly. A measuring spoon ensures accurate ingredient amounts. First, preheat your air fryer to 400°F (200°C). This takes about 5 minutes. While it heats, prepare the potatoes. Take 2 cups of baby potatoes and cut them in half. Place them into a large mixing bowl. Add 3 tablespoons of extra virgin olive oil to the bowl. Next, add 4 cloves of finely minced garlic. Sprinkle in 1 teaspoon of dried oregano and ½ teaspoon of smoked paprika. Finally, add sea salt and black pepper to taste. Toss everything together until each potato is well coated. Once mixed, sprinkle ½ cup of freshly grated Parmesan cheese over the potatoes. Gently toss again to ensure the cheese sticks to the potatoes. Now, it’s time to cook! Carefully place the seasoned potato bites in the air fryer basket. Make sure they are in a single layer. Avoid overcrowding the basket so air can flow freely. If you have too many, cook them in batches. Cook the potato bites for 15-18 minutes. At the halfway point, shake the basket gently. This helps them cook evenly. Watch closely until they turn a lovely golden brown and crisp up nicely. For the best results, follow these tips. First, always preheat your air fryer. This helps create a hot environment. Second, don’t stack the potatoes. Single layers allow hot air to circulate. Third, shake the basket midway through cooking. This moves the potatoes around and helps them crisp up on all sides. Lastly, keep an eye on them. Cooking times can vary based on the air fryer model. Enjoy your perfectly crispy garlic Parmesan potato bites! To boost flavor, always use fresh garlic. Fresh garlic gives a strong taste that dried garlic lacks. Also, try adding herbs like thyme or rosemary for extra depth. Adjust sea salt and black pepper to your liking. Taste as you go! For the best crispiness, don’t overcrowd the air fryer. Cook in batches if needed. This allows hot air to circulate around each potato bite. Shake the basket halfway through cooking. This helps them cook evenly and get nice and crispy. Avoid using too much olive oil; it can make the bites greasy. Make sure all potatoes are cut to the same size. This ensures they cook evenly. Lastly, don’t skip the preheating step. A hot air fryer cooks better and faster! {{image_4}} You can change up the flavor of your potato bites. Try using different spices like garlic powder, onion powder, or chili flakes for a kick. Instead of oregano, mix in thyme or rosemary for a fresh taste. Cheese is also fun to swap. You can use cheddar, mozzarella, or even feta cheese for a different twist. Each option brings a unique flavor to your dish. If you need a dairy-free option, try using nutritional yeast instead of Parmesan. This gives a cheesy taste without the dairy. For oil-free cooking, you can skip the olive oil. Just use a splash of vegetable broth to coat the potatoes. If you need gluten-free options, rest easy. The recipe is naturally gluten-free since it doesn't use any flour. While baby potatoes are perfect, you can use other types. Russet potatoes yield a fluffy texture. Yukon Gold potatoes offer a creamy taste. If you want bite-sized pieces, cut larger potatoes into smaller chunks. Sweet potatoes also work great. They add a nice sweetness and pair well with garlic and cheese. Just adjust the cooking time, as sweet potatoes may take a bit longer to cook. To keep your potato bites fresh, store them in an airtight container. Make sure they cool down first. Place them in the fridge for up to three days. This keeps them crispy when you reheat them. To reheat, use the air fryer again. Preheat it to 350°F (175°C). Place the potato bites in a single layer. Cook for about 5 to 7 minutes. This helps them regain their crispiness. You can also use a microwave but it may make them soft. You can freeze your potato bites for later. After cooking, let them cool. Then, place them in a freezer-safe bag. They can last for up to three months. When you want to eat them, just air fry them straight from the freezer. Cook them for about 10 to 12 minutes at 400°F (200°C). Enjoy them as if they were fresh! Yes, you can make these potato bites in the oven. Preheat your oven to 425°F (220°C). Toss the potatoes with oil and seasonings as usual. Spread them on a baking sheet in a single layer. Bake for 25-30 minutes, flipping halfway through. They will still be tasty, but may not be as crispy. Cook the potato bites in the air fryer for 15-18 minutes. Shake the basket halfway through to ensure even cooking. Keep a close watch near the end. You want them golden brown and crispy. These potato bites pair well with many dishes. Serve them as an appetizer with dipping sauces like ranch or garlic aioli. They also go great with grilled meats or salads. Try them alongside burgers or as a side for your favorite sandwich. Yes! You can use other vegetables like sweet potatoes, carrots, or zucchini. Adjust the cooking time based on the vegetable you choose. Just cut them into similar-sized pieces for even cooking. Enjoy experimenting with different flavors! This blog covered everything you need for perfect air fryer potato bites. We went over the ingredients, steps, and tips to enhance flavor. You learned about storage options and how to avoid common mistakes. Remember, you can get creative with seasonings and types of potatoes. Try different vegetables too! With these ideas, you will impress everyone with your dish. Enjoy your cooking and happy munching on those crispy bites!

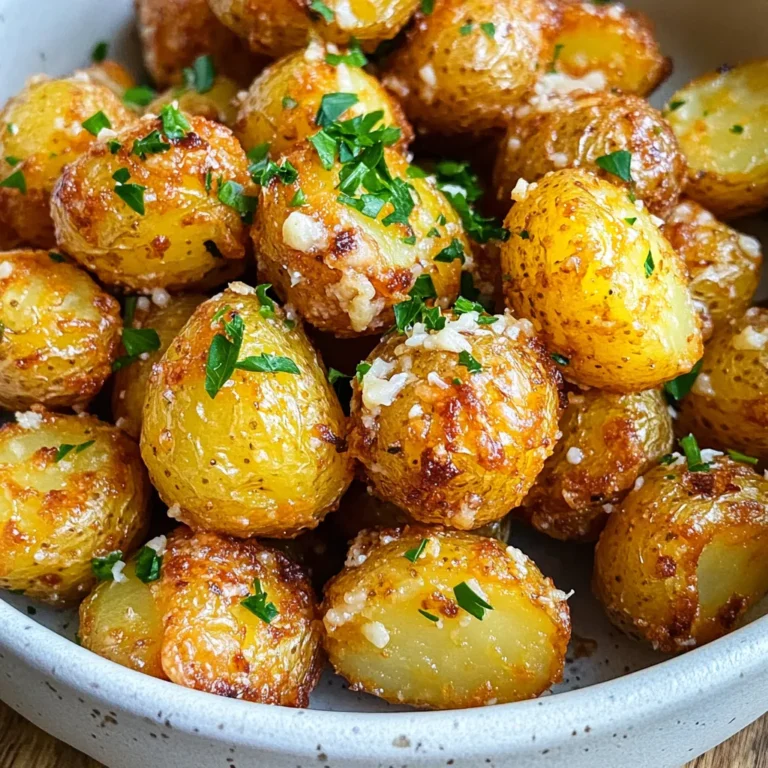
Air Fryer Garlic Parmesan Potato Bites Simple Recipe

- 2 cups all-purpose flour - 1 cup granulated sugar - 1 teaspoon baking powder - 1/2 teaspoon baking soda - 1/2 teaspoon salt - 1 teaspoon ground cinnamon - 1/2 teaspoon ground nutmeg - 2 large eggs - 1/2 cup vegetable oil - 1 teaspoon pure vanilla extract - 1 cup apples, peeled and diced (about 2 medium apples) - 1/2 cup caramel sauce, plus extra for drizzling - 1/2 cup chopped walnuts or pecans (optional) When measuring flour, spoon it into your cup and level it off. This method avoids packing flour, which can make your bread dense. Use a liquid measuring cup for oils and liquids. You can also use a kitchen scale for more accuracy. For the apples, aim for about two medium-sized apples to yield one cup when diced. This ensures consistent flavor in every slice. If you lack an ingredient, don’t worry! You can replace all-purpose flour with whole wheat flour for a heartier loaf. Coconut oil works well in place of vegetable oil and adds a subtle flavor. If you need to avoid eggs, try using a flaxseed meal mix. Use one tablespoon of flaxseed meal mixed with three tablespoons of water for each egg. For the caramel sauce, you can use store-bought or make your own with sugar and cream. If nuts aren’t your thing, you can simply skip them or add chocolate chips for a sweet twist. First, set your oven to 350°F (175°C). This temperature is perfect for baking the bread. Next, take a 9x5 inch loaf pan. Grease it well with butter or non-stick spray. This step helps the loaf come out easily after baking. In a large bowl, add the following dry ingredients: - 2 cups all-purpose flour - 1 cup granulated sugar - 1 teaspoon baking powder - 1/2 teaspoon baking soda - 1/2 teaspoon salt - 1 teaspoon ground cinnamon - 1/2 teaspoon ground nutmeg Whisk these ingredients together. Make sure they mix well. This will give the bread a nice rise and flavor. In a medium bowl, crack two large eggs. Beat them until they look smooth. Add in 1/2 cup vegetable oil and 1 teaspoon pure vanilla extract. Mix these well. This wet mixture adds moisture and flavor to the bread. Slowly pour the wet mixture into the dry mix. Use a spatula or wooden spoon to stir gently. Mix until just combined. Be careful not to overmix. This keeps the loaf tender and fluffy. Now, fold in 1 cup of peeled and diced apples. If you like, add 1/2 cup chopped walnuts or pecans. Pour half of the batter into the greased loaf pan. Drizzle about 1/4 cup of caramel sauce on top. Let it spread a bit. Then, add the rest of the batter. Smooth the top with a spatula. Place the pan in the oven and bake for 55-65 minutes. Check for doneness with a toothpick. It should come out clean or with a few moist crumbs. After baking, let the loaf cool in the pan for 10 minutes. Then, move it to a wire rack to cool completely. Drizzle more caramel sauce on top just before serving for an extra treat. To get the best loaf, start with fresh ingredients. Use room temperature eggs; they mix better. When mixing the wet and dry ingredients, stir gently. Overmixing leads to a dense loaf. Your batter should be just combined with some lumps. This keeps the loaf light and fluffy. Evenly mix the apples and nuts into the batter. Fold them in gently to avoid breaking them apart. Use a spatula to scrape the bottom of the bowl. This ensures all ingredients blend well. Layering the caramel sauce helps spread its sweetness throughout the loaf. Pour half the batter first, drizzle caramel, and then add the rest. Serve the bread warm or at room temperature. This enhances the sweet caramel flavor. Cut thick slices for a cozy feel. For a fun touch, drizzle extra caramel sauce on top. Place slices on a decorative platter. Add a small bowl of caramel for dipping. Garnish with chopped nuts for crunch and beauty. {{image_4}} You can enhance the bread by adding nuts or seeds. I love using walnuts or pecans. They add a nice crunch. Just chop them up and fold them into the batter. You can add about 1/2 cup for the best taste. If you prefer seeds, try pumpkin or sunflower seeds. They work well too. They add a tasty twist and a boost of nutrition. This recipe is great for seasonal twists. In fall, you can add spices like ginger or cloves. These spices bring warmth and depth to the flavor. In spring, consider adding orange zest for a fresh taste. It brightens the bread. You can also mix in dried fruits like cranberries or raisins. They add sweetness and texture, making the loaf even more delightful. If you need a gluten-free option, it’s easy to adapt. Use a gluten-free flour blend instead of regular flour. Make sure it’s a 1:1 ratio blend for best results. You might want to add a bit of xanthan gum too. This helps the loaf rise and hold together. Check that your caramel sauce is also gluten-free. This way, everyone can enjoy this cozy treat! To keep your caramel apple bread loaf fresh, store it in an airtight container. This helps prevent drying out. You can also wrap it tightly in plastic wrap. Store it at room temperature for up to three days. If you need to keep it longer, freezing is a great option. To freeze your bread loaf, first let it cool completely. Once cool, wrap it tightly in plastic wrap or aluminum foil. Place it in a freezer-safe bag or container. This keeps out air and moisture. Your caramel apple bread can be frozen for up to three months. Remember to label the bag with the date. To reheat your bread loaf, preheat your oven to 350°F (175°C). Unwrap the loaf and place it on a baking sheet. Heat it for about 10 to 15 minutes, or until warm. You can also microwave individual slices for about 15 to 20 seconds. If you like, drizzle some caramel sauce on top before serving. This adds extra flavor and warmth. To make this caramel apple bread loaf vegan, replace the eggs with flax eggs. Mix 1 tablespoon of flaxseed meal with 2.5 tablespoons of water for each egg. Let it sit for 5 minutes until it thickens. You can also switch the vegetable oil for coconut oil or another plant-based oil. Use maple syrup instead of granulated sugar for a sweeter touch. Lastly, make sure the caramel sauce is dairy-free. If you need a substitute for caramel sauce, try using a homemade version. Combine brown sugar, coconut milk, and a bit of vanilla extract in a pan. Cook over medium heat until it thickens. You can also use honey or maple syrup for a different flavor. Both will add sweetness and moisture to your loaf. To check if the bread is done, insert a toothpick into the center. If it comes out clean or with a few moist crumbs, the bread is ready. The top should be golden brown. If you notice it browning too fast, cover it loosely with foil to prevent burning. Yes, you can use different types of apples! Granny Smith apples give a tart flavor and hold their shape well. Honeycrisp apples add sweetness and crunch. You can even mix apple varieties for a complex flavor. Just make sure to peel and dice them before adding to the batter. This blog post covered key ingredients, preparation steps, and storage tips for making delicious bread. You learned about measurements, substitutions, and how to create the perfect loaf. I shared useful tips to ensure good texture and presentation. Variations, like adding nuts or seasonal flavors, add fun twists. Remember to store bread well and reheat it for the best taste. With these insights, you’re ready to bake great bread every time. Happy baking!

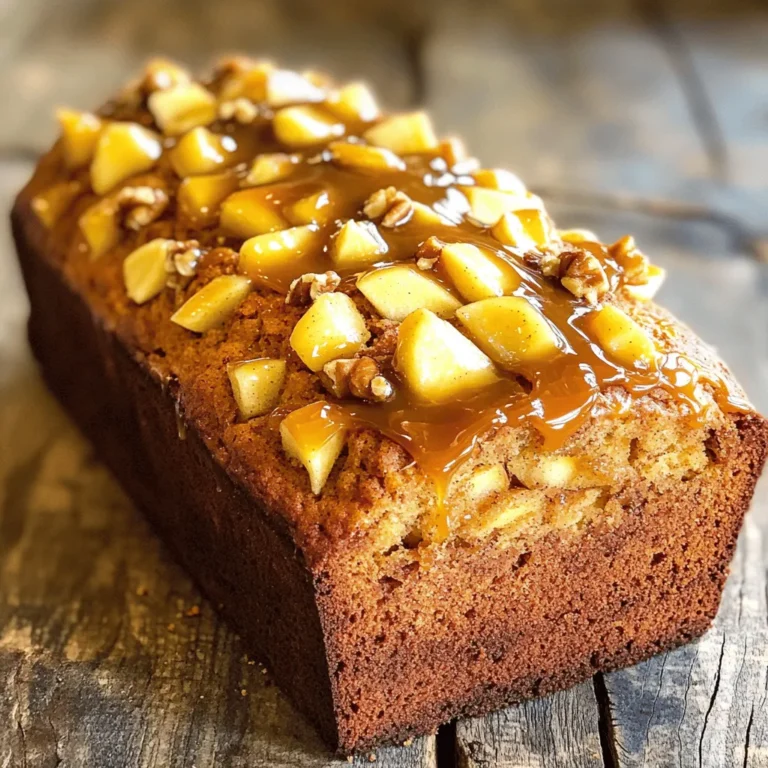
Caramel Apple Bread Loaf Flavorful and Cozy Treat

- 2 cups all-purpose flour - 1 cup granulated sugar - 1 tablespoon baking powder - ½ teaspoon baking soda - ½ teaspoon salt - ½ cup unsalted butter, melted and cooled slightly - 2 large eggs, at room temperature - 1 teaspoon vanilla extract - 1 cup buttermilk (or substitute with milk mixed with 1 tablespoon white vinegar) - 1 ½ cups fresh blueberries, rinsed and patted dry - ½ cup sliced almonds, plus extra for topping - Zest of 1 lemon for brightness - 1 tablespoon almond extract for a nutty depth These ingredients create a delightful mix of flavors. The blueberries add natural sweetness. Fresh blueberries burst in your mouth while you eat. Sliced almonds add a crunchy texture. Almond extract gives a nutty flavor that enhances the muffins. - Muffin tin and liners - Mixing bowls and utensils You will need a standard muffin tin to bake these treats. Use paper liners to keep the muffins from sticking. A large mixing bowl helps combine dry ingredients well. Smaller bowls work for the wet mix. A whisk is perfect for mixing air into the dry ingredients. A spatula is great for folding everything together without overmixing. To make great muffins, avoid overmixing the batter. Overmixing leads to tough muffins. You want to mix until just combined. A few lumps are okay. They help keep the muffins soft and fluffy. Make sure your ingredients are at the right temperature. Room temperature eggs and buttermilk mix better. Cold ingredients can lead to uneven mixing. This can affect your muffin’s rise and texture. To check for doneness, use a toothpick. Insert it into the center of a muffin. It should come out clean or with a few moist crumbs. If it has wet batter, bake for a few more minutes. Ensure even baking by rotating the muffin tin halfway through. Ovens can have hot spots. This simple step helps all muffins bake evenly. Serve these muffins warm for the best taste. You can sprinkle powdered sugar on top. This adds a nice touch and sweetness. Pair your muffins with a hot cup of coffee or tea. They also go well with milk or a fruit smoothie. Enjoy your bakery-style blueberry almond muffins! You can easily make this recipe your own by changing a few ingredients. For non-dairy milk options, almond milk or oat milk works well. These choices will keep your muffins moist and tasty. If you need a gluten-free option, use a gluten-free flour blend. Just make sure it has a good balance of starches and proteins. This way, your muffins still rise and taste great. To switch up the flavors, try adding different nuts or fruits. For example, walnuts or pecans can add a nice crunch. You can also mix in raspberries or strawberries for a fun twist. Adding spices like cinnamon or nutmeg can bring warmth to your muffins. Just a pinch can elevate the taste and make your kitchen smell amazing. You can change your muffins with the seasons. In the fall, add cranberries for a tart flavor. They pair well with the sweetness of the blueberries. During the holidays, think about adding spices like ginger or cloves. This will give your muffins a festive vibe. You can also top them with holiday-themed sprinkles for a fun touch. {{image_4}} To keep your muffins fresh, store them in an airtight container. A tight seal helps lock in moisture and flavor. Place a paper towel at the bottom of the container to absorb any extra moisture. This keeps your muffins soft and tasty. Store them at room temperature for the best results. Avoid the fridge, as it can make them dry. Freezing muffins is a great way to enjoy them later. To freeze, wrap each muffin in plastic wrap. Then, place them in a freezer bag. Make sure to push out all the air before sealing the bag. This helps prevent freezer burn. When you want to eat one, take it out and thaw it on the counter. You can also heat it in the microwave for a quick treat. Fresh muffins will last about 3 to 5 days at room temperature. If you freeze them, they can last up to 3 months. Check for signs of spoilage before eating. Look for mold or a dry texture. If they smell off, it’s best to toss them. Always trust your senses when it comes to food safety. Yes, you can use frozen blueberries. They may make the batter a bit wetter. It can also change the color of your muffins. To keep the texture nice, toss the frozen blueberries in flour before adding them to the batter. This helps absorb extra moisture and keeps your muffins fluffy. To prevent muffins from sticking, line your muffin tin with paper liners. You can also lightly grease the tin with cooking spray. If you use butter, make sure to coat the entire inside of each cup. Letting muffins cool for a few minutes before removing them helps too. You can make the batter ahead of time. However, it’s best to bake it right away for the best rise. If you need to store it, cover the bowl with plastic wrap. Refrigerate for up to 2 hours. When you're ready to bake, just bring it back to room temperature. To make these muffins healthier, reduce the sugar by ¼ cup. You can also use applesauce to replace half the butter. For a lighter touch, swap regular flour for whole wheat flour. Adding more blueberries boosts fiber and nutrients too. Flat muffins can happen for a few reasons. Overmixing the batter is a common cause. Make sure to mix just until combined. Another reason could be old baking powder. Always check the date on your leavening agents for freshness. Lastly, filling the muffin cups too full can also lead to flat tops. Fill them only two-thirds full for the best rise. In this post, we explored how to make perfect muffins using essential ingredients, equipment, and step-by-step instructions. We covered tips for baking success, storage options, and variations to try. Remember to mix carefully and check for doneness. You can enjoy muffin greatness with seasonal fruits or healthier swaps. With this guide, you're ready to bake delicious muffins that your family will love. Happy baking!

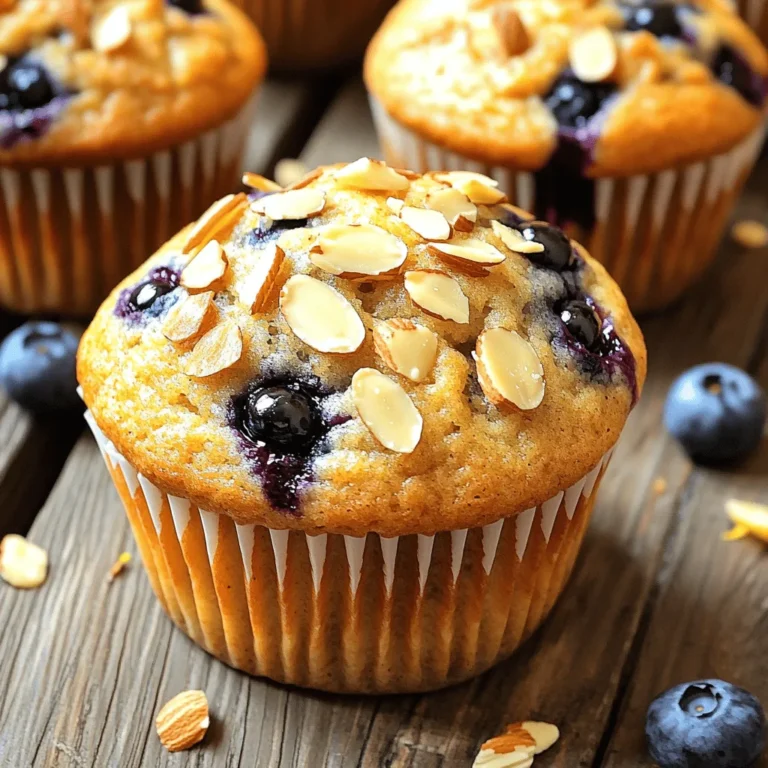
Bakery Style Blueberry Almond Muffins Simple Recipe

- Thick slices of brioche or challah bread - Nutella - Eggs - Whole milk - Pure vanilla extract - Ground cinnamon - Sea salt - Butter for frying - Powdered sugar for dusting - Fresh berries for garnish To make Nutella stuffed French toast, you need simple ingredients. Start with thick slices of brioche or challah bread. These types are soft and fluffy, perfect for soaking up the egg mixture. Next, grab some Nutella. This sweet spread is the star of our dish. You will also need eggs, which help bind everything together. Whole milk adds creaminess, while pure vanilla extract gives a lovely flavor. Add ground cinnamon for warmth and a pinch of sea salt to balance the sweetness. Use butter for frying to achieve that golden, crispy texture. Powdered sugar dusted on top adds a sweet touch. Finally, fresh berries make for a bright and tasty garnish. With these ingredients, you can create a delightful morning treat that everyone will love! To start, take two thick slices of brioche or challah bread. Use a spatula to spread Nutella on one side of each slice. Make sure to cover it well. Now, place the other two slices on top. You have created two Nutella-stuffed sandwiches. Next, we need the egg mixture. In a shallow bowl, crack in two large eggs. Add 1/2 cup of whole milk, 1 teaspoon of pure vanilla extract, 1/2 teaspoon of ground cinnamon, and a pinch of sea salt. Whisk it all together until it is smooth. Make sure the yolks mix well with the whites. Now, let’s soak the sandwiches. Gently dip each Nutella-filled sandwich into the egg mixture. Be quick! You want them to absorb some of the mixture but not get too soggy. Allow any extra egg to drip back into the bowl. Next, heat a large skillet over medium heat. Add about 2 tablespoons of butter. Let it melt and coat the pan. The pan should feel hot, but not smoking. Carefully place the soaked sandwiches in the skillet. Fry each side for about 3-4 minutes. Turn them once until they are golden brown and crispy. Once the French toast is done, take them out of the skillet. Dust them with powdered sugar for extra sweetness. Finally, arrange fresh berries on top. Strawberries, blueberries, or raspberries work great for this. Enjoy your delicious Nutella Stuffed French Toast! To make the best Nutella stuffed French toast, soak the bread just right. Dip each sandwich quickly in the egg mixture. Too long, and they get soggy. Aim for about 5 seconds on each side. This gives the toast enough flavor without losing its shape. When cooking, keep an eye on your heat. Start at medium. If the bread browns too fast, lower the heat. You want golden brown bread with a warm, gooey center. Adjust the temperature to maintain a steady cook. Add spices to elevate your French toast. A little extra cinnamon can bring warmth. You can also try nutmeg or cardamom for a twist. If you want a sweet touch, add a splash of vanilla extract to the egg mixture. For toppings, think beyond just powdered sugar. Fresh berries like strawberries or blueberries brighten the dish. You might drizzle honey or maple syrup to add sweetness. A sprinkle of crushed nuts can add crunch and flavor. Choose the right skillet for cooking. A cast-iron skillet works well for even heat. If you prefer lighter weight, a non-stick frying pan is great too. It helps to prevent sticking and makes flipping easier. Using non-stick cookware can save time and hassle. It allows for a quick clean-up too. Just make sure to use enough butter to coat the pan. This keeps the French toast from sticking while adding flavor. {{image_4}} You can make Nutella stuffed French toast even better with fruit. Sliced bananas or strawberries add a fresh taste. The sweetness of ripe bananas pairs well with Nutella. Strawberries give a bright color and flavor. You can also try different types of berries. Blueberries or raspberries add a fun twist. Their tartness balances the rich chocolate spread. Want to change the flavor? Use flavored Nutella or other spreads. There are options like hazelnut or even salted caramel. You can also add chocolate chips or nuts. They bring extra texture and taste. A sprinkle of chopped hazelnuts on top can be delightful. Mixing in peanut butter or almond butter adds a nutty twist. The choice is yours! If you want a healthier version, try whole grain bread. It gives more fiber and nutrients. You can also choose alternative milk options. Almond milk or oat milk works great. These swaps keep the taste but add health benefits. Enjoy your Nutella stuffed French toast without guilt! To keep your Nutella stuffed French toast fresh, store it in the fridge. Use an airtight container to prevent drying out. This method keeps the flavors intact. I recommend eating leftovers within two days for the best taste. When you’re ready to reheat, use a skillet. Heat it on low and add a little butter. Place the toast in the pan and warm it for a few minutes on each side. This method keeps the outside crispy and the inside warm and gooey. You can freeze Nutella stuffed French toast for later enjoyment. First, let the toast cool completely. Wrap each piece in plastic wrap. Then, place them in a freezer-safe bag. This way, they won’t stick together. You can freeze them for up to a month. When you’re ready to eat, take a piece out and let it thaw in the fridge overnight. To reheat, use the oven. Preheat it to 350°F (175°C). Place the toast on a baking sheet and warm for about 10-15 minutes. This method makes it crisp and delicious again. Yes, you can easily make this recipe dairy-free. Use almond milk, oat milk, or coconut milk instead of whole milk. For the butter, choose a plant-based option like vegan butter or coconut oil. These swaps keep the flavor rich while fitting your dietary needs. Look for a golden-brown color on both sides. The edges should be crispy, and the center should feel warm to the touch. If you gently press the toast, it should spring back slightly. This means the bread is cooked, and the Nutella inside is gooey and melted. Yes, you can prepare the egg mixture ahead of time. Store it in an airtight container in the fridge for up to 24 hours. Just give it a good whisk before using. This saves time on busy mornings and keeps your French toast quick and easy. Pair your French toast with fresh fruit like strawberries or blueberries. A drizzle of maple syrup adds sweetness. You might also enjoy it with a side of crispy bacon or a light yogurt. For drinks, coffee or fresh orange juice works great. This blog post covered how to make delicious Nutella stuffed French toast. We listed the key ingredients, shared step-by-step instructions, and offered helpful tips and variations. You can easily customize this dish to your taste and serve it fresh or store leftovers. Enjoy the rich flavors and fun possibilities of this recipe with loved ones. Nutella stuffed French toast is a treat that brings joy to breakfast or brunch!

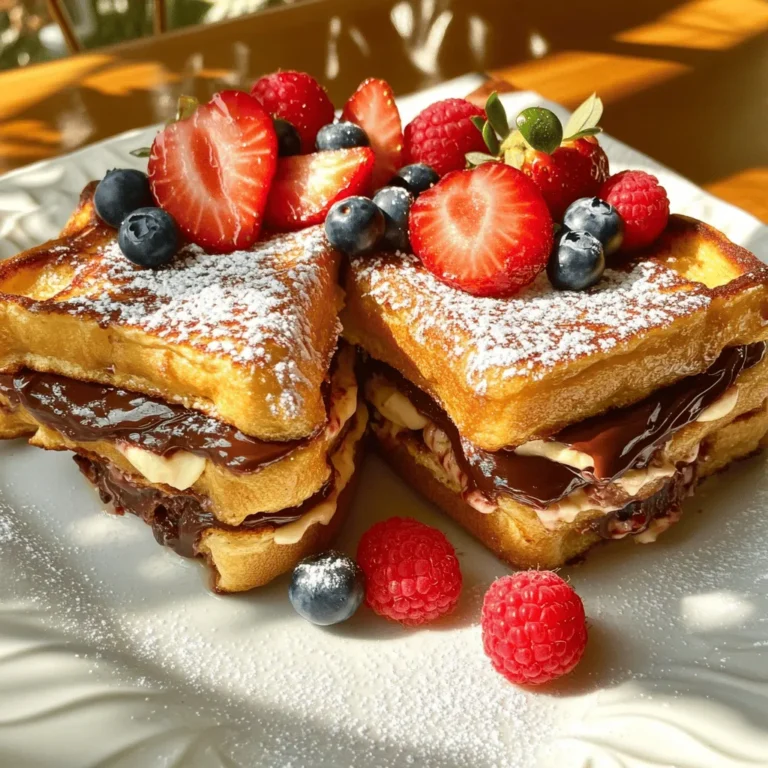
Nutella Stuffed French Toast Irresistible Morning Treat

To make Spicy Garlic Edamame, you need simple and tasty ingredients. Here’s what you will need: - 2 cups edamame (in pods) - 4 cloves garlic, finely minced - 2 tablespoons extra virgin olive oil - 1 tablespoon soy sauce - 1 teaspoon red pepper flakes - Sea salt, to taste - 1 teaspoon toasted sesame oil - 1 tablespoon sesame seeds (for garnish) - Chopped green onions (for garnish) These ingredients come together for a quick and satisfying snack. Edamame is high in protein and fiber, making it a healthy choice. Garlic adds a rich flavor, while red pepper flakes bring heat. The olive oil and sesame oil make the dish smooth and tasty. You can easily find these ingredients at any grocery store. When you gather your ingredients, make sure your edamame is fresh. Look for bright green pods without blemishes. This will help your dish look and taste great. If you want a mild snack, use less red pepper flakes. Adjust the spice to fit your taste. This recipe is flexible and perfect for all spice lovers! - Fill a pot with water and add salt. - Bring the water to a boil. - Add edamame pods and cook for 4-5 minutes. Cooking the edamame just right is key. You want them tender but firm. If you overcook them, they lose their bite and flavor. - Drain the cooked edamame in a colander. - Transfer them to a bowl of ice water. Chilling stops the cooking fast. This keeps the bright green color. After a few minutes, drain again and pat dry with a towel. - Heat olive oil in a skillet over medium heat. - Add minced garlic and sauté for 1 minute. - Mix in soy sauce, red pepper flakes, and sesame oil. Sautéing the garlic brings out its sweet flavor. Stir it often to avoid burning. Adding soy sauce and sesame oil gives it depth. - Add the drained edamame to the skillet. - Toss the edamame in the spicy garlic sauce. Mix them well to coat every pod. Sauté for an additional 2-3 minutes until heated through. - Sprinkle sea salt to taste. - Plate the edamame and garnish with sesame seeds and chopped green onions. The final touch adds color and crunch. The sesame seeds and green onions make the dish pop. Enjoy your spicy garlic edamame! When picking edamame, look for bright green pods. They should be firm and plump. Avoid any that have brown spots or wrinkles. Fresh edamame has a sweet taste and vibrant color that makes your dish pop. Always choose the best quality for great flavor. If you want to change the spice, start with less red pepper flakes. Add more if needed after cooking. This way, you can make the dish milder or hotter, depending on your taste. Remember, a little goes a long way. You can also try other spices for a twist! Be careful not to burn the garlic. Keep the heat at medium and stir it constantly. Garlic cooks fast and can turn bitter if it burns. For the edamame, don’t overcook them. They should be tender but still firm. This keeps them bright and tasty! {{image_4}} You can turn your Spicy Garlic Edamame into a heartier snack by adding protein. Shrimp or chicken works well. Simply sauté the shrimp in olive oil until they are pink and cooked through. For chicken, use small, bite-sized pieces. Cook them until golden brown before adding the garlic and sauce. This addition makes the dish more filling. If you want a vegan twist, try using different seasonings. Instead of soy sauce, you can use tamari for a gluten-free option. You can also sprinkle nutritional yeast on top for a cheesy flavor. Add some roasted chickpeas for extra protein and crunch. These swaps keep the dish plant-based while still bursting with flavor. To give your edamame a fresh twist, add extra herbs or citrus zest. Fresh cilantro or basil can brighten up the dish. A splash of lime or lemon juice at the end adds a tangy kick. You can even try a sprinkle of smoked paprika for a smoky flavor. These enhancements make your snack even more exciting and tasty! To keep your Spicy Garlic Edamame fresh, cool them completely first. Place the edamame in an airtight container. Store them in the fridge for up to three days. Make sure to seal the container well. This helps stop moisture and keeps the flavor strong. If you want to save some for later, freezing is a great option. First, cool the cooked edamame in ice water, then drain them well. Spread them on a baking sheet in a single layer. Freeze for about two hours until they are solid. Once frozen, transfer them to a freezer bag. They will stay fresh for up to three months. When you’re ready to enjoy your edamame again, there are two easy methods. For the stovetop, heat a little olive oil in a skillet over medium heat. Add the frozen edamame and sauté for about five minutes. Stir often to heat them evenly. For the microwave, place the edamame in a bowl with a splash of water. Cover and heat for two to three minutes. This keeps them tasty and warm without losing flavor. Yes, you can make Spicy Garlic Edamame ahead of time. Cook the edamame and prepare the sauce. Store them separately in airtight containers in the fridge. You can keep them for about 3 days. When you are ready to serve, just reheat the edamame in a pan for a few minutes. This will help keep the flavors fresh. Spicy Garlic Edamame pairs well with many dishes. Here are some ideas: - Sushi rolls - Rice bowls - Stir-fries - Grilled meats - Noodle dishes You can also serve it as a snack with drinks or as an appetizer at parties. Yes, Spicy Garlic Edamame is healthy. Edamame is rich in protein, fiber, and vitamins. Each serving provides essential nutrients. They are low in calories and fat. Garlic adds health benefits, too. It can boost your immune system and may lower blood pressure. This dish is a great choice for a healthy snack or side. You’ve learned how to make Spicy Garlic Edamame, from ingredients to storage. We covered tips for fresh pods and adjusting spice levels. Try adding shrimp for protein or different herbs for flavor. Remember, these snacks are easy to store and reheat. Enjoy your tasty, healthy treat! Your culinary skills will shine with this simple recipe.

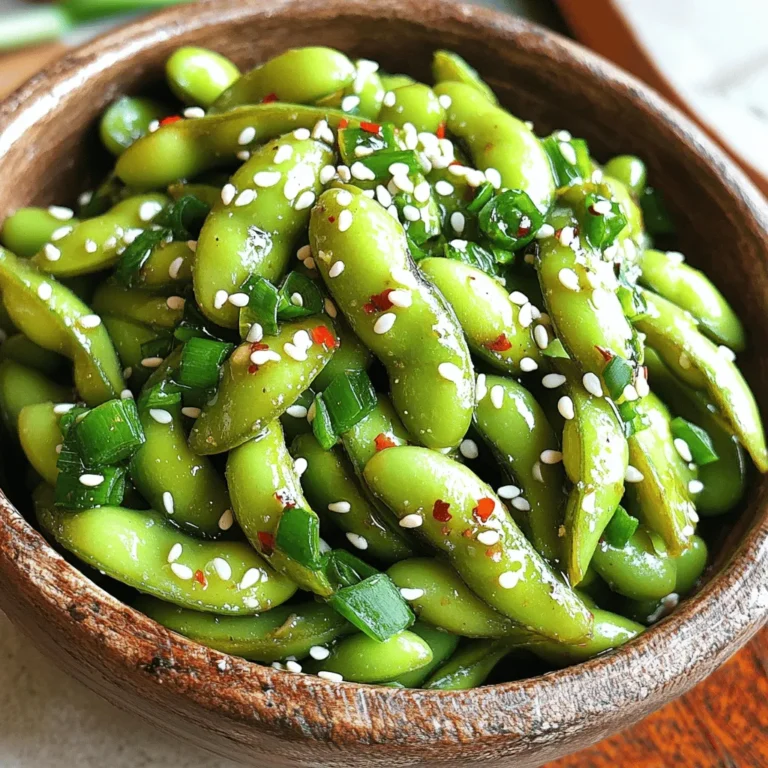
Spicy Garlic Edamame Flavorful and Simple Snack

For these Thai Peanut Chicken Lettuce Wraps, you need a few key items: - 1 lb ground chicken - ½ cup bell peppers, diced - ½ cup carrots, grated - ¼ cup green onions, chopped - ¼ cup fresh cilantro, chopped - 1 head of butter lettuce or romaine lettuce The ground chicken gives the wraps a nice protein base. Bell peppers add crunch and color. Carrots bring sweetness, while green onions and cilantro add fresh flavor. The sauce makes this dish shine. Here’s what you need: - 2 tablespoons creamy peanut butter - 1 tablespoon low-sodium soy sauce - 1 tablespoon fish sauce - 1 tablespoon packed brown sugar - 1 tablespoon freshly squeezed lime juice - 1 clove garlic, finely minced - 1 teaspoon fresh ginger, grated These sauces blend together well. The peanut butter creates creaminess, while the fish sauce adds umami. Lime juice gives a bright kick. Garlic and ginger bring warmth and depth. Garnishes and extra veggies complete the dish. You’ll want: - ¼ cup chopped peanuts, for garnish - Sriracha or chili sauce, for an extra kick (optional) Chopped peanuts add a nice crunch on top. Sriracha brings heat if you like spice. You can also use lime wedges to squeeze on the wraps for extra flavor. This combination of ingredients makes the wraps flavorful and fun to make! Start by heating a large skillet over medium heat. Add a little oil to the pan. Once hot, toss in the minced garlic and grated ginger. Cook these for about one minute. You want them fragrant and golden. Next, add the ground chicken. Use a wooden spoon to break it apart. Cook for about 5 to 7 minutes. The chicken should turn brown and no longer pink. In a separate bowl, mix the creamy peanut butter, soy sauce, fish sauce, brown sugar, and lime juice. Use a whisk to blend it well. The goal is a smooth sauce. Once the chicken is cooked, pour this sauce over it. Stir in the diced bell peppers and grated carrots. Cook for another 2 to 3 minutes. This time lets the veggies soften and the flavors meld. Now, it's time to put it all together. Take a lettuce leaf and place a generous spoonful of the chicken mixture in the center. Sprinkle some chopped peanuts on top for crunch. If you like heat, drizzle some Sriracha or chili sauce over it. Carefully fold the lettuce around the filling. This makes a tasty wrap that is fun to eat! Enjoy these fresh and vibrant wraps right away. To cook the chicken just right, use a non-stick skillet. Heat the skillet on medium heat. Add a small amount of oil. Once hot, add the minced garlic and grated ginger. Sauté for one minute. This step adds great flavor. Then add the ground chicken. Break it up while cooking. Cook for about 5 to 7 minutes. Look for the chicken to turn brown. It should not be pink anymore. Stir often to prevent sticking. You can make this recipe ahead of time. The chicken filling stores well in the fridge. Prepare it up to three days in advance. After cooking, let it cool completely. Place it in an airtight container. When ready to eat, just reheat the chicken. You can use a microwave or a skillet. Then, assemble the wraps with fresh lettuce. This way, you save time and enjoy a quick meal. Choosing the right lettuce is key. Butter lettuce is soft and easy to fold. It gives a nice crunch to each bite. Romaine lettuce is another great option. It has a firm texture and holds up well. You can also try red leaf lettuce for color. Just make sure the leaves are large enough. This way, they hold the filling properly. Enjoy your wraps with any of these lettuce types! {{image_4}} You can easily make these wraps vegetarian. Use 1 pound of firm tofu instead of chicken. Press the tofu to remove excess water, then crumble it. Cook the tofu in the skillet until it is golden brown. Add the same sauce for great flavor. You can also use tempeh for a nutty taste. If you want more protein, try ground turkey or beef. You can also use shrimp for a seafood twist. Cook the shrimp until pink and tender, then add the sauce. For a fun twist, use shredded rotisserie chicken. It saves time and still tastes amazing. Add more flavor with fresh herbs or spices. Try adding fresh basil or mint for a refreshing taste. You can also mix in a dash of sesame oil for a nutty depth. If you like heat, toss in some red pepper flakes or chopped jalapeños. These little changes can make your wraps even more exciting! After making Thai peanut chicken lettuce wraps, let them cool down. Store any leftovers in an airtight container. Place the chicken mix in one container and the lettuce leaves in another. This keeps the wraps fresh and crisp. You can store them in the fridge for up to three days. If you want to keep the chicken for longer, freezing works well. Allow the chicken mixture to cool completely. Then, place it in a freezer-safe bag or container. Label the bag with the date. You can freeze it for up to three months. Just remember, lettuce does not freeze well. When you’re ready to eat the frozen chicken, thaw it in the fridge overnight. To reheat, use a skillet over medium heat. Stir until it’s hot all the way through. If you want to enjoy the wraps fresh, assemble them right before serving. This keeps the lettuce crisp and the flavors bright. Yes, you can use other meats. Ground turkey is a great substitute. It has a light taste. You can also use cooked chicken, beef, or pork. Just ensure they are cooked well. For a vegetarian option, try tofu or tempeh. Both will soak up flavors nicely. If you need a peanut butter swap, try almond butter or sunflower seed butter. Both give a nutty taste. If allergies are a concern, tahini works too. It has a creamy texture and adds flavor. Just adjust the amount for taste. To add heat, use more Sriracha or chili sauce. You can also mix in some red pepper flakes. Fresh jalapeños or Thai bird chilies work well too. Start with a little, then taste. You can always add more spice! This blog post covered many key parts of making delicious lettuce wraps. We explored the best ingredients like chicken and sauces, and how to prepare each part. You learned my tips for cooking chicken just right and making quick meal prep easy. You can also try vegetarian options or add more protein. Storing and reheating your wraps is simple too. Now that you have all this information, it’s time to get cooking. Enjoy creating your tasty wraps!

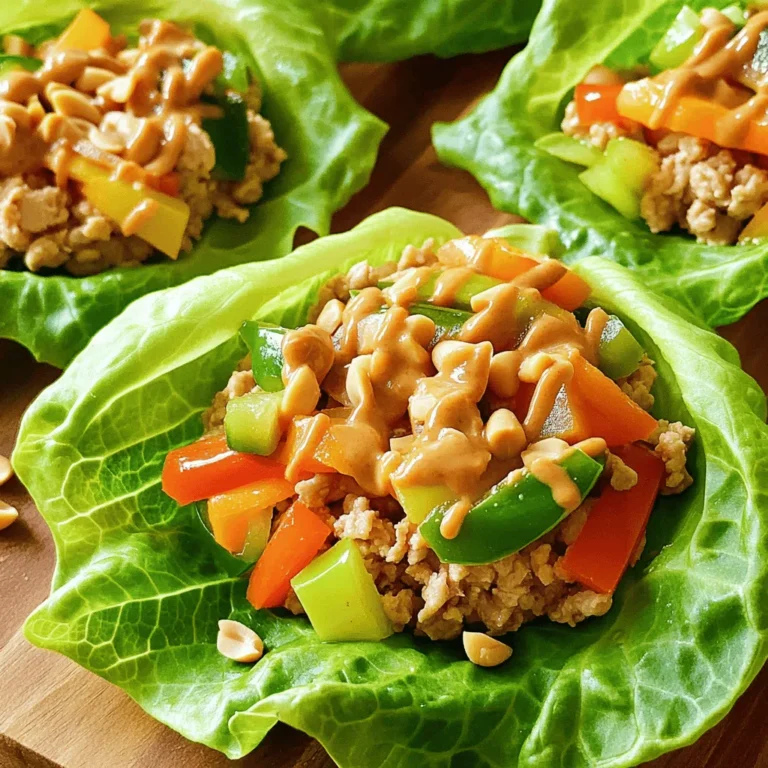
Thai Peanut Chicken Lettuce Wraps Flavorful and Fun

To make these tasty squares, you will need: - 1 ½ cups graham cracker crumbs - ½ cup unsalted butter, melted - 2 tablespoons granulated sugar - 16 oz cream cheese, softened to room temperature - 1 cup granulated sugar - 3 large eggs, at room temperature - Zest of 1 lemon - ¼ cup freshly squeezed lemon juice - 1 cup fresh raspberries (or frozen, thawed and drained) - 2 tablespoons raspberry puree (optional, for drizzling) - Fresh mint leaves for garnish (optional) Each ingredient plays a key role in flavor and texture. The graham cracker crumbs make a delicious crust. The butter binds the crumbs together, while sugar adds sweetness. Cream cheese creates the rich filling. Eggs help the cheesecake set. Lemon zest and juice give a bright, fresh taste. Raspberries add a fruity burst. Optional raspberry puree makes it even prettier! You can use fresh mint leaves to add color and aroma. The raspberry puree is great if you want to drizzle it on top. Whole raspberries around the squares can also make your dessert look special. To start, preheat your oven to 325°F (160°C). In a bowl, mix 1 ½ cups of graham cracker crumbs, ½ cup of melted unsalted butter, and 2 tablespoons of granulated sugar. Stir this mix until the crumbs are well coated. Next, press the mixture evenly into the bottom of a 9x9 inch baking pan. Bake it for 10 minutes, then let it cool slightly. Now, let’s make the cheesecake filling. In a large bowl, beat 16 ounces of softened cream cheese with 1 cup of granulated sugar using an electric mixer. Mix until it is smooth. Add 3 large eggs one at a time, mixing well after each one. Then, fold in the zest of 1 lemon and ¼ cup of freshly squeezed lemon juice. Keep mixing until everything is smooth. Next, gently fold in 1 cup of fresh raspberries into the cheesecake mixture using a spatula. Be careful not to crush them too much. You want the raspberries to stay whole for bursts of flavor. Pour this filling over the cooled crust. Spread it evenly with the spatula. Bake for 30 to 35 minutes. The edges should be set, and the center should jiggle slightly. Once baked, take the cheesecake out of the oven. Let it cool at room temperature for about 1 hour. After that, put the pan in the refrigerator. Chill it for at least 4 hours. This helps the cheesecake set and become firm. When ready to serve, cut the cheesecake into neat squares with a sharp knife. For extra flair, drizzle some raspberry puree over the top. You can also garnish each square with a fresh mint leaf. This makes a lovely presentation! To get the best crust, use fresh graham cracker crumbs. You can crush them in a bag or use a food processor. Mix the crumbs with melted unsalted butter and granulated sugar. Make sure to press the mixture firmly into the pan. This helps it hold together when baked. Bake it at 325°F for 10 minutes. Let it cool before adding the cheesecake filling. One common mistake is overmixing the cream cheese. Beat it until smooth, then add eggs one at a time. Mixing too much can add air, leading to cracks. Avoid opening the oven door while baking. This can cause the cheesecake to sink. Lastly, let your cheesecake cool slowly to prevent cracking. When adding raspberries, be gentle. Use a spatula to fold them in slowly. This keeps the fruit intact and adds texture. Don’t squish the berries too hard. They should stay whole for a burst of flavor. If you want more raspberry taste, drizzle some puree on top before serving. {{image_4}} You can make this dessert fit different diets. For gluten-free, swap graham crackers with gluten-free crumbs. Look for brands made from nuts or oats. For a dairy-free option, use vegan cream cheese. Coconut cream can work well too. These swaps will give you a tasty cheesecake without the gluten or dairy. Raspberry lemonade cheesecake squares are fun to change up! You can add other fruits like strawberries, blueberries, or even mango. Just replace the raspberries with your choice. For a twist, try adding a splash of vanilla or almond extract. This will enhance the flavor and give a new taste to the squares. If you want to try a different crust, think beyond graham crackers. You can use crushed cookies like Oreos for a chocolatey base. For a nutty flavor, use ground almonds or pecans mixed with butter. Each option brings a new texture and taste to your cheesecake squares. Just make sure the crust holds together well when pressed into the pan! To keep your Raspberry Lemonade Cheesecake Squares fresh, store them in the fridge. Place the squares in an airtight container. This will help to avoid drying out and keep flavors intact. They will stay good for about 5 days. If you want to save some for later, freezing is a great option. First, cut the cheesecake into squares. Wrap each square in plastic wrap tightly. Then, place all the wrapped squares in a freezer-safe bag or container. They can last up to 2 months in the freezer. When you are ready to enjoy your frozen cheesecake squares, take them out of the freezer. Place them in the fridge to thaw overnight. This way, they will be ready to eat by the next day. Avoid thawing them at room temperature, as this can make them soggy. Yes, you can use frozen raspberries. Just thaw and drain them first. This helps keep the texture right. Fresh raspberries are great, but frozen work well too. They still add that tart flavor and beautiful color. These cheesecake squares last about five days in the fridge. Store them in an airtight container. This keeps them fresh and tasty. You can also cover them tightly with plastic wrap. Yes, you can make these cheesecake squares a day ahead. In fact, chilling them overnight makes the flavors better. Just remember to cover them well before chilling. This way, they stay moist and delicious. To cut cheesecake squares, use a sharp knife. Dip the knife in hot water, then wipe it dry. This helps make clean cuts. After each cut, repeat this process. It keeps the edges neat and smooth. Raspberry Lemonade Cheesecake Squares are simple yet delightful to make. We covered the ingredient list, step-by-step instructions, tips, variations, storage info, and answered common FAQs. By following these steps, you can create a tasty dessert that impresses everyone. Remember, avoid common mistakes and try different flavors. This recipe is flexible, so feel free to make it your own. Enjoy your cheesecake squares and share them with friends and family. Happy baking!

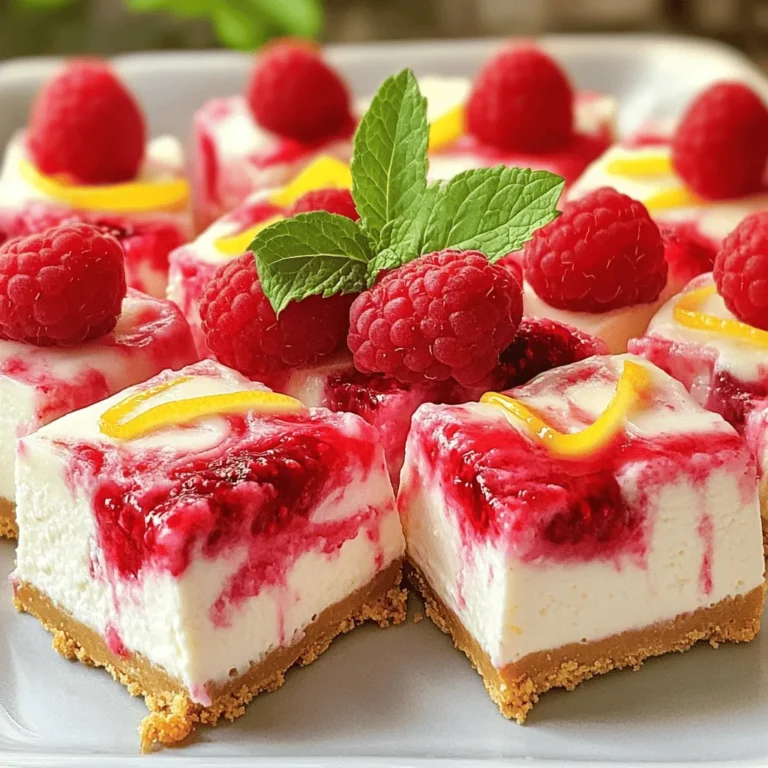
Raspberry Lemonade Cheesecake Squares Easy Dessert Treat

- 1 lb ground beef or turkey - 1/2 cup breadcrumbs - 1/4 cup onion, finely chopped - 2 cloves garlic, minced - 1/4 cup fresh cilantro, finely chopped - 1 egg, beaten - 1 cup barbecue sauce - 1/2 teaspoon smoked paprika - 1/2 teaspoon ground ginger - 1/2 teaspoon salt - 1/2 teaspoon black pepper - 1 cup pineapple chunks - 1 cup shredded mozzarella cheese - Sliced green onions for garnish First, preheat your oven to 400°F (200°C). This temperature helps the meatballs cook evenly. Next, take a large sheet pan and line it with parchment paper. This makes cleanup easy and helps prevent sticking. In a big mixing bowl, combine 1 pound of ground meat, 1/2 cup of breadcrumbs, and 1/4 cup of finely chopped onion. Add 2 cloves of minced garlic, 1/4 cup of chopped cilantro, and 1 beaten egg. Then sprinkle in 1/2 teaspoon each of salt, black pepper, smoked paprika, and ground ginger. Use your hands to mix everything well, but do not overmix. With damp hands, shape the mixture into meatballs about 1.5 inches wide. Place these meatballs on one side of your prepared sheet pan. Make sure to leave space between them. This helps them cook properly. On the other side of the sheet pan, arrange 1 cup of pineapple chunks. Make sure they are in a single layer. Then, drizzle 1 cup of your favorite barbecue sauce over both the meatballs and the pineapple. Aim for even coverage without drowning them in sauce. Now, place the sheet pan in the preheated oven. Bake for 20 to 25 minutes. The meatballs should reach an internal temperature of 165°F (74°C). In the last 5 minutes of baking, sprinkle 1 cup of shredded mozzarella cheese on top of the meatballs. This will melt and add a tasty finish. After baking, let the meatballs rest for a few minutes. This helps keep them juicy. If you want, garnish with sliced green onions before serving. This adds a nice pop of color and flavor to the dish. To make great meatballs, don’t overmix the meat. Mixing too much makes them tough. You want them to be soft and juicy. Just mix until everything is combined. Use your hands or a spatula for best results. You can adjust the amount of BBQ sauce to fit your taste. If you like it sweeter, add more sauce. If you prefer a tangy flavor, use less. Just remember to coat both the meatballs and pineapple. This balance makes every bite delicious. To get perfect melted cheese, add it in the last five minutes of baking. This way, it melts just right. Make sure the cheese is evenly spread over the meatballs. Keep an eye on it so it doesn’t burn. Enjoy that gooey, cheesy goodness! {{image_4}} You can swap out ground beef or turkey for ground chicken. Chicken offers a lighter taste and cooks well with the BBQ sauce. If you prefer plant-based options, try using lentils or chickpeas. These add protein and texture without meat. When using these alternatives, adjust seasonings to match your flavor goals. BBQ sauce varies by region. In Kansas City, it tends to be thick and sweet. In Texas, it is often smoky with a spicy kick. You can also use a vinegar-based sauce from the Carolinas for a tangy twist. Each sauce brings its unique flavor profile to the meatballs. Experiment to find your favorite! Boost the flavor by adding veggies. Try bell peppers or zucchini alongside the meatballs. You can also mix in some diced apples for a sweet touch. Adding these ingredients gives more nutrition and color to the dish. Feel free to get creative with what you have on hand! To keep your pineapple BBQ meatballs fresh, use an airtight container. Glass or plastic containers work well. Store them in the fridge for up to three days. Make sure they are completely cool before sealing. This helps keep moisture in check. The best way to reheat meatballs is in the oven. Preheat it to 350°F (175°C). Place the meatballs on a baking sheet. Cover them with foil to keep them moist. Heat for about 10-15 minutes, until warmed through. You can also use a microwave. Heat them in a microwave-safe dish for 1-2 minutes, but be careful not to overcook. To freeze meatballs, let them cool completely first. Place them in a single layer on a baking sheet. Freeze for about an hour until firm. After that, transfer them to a freezer bag or container. They will stay good for up to three months. When you’re ready to eat, thaw them in the fridge overnight. Reheat them as mentioned above for the best taste. Yes, you can use frozen meatballs. Just place them on the sheet pan like fresh ones. You might need to bake them a bit longer. Check the package for cooking times. Ensure they reach 165°F (74°C) to be safe. Using frozen meatballs saves time and makes this dish even easier. To check if meatballs are done, use a meat thermometer. The inside should be 165°F (74°C). You can also cut one in half. The meat should be brown with no pink. If you see any pink, keep cooking them. Proper cooking keeps the meatballs safe to eat and juicy. These meatballs pair well with many sides. Try serving them with rice or noodles. You can also add a fresh salad or steamed veggies. For a fun twist, serve them in slider buns. This makes a great meal for family or friends. You can even add extra barbecue sauce for more flavor. This blog post covered how to make delicious pineapple BBQ meatballs. You learned about the key ingredients, like ground meat and spices. We outlined a simple, step-by-step process to create the perfect meatballs. I shared tips for texture, flavor, and storage. Remember, you can adjust flavors and even try different meats. Enjoy experimenting in your kitchen with this easy recipe! Your friends and family will love your tasty results.

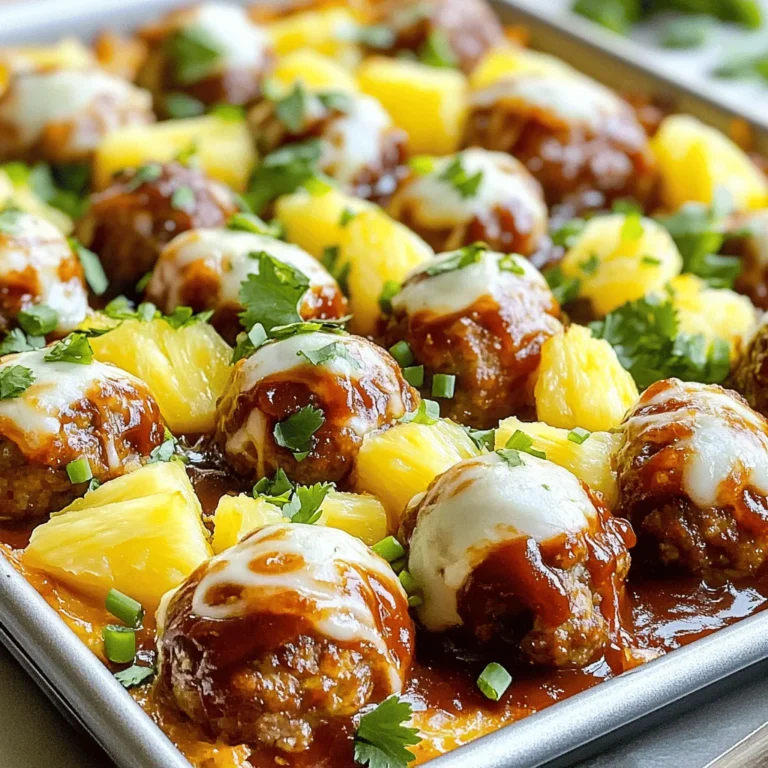
Sheet Pan Pineapple BBQ Meatballs Easy Dinner Delight

PREV 1 … 4 5 6 … 18 NEXT
sweet savory saga

explore

DessertsDinnerAppetizersDrinks

Our Policies

  • Cookie Policy
  • Copyright Policy
  • Disclaimer
  • GDPR Policy
  • Terms Of Use
Back to Top
  • About
  • Contact Us
  • Privacy Policy
© 2025 sweet savory saga