FREE DINNER EBOOK! Get your copy!
  • Cookie Policy
  • GDPR Policy
  • Disclaimer
  • Terms Of Use
  • Visit my other site: Fun Cookie Recipes
sweet savory saga
  • Home
  • Dinner
  • Desserts
  • Drinks
  • Appetizers
  • Contact
  • About
  • Privacy Policy
  • Home
  • Dinner
  • Desserts
  • Drinks
  • Appetizers
  • Contact
  • About
  • Privacy Policy
  • Cookie Policy
  • GDPR Policy
  • Disclaimer
  • Terms Of Use
Visit my other site: Fun Cookie Recipes

HOME / CATEGORIES /

Latest

- 1 cup dried green or brown lentils - 1 can (13.5 oz) full-fat coconut milk - 4 cups vegetable broth Lentils are the star of this soup. They bring a hearty texture and protein. You can use green or brown lentils, as both work well. Coconut milk adds creaminess and a rich flavor. It gives the soup a tropical twist. Vegetable broth ties everything together, making it warm and filling. - 1 medium onion, finely chopped - 3 cloves garlic, minced - 1 tablespoon fresh ginger, finely grated - 1 tablespoon curry powder (adjust to taste) - 1 teaspoon ground cumin - 1 teaspoon turmeric powder Aromatics are key to this dish. Onion, garlic, and ginger create a flavorful base. Sauté them before adding to the slow cooker. This step deepens their taste. The spices, like curry powder and cumin, add warmth. Turmeric gives a beautiful color and extra health benefits. You can adjust spices to fit your taste. - 1 red bell pepper, diced into bite-sized pieces - 1 medium carrot, diced - 2 cups fresh spinach, roughly chopped - Salt and black pepper to taste Veggies add color and nutrition. Red bell pepper and carrot bring sweetness. Fresh spinach adds a pop of green. It wilts down and blends into the soup. Season with salt and pepper to enhance flavors. This mix of ingredients makes the soup vibrant and wholesome. Feel free to get creative with your veggies! Consider adding seasonal choices for variety. To start, heat 1 tablespoon of extra virgin olive oil in a medium skillet over medium heat. Once the oil is warm, add 1 finely chopped medium onion. Sauté the onion for 3 to 5 minutes. You want it to turn soft and translucent. Next, add 3 minced garlic cloves and 1 tablespoon of finely grated fresh ginger. Stir the mix for about 1 to 2 minutes. This will bring out a nice aroma. Now, it's time to move to the slow cooker. Transfer the sautéed onion mix into the bowl of your slow cooker. Add 1 cup of rinsed green or brown lentils to the pot. Then, pour in 1 can of full-fat coconut milk and 4 cups of vegetable broth. Next, toss in 1 diced red bell pepper and 1 diced medium carrot. Sprinkle in 1 tablespoon of curry powder, 1 teaspoon of ground cumin, and 1 teaspoon of turmeric powder. Don't forget to add 2 tablespoons of soy sauce. Mix everything well until it’s all combined. Cover your slow cooker with the lid. Now, set the cooker on low for 6 to 8 hours or on high for 3 to 4 hours. You’ll know the soup is ready when the lentils are soft and have soaked up all the yummy curry flavors. About 15 minutes before you serve, stir in 2 cups of roughly chopped fresh spinach. This will add a lovely color and boost the nutrients in your soup. - Adjusting spice levels with curry powder: Curry powder is key to this soup. Start with one tablespoon. Taste it after cooking. If you want more heat, add more curry powder. You can mix a bit of cayenne for a spicy kick. - Adding lemon juice for brightness: A squeeze of lemon juice can brighten the soup. Add it just before serving. It brings a fresh taste that balances the creaminess of coconut milk. - Pre-soaking lentils for faster cooking: Soaking lentils can save you time. Rinse and soak them for 30 minutes before cooking. This reduces cooking time and helps them cook evenly. - Best practices for sautéing aromatics: Start with medium heat when sautéing. Use olive oil to cook onions until they are soft. This helps release their sweetness. Add garlic and ginger last. Cook for just a minute to keep their flavors strong. - Serving suggestions with garnishes: Serve the soup in bright bowls. Top each bowl with fresh cilantro. This adds color and flavor to your dish. - Accompaniments like naan or rice: Pair the soup with warm naan or fluffy rice. These sides complement the soup well. They also make for a hearty meal. Enjoy the mix of flavors and textures! {{image_4}} You can boost the protein in your soup easily. Adding canned chickpeas gives a nice texture. Just rinse them and throw them in the slow cooker. Tofu is another great option. Use firm tofu, cut it into cubes, and add it during cooking for a hearty bite. If you want a meatier dish, cooked chicken or shrimp works well too. Just add them during the last hour of cooking to keep them tender. You can easily make this soup vegan and gluten-free. Use tamari instead of regular soy sauce. It tastes great and keeps it gluten-free. For flavor, focus on spices and fresh herbs. You can add extra garlic or ginger to enhance the taste. Make sure all your seasonings are free of animal products. This way, everyone can enjoy the soup. Feel free to mix in seasonal veggies. Zucchini or sweet potatoes are excellent choices. Cut them into small pieces so they cook well. You can also use frozen veggies if fresh ones are not available. They can add color and nutrients. Each time you make the soup, try different veggies for a new twist! After you make your slow cooker coconut curry lentil soup, let it cool. This step is key. Cooling helps keep the soup fresh. To store, use airtight containers. These will keep your soup safe in the fridge. Make sure to cover them well. The soup should last about 4-5 days in the fridge. If you want to save some soup for later, freezing is a good idea. First, let the soup cool completely. Then, pour it into freezer-safe containers. Leave a bit of space at the top. This allows the soup to expand when frozen. To thaw, move the container to the fridge overnight. When you are ready to eat, reheat on the stove or in the microwave. Stir well to keep the flavor even. The soup lasts about 4-5 days in the fridge. In the freezer, it can stay good for up to 3 months. Keep an eye on signs of spoilage. If you see any mold or smell anything off, throw it away. Always trust your senses when it comes to food safety. It takes about 6 to 8 hours on low heat or 3 to 4 hours on high heat. The lentils need time to soften and soak up all the tasty flavors from the spices and broth. Yes, you can use canned lentils. Just rinse them well and add them in the last 30 minutes of cooking. This way, they stay tender and do not turn mushy. If you do not have coconut milk, you can use almond milk or cashew cream. These alternatives will give a different taste but still work well in the soup. Absolutely! This soup is great for meal prep. You can store it in the fridge for up to five days. It also freezes well, so you can make a big batch and enjoy it later. To spice it up, add more curry powder or a pinch of cayenne pepper. You can also add fresh chili peppers for an extra kick. Adjust it to your taste for the perfect heat! This blog post walked you through making a flavorful lentil soup. We covered the essential ingredients, step-by-step cooking methods, and tips for enhancing flavor. You learned how to customize the soup with proteins and veggies, along with how to store leftovers properly. Making this soup is easy and rewarding. You can adjust the taste to fit your style. Enjoy this delicious dish anytime, whether fresh or reheated. Happy cooking!

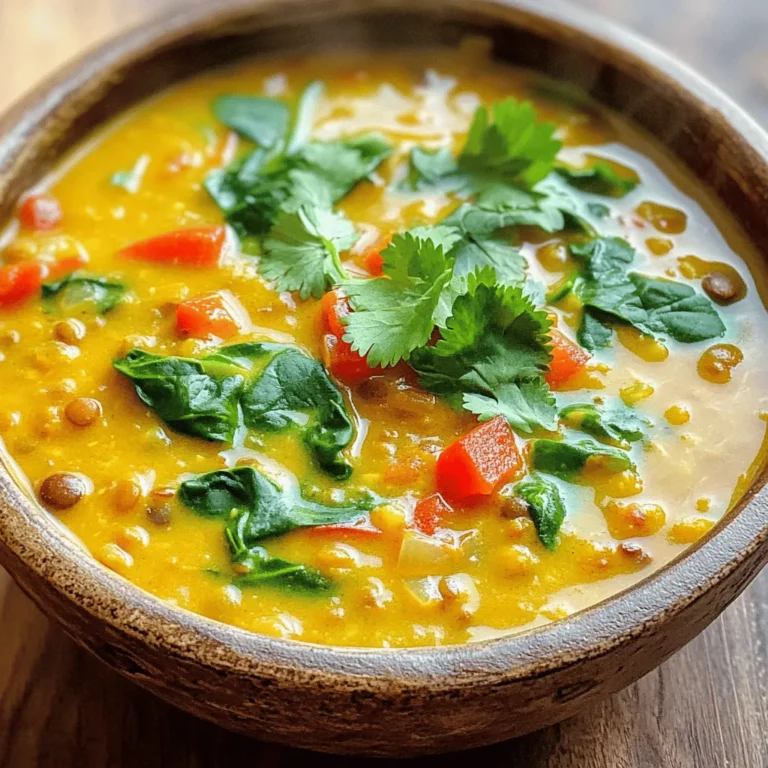
Slow Cooker Coconut Curry Lentil Soup Delight

- 1 pound large shrimp, peeled and deveined - 1 cup quinoa, thoroughly rinsed - 2 cups low-sodium vegetable broth - 4 tablespoons honey - 3 tablespoons soy sauce (or tamari for gluten-free) - 3 cloves garlic, finely minced - 1 tablespoon fresh ginger, minced - 2 tablespoons extra virgin olive oil - 1 cup bell peppers, diced (choose red, yellow, or orange for the best color) - 1 cup snap peas, trimmed - Salt and freshly cracked black pepper to taste - 1 green onion, thinly sliced - Toasted sesame seeds - Large skillet or sauté pan - Measuring cups and spoons - Wooden spoon or spatula - Lid for the skillet Start by heating extra virgin olive oil in a large skillet over medium heat. Once the oil is hot and shimmering, add minced garlic and ginger. Sauté these for 1-2 minutes. Stir often to keep them from burning. You want them fragrant and golden. Next, raise the heat to medium-high. Add the peeled and deveined shrimp to the skillet. Season the shrimp with salt and freshly cracked black pepper. Cook for about 2-3 minutes. Stir occasionally until the shrimp turn pink and opaque. Once done, transfer the shrimp to a plate and set aside. In the same skillet, add the thoroughly rinsed quinoa. Toast it over medium heat for 1-2 minutes. Stir continuously until the quinoa turns lightly golden and aromatic. This step adds a nice nutty flavor. Now, carefully pour in low-sodium vegetable broth, honey, and soy sauce. Stir everything well to combine. Next, fold in diced bell peppers and snap peas. Increase the heat slightly to bring the mixture to a gentle simmer. Once it begins to simmer, cover the skillet with a lid. Reduce the heat to low and let it cook for about 15 minutes. This allows the quinoa to absorb all the liquid and become fluffy. After the quinoa has cooked, remove the lid. Gently fold the sautéed shrimp back into the skillet. Stir everything together, letting the shrimp warm through for an additional 2 minutes. Taste the dish and adjust seasoning if needed. Pick fresh shrimp for the best taste. Look for shrimp that are firm and shiny. The shells should be clean, and there should be no strong smell. Frozen shrimp work well too. Just thaw them slowly in the fridge overnight. This keeps their texture nice. Rinse your quinoa well. This removes a bitter coating called saponin. Use two cups of low-sodium vegetable broth for better flavor. Toasting the quinoa in the pan first gives it a nutty taste. Make sure to cover the skillet while it simmers. This helps the quinoa absorb the broth fully. Want to spice things up? Add a pinch of red pepper flakes for heat. You can swap honey for maple syrup for a different sweet note. Try adding fresh herbs like cilantro or basil for freshness. For a zesty kick, a squeeze of lime juice brightens the dish. {{image_4}} You can swap shrimp for chicken or tofu. Chicken thighs work well and stay juicy. Cook the chicken until it reaches 165°F. For tofu, use firm or extra-firm. Cube the tofu and sauté it until golden. This adds a nice texture. You can also try using scallops for a seafood twist. Feel free to change the veggies based on your taste. Zucchini and carrots add color and crunch. Broccoli or asparagus can also work well. Just cut them into small pieces for even cooking. Adding corn can bring a sweet touch to the dish. Be creative and use what you have on hand! To add heat, mix in red pepper flakes or sriracha. Start with a small amount to test the spice. Increase it to your liking. For a milder dish, skip the spicy elements. You can also balance it with more honey for sweetness. Adjusting spice levels can make each meal unique. You can store leftover One-Pan Honey Garlic Shrimp Quinoa in the fridge. Place it in an airtight container. It stays fresh for 3 to 4 days. Make sure it cools down before sealing. This keeps the shrimp and quinoa tasty. If you want to save it longer, freezing is a great option. Use a freezer-safe container or bag. Remove as much air as you can to prevent freezer burn. It can last up to 3 months in the freezer. When ready to eat, thaw it overnight in the fridge. To reheat, use the microwave or stovetop. If using the microwave, place it in a bowl and cover it. Heat for 1 to 2 minutes, stirring halfway through. On the stovetop, add a splash of broth to a pan and heat over low. Stir often until hot. Enjoy your meal as if it was fresh! Yes, you can make this dish ahead of time. Cook the shrimp and quinoa as usual. Store them in an airtight container. When ready to eat, just reheat gently in a pan. You can tell shrimp are cooked when they turn pink and opaque. This takes about 2-3 minutes. They should curl into a C shape. If they are still gray or clear, keep cooking. If you don’t have quinoa, you can use rice or couscous. Both options cook well and absorb flavors. Adjust cooking times based on the grain you choose. Yes, this recipe can be gluten-free. Use tamari instead of soy sauce. Make sure all other ingredients are gluten-free as well. To add heat, include red pepper flakes or chili sauce. You can also use spicy bell peppers. Adjust the amount to fit your taste. This post covered all you need to make a tasty shrimp and quinoa dish. We talked about the key ingredients and cooking steps. I shared tips for cooking shrimp and quinoa perfectly. You can adjust flavors with different proteins and veggies. For storage, I gave easy guidelines for refrigerating and freezing. Enjoy experimenting with this recipe. It’s simple, fun, and flavorful. You’ll impress anyone who tries it.

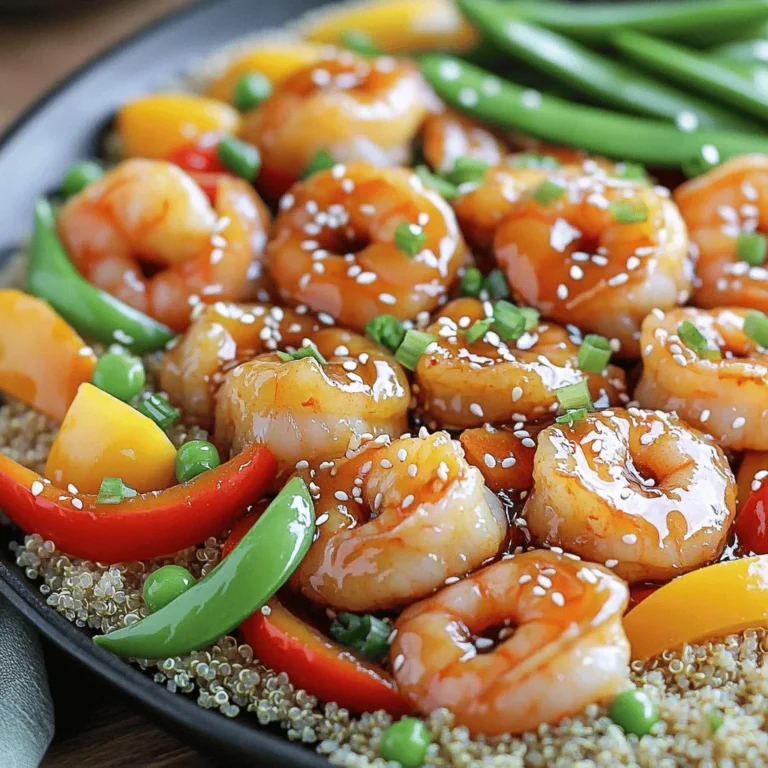
One-Pan Honey Garlic Shrimp Quinoa Delightful Meal

- 1 cup cottage cheese - 1 cup rolled oats - 1 cup milk (or your choice of non-dairy milk) - 2 large eggs - 1 teaspoon vanilla extract - 1 tablespoon honey (or maple syrup for a vegan option) - 1 teaspoon baking powder - 1/2 teaspoon ground cinnamon - 1 cup fresh or frozen blueberries - A pinch of salt - Butter or oil for cooking Cottage cheese is rich in protein and calcium. This helps build strong bones and muscles. Rolled oats provide fiber that aids digestion. They keep you full longer, which is great for weight control. Milk adds calcium and vitamin D, essential for bone health. Eggs offer protein and healthy fats, boosting energy. Honey gives natural sweetness and contains antioxidants. Blueberries are high in vitamins and antioxidants. They support heart health and improve brain function. Cinnamon may lower blood sugar levels while adding flavor. You can swap cottage cheese with Greek yogurt for a creamy texture. For dairy-free, use almond or soy milk instead of regular milk. If you need a vegan option, replace eggs with flax eggs or applesauce. Maple syrup is a great alternative to honey for vegan diets. Use gluten-free oats to make this recipe gluten-free. You can also add different fruits like bananas or strawberries for variety. To make the batter, start by gathering your ingredients. You will need cottage cheese, rolled oats, milk, eggs, vanilla extract, honey or maple syrup, baking powder, ground cinnamon, and salt. Place these in a blender. Blend until smooth. This step ensures no lumps remain. The batter should be creamy and thick. Next, gently fold in the blueberries. If you use frozen blueberries, add them straight from the freezer. This keeps them intact during cooking. Now, heat a non-stick skillet or griddle over medium heat. Add a small amount of butter or oil to the pan. This helps prevent sticking. For each pancake, pour about 1/4 cup of batter onto the skillet. Cook for 2-3 minutes. You will see bubbles form on the surface. This shows they are ready to flip. Carefully flip the pancakes and cook for another 2-3 minutes. Look for a golden brown color. Continue cooking the remaining batter, adding more butter or oil as needed. Serve the pancakes hot from the skillet. Stack them on a plate and add more blueberries on top. Drizzle with honey or maple syrup for added sweetness. You can also dust with powdered sugar for a nice touch. This makes the pancakes look great and taste even better. Enjoy your delicious cottage cheese blueberry pancakes! To get fluffy pancakes, blend the batter until smooth. This mixes air into the batter. Make sure not to overmix after adding the blueberries. Letting the batter rest for a few minutes helps too. This allows the oats to soak up some milk. The result? A light and airy pancake that you will love! If you have leftover batter, store it in an airtight container. You can keep it in the fridge for up to two days. When ready to use, stir it gently to mix again. If it feels too thick, add a splash of milk to thin it out. This way, you can enjoy fresh pancakes again without starting from scratch! For making these pancakes, a non-stick skillet or griddle works best. It helps the pancakes cook evenly and prevents sticking. A spatula is key for flipping the pancakes safely. If you have a blender, use it to mix the batter quickly. This makes prep easy and cleanup a breeze! {{image_4}} If you want a vegan twist on cottage cheese blueberry pancakes, it’s easy! Substitute the cottage cheese with silken tofu. This gives a creamy texture. Use almond milk or oat milk instead of dairy milk. Replace eggs with flax eggs. Just mix one tablespoon of ground flaxseed with three tablespoons of water. Let it sit until it thickens, then add it to your batter. For sweetening, use maple syrup instead of honey. These swaps keep the flavor amazing and make it plant-based! Blueberries are fantastic, but you can have fun with other fruits! Try adding mashed bananas for a sweet twist. You can also mix in chopped strawberries or diced apples. If you like a tropical vibe, pineapple chunks work great too. You might even add a mix of fruits for extra flavor. Experimenting with different fruits keeps each pancake breakfast fresh and exciting! Want to elevate your pancakes? Consider adding spices or extracts. A pinch of nutmeg gives a warm, cozy flavor. You can also try adding lemon zest for a bright, fresh touch. For an extra sweet layer, a splash of almond extract can work wonders. Mixing in a bit of cocoa powder transforms these pancakes into a chocolatey treat. These simple enhancements can make your pancakes even more delicious and fun to eat! To store leftover pancakes, let them cool first. Place them in a single layer on a plate. Cover the plate with plastic wrap or foil. You can also put them in an airtight container. Store them in the fridge for up to three days. This keeps your pancakes fresh and tasty. To freeze pancakes, stack them with parchment paper between each one. This prevents them from sticking together. Place the stack in a freezer-safe bag or container. Squeeze out the air to avoid freezer burn. You can freeze them for up to three months. When you want to enjoy them, you can take out as many as you need. To reheat pancakes, you have a few options. The microwave is quick. Place a pancake on a microwave-safe plate and cover it with a damp paper towel. Heat for about 20-30 seconds. For a crispy texture, use a skillet. Heat the skillet over medium heat and add a little butter. Cook each pancake for 1-2 minutes on each side. This keeps them warm and delicious! Yes, you can use different cheeses. Ricotta or cream cheese works well. They add a nice creaminess. Choose a cheese that blends smoothly for the best texture. If you want a stronger flavor, go for feta. Just keep in mind that this will change the taste a bit. To make these pancakes gluten-free, swap the rolled oats for gluten-free oats. Make sure to check the label. Some oats may have gluten. You can also use gluten-free flour if you prefer a different texture. This will keep your pancakes light and fluffy. Absolutely! You can prepare the batter ahead of time. Store it in the fridge for up to 24 hours. Just give it a good stir before cooking. If the batter thickens, add a splash of milk to loosen it up. This makes breakfast easy on busy mornings! This article covered essential points on making delicious pancakes. We discussed key ingredients, their health benefits, and tasty substitutions for different diets. You learned the step-by-step method for preparing and cooking pancakes, plus serving ideas. Helpful tips shared secrets to fluffy pancakes and storing techniques. We also explored variations, including vegan options and fun flavor boosts. Finally, I answered common questions to make your pancake experience smooth. Enjoy your pancake-making journey, and remember, cooking can be both fun and delicious!

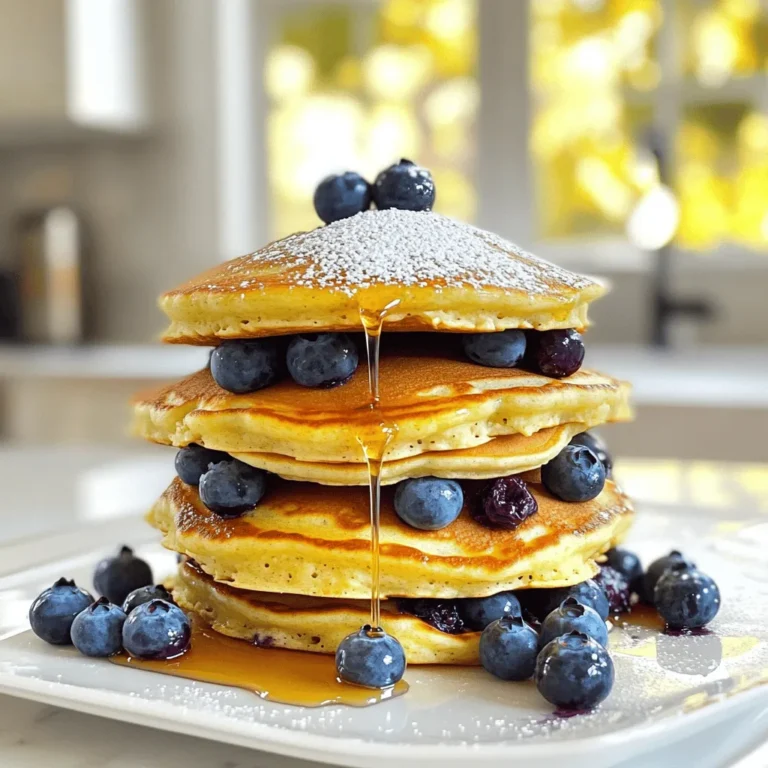
Cottage Cheese Blueberry Pancakes Flavorful and Easy

To make these tasty taco bowls, you will need the following main ingredients: - 2 boneless, skinless chicken breasts - 1/4 cup honey - 2 tablespoons freshly squeezed lime juice - 1 teaspoon lime zest - 1 teaspoon chili powder - 1 teaspoon ground cumin - Salt and pepper to taste - 1 tablespoon olive oil - 1 cup cooked brown rice or quinoa - 1 cup black beans, rinsed and drained - 1 cup corn kernels (fresh, canned, or frozen) - 1 avocado, diced - 1 cup cherry tomatoes, halved - 1/4 cup red onion, finely chopped - Fresh cilantro, chopped (for garnish) - Lime wedges (for serving) I love to add a few extras to make these bowls even better. Here are some great options: - Sour cream or Greek yogurt - Shredded cheese (like cheddar or queso fresco) - Jalapeño slices for some heat - Sliced radishes for crunch - Extra lime wedges for serving If you have specific dietary needs, don't worry! Here are some easy swaps: - For a vegan option, use tofu or tempeh instead of chicken. - Substitute honey with agave syrup for a vegan-friendly sweetener. - Swap brown rice with cauliflower rice for a low-carb option. - Use quinoa if you want a gluten-free grain. - Black beans can be replaced with pinto beans or chickpeas. These ingredients and tips will help you create a delicious meal that fits your needs. Enjoy your cooking! To start, you need to marinate the chicken. In a medium bowl, mix together these ingredients: - 1/4 cup honey - 2 tablespoons freshly squeezed lime juice - 1 teaspoon lime zest - 1 teaspoon chili powder - 1 teaspoon ground cumin - Salt and pepper to taste Whisk these until well combined. Now, add the chicken breasts and coat them fully in the marinade. Cover the bowl with plastic wrap. Place it in the fridge for at least 30 minutes. If you have more time, let it marinate for up to 2 hours. This will make the chicken more flavorful. Next, heat 1 tablespoon of olive oil in a large skillet over medium heat. When the oil is hot, take the chicken out of the marinade. Place it in the skillet. Cook each side for about 6-7 minutes. You want the chicken to turn golden brown and the juices to run clear. After cooking, move the chicken to a cutting board. Let it rest for 5 minutes. This helps keep it juicy. Slice the chicken into bite-sized strips. Now it’s time to build your taco bowls. Start with a base of cooked brown rice or quinoa. Divide 1 cup among four bowls. On top of that, add a spoonful of black beans and a scoop of corn kernels. Then, arrange the diced avocado and halved cherry tomatoes over the rice and beans. Next, layer the sliced chicken strips on top of the bowls. Make sure each bowl has a good amount of chicken. For the finishing touch, sprinkle finely chopped red onion and fresh cilantro over each bowl. If you want more zing, squeeze some lime juice on top. Serve your taco bowls warm with lime wedges on the side. Enjoy the burst of flavors! To keep the chicken tender, marinate it well. Use honey, lime juice, and spices. Let it sit for at least 30 minutes. If you can, let it rest in the fridge for up to 2 hours. This helps the flavors soak in. When cooking, use medium heat. Avoid high heat, as it can dry out the chicken. Cook each side for 6-7 minutes. Check that the juices run clear. Let the chicken rest before slicing. This keeps it juicy and tender. To boost the flavor of your taco bowls, try adding lime zest. It gives a fresh kick. Fresh herbs like cilantro also add brightness. Don’t forget about salt and pepper. These simple seasonings bring out the taste of each ingredient. If you like spice, add jalapeños or a hot sauce. For extra sweetness, consider roasted corn. It adds a nice contrast to the savory chicken. Experiment with different toppings to suit your taste. These taco bowls are great on their own but can shine even more with sides. Serve with tortilla chips for crunch. A fresh salad pairs well, too. You can also add a dollop of sour cream or Greek yogurt. This adds creaminess to the dish. For drinks, try a cold limeade or a light beer. These drinks complement the flavors nicely. Don't forget lime wedges for a zesty finish! {{image_4}} You can easily make this dish vegetarian or vegan. For a vegetarian option, replace the chicken with grilled zucchini or portobello mushrooms. Both bring a nice texture and flavor. Marinate them in the honey-lime mix to soak up those great tastes. For a vegan version, swap honey for agave syrup. It gives the same sweetness without using any animal products. Use the same marinating process for the veggies. You can also add more beans or roasted chickpeas for protein. This recipe is almost naturally gluten-free! Just make sure your beans and corn are certified gluten-free. Most canned beans are safe. If you use packaged rice or quinoa, check the labels too. You can also use gluten-free tortillas instead of rice or quinoa if you prefer a wrap. If you want to switch up the base, there are great options! Instead of brown rice or quinoa, try cauliflower rice for a lighter option. It cooks quickly and has a mild flavor that works well. You can also use farro or barley for a chewy texture that adds a nice bite. Each grain adds its own unique taste and nutrition to your taco bowl. To keep your honey lime chicken taco bowls fresh, store them in airtight containers. This helps prevent moisture loss and keeps the flavors intact. Allow the bowls to cool to room temperature before sealing. You can keep them in the fridge for up to three days. Remember, the fresher the ingredients, the better they taste later. When it’s time to enjoy your leftovers, you can reheat them easily. Place the bowls in the microwave and cover them with a damp paper towel. Heat for about 1-2 minutes, stirring halfway through. This helps warm everything evenly. You can also reheat in a skillet over medium heat for about 5-7 minutes, stirring often. Make sure the chicken is hot all the way through. If you want to save some for later, you can freeze the taco bowls. First, let the chicken cool completely. Then, pack the chicken, rice or quinoa, and veggies into freezer-safe bags or containers. Make sure to remove as much air as possible. You can freeze them for up to three months. When ready to eat, thaw in the fridge overnight and reheat as described. Enjoy your tasty meal anytime! You can marinate the chicken for at least 30 minutes. If you want more flavor, marinate it for up to 2 hours. This lets the chicken soak up all that tasty honey and lime mix. Just remember not to go over 2 hours, as the acid in lime juice can make the chicken mushy. Yes, you can use store-bought taco seasoning if you’re short on time. Just use about 1 tablespoon, but taste as you go. Homemade seasoning gives you control over flavors, but store-bought is a good shortcut. Check for salt in the mix, too, as you may want to reduce added salt in your marinade. You can add many toppings to your taco bowls! Here are some great options: - Shredded cheese (like cheddar or queso fresco) - Sour cream or Greek yogurt - Sliced jalapeños for some heat - Chopped green onions - Sliced radishes for crunch - Hot sauce for extra spice - Lime wedges for a citrus kick Feel free to mix and match to make your bowl unique! Honey lime chicken taco bowls are a fresh and tasty choice. We covered the key ingredients, including garnishes and substitutions for diets. The step-by-step instructions help you cook chicken perfectly and assemble your bowls. Tips for tender chicken and flavor boosts enhance your dish. You can also customize it with options for veggies and gluten-free needs. Storing and reheating leftovers will keep your meals fresh and easy. Enjoy making this meal your own, and share the joy of cooking with others!

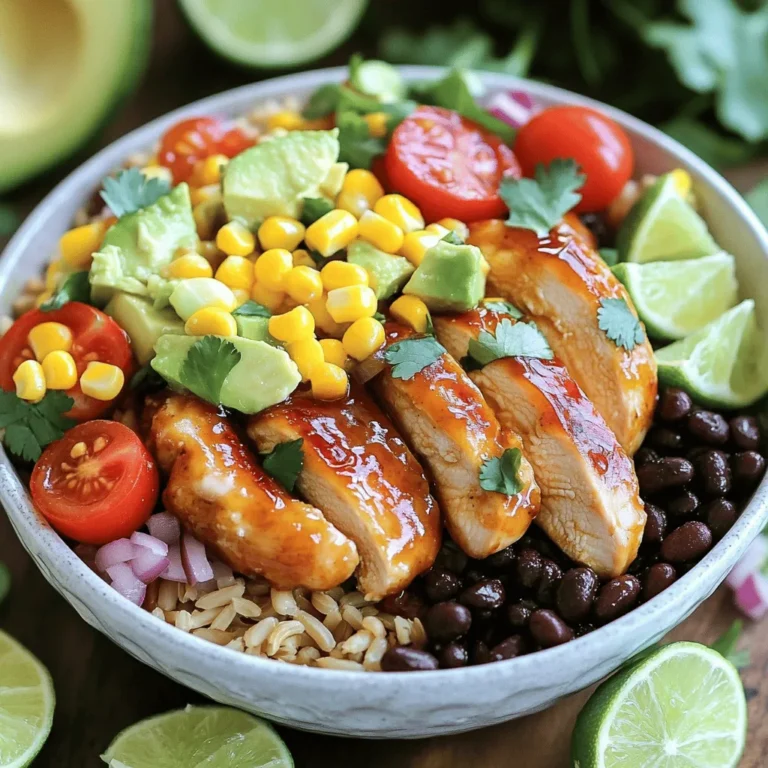
Savory Honey Lime Chicken Taco Bowls Recipe Guide

To make these delightful cookies, you will need: - 1 cup pumpkin puree - 1/2 cup unsalted butter, softened to room temperature - 1 cup packed brown sugar - 1/2 cup granulated sugar - 1 large egg, at room temperature - 2 teaspoons pure vanilla extract - 2 cups all-purpose flour - 1 teaspoon baking soda - 1 teaspoon baking powder - 2 teaspoons pumpkin pie spice - 1/2 teaspoon fine salt - 1 cup semi-sweet chocolate chips - 1 tablespoon coconut oil (for melting chocolate) - Optional: Sprinkles or finely crushed pecans for topping You can swap some ingredients if needed: - Pumpkin puree can be replaced with applesauce for a different flavor. - Use coconut butter instead of unsalted butter for a dairy-free option. - Swap granulated sugar with coconut sugar for a lower glycemic index. - If you don’t have pumpkin pie spice, mix cinnamon, ginger, and nutmeg in equal parts. - Dark chocolate chips work well in place of semi-sweet chocolate chips. Using quality ingredients makes a big difference in flavor. Here are some tips: - Choose fresh pumpkin puree from a can or cook your own pumpkin. - Use good quality chocolate for dipping; it melts better. - Check that your spices are fresh to boost flavor. - Look for organic sugars to avoid additives. - Make sure your butter is at room temp for easy mixing. These choices enhance the taste and texture of your cookies. Enjoy the process and the delightful smells in your kitchen! 1. Start by preheating your oven to 350°F (175°C). Line a baking sheet with parchment paper. This helps with cleanup later. 2. In a large bowl, cream together 1/2 cup softened unsalted butter, 1 cup packed brown sugar, and 1/2 cup granulated sugar. Mix until it feels light and fluffy, about 3-4 minutes. 3. Add in 1 cup pumpkin puree, 1 large egg, and 2 teaspoons pure vanilla extract. Beat on medium speed. Make sure everything blends well. 4. In a separate bowl, whisk together 2 cups all-purpose flour, 1 teaspoon baking soda, 1 teaspoon baking powder, 2 teaspoons pumpkin pie spice, and 1/2 teaspoon fine salt. This helps mix the dry ingredients evenly. 5. Gradually mix the dry ingredients into the wet mixture. Use a spatula to fold gently. Don’t overmix; this keeps your cookies soft. 6. Use a tablespoon or cookie scoop to drop dough onto the prepared baking sheet. Space each dollop about 2 inches apart. 7. Bake the cookies in the preheated oven for 10-12 minutes. They should set and the edges turn a light golden brown. The centers may look soft, but they will firm up while cooling. 8. Once done, take the baking sheet out and let the cookies cool for 5 minutes. Then, move them to a wire rack to cool completely. 9. While the cookies cool, prepare the chocolate dip. Place 1 cup semi-sweet chocolate chips and 1 tablespoon coconut oil in a microwave-safe bowl. 10. Heat the mixture in 30-second bursts in the microwave. Stir between each burst until the chocolate is smooth and fully melted. 11. After the cookies are cool, dip half of each cookie into the melted chocolate. Let excess chocolate drip back into the bowl. 12. Place the dipped cookies back on the lined baking sheet. If you want, add toppings like sprinkles or crushed pecans right away. 13. Let the chocolate set at room temperature or chill in the fridge for about 15 minutes to harden. To get soft and chewy cookies, you must not overmix the dough. Mix until the flour just blends in. This keeps the cookies tender. Make sure your butter is softened, but not melted. Chilling the dough for 30 minutes also helps create a nice texture. For smooth dipping, use semi-sweet chocolate chips and coconut oil. The oil helps the chocolate melt easily and adds a nice sheen. Dip half of each cookie for a beautiful look. You can also add toppings right after dipping, like sprinkles or crushed nuts, to make them pop. If your cookies stick, you can use parchment paper on your baking sheet. This helps keep them from sticking. Letting the cookies cool on a wire rack is key too. If they feel soft, wait a few minutes before moving them. This way, they won't break apart. {{image_4}} You can easily make these cookies gluten-free. Simply swap the all-purpose flour with a gluten-free blend. Look for a blend that contains xanthan gum. This helps mimic the texture of regular flour. The cookies will still taste great and keep their soft, chewy texture. While semi-sweet chocolate is a classic choice, you can try other types too. Dark chocolate adds a rich flavor. Milk chocolate offers a sweeter taste. You might even use white chocolate for a fun twist. Just remember to adjust the sweetness based on your chocolate choice. Feel free to get creative with flavors! You can add chopped nuts, like pecans or walnuts, for crunch. Dried cranberries or chocolate chunks can boost taste and texture. For a spiced kick, consider adding a pinch of cinnamon or nutmeg. Each mix-in adds a unique twist to your cookies. To keep your chocolate dipped pumpkin spice cookies fresh, store them in an airtight container. Choose a container that fits the cookies snugly. This helps keep the cookies soft and moist. You can also layer parchment paper between cookies to prevent sticking. Avoid storing them near heat or sunlight, as this can affect their texture. When stored properly, these cookies can last up to one week at room temperature. If you want them to stay fresh longer, consider refrigerating them. In the fridge, they can last up to two weeks. However, the texture may change slightly, becoming firmer. If you want to enjoy these cookies later, freezing is a great option. First, let the cookies cool completely. Then, place them in a single layer on a baking sheet. Freeze them for about an hour until they are solid. After that, transfer them to a freezer-safe bag or container. They can last up to three months in the freezer. To enjoy, simply thaw them at room temperature or warm them in the oven for a few minutes. Yes, you can use canned pumpkin puree in this recipe. It saves time and is easy to find. Just make sure to choose pure pumpkin, not pumpkin pie filling. Pure pumpkin gives the best flavor and texture to your cookies. It keeps the cookies moist and adds that lovely fall taste we all enjoy. To check if the cookies are done, look for a few signs. The edges should be lightly golden. The centers might look soft, which is fine. They will firm up as they cool. You can also gently touch the top of a cookie. If it springs back, they are ready to come out of the oven. Semi-sweet chocolate is the best choice for dipping these cookies. It has a rich flavor that pairs well with pumpkin spice. You can also use dark or milk chocolate if you prefer. Just make sure to melt it carefully to avoid burning. A little coconut oil in the mix helps create a smooth dip. In this post, we explored key ingredients for cookies, their substitutes, and how to ensure quality. We also detailed step-by-step instructions for preparation, baking, and tips for chocolate dipping. You learned how to achieve the perfect cookie texture, enhance flavors, and avoid stickiness. We covered gluten-free and flavor variations, as well as best storage practices. Remember, great cookies come from using the right methods and ingredients. Enjoy making delicious treats that everyone will love!

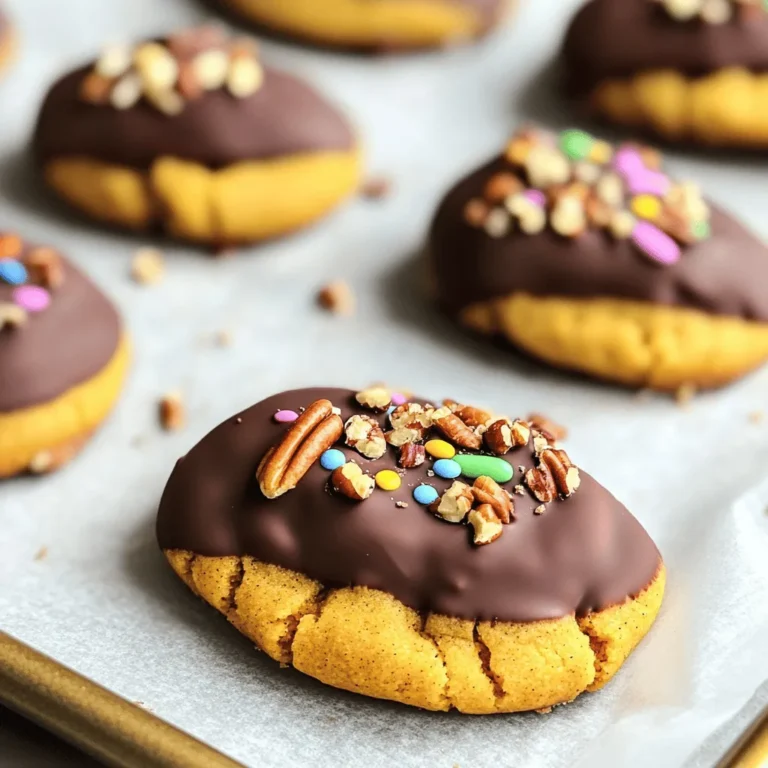
Chocolate Dipped Pumpkin Spice Cookies Flavorful Treat

To make No-Bake Matcha Cheesecake Bars, you need the following simple ingredients: - 1 ½ cups almond flour - 1/2 cup coconut oil, melted - 1/4 cup maple syrup - 1 ½ cups cream cheese, softened at room temperature - 1/2 cup Greek yogurt - 1/2 cup powdered sugar - 3 tablespoons culinary matcha powder - 1 teaspoon vanilla extract - Pinch of salt - Fresh mint leaves for garnish (optional) Each ingredient adds to the flavor and texture of the bars. Almond flour gives a nice crunch. Coconut oil makes the crust rich and smooth. Maple syrup adds sweetness and a hint of flavor. Cream cheese and Greek yogurt create a creamy filling. The matcha powder gives the cheesecake its vibrant green color and unique taste. Vanilla extract and salt enhance all these flavors. Finally, fresh mint leaves can add a nice touch when you serve them. Gather these ingredients before you start. This ensures you have everything you need to make these delicious bars. To make the crust, you need three simple ingredients. Grab your almond flour, melted coconut oil, and maple syrup. In a mixing bowl, combine 1 ½ cups almond flour, 1/2 cup coconut oil, and 1/4 cup maple syrup. Mix them until you see a crumbly texture. This is the base of your cheesecake bars. Now, take an 8x8 inch baking pan. Line it with parchment paper. Firmly press your crust mixture into the bottom of the pan. Make sure it is even and compact. This step keeps the bars from falling apart. Then, put the pan in the fridge for about 15 minutes. This helps the crust harden a bit. For the cheesecake filling, you will need more ingredients. Gather 1 ½ cups cream cheese, 1/2 cup Greek yogurt, 1/2 cup powdered sugar, 3 tablespoons culinary matcha powder, 1 teaspoon vanilla extract, and a pinch of salt. In a large bowl, combine all these items. Using an electric mixer, beat the mixture on medium speed. Keep mixing until it is smooth and fluffy. Scrape the bowl's sides as needed. This ensures everything mixes well. The filling should be creamy and light. Once your crust is chilled, it's time to assemble. Carefully pour the matcha cheesecake filling over the crust. Use a spatula to spread it evenly. Make sure the filling covers the crust well. This helps with the look and taste. Next, cover the baking pan with plastic wrap or a lid. Place it in the fridge for at least 4 hours. This allows the cheesecake to set. It will firm up enough to slice into bars later. When ready, you can lift it out using the parchment paper as handles. Slice into squares, and enjoy your delicious treat! To get a smooth and creamy texture, start with softened cream cheese. Take it out of the fridge at least 30 minutes before mixing. This helps it blend well. If you skip this step, your batter may be lumpy. When mixing, use an electric mixer on medium speed. This ensures all ingredients blend evenly. Scrape down the bowl's sides often. This way, no cream cheese or matcha gets left behind. If you want to change the sweetness, try using less maple syrup. You can also add more powdered sugar for a sweeter taste. Adjust it to fit your preference. For matcha intensity, start with the suggested amount. Taste the filling as you mix. If you want a bolder flavor, add more matcha powder gradually. For a stunning presentation, arrange the bars on a colorful platter. Drizzle extra maple syrup or matcha on top. This adds flair and makes your dessert look gourmet. Pair these bars with a refreshing drink. Green tea or coconut water works well. This balance of flavors enhances your treat and makes it even more enjoyable. {{image_4}} You can change the crust to fit your taste. If you want a different flavor, try using other nut flours, like hazelnut or cashew. These options can add a unique twist. You can also mix in spices. A pinch of cinnamon adds warmth. Cocoa powder gives a chocolatey hint. Both spices mix well with matcha. Fruits can make your cheesecake bars even better. Sliced strawberries or mangoes can add a fresh taste. You can fold them into the cheesecake filling or place them on top. For another twist, try different extracts. Almond or coconut extract can bring new flavors to your bars. Just make sure to adjust the amount so the matcha shines through. If you want to make this recipe vegan-friendly, swap the cream cheese for a vegan cream cheese. You can also use coconut yogurt instead of Greek yogurt. For sweetening, opt for agave syrup or a plant-based sweetener. To make it gluten-free, ensure your nut flour and any other ingredients are certified gluten-free. These adjustments help everyone enjoy this tasty treat. To keep your no-bake matcha cheesecake bars fresh, store them in the fridge. Use an airtight container to prevent them from drying out. This method keeps the bars tasty for several days. If you want to save them for longer, you can freeze them. Just wrap each bar in plastic wrap and then place them in a freezer-safe bag. This helps keep the flavor and texture intact. These delicious bars can stay fresh in the fridge for about 5 days. If frozen, they can last up to 2 months. Be on the lookout for signs of spoilage. If you see any mold or the bars smell off, it’s best to toss them out. Enjoy your sweet treat while it’s fresh for the best flavor! Yes, you can make these bars a day or two ahead. They store well in the fridge. Just cover them tightly with plastic wrap to keep them fresh. This way, you can enjoy them whenever you want! If you don’t have Greek yogurt, use regular yogurt. You can also try sour cream or silken tofu for a dairy-free option. Both will give you a creamy texture that works great in the recipe. The cheesecake is set when it feels firm to the touch. You can gently press the top with your finger. If it springs back, it’s ready. It should also hold its shape when sliced. Yes! You can use cashew cream cheese or any store-bought vegan cream cheese. These options will give you that creamy texture without dairy. Just make sure to check the flavor for balance. This recipe for No-Bake Matcha Cheesecake Bars is simple and fun. We covered the easy steps to make a great crust and creamy filling. I shared helpful tips to get the right texture and flavor. You can also explore different variations based on your taste. With the right storage, these bars can last and stay fresh. Get creative and enjoy this tasty treat anytime you want!

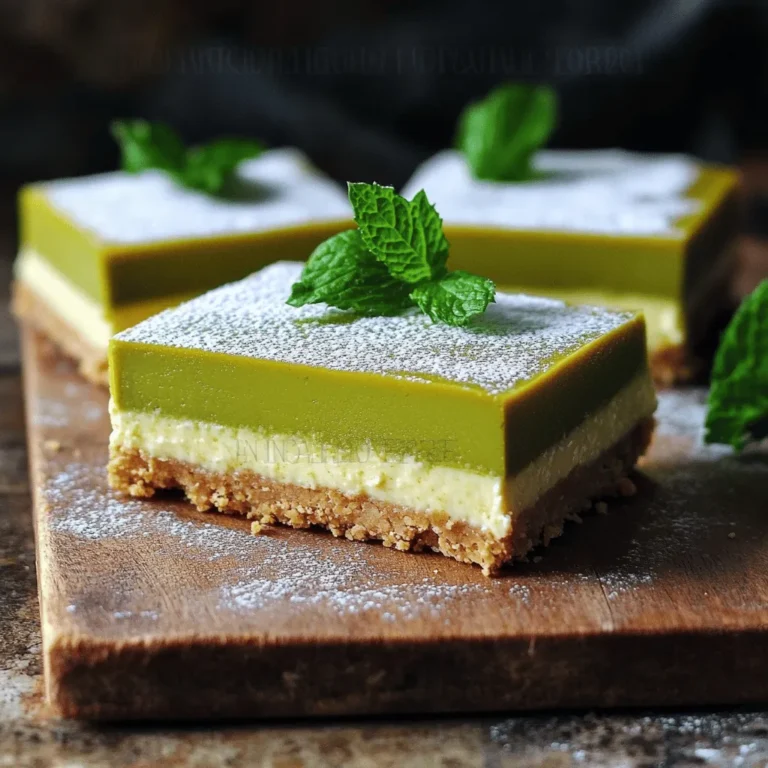
No-Bake Matcha Cheesecake Bars Easy and Delicious Treat

- 1 cup oats, blended into a fine flour - 1 scoop vanilla protein powder - 1 tablespoon baking powder - 1/2 teaspoon sea salt - 1 cup almond milk (or your preferred milk) - 1 large egg, at room temperature - 2 tablespoons honey or maple syrup, for sweetness - Zest of 1 vibrant lemon - 2 tablespoons freshly squeezed lemon juice - 1/2 cup fresh blueberries (plus extra for serving) - Coconut oil or butter, for greasing the skillet To make lemon blueberry protein pancakes, start with oats. Blend them until they turn into flour. This oat flour gives a nice texture and adds fiber. Next, add a scoop of vanilla protein powder for that extra boost. This makes your pancakes filling and healthy. In a bowl, mix together baking powder and sea salt. Baking powder helps your pancakes rise. The sea salt enhances all the flavors. You can use almond milk or any milk you like. This keeps the pancakes moist. Then, add a large egg to bind everything together. Sweeten your mixture with honey or maple syrup. Both options add a delightful touch. Now for the star ingredients: lemon zest and juice. The zest brings brightness, while the juice gives a tangy kick. Fresh blueberries are key. They provide bursts of flavor in each bite. Use half a cup, but save some for serving. Lastly, grease your skillet with coconut oil or butter. This helps prevent sticking and adds flavor to your pancakes. Gather these ingredients, and you’re ready to whip up a tasty breakfast treat! Start by blending 1 cup of oats into a fine flour. This gives a great base for the pancakes. Next, combine your oat flour with 1 scoop of vanilla protein powder, 1 tablespoon of baking powder, and 1/2 teaspoon of sea salt. Use a whisk to mix them well. This step is key to ensure even flavor. In a separate bowl, whisk together 1 cup of almond milk, 1 large egg, and 2 tablespoons of honey or maple syrup. This sweetens the mix naturally. Then, add the zest from 1 lemon and 2 tablespoons of freshly squeezed lemon juice. The lemon gives a bright flavor that pairs well with blueberries. Slowly pour the wet mixture into the dry ingredients. Stir gently until just combined. It’s okay if there are a few lumps in the batter. The final touch is folding in 1/2 cup of fresh blueberries. Be careful not to smash them while mixing. Now, heat a non-stick skillet over medium heat. Add a small amount of coconut oil or butter to grease the pan. For each pancake, pour about 1/4 cup of batter onto the skillet. Cook until bubbles form on top and the edges look firm, about 2-3 minutes. Flip the pancake and cook for another 1-2 minutes, until golden brown. Repeat until you finish the batter. Enjoy your pancakes warm with extra blueberries! To make fluffy pancakes, avoid overmixing. Mix until just combined; lumps are okay. If your batter feels too thick, add a splash of almond milk to thin it out. You want a smooth, pourable consistency that holds shape but doesn’t run. Watch for bubbles on the pancake surface. When you see bubbles, it's time to flip. Cook each side until golden brown. If you prefer a softer pancake, lower the heat and cook longer. For crisper edges, increase the heat slightly. Garnish your pancakes with fresh blueberries and a sprinkle of lemon zest for a bright touch. You can also top them with Greek yogurt for creaminess or drizzle with honey or maple syrup for sweetness. Adding sliced strawberries on the side boosts flavor and presentation. {{image_4}} You can use many types of protein powder for this recipe. Vanilla protein powder adds a nice touch, but feel free to try chocolate or berry flavors. Each has its own taste, changing the pancake's vibe. If you follow a vegan diet, consider using pea protein or brown rice protein. Both are great choices that keep the pancakes tasty and healthy. While blueberries shine in this recipe, other fruits can work well too. Try using diced strawberries or bananas for a fun twist. You can also mix in dried fruits like raisins or cranberries for added sweetness. Nuts like walnuts or pecans can offer a nice crunch and flavor boost. Experiment with what you have on hand or what you love most! Adding spices can elevate your pancakes. A pinch of cinnamon brings warmth, while a splash of vanilla makes them fragrant. You can also use zests from oranges or limes for a bright flavor. These small changes can create a whole new pancake experience. Don't be afraid to get creative and find the mix that excites your taste buds! To keep your leftover pancakes fresh, store them in an airtight container. Place a piece of parchment paper between each pancake. This prevents them from sticking together. You can refrigerate them for up to three days. If you want to save them longer, freezing is a great option. To freeze pancakes, stack them with parchment paper in between. Wrap the stack tightly in plastic wrap or aluminum foil. Place the wrapped pancakes in a freezer-safe bag. They can last for about two months in the freezer. To reheat pancakes, you have a few options to keep them moist. The microwave is quick and easy. Place a pancake on a plate, cover it with a damp paper towel, and heat for about 20-30 seconds. This helps keep the pancake soft. You can also use the oven. Preheat it to 350°F (175°C). Arrange the pancakes on a baking sheet and cover with foil. Heat for about 10-15 minutes. This method keeps them fluffy and warm. For a fun twist, you can use a skillet. Heat the skillet over low heat and add a little butter. Place the pancake in the skillet for a couple of minutes on each side. This gives them a nice crispy edge while keeping the center soft. You can make these pancakes gluten-free by using certified gluten-free oats. Blend them into flour as you would with regular oats. Always check labels to ensure no gluten is present in the protein powder or other ingredients. Yes, you can prepare the batter in advance. Store it in the fridge for up to 24 hours. Before cooking, give it a good stir. If it thickens too much, add a splash of milk to loosen it. For an egg substitute, you can use flaxseed meal or applesauce. Mix 1 tablespoon of flaxseed meal with 2.5 tablespoons of water, and let it sit for a few minutes. Alternatively, use 1/4 cup of unsweetened applesauce. These pancakes have about 300 calories per serving, which is roughly six pancakes. The exact count may vary based on the specific ingredients you use. Yes, you can use frozen blueberries. They may make the batter a bit wetter, but they will still taste great. Just fold them in gently to avoid breaking them apart too much. You now know how to make delicious Lemon Blueberry Protein Pancakes. We covered the key ingredients, step-by-step instructions, helpful tips, and tasty variations. With this guide, you can whip up a healthy breakfast that tastes great and meets your needs. Remember to store any leftovers properly and enjoy them later. Try different fruit or protein options to keep things exciting. Enjoy every delicious bite and impress your friends and family with your skills!

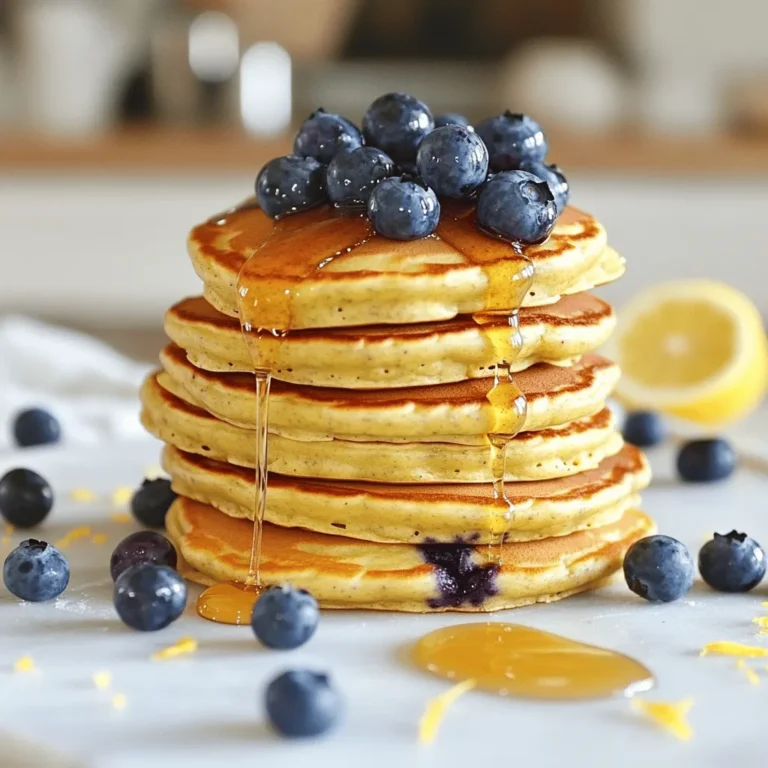
Lemon Blueberry Protein Pancakes Healthy Breakfast Treat

To make this dish, you will need: - 2 tablespoons olive oil - 1 pound boneless, skinless chicken breast, diced - 3 cloves garlic, minced - 1 cup cherry tomatoes, halved - 1 cup chicken broth (low sodium is best) - 1 cup heavy cream - 1 cup basil pesto (store-bought or homemade) - 12 ounces pasta (penne or fusilli) - Salt and black pepper, to taste - Fresh basil leaves, for garnish - Grated Parmesan cheese, for serving You can swap some ingredients to fit your taste: - Use vegetable oil instead of olive oil. - Chicken can be replaced with shrimp or tofu. - Swap cherry tomatoes for diced bell peppers or spinach. - Use vegetable broth for a vegetarian version. - Substitute heavy cream with coconut milk for a lighter dish. - You can try different pasta shapes like spaghetti or fusilli. For added flair and taste, consider these garnishes: - Extra fresh basil leaves for a pop of color. - A drizzle of olive oil for richness. - Toasted pine nuts for crunch. - A sprinkle of red pepper flakes for heat. - Lemon zest for a fresh zing. This dish is all about flavor and simple prep. Enjoy cooking! First, heat 2 tablespoons of olive oil in a large pot over medium heat. Once hot, add 1 pound of diced chicken breast. Season it well with salt and freshly cracked black pepper. Cook the chicken for 5-7 minutes. Stir occasionally until it turns golden brown. When the chicken is cooked through, add 3 cloves of minced garlic. Sauté for about 1 minute until the garlic smells good but does not brown. Next, toss in 1 cup of halved cherry tomatoes. Cook these for 2-3 minutes until they soften and release their juices. After the chicken and tomatoes are ready, pour in 1 cup of low-sodium chicken broth. Turn up the heat to bring the mix to a gentle simmer. Then, add 1 cup of heavy cream and 1 cup of basil pesto. Stir everything together until it becomes creamy and well-mixed. This is where the magic happens, giving your dish a rich flavor. Now, add 12 ounces of your chosen pasta, like penne or fusilli. Make sure the pasta is fully under the sauce. Cover the pot with a lid and cook it on medium heat. Let it simmer for 12-15 minutes, stirring occasionally. This will help the pasta absorb the liquid. When the pasta is al dente, take the pot off the heat. Let it sit for a couple of minutes to thicken. Finally, taste your dish and adjust the seasoning with more salt and pepper if needed. Serve warm, topped with fresh basil leaves and grated Parmesan cheese. Enjoy your delightful meal! To boost the taste of your dish, use fresh herbs. Fresh basil adds a bright flavor. You can also add a squeeze of lemon juice for a zesty kick. A sprinkle of red pepper flakes gives warmth without overpowering the dish. Lastly, try different types of pesto. Sun-dried tomato or arugula pesto can change the flavor profile entirely. Start by boiling your pasta in the same pot as your other ingredients. This helps the pasta soak up all the delicious flavors. Stir the pasta often to prevent sticking. Cook until it’s al dente, which means firm to the bite. This texture ensures your pasta won’t turn mushy. Always taste it a minute or two before the time is up. A large pot or Dutch oven works best for this recipe. It helps evenly distribute heat. A good wooden spoon is great for stirring without scratching your pot. Use a lid to trap steam for faster cooking. Invest in a quality chef’s knife for easy chopping of chicken and veggies. Having these tools makes the cooking process smooth and enjoyable. {{image_4}} If you want to switch up the protein, try shrimp or turkey. Shrimp cooks fast and adds a nice flavor. Turkey breast is lean and works well too. You can also use diced tofu for a tasty twist. Just be sure to cook it until golden brown. To make this dish vegetarian, leave out the chicken. You can add chickpeas or lentils for protein. For a vegan option, swap the heavy cream for coconut milk. Use a vegan pesto and skip the cheese. This keeps the dish rich and creamy without animal products. Adding seasonal veggies can boost flavor and nutrition. In spring, include asparagus or peas for freshness. Summer is great for zucchini and bell peppers. In fall, add butternut squash or kale. These veggies not only add color but also enhance the meal's taste. To keep your One-Pot Creamy Pesto Chicken Pasta fresh, store it in an airtight container. Make sure it cools down to room temperature first. This helps avoid moisture buildup. Properly stored, it lasts in the fridge for about three days. If you want to enjoy it later, consider freezing it. Freezing this dish is easy and smart. Divide the pasta into meal-sized portions. Use freezer-safe containers or bags. Be sure to remove as much air as possible. This helps prevent freezer burn. It can stay frozen for up to three months. When you’re ready to eat, let it thaw in the fridge overnight. To reheat, you have a few options. You can use the microwave or stovetop. If using the microwave, place it in a bowl with a splash of water. Cover it to keep moisture in. Heat in short intervals, stirring often. For the stovetop, add a bit of chicken broth to a pan. Heat over medium until warm, stirring occasionally. This keeps the pasta creamy and delicious. Yes, you can make this dish gluten-free. Use gluten-free pasta made from rice or quinoa. Many brands offer great textures and flavors. Just cook the pasta as you would regular pasta. Check the cooking time, as it may differ. To make the pasta more creamy, add more heavy cream. You can also stir in some cream cheese. Mixing in half-and-half can add creaminess too. Another option is to blend some of the pasta with the sauce for a thicker texture. You can serve this pasta with a fresh salad. A simple green salad works well. Grilled vegetables also make a great side. Garlic bread or crusty rolls are nice choices too. For a fun twist, serve with a light soup. This blog post covered all you need for creating One-Pot Creamy Pesto Chicken Pasta. We explored key ingredients and their substitutes, ensuring flavor and ease. You learned step-by-step instructions for cooking, along with tips to enhance taste and perfect pasta. We also discussed variations, storage, and even answered common questions. In the end, this dish is simple and fun to make. You can easily adjust it to suit your needs. Enjoy your cooking journey!

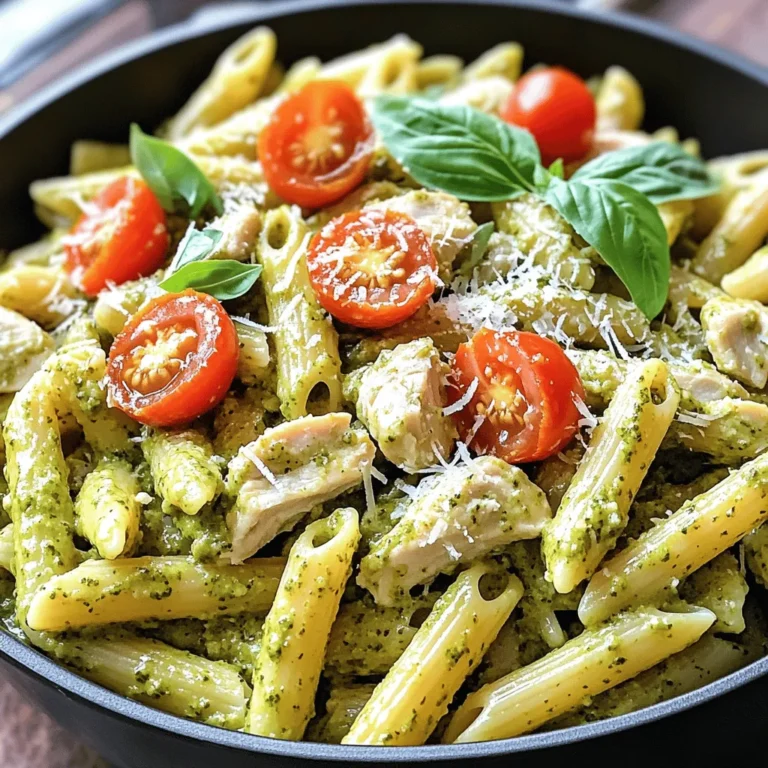
One-Pot Creamy Pesto Chicken Pasta Delightful Meal

- 2 cups graham cracker crumbs - ½ cup unsalted butter, melted - 2 tablespoons brown sugar - 1 teaspoon ground cinnamon - 16 oz cream cheese, softened - 1 cup granulated sugar - ½ cup apple cider - 3 large eggs - 1 teaspoon vanilla extract - 1 tablespoon all-purpose flour - ½ teaspoon ground nutmeg - 1 cup caramel sauce - Sliced apples and extra caramel for garnish - Mixing bowls - Electric mixer - 9x13-inch baking dish - Parchment paper Gather these ingredients first. The graham cracker crumbs form a tasty crust. The melted butter binds it all. Brown sugar and cinnamon bring sweetness and warmth to the crust. For the cheesecake filling, you’ll need softened cream cheese. This is key for a smooth texture. Granulated sugar adds sweetness, while apple cider gives a nice twist. The eggs bind everything together. The vanilla extract adds flavor. Sifting in flour and nutmeg rounds out the filling. You will also want caramel sauce for that drizzly touch. Finally, sliced apples make a great garnish. With the right tools, your baking will go smoothly. Mixing bowls help combine ingredients. An electric mixer makes quick work of beating the cream cheese. The baking dish is where all the magic happens. Parchment paper ensures easy removal and cleanup. - Preheat the oven to 350°F (175°C). - Grease and line the baking dish with parchment paper. First, you want to get your oven ready. Preheating it helps the bars bake evenly. While the oven warms up, take your 9x13-inch baking dish. Grease it well and line the bottom with parchment paper. This makes it easier to lift the bars out later. - Combine graham cracker crumbs, melted butter, brown sugar, and cinnamon. - Press the mixture into the prepared baking dish and bake. In a big bowl, mix the graham cracker crumbs with melted butter, brown sugar, and cinnamon. Stir until everything is damp. Then, press this mixture firmly into the bottom of your baking dish. Bake it for about 10 minutes until it's lightly golden. Let it cool slightly before adding the filling. - Beat cream cheese and sugar until smooth. - Gradually add in apple cider, eggs, vanilla, and dry ingredients. - Pour filling over the cooled crust and swirl in caramel. Next, grab another bowl. Beat the softened cream cheese with granulated sugar until it's smooth. Slowly mix in the apple cider. Then add the eggs one at a time, mixing well after each. Don't forget the vanilla! Finally, sift in the all-purpose flour and ground nutmeg. Mix gently until combined. Pour this smooth filling over your cooled crust. Drizzle half of the caramel sauce on top and swirl it in with a knife for a pretty look. - Bake for 30-35 minutes. - Allow to cool at room temperature before chilling. Now, place the dish back into the oven. Bake for 30 to 35 minutes. The edges should look set, but the center can be a bit jiggly. This is normal! Once baked, take it out and let it cool at room temperature for about an hour. After that, cover and refrigerate for at least 4 hours. This cooling step makes the bars creamy and delicious. To get a smooth cheesecake batter, you need to beat the cream cheese well. Start with softened cream cheese. If it's cold, it will clump up. Use an electric mixer to mix it with granulated sugar. Beat them together until the mix is creamy and lump-free. This process is key for a great texture. Always let your ingredients sit out before you start. Room temperature eggs and cream cheese mix better. This small step makes a big difference in the end result. Swirling caramel into your cheesecake can be tricky. To keep the caramel swirl looking nice, add it in a pattern. Drizzle half of the caramel over the filling. Then, use a knife to swirl it gently. Don't mix it too much. You want those pretty lines of caramel to show. For the best results, use the right amount of caramel. Too much can make it too sweet and lose that swirl effect. Aim for a quarter-cup to half-cup for perfect flavor balance. Knowing when your cheesecake bars are done is important. Look for the edges to be set. The center should still jiggle a little. This means it will firm up nicely as it cools. Chilling your cheesecake bars is crucial. After baking, let them cool at room temperature for an hour. Then, cover and refrigerate for at least four hours. This time helps the bars set up and makes them easier to cut. Enjoy your delicious creation! {{image_4}} To make your Apple Cider Caramel Cheesecake Bars even more exciting, try adding spices. You can mix in 1/4 teaspoon of ground cloves or allspice. This can give a warm, cozy flavor that fits well with the apple cider. Another option is to incorporate citrus zest. A teaspoon of lemon zest or orange peel can brighten the taste. This adds a fresh note that balances the sweetness of the caramel. If you need gluten-free options, swap regular graham crackers for gluten-free ones. They work just as well in the crust. For those following a vegan diet, you can replace cream cheese with a plant-based version. Use silken tofu or vegan cream cheese. Instead of eggs, consider using flax eggs. Mix 1 tablespoon of ground flaxseed with 2.5 tablespoons of water for each egg. This will keep the bars creamy. When you serve these bars, think about pairings. A scoop of vanilla ice cream on the side is a perfect match. Whipped cream also adds a light touch that complements the richness. For garnishing, you can get creative. Try crushed nuts, like pecans or walnuts, for a crunchy texture. A sprinkle of cinnamon on top can also make the presentation pop. Consider drizzling extra caramel in a fun pattern for a beautiful finish. To keep your Apple Cider Caramel Cheesecake Bars fresh, refrigerate them right after they cool. Place them in an airtight container. This will help maintain their tasty flavors and creamy texture. If you want to wrap them, use plastic wrap. Make sure to cover them well to avoid air exposure. This helps prevent drying out. Store them in the fridge for up to five days. If you want to save some bars for later, freezing is a great option. First, cut the bars into squares. Then, wrap each square in plastic wrap. After that, place the wrapped bars in a freezer-safe bag or container. Be sure to remove as much air as possible. Frozen bars can last up to three months. When you're ready to enjoy them, take the bars out of the freezer. Place them in the fridge overnight. This slow thawing keeps their taste and texture. You can also thaw them at room temperature for about two hours. Enjoy your delicious dessert anytime! You can tell when the cheesecake bars are done by looking at the edges. The edges should look set and firm. The center should still jiggle a bit when you shake the pan. This jiggle means the filling is creamy. It will firm up as it cools. Yes, you can make these cheesecake bars ahead of time! After baking, let them cool at room temperature for about an hour. Then, cover and chill them in the fridge for at least four hours. You can even make them a day before. This gives the flavors time to blend. Absolutely! You can use other apples if you like. Granny Smith apples give a tart taste. Honeycrisps add sweetness and crunch. You can also try Fuji or Gala apples. Each apple will change the flavor a little, so pick your favorite! If you need a cream cheese substitute, you have options. You can use Greek yogurt for a lighter version. Silken tofu can also work, making it vegan-friendly. For a richer taste, try mascarpone cheese. Each will change the flavor, so choose what fits your needs best. This blog post covered a tasty cheesecake recipe with a crunchy crust and creamy filling. We discussed key ingredients, tools needed, and step-by-step instructions. You learned essential tips for smooth batter and perfect caramel. We also explored variations and storage methods for your cheesecake bars. In conclusion, this cheesecake is a crowd-pleaser. Use the tips to make it your own. Enjoy sharing this dessert with friends and family!

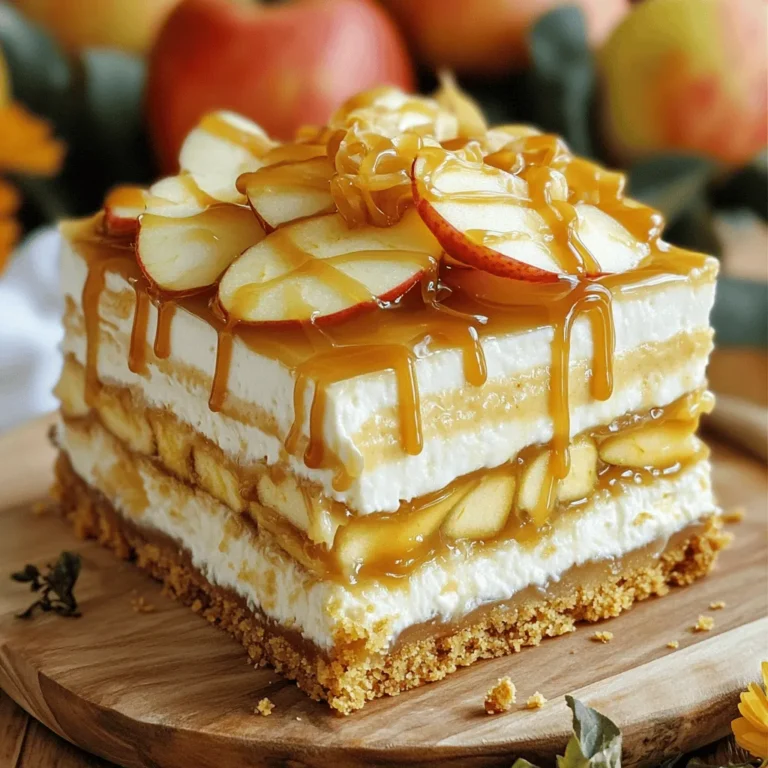
Apple Cider Caramel Cheesecake Bars Delightful Treat

- 1 lb boneless, skinless chicken thighs, cut into bite-sized pieces - 1 cup all-purpose flour - 1 cup panko breadcrumbs - 1 teaspoon garlic powder - 1 teaspoon onion powder - 1 teaspoon smoked paprika - 1/2 teaspoon freshly ground black pepper - 1/2 teaspoon sea salt - 1/4 cup freshly squeezed lemon juice - Zest of 1 lemon - 2 tablespoons low-sodium soy sauce - 1 teaspoon honey - 2 tablespoons sesame oil Gather these ingredients for a tasty dish. Chicken thighs provide juicy meat. Flour helps the coating stick. Panko breadcrumbs give a crispy crunch. The spices enhance flavor with garlic, onion, and smoked paprika. The lemon sauce is bright and zesty. Fresh lemon juice adds tartness. The zest brings out more lemon flavor. Soy sauce adds umami, while honey balances the tang. Sesame oil adds a nutty taste. With these ingredients, you're set for a dish better than takeout. Enjoy cooking! 1. Prepare the coating: In a medium bowl, mix the flour, garlic powder, onion powder, smoked paprika, black pepper, and sea salt. This blend gives the chicken great taste. 2. Create the egg wash: In another bowl, beat the two eggs until they are well mixed and frothy. This will help the breadcrumbs stick to the chicken. 3. Set up the breadcrumb station: In a third bowl, pour in the panko breadcrumbs. They will give the chicken a nice crunch. 1. Coat the chicken pieces: Take a piece of chicken. First, dredge it in the flour mix. Then dip it into the beaten eggs, letting excess drip off. Finally, coat it in the panko breadcrumbs, pressing lightly. Place the coated chicken on a plate and repeat with the rest. 2. Heat the oil in the skillet: In a large skillet, heat sesame oil over medium-high heat. Make sure the oil is hot enough for frying. 3. Fry the chicken until golden brown: Once the oil shimmers, add the chicken in batches. Fry for 5-7 minutes on each side. Cook until the chicken is golden brown and crispy. Adjust the heat to avoid burning. 1. Whisk the lemon sauce ingredients: In a small bowl, mix together the lemon juice, lemon zest, soy sauce, and honey. This mix gives the dish its zesty flavor. 2. Simmer the sauce in the skillet: After frying the chicken, pour the lemon sauce into the same skillet. Scrape up any browned bits from the bottom. Bring to a gentle simmer for 2-3 minutes until it thickens slightly. 3. Combine chicken with the sauce: Add the crispy chicken back to the skillet. Toss gently in the lemon sauce to coat each piece. This adds a burst of flavor and makes it shine. To get that perfect crunch, hot oil is key. Heat the sesame oil until it shimmers. This shows it’s ready for frying. If the oil is not hot enough, the chicken will absorb too much oil and become soggy. Avoid overcrowding in the skillet. If you add too much chicken at once, it drops the oil temperature. Fry in batches to keep the oil hot. This helps each piece get that golden, crispy crust you want. For extra flavor, try adding spices. Consider cayenne pepper for a bit of heat. You can also add herbs like thyme or rosemary for added depth. Fresh ingredients matter, too. Use fresh garlic instead of powder for a stronger taste. Fresh lemon juice and zest brighten the dish, making it more vibrant. Plating makes a big difference. Serve the crispy lemon chicken on a decorative platter. Add extra lemon slices around the chicken for a pop of color. A sprinkle of chopped green onions adds freshness and brightness. For a complete meal, pair it with fluffy steamed rice or sautéed seasonal vegetables. This not only makes the dish look better but also enhances the flavors. {{image_4}} You can make this dish lighter by using chicken breast. Chicken breast has less fat than thighs. This change will keep the meal tasty and healthy. For a gluten-free option, swap all-purpose flour with almond flour. Almond flour still gives a nice crunch, and it’s a great choice for those who avoid gluten. Want to change the flavor? Try adding lime or orange juice instead of lemon. These citrus fruits give a fresh twist. If you like some heat, mix in cayenne pepper or chili flakes. Just a pinch can add a spicy kick. This crispy lemon chicken pairs well with many side dishes. Fluffy steamed rice is a classic choice. You can also serve it with sautéed seasonal vegetables for added color and flavor. For dips, consider a tangy yogurt sauce or a sweet chili sauce. These sauces can enhance the meal and make it even more enjoyable. To keep your crispy lemon chicken fresh, follow these tips: - Refrigeration tips: Let the chicken cool down to room temperature. Place it in an airtight container. Store it in the fridge for up to three days. - Freezing instructions: If you want to freeze it, wrap the chicken in plastic wrap, then place it in a freezer bag. It will last about three months in the freezer. To enjoy that crispy texture again, reheating is key. - How to reheat for the best texture: The best way to reheat is in the oven. Preheat your oven to 375°F (190°C). Place the chicken on a baking sheet and heat for about 10-15 minutes. - Oven vs. microwave reheating techniques: The oven keeps the crispiness. The microwave can make it soggy. If you must use the microwave, heat in short bursts. Check often to avoid overcooking. Knowing how long your chicken lasts is important. - How long does it last in the fridge?: In the fridge, it stays tasty for three days. - Signs of spoilage: Look for a sour smell or a change in color. If it feels slimy, throw it away. Always trust your senses! Yes, you can use frozen chicken. However, thawing it is important for the best results. To thaw, place the chicken in the fridge overnight. If you're in a hurry, submerge the sealed chicken in cold water for about an hour. Avoid using hot water, as this can lead to uneven thawing. If you don't have panko breadcrumbs, there are many good substitutes. You can use regular breadcrumbs, crushed cornflakes, or even ground oats. These alternatives will still give you a nice crunch. Just remember, panko gives a lighter texture, so choose wisely based on what you have. To reduce oiliness, there are a few simple tips. First, make sure the oil is hot enough before adding the chicken. This helps create a crispy outer layer. Second, avoid overcrowding the skillet. Fry in batches to allow proper air circulation. Lastly, drain the chicken on paper towels right after frying. This will absorb excess oil and keep your chicken crispy. This blog post covered how to make crispy chicken with a vibrant lemon sauce. We explored key ingredients like chicken thighs, panko breadcrumbs, and essential spices. I shared steps for preparation, cooking, and creating the perfect sauce. You also learned tips for crispiness and flavor boosts. Remember, variations let you customize the dish to your taste. With proper storage and reheating advice, you'll enjoy this meal fresh every time. Enjoy your cooking journey and take pride in your tasty creations!

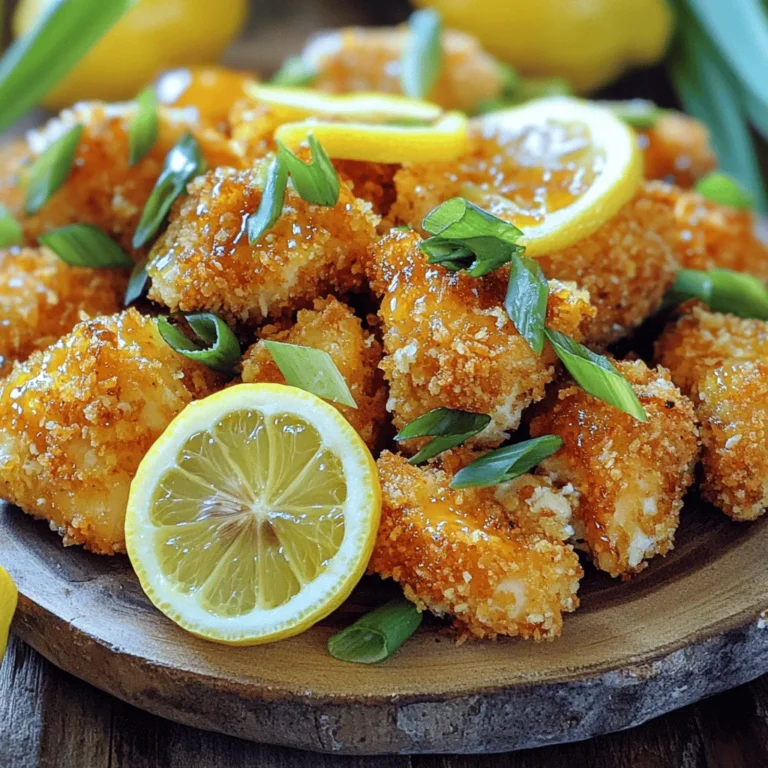
Crispy Lemon Chicken Better Than Takeout Recipe

PREV 1 … 6 7 8 … 18 NEXT
sweet savory saga

explore

DessertsDinnerAppetizersDrinks

Our Policies

  • Cookie Policy
  • Copyright Policy
  • Disclaimer
  • GDPR Policy
  • Terms Of Use
Back to Top
  • About
  • Contact Us
  • Privacy Policy
© 2025 sweet savory saga