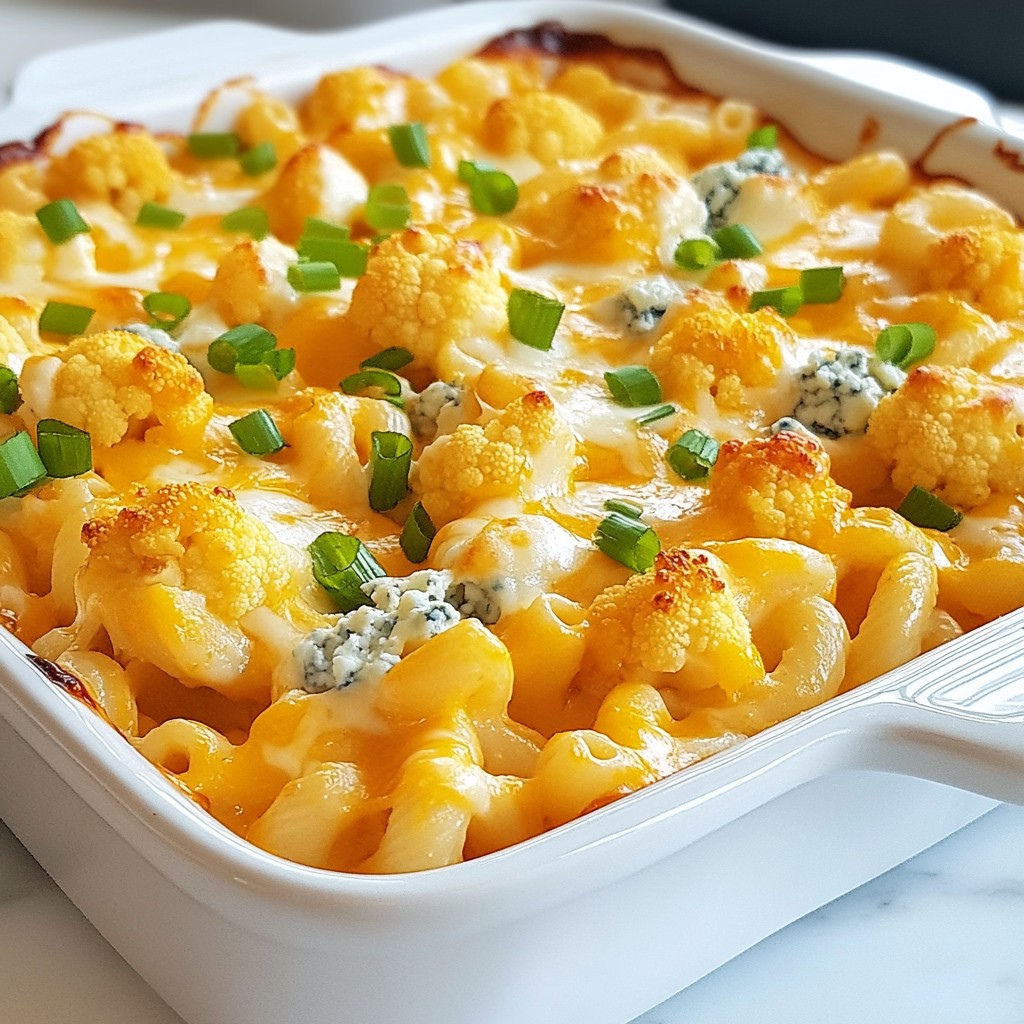
Are you ready to elevate your comfort food game? Buffalo Cauliflower Mac and Cheese is a rich, creamy delight that satisfies cravings without the guilt. Packed with flavor and a touch of heat, this dish turns classic comfort into a healthy masterpiece. Join me as I guide you through a simple recipe that’s sure to impress both veggie lovers and cheese enthusiasts alike. Let’s dive into the ingredients that make this meal unforgettable!
Why I Love This Recipe
- Flavor Explosion: This dish combines the creamy richness of mac and cheese with the spicy kick of buffalo sauce, creating an unforgettable flavor experience.
- Healthy Twist: By incorporating cauliflower, this recipe adds nutritious veggies to a classic comfort food, making it a healthier choice without sacrificing taste.
- Simple Ingredients: All the ingredients are easy to find and often staples in many kitchens, allowing for a hassle-free cooking experience.
- Shareable Delight: This recipe serves 6, making it perfect for gatherings, potlucks, or family dinners where everyone can enjoy a hearty meal together.
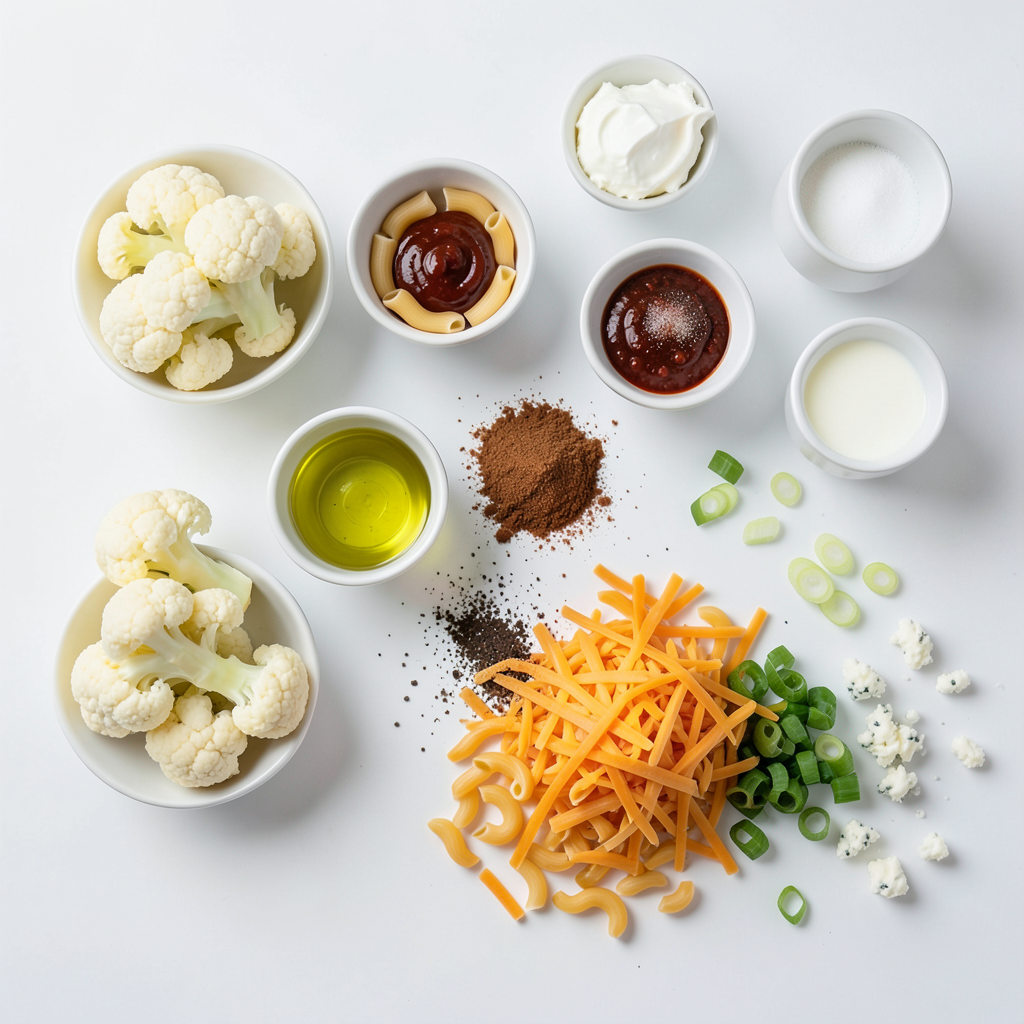
Ingredients
List of Ingredients
- 1 medium head of cauliflower, broken into bite-sized florets
- 2 cups elbow macaroni
- 3 tablespoons olive oil
- 1/2 cup hot sauce (such as Frank's RedHot)
- 1 tablespoon garlic powder
- 1 teaspoon smoked paprika
- 2 cups shredded sharp cheddar cheese
- 1 cup cream cheese, softened to room temperature
- 1 cup whole milk
- Salt and freshly ground black pepper, to taste
- 1/2 cup green onions, thinly sliced (for garnish)
- 1/4 cup crumbled blue cheese (optional, for an added topping)
Suggested Brands for Ingredients
I often use Frank's RedHot for the hot sauce. It gives the right heat and flavor. For cheese, Tillamook sharp cheddar is my go-to. It melts well and has a rich taste. When it comes to cream cheese, I prefer Philadelphia for its smooth texture. For macaroni, Barilla makes great elbow pasta that cooks evenly.
Substitutions for Dietary Restrictions
If you want a gluten-free option, swap elbow macaroni with gluten-free pasta. Use gluten-free hot sauce if you need to avoid gluten. For a vegan version, use nut-based cheese instead of dairy cheese. You can also use coconut cream in place of cream cheese. Just remember to adjust flavors as needed to keep it tasty!
Step-by-Step Instructions
Preheating the Oven
First, preheat your oven to 400°F (200°C). This step is key for roasting the cauliflower and later baking the mac and cheese.
Preparing and Roasting the Cauliflower
In a large bowl, combine the cauliflower florets with olive oil, garlic powder, smoked paprika, salt, and black pepper. Toss the florets well to coat them evenly. Spread the seasoned cauliflower on a baking sheet in one layer. Place the baking sheet in the hot oven and roast for 20-25 minutes. Check the cauliflower halfway through, stirring to ensure even cooking. You want it golden brown and tender.
Cooking the Elbow Macaroni
While the cauliflower roasts, fill a large pot with salted water and bring it to a boil. Add the elbow macaroni and cook according to the package directions until it is al dente. Once done, drain the pasta and set it aside for later.
Preparing the Cheese Mixture
In another bowl, mix the shredded cheddar cheese, softened cream cheese, whole milk, and hot sauce. Stir until the mixture is smooth and well combined. This cheesy blend is the heart of your mac and cheese.
Combining Ingredients and Baking
Once the cauliflower is roasted, add it to the cheese mixture. Gently fold in the cauliflower to keep the florets intact. Next, add the drained macaroni to the bowl. Carefully mix everything until the pasta is well coated with the cheesy goodness. Pour the mixture into a greased baking dish, spreading it evenly. If you like, sprinkle crumbled blue cheese on top for extra flavor. Bake in the preheated oven for 15-20 minutes until the cheese is bubbly and melted. After baking, let it cool for a few minutes, then garnish with sliced green onions before serving.
Tips & Tricks
How to Achieve the Best Texture
For the perfect texture, roasting the cauliflower is key. It adds a nice crunch. Make sure to spread the florets out on the baking sheet. This helps them roast evenly. Stir them halfway through cooking to avoid sogginess. Aim for golden brown and fork-tender pieces. This contrast with the creamy mac and cheese is delightful.
Serving Suggestions
Serve your Buffalo Cauliflower Mac and Cheese hot from the oven. It looks great in a large dish. For an extra kick, drizzle more hot sauce on top. You can also add fresh green onions for a pop of color and flavor. This dish is rich and filling, so small portions work well.
Ideal Pairings (sides/drinks)
Pair your mac and cheese with a fresh salad for balance. A simple green salad with lemon dressing works great. For drinks, a light beer or sparkling water complements the heat. If you prefer wine, a chilled Sauvignon Blanc matches nicely. These pairings enhance the meal without overpowering it.
Pro Tips
- Roasting for Flavor: Roast the cauliflower until it's well browned; this enhances its flavor and adds a delicious depth to the dish.
- Cheese Choices: For a different flavor profile, try mixing in other types of cheese such as gouda or pepper jack along with the cheddar.
- Make Ahead: This dish can be prepared in advance. Assemble everything, cover, and refrigerate. When ready, just bake it straight from the fridge, adding a few extra minutes to the baking time.
- Spice It Up: Adjust the amount of hot sauce to your taste. If you prefer it milder, start with less and add more until it reaches your desired heat level.
Variations
Vegan Buffalo Cauliflower Mac and Cheese
To make a vegan version of Buffalo cauliflower mac and cheese, swap out dairy ingredients. Use cashew cream or nutritional yeast instead of cream cheese. For cheese flavor, try vegan cheese brands like Daiya or Violife. Replace whole milk with almond or oat milk for creaminess. Use your favorite hot sauce to keep that spicy kick.
Gluten-Free Options
If you need a gluten-free meal, choose gluten-free elbow macaroni. Brands like Barilla or Banza offer great options. You can also make a gluten-free cheese sauce using rice flour. This keeps the same creamy texture without the gluten. Ensure your hot sauce is gluten-free, as some brands use gluten in their recipes.
Alternative Cheese and Spice Combinations
You can switch up the cheese and spices for new flavors. Try using gouda or pepper jack cheese for a unique twist. For spices, add cayenne pepper for heat or Italian herbs for a different taste. Mixing in some smoked cheese adds depth. Experiment with these options to find your favorite flavor profile!
Storage Info
How to Store Leftovers
To store your Buffalo Cauliflower Mac and Cheese, let it cool first. Then, place it in an airtight container. This helps keep the flavors fresh. Make sure to cover it tightly. Stored this way, it lasts up to three days in the fridge.
Reheating Instructions
When you're ready to eat the leftovers, preheat your oven to 350°F (175°C). Transfer the mac and cheese to a baking dish. Cover it with foil to keep it moist. Bake for about 15-20 minutes. Check to see if it's warm all the way through. You can also reheat it in the microwave, but the oven keeps it creamy.
Freezing Tips
If you want to freeze Buffalo Cauliflower Mac and Cheese, use a freezer-safe container. Make sure it cools completely first. It can last up to three months in the freezer. When ready to eat, thaw it overnight in the fridge. Then, reheat it in the oven as mentioned above. This keeps the texture nice and creamy.
FAQs
What is Buffalo Cauliflower Mac and Cheese?
Buffalo Cauliflower Mac and Cheese is a creamy and spicy dish. It combines pasta, roasted cauliflower, and a rich cheese sauce. The dish gets its kick from hot sauce, often Frank's RedHot. This recipe blends comfort food with a healthy twist. It's perfect for those who love flavors and textures.
Can I use frozen cauliflower for this recipe?
Yes, you can use frozen cauliflower. It saves time and still tastes good. Just make sure to thaw and drain it well. This helps avoid too much water in your dish. Keep in mind that frozen cauliflower may cook faster than fresh. Adjust your roasting time as needed.
How can I make it less spicy?
To reduce the heat, cut back on the hot sauce. You can also mix in more cream cheese or milk. These ingredients help balance the spice. Another option is to use a milder hot sauce. You can even skip the hot sauce and add a touch of garlic instead for flavor.
What can I use instead of elbow macaroni?
If you want a different pasta, try penne or shells. Gluten-free pasta works well too. Whole wheat pasta adds a nutty flavor. You can even use spiralized veggies for a low-carb option. Just adjust cooking times based on the pasta you choose.
We covered a tasty Buffalo Cauliflower Mac and Cheese recipe, from ingredients to storing leftovers. You can choose from various brands and still meet dietary needs. The step-by-step guide makes it easy to cook and combine all parts. Don’t forget the tips for a perfect texture and great sides. You can even try fun variations like vegan or gluten-free options. Enjoy your cooking and remember, creativity makes every dish unique!