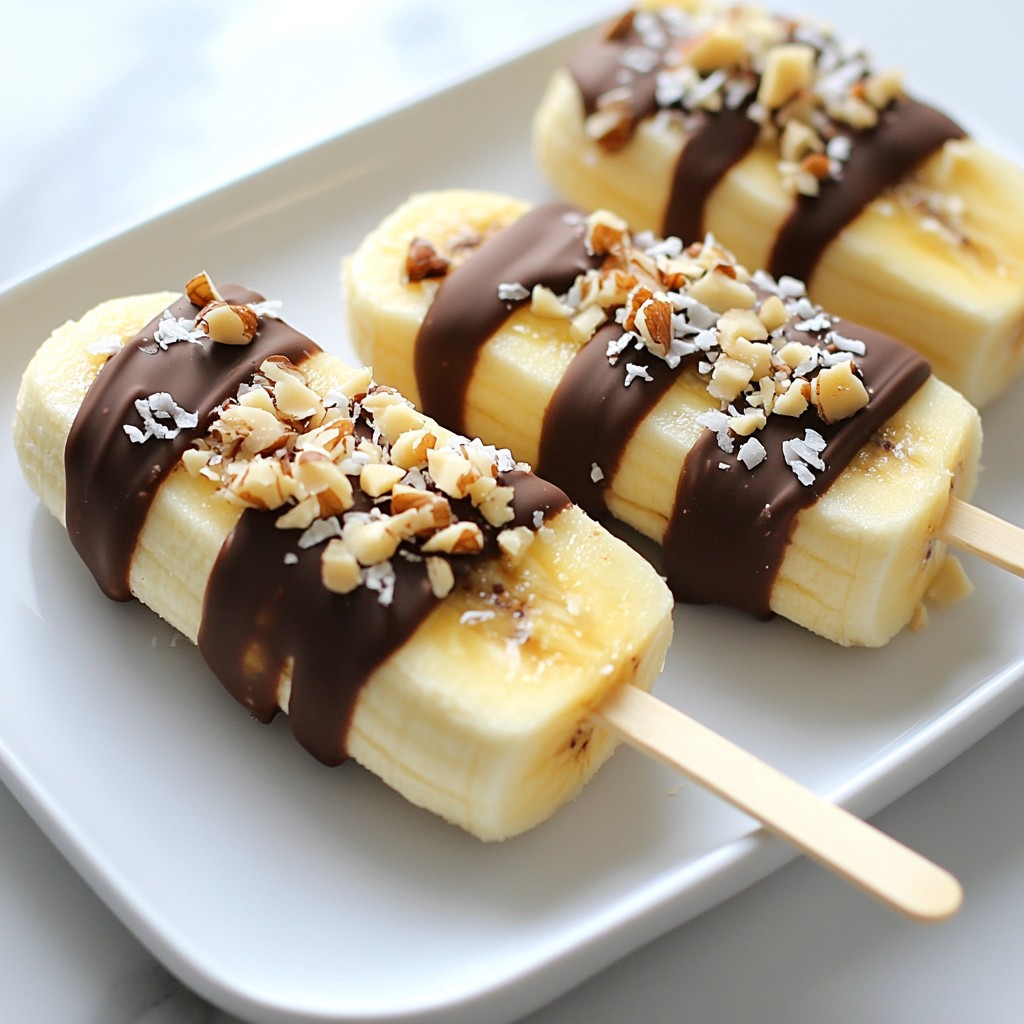
Are you ready to indulge in a delicious frozen treat? Chocolate-covered banana pops are simple to make and incredibly satisfying. With just a few ingredients and an easy step-by-step guide, you can create this fun snack in no time. Dive into this article to learn how to craft these sweet bites and explore cool variations, handy tips, and smart storage methods. Your taste buds will thank you!
Why I Love This Recipe
- Easy to Make: This recipe requires minimal ingredients and can be prepared in just 15 minutes, making it a quick and fun treat.
- Healthy Indulgence: Using bananas and dark chocolate, this dessert strikes a perfect balance between health and indulgence.
- Customizable Toppings: With a variety of nuts and coconut to choose from, you can easily customize each pop to your taste.
- Perfect for Any Occasion: These chocolate-covered banana pops are great for parties, snacks, or as a refreshing treat on a hot day.
Ingredients
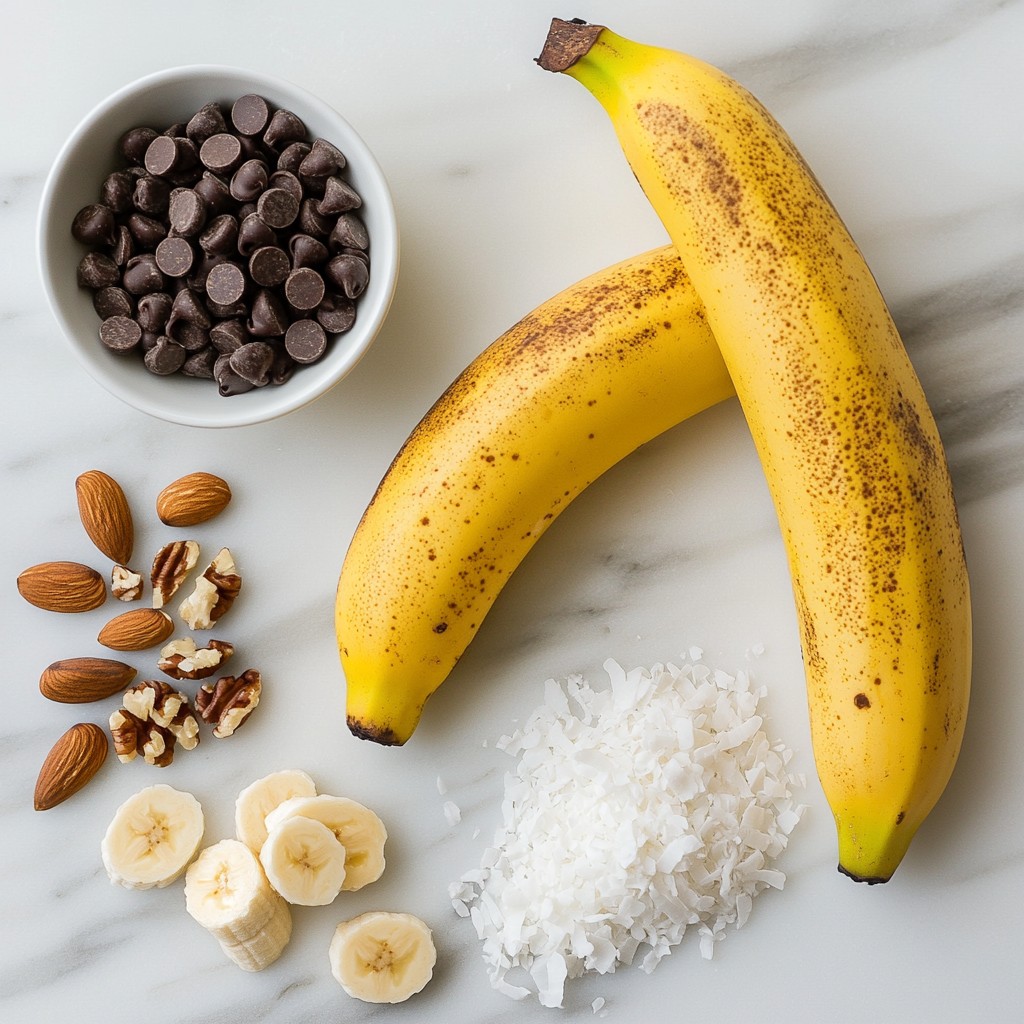
List of Essential Ingredients
- Ripe bananas
- Dark chocolate chips
- Coconut oil
- Chopped nuts (almonds, walnuts, or peanuts)
- Unsweetened shredded coconut (optional)
- Popsicle sticks
To make chocolate covered banana pops, you need ripe bananas. Ripe bananas have a sweet taste. They are easier to coat in chocolate. Next, gather dark chocolate chips. They give a rich flavor. Coconut oil helps the chocolate melt smoothly.
Chopped nuts add a nice crunch. You can choose almonds, walnuts, or peanuts. Unsweetened shredded coconut is optional. It gives a tropical twist. Finally, have popsicle sticks ready to hold the banana pops.
These ingredients create a fun and tasty treat! Enjoy the process of making them.
Step-by-Step Instructions
Preparing the Bananas
Start by peeling the bananas. Use ripe bananas for the best taste. Slice them into halves or thirds. The size depends on how big you want each pop. Next, grab your popsicle sticks. Insert one stick into each banana piece. Push it in halfway to keep it sturdy.
Melting the Chocolate
Now, let’s melt the chocolate. Combine the dark chocolate chips with the coconut oil in a bowl. The oil makes the chocolate smooth. Place the bowl in the microwave. Heat it in 30-second bursts. Stir the mixture after each time. Keep going until the chocolate is fully melted and silky.
Coating the Banana Pops
Take each banana pop and dip it into the melted chocolate. Make sure to coat all sides well. Let any extra chocolate drip back into the bowl. Now it’s time to add some crunch! Roll each chocolate-covered pop in chopped nuts or shredded coconut. This adds great flavor and texture.
Freezing the Pops
Place the coated banana pops on a baking sheet. Use parchment paper to stop them from sticking. Once all pops are on the sheet, put them in the freezer. Let them freeze for at least 2 hours. Check if they are firm before enjoying. The longer they freeze, the better they taste!
Tips & Tricks
Perfecting the Chocolate Coating
To get a great chocolate coating, dip the banana pop deep. Make sure that every side is covered. If you find excess chocolate dripping off, hold the pop above the bowl. Let the extra chocolate fall back. This will help keep your pops neat and tasty.
Enhancing Texture
Choosing the right nuts can add crunch. Almonds bring a light flavor, while walnuts add depth. Peanuts give a nice saltiness. You can also use shredded coconut for a tropical touch. It adds sweetness and a chewy texture that pairs well with chocolate.
Presentation Ideas
Serving these pops can be fun! Use a colorful plate or a fun stand. Drizzle some extra melted chocolate over the top for flair. You can also sprinkle more nuts or coconut on top. These small touches make your treats look even more inviting!
Pro Tips
- Use Ripe Bananas: Choose bananas that are ripe but not overly brown for the best taste and texture in your pops.
- Customize Your Toppings: Feel free to mix and match toppings like crushed cookies or dried fruits for a unique twist.
- Melt Chocolate Evenly: Stir the chocolate frequently while melting to prevent burning and to achieve a smooth consistency.
- Store Properly: Keep leftover pops in an airtight container in the freezer to maintain freshness and avoid freezer burn.
Variations
Flavor Options
You can switch up the chocolate type for variety. Try using white chocolate or milk chocolate. Each option gives a new taste and look to your pops. You can also add flavored extracts. A drop of vanilla or peppermint oil can enhance the flavor. Just mix it in the melted chocolate before dipping.
Dietary Adjustments
To make these pops vegan, use dairy-free chocolate. Many brands offer great options that taste delicious. This way, everyone can enjoy them. If you are gluten-free, rest easy. The ingredients here are all gluten-free. Just check the nuts and chocolate to be safe.
Fruit Alternatives
Bananas are great, but you can use other fruits too. Try strawberries or apple slices for a fun twist. They taste amazing when covered in chocolate. You can also mix different fruits. A combo of bananas and strawberries makes a colorful treat. Enjoy experimenting with your favorite fruits!
Storage Info
Best Practices for Storage
To enjoy your chocolate-covered banana pops later, keep them in the freezer. Place the pops in a sturdy container. This keeps them safe and prevents sticking. Use parchment paper between layers if you stack them. This step helps avoid freezer burn, which can ruin their taste.
Shelf Life
These tasty treats can last up to two months in the freezer. Check for signs of spoilage before eating. If the chocolate has a white film or the banana is discolored, toss it out. When stored well, they stay fresh and delicious for a long time.
Re-freezing Tips
You can refreeze banana pops once they thaw, but the texture might change. For the best results, eat them fresh. If you must refreeze, wrap them tightly. This helps maintain their texture. Enjoy them quickly for the best taste and feel.
FAQs
How long does it take for chocolate-covered banana pops to freeze?
It takes about 2 hours for chocolate-covered banana pops to freeze. After coating the bananas with chocolate, place them on a baking sheet lined with parchment paper. Make sure they are spaced out so they don’t stick together. You want them to be firm to the touch before eating.
Can I use milk chocolate instead of dark chocolate?
Yes, you can use milk chocolate instead of dark chocolate. Milk chocolate gives a sweeter taste. You can also try white chocolate for a different flavor. Each type adds its own twist to your treat.
Are chocolate-covered banana pops healthy?
Chocolate-covered banana pops can be a healthy treat. Bananas are rich in potassium and fiber. Dark chocolate has antioxidants. However, keep in mind that adding nuts or coconut adds extra calories. Enjoy them in moderation for a balanced snack.
What can I use instead of popsicle sticks?
If you don’t have popsicle sticks, you can use small skewers or cut wooden sticks. You can also use spoons for a fun twist. Just ensure whatever you use is safe and sturdy enough to hold the banana pieces.
You learned how to make delicious chocolate-covered banana pops. We covered the essential ingredients, easy steps, and helpful tips. You can get creative with flavors and fruit choices too. Remember to store them well for the best taste and texture. Enjoy making these fun treats anytime you want a sweet, healthy snack. Now, gather your ingredients and start creating your own yummy banana pops!