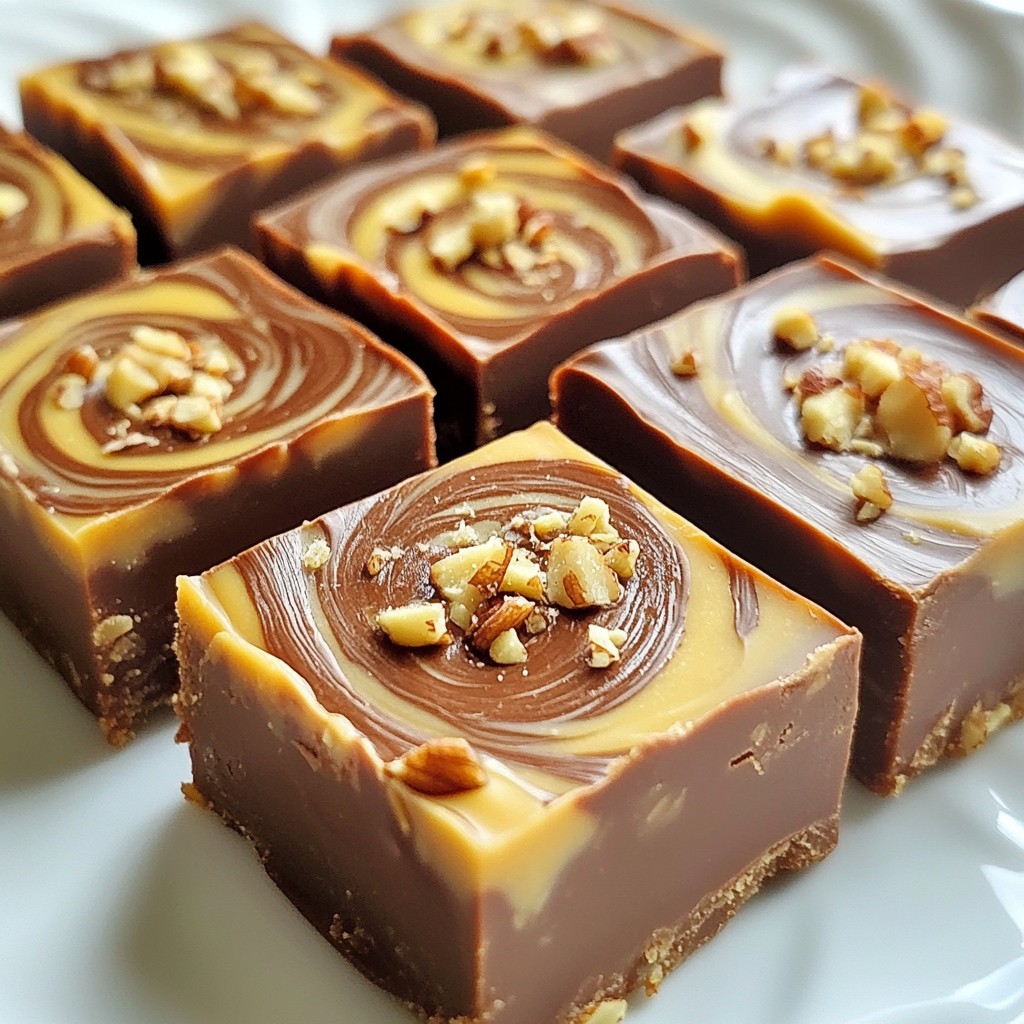
Are you ready to dive into a sweet experience? This Chocolate Peanut Butter Swirl Fudge is an easy-to-make treat that you won’t be able to resist. With rich chocolate, smooth peanut butter, and just a hint of salt, this fudge will be your new favorite dessert. In this guide, I’ll walk you through each step, share tips, and show you how to impress your friends and family with this delightful snack. Let’s get started!
Why I Love This Recipe
- Decadent Flavor: This fudge combines rich chocolate and creamy peanut butter, creating a dessert that is both indulgent and satisfying.
- Easy to Make: With simple ingredients and straightforward steps, this recipe is perfect for bakers of all skill levels.
- Perfect for Sharing: Cut into squares, this fudge is ideal for parties, gifts, or any gathering where you want to impress.
- Customizable: You can easily tweak the recipe by adding your favorite nuts, or even trying different types of chocolate.
Ingredients
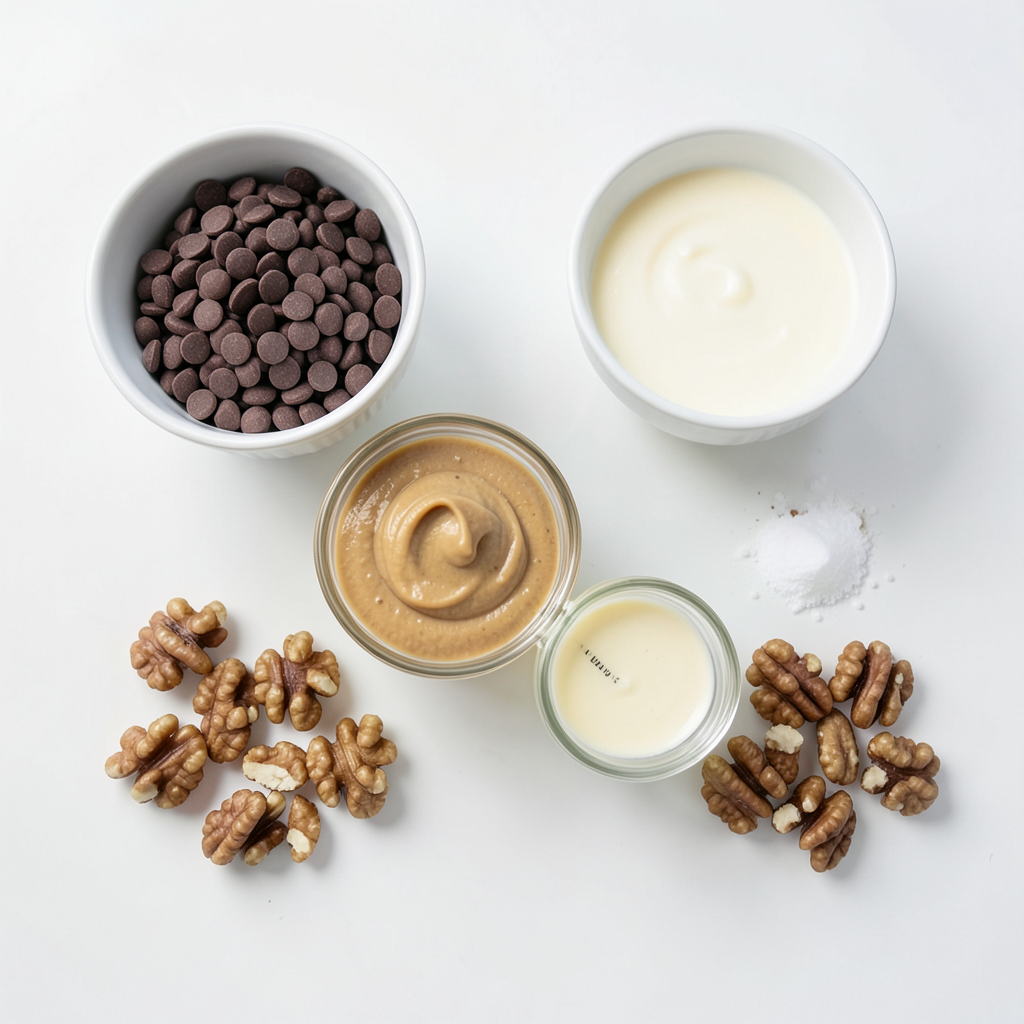
To make Chocolate Peanut Butter Swirl Fudge, you will need the following simple ingredients:
- 2 cups semi-sweet chocolate chips
- 1 cup creamy peanut butter
- 1 cup sweetened condensed milk
- 1 teaspoon vanilla extract
- 1/4 teaspoon salt
- 1 cup chopped nuts (optional; walnuts or peanuts are fantastic choices)
Each ingredient plays a key role in making this fudge rich and creamy. The semi-sweet chocolate chips provide a deep chocolate flavor. The creamy peanut butter adds that classic nutty taste. Sweetened condensed milk brings sweetness and creaminess. Vanilla extract boosts the overall flavor, while salt balances the sweetness. If you want some crunch, chopped nuts are a great option!
Having all these ingredients ready will make the process smooth. You can even personalize it by choosing different nuts or leaving them out. Enjoy the fun of creating this treat!
Step-by-Step Instructions
Preparation of Baking Dish
First, grab an 8-inch square baking dish. Line the bottom and sides with parchment paper. Make sure the paper hangs over the edges. This helps you lift the fudge out easily later.
Melting the Chocolate Mixture
Next, take a medium saucepan and set it over low heat. Add 2 cups of semi-sweet chocolate chips and 1 cup of sweetened condensed milk. Stir the mix well and keep stirring until it melts. The goal is a smooth, lump-free mixture.
Swirling the Peanut Butter
Now, let’s add the peanut butter! Warm 1 cup of creamy peanut butter in the microwave for 20 to 30 seconds. This will make it easier to drizzle. Carefully pour the soft peanut butter over the melted chocolate. Using a knife or toothpick, gently swirl the peanut butter into the chocolate. This creates a lovely marbled effect. Be creative!
Chilling and Cutting the Fudge
After swirling, it’s time for the fridge. Place the dish in the refrigerator for at least 2 hours. This cooling time helps the fudge set firmly. Once it is set, lift the fudge out using the parchment paper. Cut it into squares with a sharp knife. Enjoy your delicious fudge!
Tips & Tricks
Perfecting the Texture
To make smooth and creamy fudge, start with quality ingredients. Use fresh chocolate chips and creamy peanut butter. Melt the chocolate and sweetened condensed milk together over low heat. Stir constantly to avoid lumps. You want a shiny and smooth mixture. Adding a pinch of salt enhances the flavors, making the fudge richer.
Swirling Techniques
Swirling peanut butter into chocolate can be fun! After melting the peanut butter, drizzle it over the chocolate. Use a knife or toothpick to create swirls. Don't overdo it; a few gentle swirls give a nice effect. Try different patterns for unique designs. You could also alternate layers of chocolate and peanut butter for a fun twist.
Serving Suggestions
For a stunning presentation, cut the fudge into neat squares. Place them on a pretty plate. Drizzle some extra melted chocolate or warm peanut butter on top. A sprinkle of chopped nuts adds a nice touch, too. Serving fudge this way makes it more inviting. Your guests will love it!
Pro Tips
- Use Quality Chocolate: Opt for high-quality semi-sweet chocolate chips for a richer flavor and smoother texture in your fudge.
- Don’t Overheat the Chocolate: Melt the chocolate chips over low heat and stir continuously to prevent burning and ensure a smooth consistency.
- Chill for Best Results: Allow the fudge to chill in the refrigerator for a full 2 hours or more to achieve the perfect set and texture.
- Customize with Toppings: Feel free to experiment with different nuts, or even add a sprinkle of sea salt on top for a delightful contrast.
Variations
Nut-Free Option
You can enjoy this fudge without peanuts. Try using sunflower seed butter instead. It has a similar creamy texture and works well in recipes. You can also use soy nut butter for a nut-free treat. Both options keep the fudge rich and tasty.
Flavor Add-ins
Want to shake things up? Add a pinch of sea salt for a sweet-salty kick. A teaspoon of espresso powder brings out the chocolate flavor in a bold way. You can also sprinkle in some cinnamon or nutmeg for a warm touch. These flavors mix well with chocolate and peanut butter.
Alternative Toppings
If you love crunch, try different nuts like almonds or pecans. You can also mix in candy pieces, like crushed pretzels or toffee bits, for added texture. Each topping gives the fudge a unique twist. Be creative and make it your own!
Storage Info
Best Practices for Storage
Store your fudge in an airtight container. This keeps it fresh and tasty. Use a container that fits the fudge snugly. This helps prevent air from getting in. If you want, you can separate layers with parchment paper. This stops sticking and makes it easy to grab a piece.
Shelf Life
Your chocolate peanut butter swirl fudge stays fresh for up to two weeks. Keep it in the fridge for the best taste and texture. After two weeks, it may not taste as good. If you notice any change in smell or look, it's best to throw it away.
Freezing Instructions
You can freeze fudge to keep it longer. First, cut it into squares. Wrap each piece tightly in plastic wrap. Then place the wrapped fudge in an airtight container or a freezer bag. This keeps it safe from freezer burn. To thaw, take it out and let it sit at room temperature for about an hour. Enjoy your fudge when it is soft and ready!
FAQs
Can I use dark chocolate instead of semi-sweet?
Yes, you can use dark chocolate. It will change the taste. Dark chocolate is richer and less sweet. You might want to add a bit more sweetened condensed milk to balance the flavor. Start with half a cup more. Taste as you go to find your perfect mix.
How do I know when the fudge is properly set?
You can check if the fudge is ready by feeling it. It should feel firm and not sticky. Press gently with your finger. If it holds shape and feels cool, it’s done. You can also use a toothpick. It should come out clean when you poke the fudge.
Can I substitute other nut butters?
Absolutely! Almond butter, cashew butter, or sunflower seed butter work great. Each nut butter adds a unique flavor. Just make sure it’s creamy. You might need to warm it like with peanut butter. This makes swirling easier and keeps it smooth.
This fudge recipe is simple and fun. You learned about the key ingredients and how to mix, chill, and cut your fudge. Tips on texture, presentation, and variations help you create the best treat. Storing your fudge properly ensures it stays fresh and tasty. Remember, you can try different flavors and nut options to make it your own. Enjoy making fudge that everyone will love. It’s a sweet way to share joy and creativity in your kitchen.