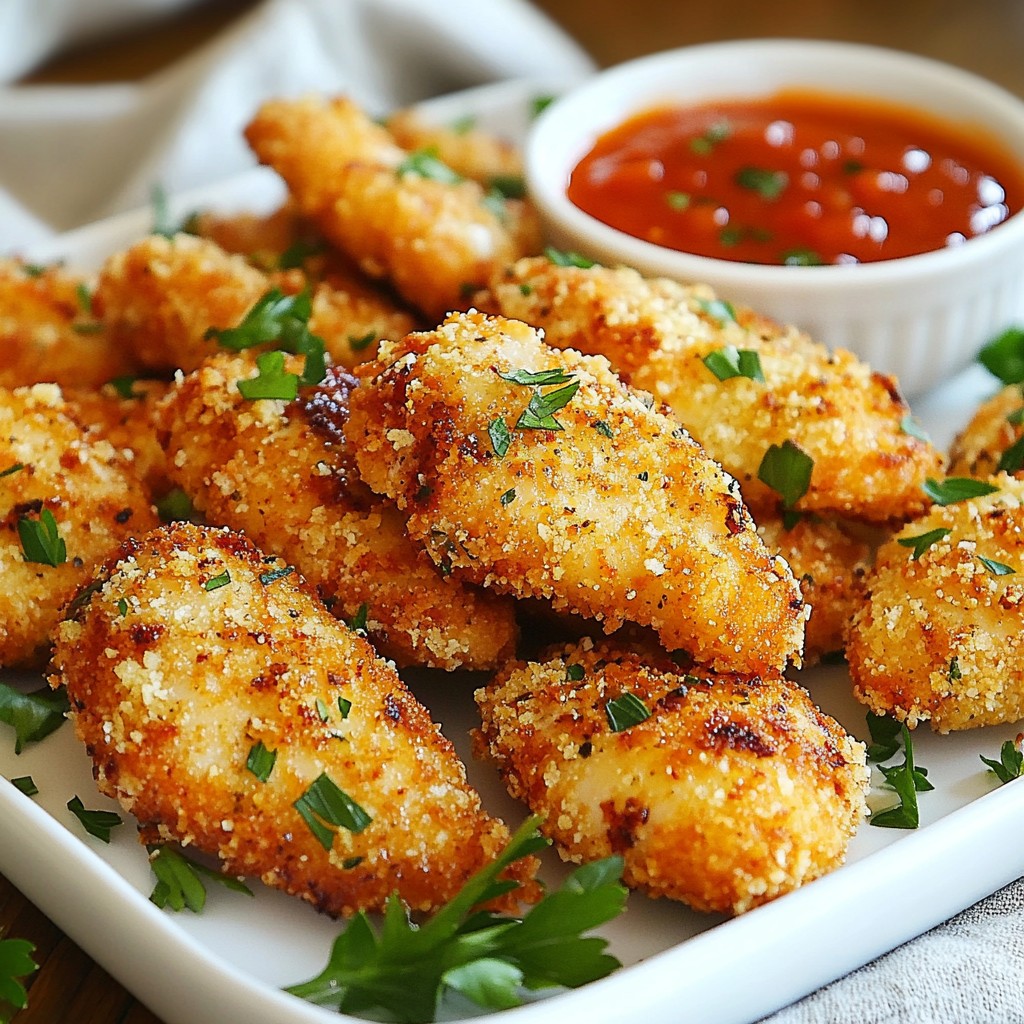
If you crave a dish that's both crispy and satisfying, you need to try my Garlic Parmesan Chicken Tenders. These golden tenders pack a punch of flavor and are easy to make. I'll guide you through simple steps and share useful tips to ensure every bite is a crunching delight. Plus, I'll show you variations to suit your taste. Get ready to elevate your dinner game!
Why I Love This Recipe
- Simple Preparation: This recipe requires minimal ingredients and straightforward steps, making it perfect for busy weeknights.
- Crispy Texture: The combination of panko breadcrumbs and Parmesan cheese creates a delightful crunch that elevates the dish.
- Flavorful Garlic Kick: With fresh garlic and Italian herbs, these chicken tenders are bursting with flavor in every bite.
- Versatile Serving Options: These tenders pair wonderfully with various dipping sauces, making them a hit for family dinners or parties.
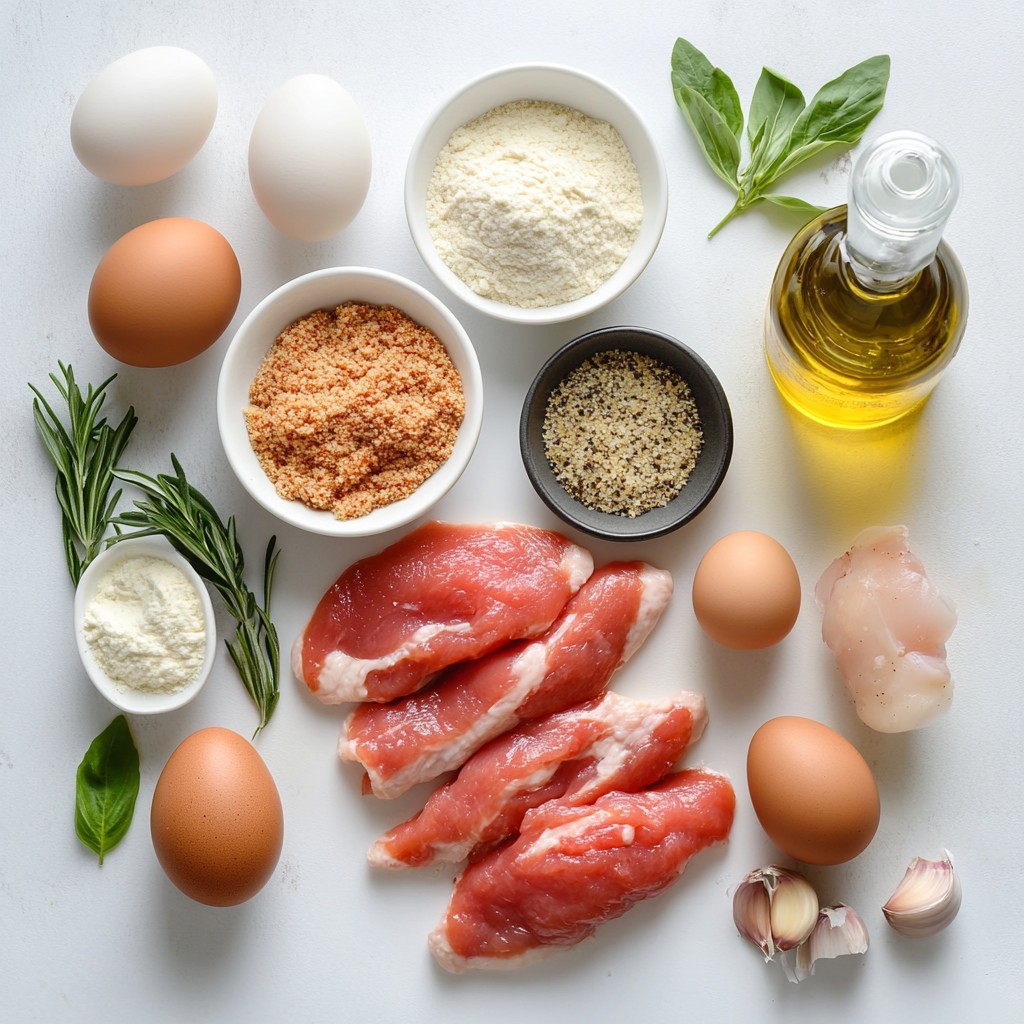
Ingredients
List of Ingredients for Garlic Parmesan Chicken Tenders
- 1 pound chicken tenders
- 1 cup all-purpose flour
- 2 large eggs
- 1/2 cup milk
- 1 cup panko breadcrumbs
- 1/2 cup freshly grated Parmesan cheese
- 4 cloves garlic, finely minced
- 1 teaspoon dried Italian herbs
- 1 teaspoon paprika
- Salt and freshly ground black pepper, to taste
- Olive oil spray or cooking spray
Optional Ingredients for Added Flavor
You can add a few extras to boost taste. Try:
- Lemon zest for a fresh zing.
- Hot sauce for a spicy kick.
- Fresh herbs like parsley for brightness.
Nutritional Information per Serving
Each serving of these chicken tenders has about:
- Calories: 320
- Protein: 30g
- Carbohydrates: 25g
- Fat: 15g
- Fiber: 1g
This dish is a tasty choice that does not skimp on flavor or crunch!
Step-by-Step Instructions
Preparation Steps
First, I preheat my oven to 400°F (200°C). This step is key for crispy chicken. Next, I grab a baking sheet and line it with parchment paper. This makes cleanup easy. In a shallow bowl, I mix 1 cup of flour, salt, pepper, and 1 teaspoon of paprika. I whisk this until it is well combined. This mixture will be the first coating for the chicken.
Then, I take a second bowl and beat 2 large eggs with 1/2 cup of milk. I mix them until they are smooth. This helps the coatings stick to the chicken tenders. In a third bowl, I combine 1 cup of panko breadcrumbs, 1/2 cup of grated Parmesan cheese, 4 minced garlic cloves, and 1 teaspoon of dried Italian herbs. I mix this well to spread out the flavors.
Coating the Chicken Tenders
Now, I work with one chicken tender at a time. First, I coat it in the flour mix. I shake off any extra flour to avoid clumps. Next, I dip the chicken in the egg mixture. I make sure it is fully coated and let any extra egg drip back into the bowl. Finally, I roll the chicken in the breadcrumb mix. I press gently to help the crumbs stick well.
Once all the chicken tenders are coated, I arrange them on the baking sheet. I place them in a single layer. It’s important they do not touch each other for even cooking.
Baking Instructions for Perfect Crunch
Before baking, I lightly spray the tops of the chicken tenders with olive oil spray. This gives them a lovely golden-brown color. Now, I bake them in the preheated oven for 20-25 minutes. I check the internal temperature. It should reach 165°F (75°C). The coating must be crispy and golden brown. After baking, I remove the tenders and let them cool slightly on the baking sheet. They are now ready to serve!
Tips & Tricks
How to Achieve the Perfect Crunch
To get that perfect crunch on your chicken tenders, follow these steps:
- Use panko breadcrumbs. They give a better texture than regular breadcrumbs.
- Make sure to press the crumbs onto the chicken. This helps them stick.
- Lightly spray olive oil on top before baking. This promotes browning and crispiness.
- Bake them on a parchment-lined sheet. This prevents sticking and helps with even cooking.
- Avoid overcrowding the baking sheet. This allows hot air to circulate around each tender.
Common Mistakes to Avoid
Here are some common mistakes that can ruin your chicken tenders:
- Skipping the flour coating. This helps the egg and breadcrumbs stick better.
- Not shaking off excess flour. Too much flour can lead to clumps.
- Overcrowding the pan. This can cause steaming instead of baking.
- Not preheating the oven. A hot oven is key for a crispy finish.
- Forgetting to check the internal temperature. Chicken should reach 165°F (75°C) for safety.
Recommended Cooking Tools
Using the right tools makes cooking easier and more fun:
- Baking sheet: A sturdy one helps with even baking.
- Parchment paper: This makes cleanup easy and prevents sticking.
- Three shallow bowls: Use these for the flour, egg, and breadcrumb mixtures.
- Tongs or forks: These help you handle the chicken without making a mess.
- Olive oil spray: This gives that golden color and crispy texture.
Pro Tips
- Use Fresh Ingredients: Always opt for fresh garlic and high-quality Parmesan cheese to enhance the flavors of your chicken tenders.
- Double Coating Technique: For extra crunch, you can double dip the chicken tenders in the egg mixture and breadcrumbs for a thicker coating.
- Customize Your Spices: Feel free to experiment with different spices or add a touch of cayenne pepper for a spicy kick!
- Rest Before Serving: Let the tenders rest for a few minutes after baking to allow the juices to redistribute, ensuring they stay moist.
Variations
Spicy Garlic Parmesan Chicken Tenders
You can add some heat to your Garlic Parmesan Chicken Tenders. To make them spicy, mix some cayenne pepper or chili powder into the flour mix. Start with just a pinch and taste it to see if you want more. You can also add a few dashes of hot sauce to the egg mixture for extra flavor. These small tweaks will give you a nice kick while keeping the garlic and cheese flavors.
Air Fryer Method for Chicken Tenders
Using an air fryer makes these tenders extra crispy without much oil. To use this method, follow the same coating steps. Instead of baking, place the coated tenders in the air fryer basket in a single layer. Cook them at 380°F for about 12-15 minutes. Flip them halfway through for even browning. The result? Crispy, golden chicken tenders without heating up your whole oven.
Gluten-Free Version of Garlic Parmesan Chicken Tenders
You can easily make these tenders gluten-free. Simply replace the all-purpose flour with a gluten-free flour blend. Use gluten-free panko breadcrumbs instead of regular ones. This way, you can enjoy the same great taste without gluten. Just ensure all your ingredients are labeled gluten-free. You won't miss out on the crunch or flavor!
Storage Info
How to Store Leftover Chicken Tenders
Store leftover chicken tenders in an airtight container. Place a paper towel in the container to absorb moisture. This helps keep the chicken crispy. You can keep them in the fridge for up to three days. If you have more than you can eat, consider freezing them.
Reheating Instructions for Best Texture
To reheat, use your oven for the best texture. Preheat the oven to 375°F (190°C). Place the chicken tenders on a baking sheet. Bake for about 10-15 minutes until they are heated through. This keeps them crispy. You can also use an air fryer at 350°F (175°C) for about 5-7 minutes.
Freezing for Future Meals
To freeze, first let the chicken tenders cool completely. Place them in a single layer on a baking sheet. Freeze for about 1-2 hours until solid. Then transfer them to a freezer-safe bag. They can last up to three months in the freezer. When ready to eat, reheat them as mentioned above.
FAQs
Can I use chicken breasts instead of tenders?
Yes, you can use chicken breasts. Just cut them into strips. This way, they will cook evenly. Make sure the strips are about the same size as tenders. This helps with cooking time. Chicken breasts may take a few extra minutes to bake fully. Always check the internal temperature to be sure it reaches 165°F (75°C).
What can I serve with Garlic Parmesan Chicken Tenders?
Garlic Parmesan Chicken Tenders pair well with many sides. Here are some ideas:
- Crispy fries or sweet potato fries
- Fresh salad with a light vinaigrette
- Creamy coleslaw for a crunchy bite
- Tangy marinara or ranch dressing for dipping
- Steamed veggies for a healthy touch
These sides add flavor and color to your meal. Feel free to mix and match!
How long will the leftovers last in the fridge?
Leftovers can stay fresh for about 3 to 4 days in the fridge. Store them in an airtight container. This keeps them from drying out. You can enjoy them cold or reheat them in the oven. Just make sure they get warm all the way through.
You learned how to make Garlic Parmesan Chicken Tenders using simple steps and tasty ingredients. This dish offers mix-and-match options to suit your taste, even for spicy lovers or those needing gluten-free choices. Remember to store and reheat leftovers properly for the best crunch. Whether you cook them in the oven or an air fryer, you can enjoy a flavorful meal. Use these tips to impress at dinner. Get ready to serve a dish that everyone will love!