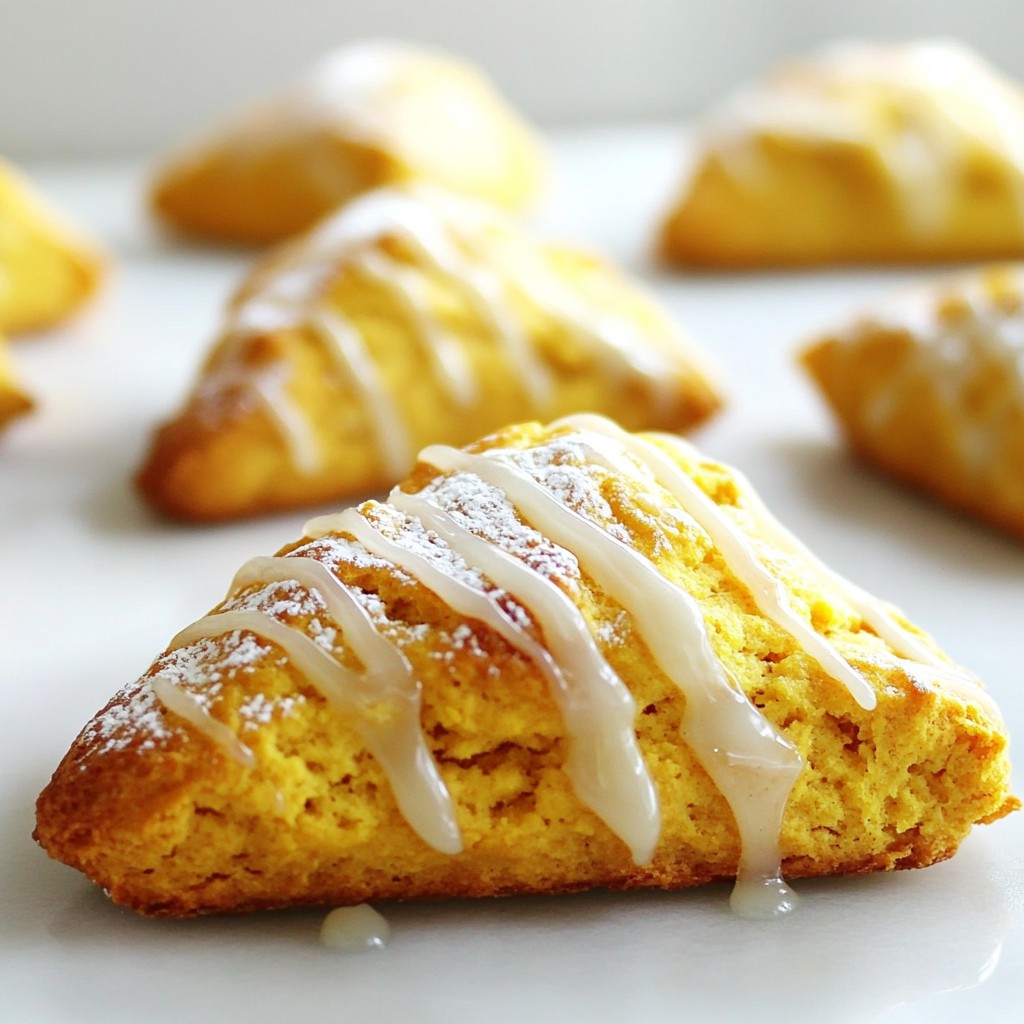
Ready to enjoy the flavors of fall? These Maple Glazed Pumpkin Scones are the perfect treat for cozy mornings or afternoon snacks. They are soft, rich, and topped with a sweet glaze that melts in your mouth. In this article, I'll share the easy recipe and tips to make these delightful scones a hit in your home. Get your apron on and let’s start baking these tasty delights!
Why I Love This Recipe
- Deliciously Seasonal: These scones capture the essence of fall with pumpkin and warm spices, making them perfect for autumn gatherings.
- Simple Preparation: With easy-to-follow steps, even novice bakers can whip up these delightful treats in no time.
- Maple Glaze Magic: The maple glaze adds a touch of sweetness and elegance, elevating the scones to a gourmet level.
- Versatile Enjoyment: These pumpkin scones are perfect for breakfast, brunch, or an afternoon snack, and pair wonderfully with coffee or tea.
Ingredients
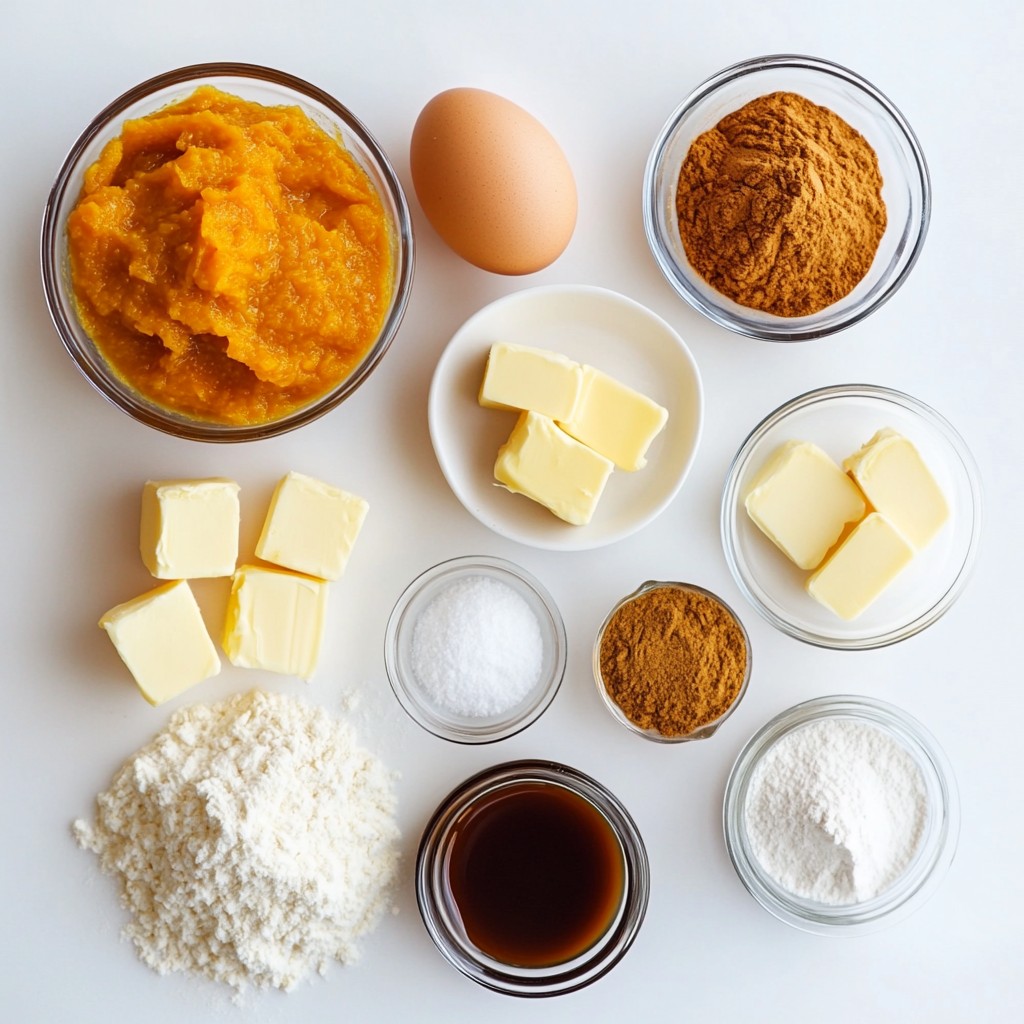
List of Ingredients
To make maple glazed pumpkin scones, gather these ingredients:
- 2 cups all-purpose flour
- 1/2 cup pumpkin puree
- 1/4 cup pure maple syrup
- 1/4 cup brown sugar, packed
- 1/2 cup cold unsalted butter, cut into small cubes
- 1 tablespoon baking powder
- 1 teaspoon ground cinnamon
- 1/2 teaspoon ground nutmeg
- 1/4 teaspoon ground ginger
- 1/4 teaspoon salt
- 1/2 cup heavy cream
- 1 large egg
- 1/2 teaspoon pure vanilla extract
Recommended Brands for Quality Ingredients
Using high-quality ingredients makes a big difference. Here are some brands I trust:
- King Arthur Flour: Their all-purpose flour has great texture.
- Liberty Maple Syrup: This brand offers rich and pure maple flavor.
- Duncan Hines Pumpkin Puree: This pumpkin puree is smooth and flavorful.
- Challenge Butter: Their unsalted butter gives the right creaminess.
Substitutions for Common Allergens
If you have allergies, try these swaps:
- For gluten-free, use a gluten-free all-purpose flour blend.
- If you're dairy-free, substitute with vegan butter and almond milk.
- For egg-free, use a flax egg (1 tablespoon flaxseed meal + 3 tablespoons water).
- To avoid sugar, use coconut sugar or a sugar alternative.
These options help everyone enjoy delicious scones!
Step-by-Step Instructions
Prepping the Oven and Baking Sheet
First, you need to preheat your oven to 400°F (200°C). This step ensures the scones bake evenly. While the oven heats, line a baking sheet with parchment paper. This prevents the scones from sticking and makes cleanup easy.
Mixing Dry Ingredients
Next, grab a large mixing bowl. Add 2 cups of all-purpose flour, 1 tablespoon of baking powder, 1 teaspoon of ground cinnamon, 1/2 teaspoon of ground nutmeg, 1/4 teaspoon of ground ginger, and 1/4 teaspoon of salt. Use a whisk to combine these dry ingredients well. This helps distribute the leavening agents and spices.
Incorporating Butter for Flakiness
Now it's time to add 1/2 cup of cold, cubed unsalted butter to your flour mixture. Use a pastry cutter or your fingertips to rub the butter into the flour. You want to create coarse crumbs. Leave some pea-sized chunks of butter. These bits create a flaky texture in your scones.
Combining Wet Ingredients
In another bowl, mix together 1/2 cup of pumpkin puree, 1/4 cup of pure maple syrup, 1/2 cup of heavy cream, 1 large egg, and 1/2 teaspoon of pure vanilla extract. Whisk until the mixture is smooth and well combined. This blend adds moisture and flavor to your scones.
Shaping the Dough
Lightly flour a clean surface. Turn the dough out onto this surface and pat it down into a circle about 1 inch thick. Use a sharp knife to cut the dough into wedges. You can also use a biscuit cutter for round scones. This will make them easier to bake evenly.
Baking Instructions and Indicators
Transfer the shaped scones to your baking sheet. Make sure to space them about 1 inch apart. This allows room for rising. Bake in your preheated oven for 15-20 minutes. The scones should turn a light golden color. To check for doneness, insert a toothpick into the center. If it comes out clean, your scones are ready!
Tips & Tricks
How to Achieve the Perfect Scone Texture
For a great scone, keep your butter cold. This helps create a flaky texture. Cut the butter into the flour mixture until it looks like crumbs. Don’t overmix your dough. Mix just until combined. This keeps the scones light and airy.
Best Practices for Glazing
To make the glaze, use powdered sugar and maple syrup. Whisk them together until smooth. Let the scones cool fully before glazing. This stops the glaze from melting away. Drizzle the glaze slowly over the scones. Let it drape down the sides for a beautiful look.
Troubleshooting Common Scone Issues
If your scones are too dry, you may have overmixed the dough. Use light hands when folding. If they spread too much while baking, try chilling the dough before cutting. For flat scones, ensure your baking powder is fresh. It helps the scones rise nicely.
Pro Tips
- Use Cold Ingredients: Ensure your butter and cream are cold to create a flakier texture in the scones.
- Don't Overmix: Gently fold the dough to avoid tough scones. Overmixing can lead to a dense texture.
- Check for Doneness: Insert a toothpick into the center of a scone; it should come out clean when they're ready.
- Flavor Variations: Experiment by adding chocolate chips, nuts, or dried cranberries for a unique twist on the classic scone.
Variations
Adding Chocolate Chips or Nuts
You can easily add chocolate chips or nuts to these scones. For a rich taste, mix in 1/2 cup of chocolate chips. Dark chocolate works well, but milk chocolate is great too. If you prefer a nutty crunch, try adding 1/2 cup of chopped nuts like walnuts or pecans. Just fold them into the dough before you shape it. This change adds a new layer of flavor and texture to your scones.
Alternative Glazes or Toppings
While maple glaze is fantastic, you can switch it up. Try a simple vanilla glaze made with powdered sugar and milk. Mix 1 cup of powdered sugar with 2 tablespoons of milk until smooth. Drizzle it over the cool scones for a sweet touch. You can also top them with a sprinkle of cinnamon sugar. This adds a nice crunch and extra sweetness to each bite.
Seasonal Flavor Swaps (e.g., Cranberry, Maple Pecan)
Feel free to play with seasonal flavors. Dried cranberries add a tart burst, making the scones perfect for fall. Just mix in 1/2 cup of dried cranberries into the dough. For a cozy twist, try adding maple pecan flavor. Replace half of the pumpkin with 1/4 cup of pure maple syrup and add 1/2 cup of chopped pecans. These variations keep the recipe exciting and fresh all season long.
Storage Info
How to Store Leftover Scones
To keep your leftover scones fresh, place them in an airtight container. This will help maintain their moisture. You can store them at room temperature for up to 2 days. If you want to keep them longer, move them to the fridge. They can last up to a week in the fridge, but they may dry out a bit.
Freezing Instructions for Scones
Freezing scones is a great way to save them for later. Wrap each scone tightly in plastic wrap. Then, place them in a freezer bag or container. They will stay fresh for up to 3 months in the freezer. When you're ready to eat them, take out as many scones as you need. Let them thaw in the fridge overnight or at room temperature for a couple of hours.
Reheating Tips to Retain Texture
To reheat your scones, you can use the oven. Preheat it to 350°F (175°C). Place the scones on a baking sheet and cover them with foil to keep them moist. Heat for about 10 to 15 minutes. You can also microwave them for about 15 to 20 seconds. Just be careful not to overheat, or they may become tough. Enjoy your warm scones with that lovely maple glaze!
FAQs
Can I make these scones without pumpkin?
Yes, you can make scones without pumpkin. Try using mashed bananas or applesauce instead. These fruit options add moisture and flavor. You might need to adjust the spices to match the new ingredient.
How do I know when scones are done baking?
Scones are done when they turn golden brown on top. Insert a toothpick into the center. If it comes out clean, your scones are ready. The edges should feel firm to the touch.
What's the best way to serve maple glazed pumpkin scones?
Serve these scones warm for the best taste. You can pair them with coffee or tea. They also go great with warm apple cider. A sprinkle of powdered sugar on top makes them look extra special.
Can I make the dough ahead of time?
Yes, you can make the dough ahead of time. Wrap it tightly in plastic wrap and refrigerate it. Use the dough within 24 hours for the best results. When ready to bake, shape and bake as usual.
What type of flour works best for scones?
All-purpose flour is best for scones. It gives a light and tender texture. You can also use whole wheat flour for a heartier taste. Just remember that it may change the texture slightly.
This guide covered everything you need to make great scones. We looked at the best ingredients, brands, and substitutions for allergies. We walked through easy steps to mix and bake. With tips for perfect texture and glazing, you can avoid common problems. We also explored fun variations and storage tips for leftovers.
Now, you can enjoy fresh, tasty scones anytime. Happy baking!