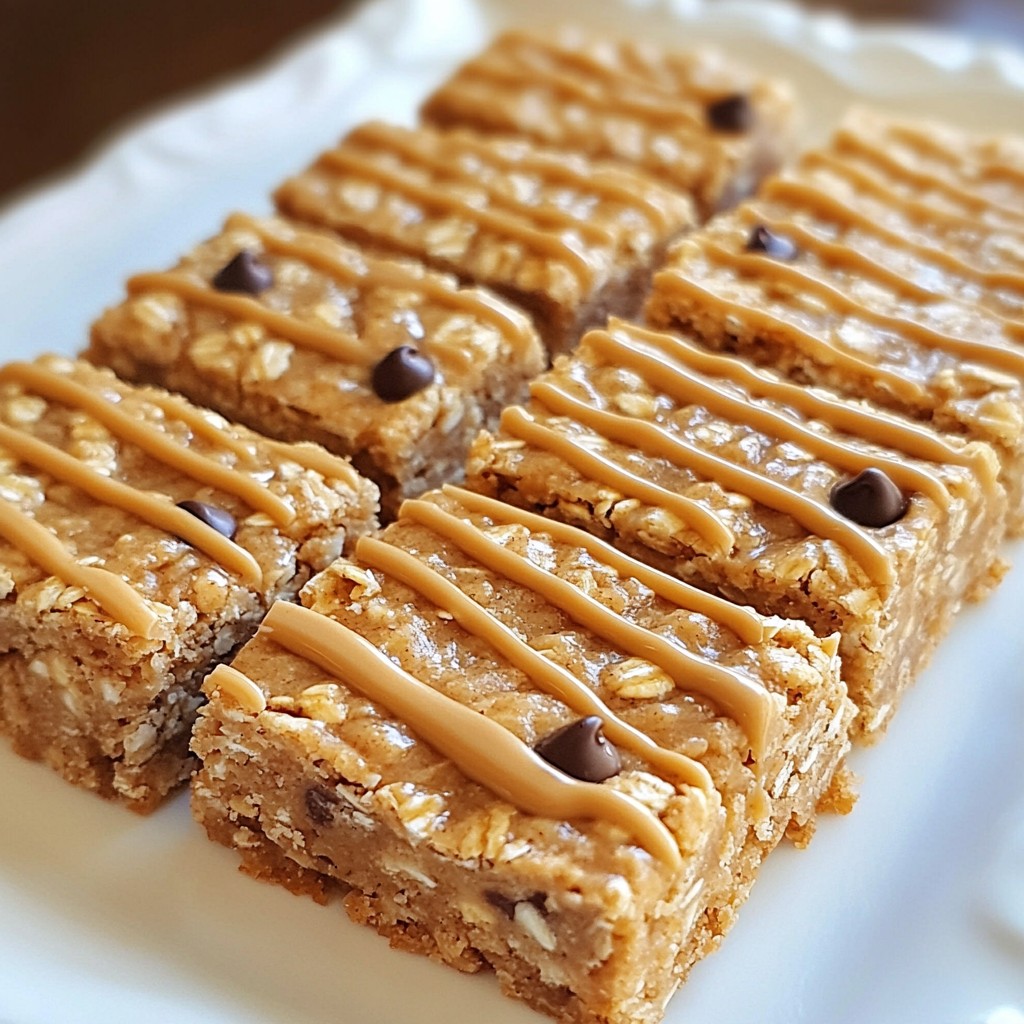
Looking for a quick and tasty snack? These No Bake Peanut Butter Oat Bars are just the thing! With simple ingredients and easy steps, you can whip up a delicious treat in no time. They’re perfect for kids and adults alike. Whether you enjoy them at home or on the go, these bars are sure to be a hit. Let’s dive in and get started on this crunchy, creamy delight!
Why I Love This Recipe
- Easy to Make: This recipe requires minimal prep time and uses simple ingredients that are usually on hand, making it a convenient option for busy days.
- Healthy Snack Option: Packed with oats, chia seeds, and peanut butter, these bars are a nutritious choice that provides energy and sustenance without refined sugars.
- Customizable: Feel free to add your favorite mix-ins such as nuts, dried fruits, or different types of chocolate to personalize these bars exactly to your taste.
- Perfect for Meal Prep: These bars store well in the fridge and are ideal for meal prepping, allowing you to have a healthy snack ready whenever you need it!
Ingredients
List of Ingredients
- 1 cup rolled oats
- 1 cup creamy peanut butter
- 1/2 cup honey or maple syrup
- 1/2 cup almond flour (or whole wheat flour)
- 1/4 cup chia seeds
- 1/2 cup mini chocolate chips (optional)
- 1/4 teaspoon salt
- 1 teaspoon vanilla extract
You need quality ingredients to make these no bake peanut butter oat bars. First, rolled oats provide a hearty base. They give the bars a chewy texture. Next, creamy peanut butter offers rich flavor and healthy fat. Honey or maple syrup acts as a natural sweetener. You can choose either based on your taste. Almond flour adds a nutty taste and makes the bars more filling. If you prefer, use whole wheat flour as a substitute.
Chia seeds are a great addition. They provide fiber and omega-3 fatty acids. Plus, they help bind the mixture together. If you love chocolate, mini chocolate chips can add sweetness. They are optional, but I recommend them for a treat.
Finally, a touch of salt and vanilla extract enhances flavor. The salt balances the sweetness. The vanilla adds a lovely aroma. Each ingredient plays a key role in the taste and texture of the bars.

Step-by-Step Instructions
Preparation of Dry Ingredients
- Combine rolled oats, almond flour, chia seeds, and salt.
- Mix thoroughly to ensure even distribution of dry ingredients. This step helps every bite taste great.
Mixing Peanut Butter Mixture
- In a microwave-safe bowl, microwave the peanut butter and honey (or maple syrup).
- Heat for about 30 seconds until warm. Stir until smooth and creamy. This makes mixing easier.
Bringing It All Together
- Pour the warm peanut butter mix over the dry ingredients.
- Add the vanilla extract and mix thoroughly.
- If you like, fold in mini chocolate chips for extra sweetness. This adds a fun twist to your bars.
Preparing the Baking Dish
- Line an 8x8 inch baking dish with parchment paper.
- Leave some paper overhang for easy removal later. This way, you won’t struggle to get the bars out.
Chilling and Setting
- Place the dish in the refrigerator for 1 to 2 hours to firm up.
- After chilling, cut into squares or rectangles for serving. Cutting them after chilling makes them easier to handle.
Tips & Tricks
Perfecting the Texture
Packing the mixture firmly is key to great bars. If you don’t pack it well, the bars may fall apart. Use your hands or a spatula to press the mixture down hard. This creates a solid base. You want the bars to hold together when you cut them. Check the texture; it should feel dense and compact.
Customization Options
You can add nuts, seeds, or dried fruits to change the flavor. Try almonds, walnuts, or pumpkin seeds for crunch. Dried cranberries or apricots bring sweetness and chewiness. Adjust the sweetness by using more or less honey or maple syrup. Taste the mixture before it sets. This way, you can make sure it’s just right for you.
Serving Suggestions
Serve the bars on a sleek cutting board for a nice look. Drizzle extra peanut butter on top for a fun touch. Wrap each bar in colorful foil. This makes them easy to grab on busy days. You can also stack them in a jar for a fun display. These tips make your treats look and taste great!
Pro Tips
- Use Natural Sweeteners: Instead of processed sugar, use honey or maple syrup for a healthier sweetness that complements the peanut butter perfectly.
- Customize Your Add-ins: Feel free to add nuts, dried fruits, or seeds to the mixture for added texture and flavor. Just be mindful of the total volume so the bars hold together.
- Store Properly: Keep the bars in an airtight container in the refrigerator for up to a week, or freeze for longer storage. This helps maintain freshness and texture.
- Perfect Serving Size: Cut the bars into smaller pieces for a quick snack or larger squares for a more filling treat. Adjust according to your needs!
Variations
Nut-Free Alternatives
If you need a nut-free option, use sun butter. Sun butter works like peanut butter but has a great taste. You can also try soy nut butter. Both options are safe for those with nut allergies. They give you the same creamy texture. This makes your bars just as tasty!
Vegan Options
Want a vegan treat? Swap honey for maple syrup. Maple syrup gives your bars a sweet touch without any animal products. It also adds a nice flavor. This small change keeps your bars vegan-friendly and delicious.
Gluten-Free Substitutes
For a gluten-free version, use gluten-free oats. These oats are safe for those with gluten sensitivities. You can also use almond flour or coconut flour instead of regular flour. Both options work well and keep your bars tasty and nutritious.
Storage Info
Best Storage Practices
To keep your no bake peanut butter oat bars fresh, store them in the refrigerator. Wrap them tightly in plastic wrap or place them in an airtight container. This will help prevent them from drying out. For longer shelf life, you can freeze them. Cut the bars into squares before freezing. Place parchment paper between layers to avoid sticking. This makes it easy to grab one at a time.
Shelf Life
When stored properly, these bars can last up to two weeks in the fridge. In the freezer, they can last for about three months. Check for signs of spoilage, like a change in color or smell. If they look dry or crumbly, toss them out. Trust your senses; they are often right!
FAQs
Can I use quick oats instead of rolled oats?
Yes, you can use quick oats. They will make the bars softer. Rolled oats give a chewier texture. If you want a heartier bite, stick with rolled oats.
Are these bars healthy?
These bars are quite healthy! They have good fiber from oats and chia seeds. Peanut butter adds protein and healthy fats. Honey or maple syrup gives natural sweetness. These bars can be a great snack for energy.
What can I use instead of almond flour?
If you need a substitute for almond flour, use whole wheat flour. You can also try oat flour or coconut flour. These options work well and keep the bars tasty.
How should I adjust the recipe for more bars?
To make more bars, simply double the ingredients. Keep the same ratios. If you want to make a larger batch, use a bigger baking dish. Adjust the chilling time if needed, too.
This blog post has shared a simple recipe for homemade snack bars. You learned easy steps to mix ingredients like oats, peanut butter, and honey. Tips helped you perfect the texture and customize flavors. We also discussed storage methods to keep your bars fresh.
These bars are healthy and can fit many diets. Try different ingredients to make them your own. Enjoy your tasty snacks anytime!