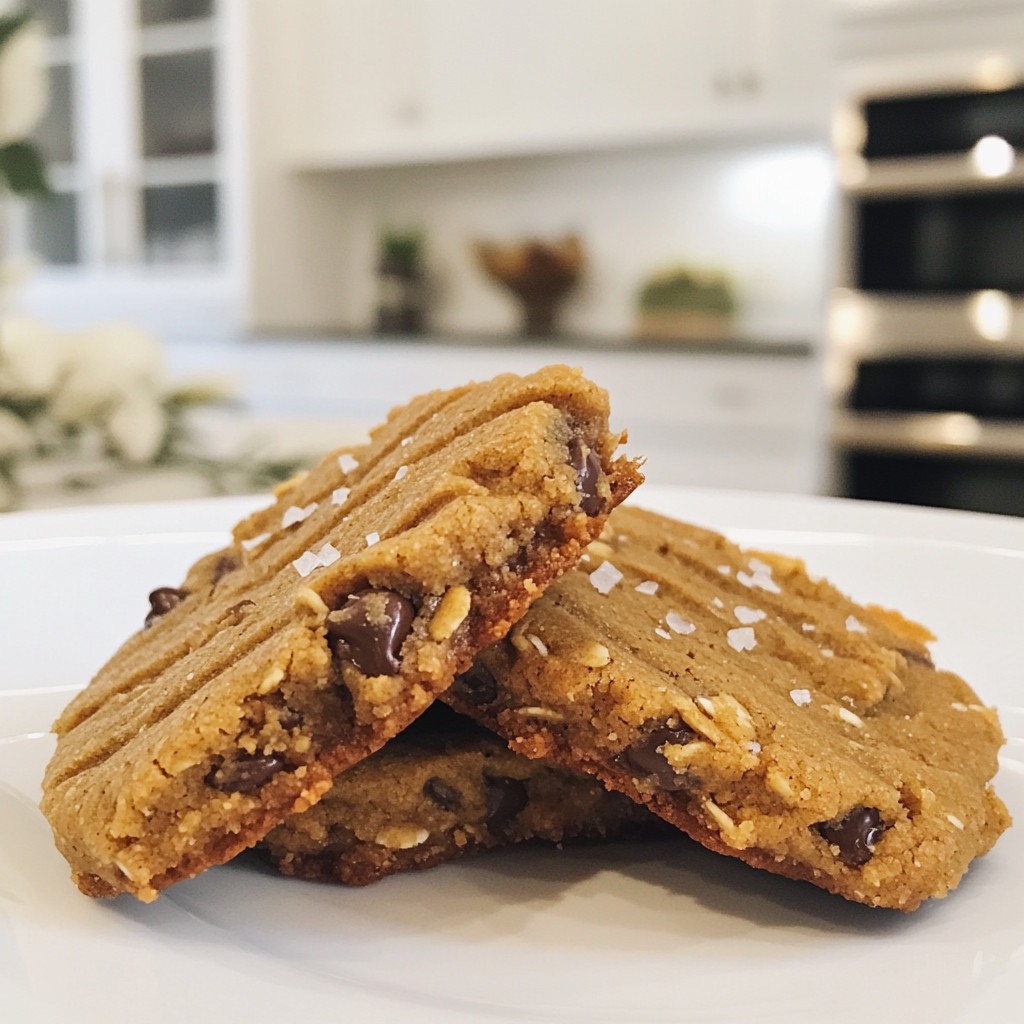
Looking for a quick and tasty snack? You’re in the right place! I’m excited to share my Peanut Butter Protein Cookies recipe that’s perfect for a healthy treat. These cookies are easy to make, packed with protein, and satisfy your sweet tooth. Whether you're needing a post-workout boost or a delicious dessert, this guide has you covered. Let’s dive into the ingredients and make some magic happen!
Why I Love This Recipe
- Nutritious Energy Boost: These cookies are packed with protein and healthy fats, making them perfect for a quick energy boost any time of the day.
- Simple to Make: With just a few ingredients and easy steps, you can whip up a batch of these delicious cookies in no time.
- Customizable Flavors: You can easily adjust the flavor by choosing different protein powders or adding mix-ins like nuts or dried fruits.
- Guilt-Free Indulgence: These cookies satisfy your sweet tooth without the guilt, thanks to wholesome ingredients like natural peanut butter and oats.
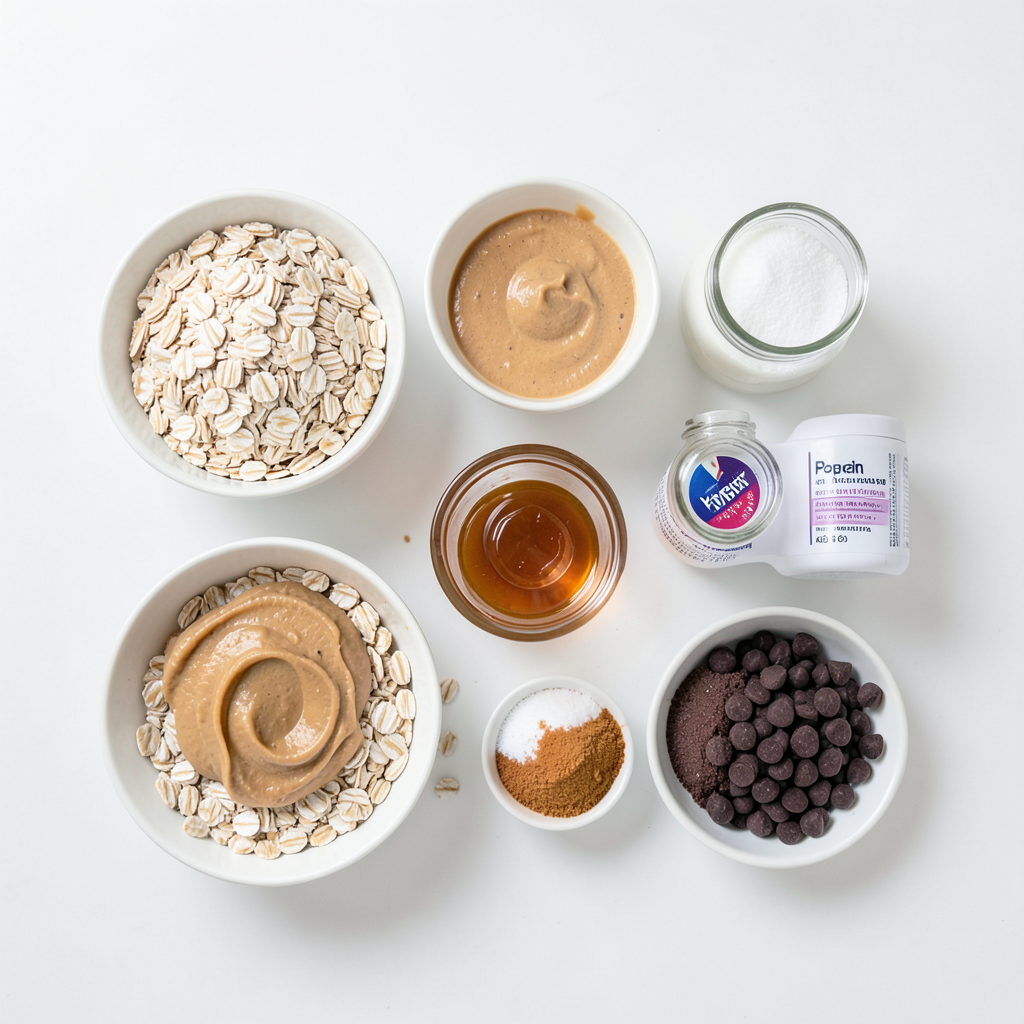
Ingredients
Peanut Butter (unsweetened, creamy or crunchy)
Natural peanut butter is the star of this recipe. You can use creamy or crunchy, depending on your taste. Creamy peanut butter gives a smooth texture, while crunchy adds fun bites. Choose unsweetened for a healthier cookie.
Oats and their substitution
Oats play a key role in texture. I recommend rolled oats for a nice chew. If you want a softer cookie, quick oats work well too. They mix in easily and soften more during baking.
Protein Powder Options
For protein powder, you can choose vanilla or chocolate. Vanilla adds a sweet touch, while chocolate gives a rich flavor. Both options boost the protein content. If you're dairy-free, look for plant-based protein powders. They mix well and keep the cookies tasty.
Step-by-Step Instructions
Preparing the ingredients and baking sheet
First, gather your ingredients. You need peanut butter, oats, protein powder, honey, and more. Preheat your oven to 350°F (175°C). Next, line your baking sheet with parchment paper. This step helps cookies not stick.
Mixing wet ingredients
In a large mixing bowl, add 1 cup of peanut butter. Then, pour in 1/4 cup of honey or maple syrup. Add 1 teaspoon of vanilla extract for extra flavor. Use a spatula or spoon to mix these until smooth. This mixture forms the base of your cookies.
Combining dry ingredients and forming the dough
Now, add 1/2 cup of rolled oats, 1/2 cup of protein powder, and 1/4 cup of brown sugar to the bowl. Sprinkle in 1/4 teaspoon of sea salt. Stir everything together until you get a thick dough. If you want chocolate chips, fold in 1/2 cup now. They make the cookies even better!
Shaping the cookies and baking
Use a tablespoon to scoop the dough. Roll it into balls about 1 inch wide. Place them on the baking sheet, leaving about 2 inches between each ball. Use a fork to press down on each ball, making a crisscross pattern. Bake for 10-12 minutes. Look for golden edges and soft centers. Let them cool for 5 minutes before moving them to a rack. Enjoy your tasty treat!
Tips & Tricks
Achieving the perfect cookie texture
To get the best cookie texture, use creamy peanut butter. It mixes well and gives a soft bite. If you like a chewier cookie, use rolled oats. You can swap them for quick oats if you want a softer cookie. This small change can make a big difference in how they feel in your mouth.
Customizing sweetness levels
You can adjust the sweetness to fit your taste. If you like it sweeter, add a bit more honey or brown sugar. If you want less sugar, reduce the honey and add more oats instead. Remember, the protein powder can also change the sweetness. Choose a flavor you enjoy to balance the taste.
Using chocolate chips or other mix-ins
Adding chocolate chips makes these cookies extra fun. You can mix in 1/2 cup of dark chocolate chips for a sweet surprise. If you want to try something new, add nuts or dried fruit. These mix-ins can give different flavors and textures. Just fold them in gently so they spread evenly in the dough.
Pro Tips
- Use Room Temperature Ingredients: Allow your peanut butter and eggs (if using) to sit at room temperature for a bit. This helps them blend more smoothly into the dough.
- Experiment with Protein Powder: Different protein powders can yield different flavors and textures. Try experimenting with plant-based or whey protein to find your favorite combination.
- Store Properly: Keep your cookies in an airtight container at room temperature for up to a week. For longer freshness, freeze them and thaw as needed.
- Add Mix-ins Wisely: While dark chocolate chips are a delightful addition, feel free to incorporate other extras like nuts, dried fruits, or seeds to customize the cookies to your liking.
Variations
Vegan alternative options
To make these cookies vegan, swap honey for pure maple syrup. Use a plant-based protein powder to keep it dairy-free. This change keeps the cookies sweet and tasty. You can still enjoy the same great flavor without any animal products.
Flavor variations with different protein powders
You can change the flavor by using different protein powders. Chocolate protein powder adds a rich taste. Vanilla protein powder gives a light, sweet flavor. You can even try flavored powders like cookies and cream or mocha for fun twists. Each choice alters the cookie's taste, making it unique.
Nut-free substitutions and alternatives
If you need a nut-free option, try sun butter or soy nut butter. These spread options taste great and give the same creamy texture. You can also use seed butters like pumpkin seed butter. These swaps keep your cookies safe for those with nut allergies while still being delicious.
Storage Info
Best practices for storing cookies
To keep your peanut butter protein cookies fresh, store them in an airtight container. This helps them stay soft and tasty. You can place parchment paper between layers to avoid sticking. Always store cookies at room temperature. Avoid the fridge, as it can dry them out.
Freezing and thawing instructions
You can freeze these cookies for later. Place them in a single layer on a baking sheet. Freeze until solid, then transfer them to a freezer bag. Make sure to remove as much air as possible. To thaw, leave them at room temperature for about an hour. You can also microwave them for a few seconds if you want them warm.
Shelf life and freshness tips
These cookies stay fresh for up to a week at room temperature. If you freeze them, they last for about three months. To check for freshness, look for any changes in texture or smell. If they seem hard or smell off, it’s best to toss them out. Enjoy these cookies while they’re at their best!
FAQs
Can I use natural sweeteners instead of honey?
Yes, you can use natural sweeteners like pure maple syrup. This provides a vegan option too. Maple syrup adds a similar sweetness and flavor. Just use the same amount as honey in the recipe. You can also try agave nectar, but it might change the cookie's texture slightly.
How can I make these cookies gluten-free?
To make these cookies gluten-free, swap the rolled oats for certified gluten-free oats. Many oats contain gluten due to cross-contamination. Using these oats ensures a safe treat for those with gluten sensitivities. You can also check if your protein powder is gluten-free.
What is the best way to reheat these cookies?
The best way to reheat cookies is to use a microwave. Place one or two cookies on a plate. Heat them for about 10-15 seconds. For a crispier texture, use an oven. Preheat it to 350°F (175°C) and warm cookies for 5 minutes. This keeps them soft and yummy.
Are peanut butter protein cookies suitable for meal prep?
Yes, these cookies are great for meal prep! They store well and are easy to grab on busy days. You can make a batch and keep them in an airtight container. They last about a week at room temperature. For longer storage, freeze them. Simply thaw them before eating.
This blog post covered key ingredients for making peanut butter protein cookies, like oats and protein powders. It walked through simple steps for mixing, shaping, and baking. I shared tips for texture, sweetness, and fun mix-ins. You also learned about vegan and nut-free options, along with storage tips for freshness.
Enjoy baking your cookies knowing how to customize them! With these techniques and ideas, you can create tasty treats that fit your diet and preference. Happy baking!