Looking for a tasty and healthy meal? Let’s dive into roasted veggie wraps that are not only delicious but also packed with nutrients! In this guide, I’ll show you how to create these easy wraps using fresh ingredients. With simple steps and helpful tips, you can enjoy a satisfying meal that fits your busy lifestyle. Let’s roll up our sleeves and get started on this flavorful journey!
Why I Love This Recipe
- Healthy and Wholesome: This recipe is packed with nutrient-rich vegetables, making it a healthy choice for any meal.
- Quick and Easy: With a prep time of just 10 minutes, these wraps are perfect for busy days when you need a quick meal.
- Customizable: You can easily swap in your favorite vegetables or add protein to suit your taste and dietary preferences.
- Deliciously Flavorful: The roasted veggies combined with hummus create a delightful flavor that’s sure to satisfy your taste buds.
Ingredients
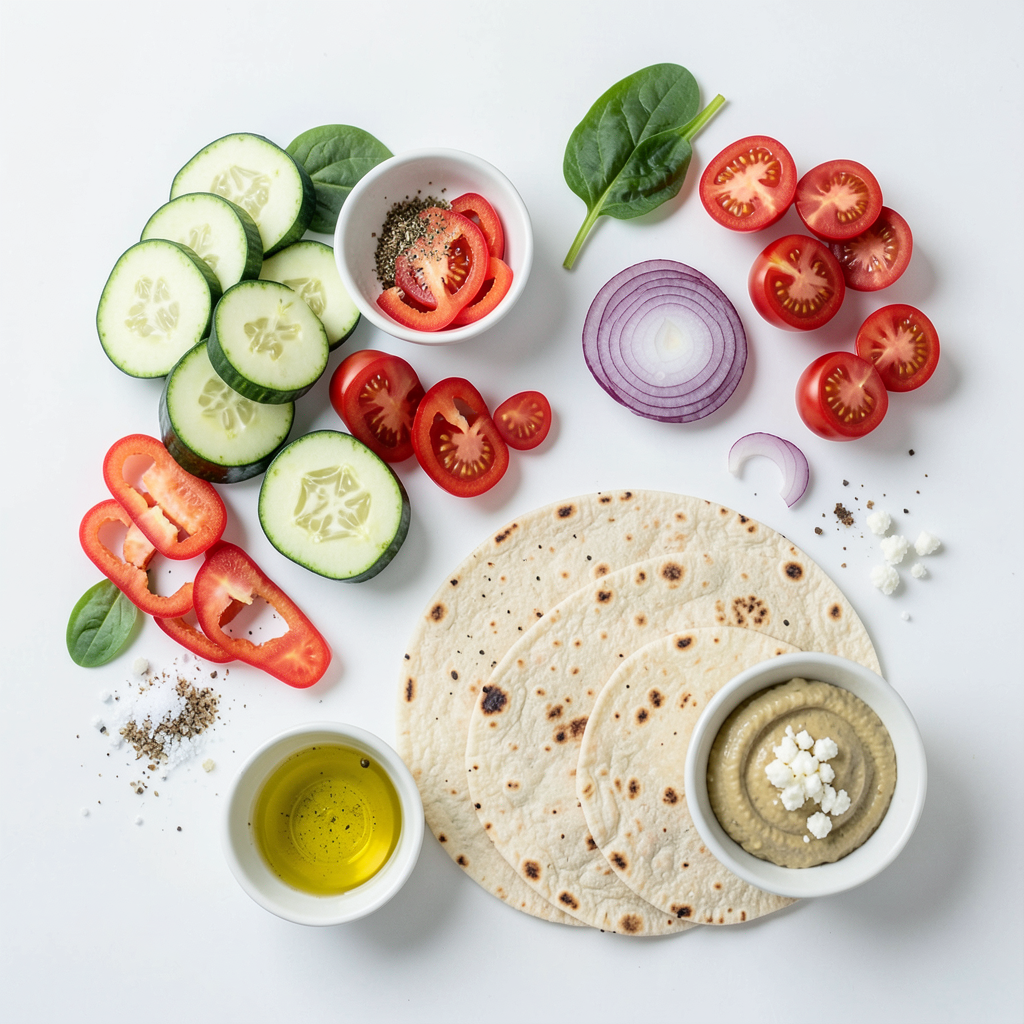
List of Ingredients
- 1 medium zucchini, sliced
- 1 red bell pepper, sliced
- 1 cup cherry tomatoes, halved
- 1 small red onion, sliced
- 1 cup spinach leaves
- 2 tablespoons olive oil
- 1 teaspoon Italian seasoning
- Salt and pepper to taste
- 4 whole wheat tortillas
- 1/2 cup hummus
- 1/4 cup crumbled feta cheese (optional)
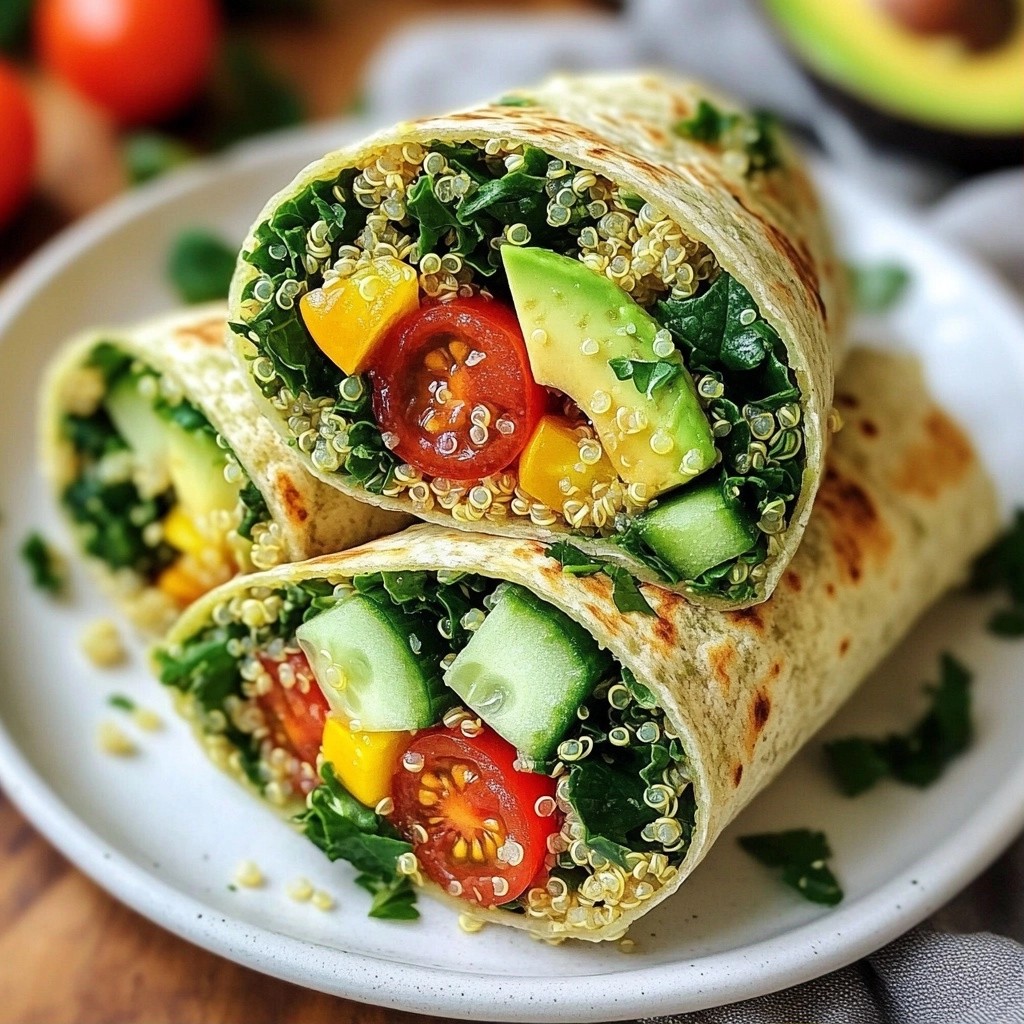
These ingredients make a colorful and tasty wrap. The zucchini adds crunch, while the bell pepper brings sweetness. Cherry tomatoes add juiciness and flavor, and red onion gives a slight bite. Spinach adds nutrients and freshness.
Olive oil helps the veggies roast well. Italian seasoning adds a blend of herbs that enhances flavors. Salt and pepper bring out the taste of all the ingredients. Whole wheat tortillas hold everything together. Hummus adds creaminess and a rich flavor. Feta is optional but adds a nice salty touch.
Each ingredient plays an important role. Using fresh, high-quality veggies makes your wraps even better. You can change up the veggies based on what you like.
Get ready to enjoy a delicious meal!
Step-by-Step Instructions
Preheat and Prepare Ingredients
1. Preheat your oven to 400°F (200°C). This helps the veggies cook evenly.
2. On a large baking sheet, combine the sliced zucchini, red bell pepper, halved cherry tomatoes, and sliced red onion. Drizzle 2 tablespoons of olive oil over the veggies.
3. Sprinkle 1 teaspoon of Italian seasoning, salt, and pepper to taste. Toss the veggies well so they are all coated in seasoning.
Roasting the Vegetables
1. Roast the vegetable mixture in the oven for about 20-25 minutes.
2. Stir halfway through cooking for even roasting. Look for tender and slightly caramelized veggies.
Assembling the Wraps
1. While the veggies roast, warm 4 whole wheat tortillas in a dry skillet over medium heat. Heat them for about 30 seconds on each side. This makes them easier to roll.
2. Once the veggies are done, remove them from the oven and let them cool slightly.
3. To assemble, spread about 2 tablespoons of hummus on each tortilla.
4. Layer a generous portion of roasted veggies and a handful of spinach leaves on top. If you like, add crumbled feta cheese for extra flavor.
5. Roll the wraps tightly, tucking in the ends as you go. Slice them in half diagonally.
This step-by-step guide makes it easy to enjoy delicious roasted veggie wraps.
Tips & Tricks
Expert Cooking Tips
- Roasting tips for perfect caramelization: Make sure your veggies are cut into similar sizes. This helps them cook evenly. Use enough olive oil; it helps the veggies brown and adds flavor. Don’t overcrowd the baking sheet. Space them out for better air circulation. Stir halfway through cooking for even results. You want them tender and slightly golden.
- How to properly warm tortillas: Use a dry skillet over medium heat. Place the tortilla in the skillet for about 30 seconds. Flip it and warm the other side for another 30 seconds. This makes them soft and easy to roll. You can also wrap them in a damp paper towel and microwave for 15-20 seconds.
Presentation Tips
- Ideas for serving and garnishing: Serve the wraps on a wooden board for a rustic look. Drizzle a bit of olive oil over them for shine. Garnish with fresh herbs like parsley or basil. These herbs add a splash of color and flavor. You can also sprinkle some crumbled feta on top for a tasty touch.
- Side suggestions for serving with wraps: Pair these wraps with extra hummus for dipping. You can also serve them with a crisp side salad or some baked sweet potato fries. A fruit salad could be a refreshing addition, too. These sides complement the wraps and make the meal feel complete.
Pro Tips
- Prep Ahead: Chop all your veggies the night before to save time during meal prep.
- Layering Flavors: Consider adding a splash of balsamic vinegar to the roasted veggies for an extra kick of flavor.
- Wrap It Right: Ensure you roll the wraps tightly to prevent the filling from spilling out when you bite into them.
- Storage Tips: If you have leftovers, store the wraps in an airtight container in the fridge for up to two days.
Variations
Ingredient Substitutions
You can change the veggies in your wrap. Try these instead:
- Eggplant
- Carrots
- Broccoli
- Asparagus
- Sweet potatoes
These options add unique flavors and textures. You can mix and match based on what you like.
For a vegan twist on hummus, try these:
- Avocado spread
- White bean dip
- Baba ganoush
These spreads add creaminess and flavor without dairy.
Additional Flavor Enhancements
To spice up your wraps, try these seasonings:
- Cumin for a warm flavor
- Paprika for smokiness
- Lemon juice for brightness
These can give your wraps a fun twist. Just sprinkle them before roasting.
Want more protein? Add these to your wraps:
- Grilled chicken or turkey
- Tofu or tempeh for plant-based options
- Lentils or chickpeas for a hearty boost
Adding protein makes your meal filling and nutritious.
Storage Info
Proper Storage Techniques
To keep your roasted veggie wraps fresh, store them in an airtight container. Place parchment paper between layers if you stack them. This helps avoid sogginess. You can keep the wraps in the fridge for up to three days.
If you have leftover roasted veggies, store them in a separate container. They can last up to five days in the fridge. Make sure to cool them first before sealing.
If you want to freeze the wraps, wrap each one tightly in plastic wrap. Then place them in a freezer-safe bag. They last up to three months in the freezer. To enjoy, thaw in the fridge overnight before reheating.
Reheating Instructions
To reheat your wraps, use a skillet. Heat on medium-low for about 5 minutes. This keeps the wrap crispy and warm. You can also use an oven. Preheat it to 350°F (175°C) and bake for 10-15 minutes.
If using a microwave, wrap in a damp paper towel. Heat for 30-45 seconds. This method may make the wrap softer. Avoid using high heat; it can make the veggies mushy.
Follow these steps, and your wraps will taste just as good as when you made them!
FAQs
Common Questions About Roasted Veggie Wraps
What other vegetables can I use? You can use many veggies in these wraps. Try carrots, eggplant, or mushrooms. Just slice them thin. This helps them roast evenly. Mix and match your favorites for fun flavors.
Can I make this recipe gluten-free? Yes, you can! Simply choose gluten-free tortillas. Many brands offer great options. Check the labels for gluten-free status. You’ll enjoy the same tasty wraps without gluten.
Nutritional Information
How nutritious are these wraps? These wraps are packed with nutrients. They contain vitamins from the veggies. Spinach adds iron, and tomatoes offer antioxidants. Whole wheat tortillas give fiber. This meal is balanced and healthy.
Can I add more protein content? Yes, you can easily boost protein. Add grilled chicken or chickpeas for extra protein. Tofu is a great option too. Just make sure to season it well for great flavor.
You learned how to make tasty roasted veggie wraps. We covered the key ingredients, steps, and tips. Roasting veggies brings out their best flavors. Remember, you can swap in different vegetables or add protein for extra nutrition. Store any leftovers correctly to keep them fresh. These wraps are easy to customize and great for any meal. Enjoy making them with your favorite ingredients!